· Katria Melrose · Outdoor Cooking · 20 min read
Can You Bake Bread In An Outdoor Pizza Oven

Unlock Perfect Loaves: Baking Bread In Your Outdoor Pizza Oven
Imagine the aroma of freshly baked bread filling your backyard. You might think your outdoor pizza oven is only for pizzas. I certainly did at first. However, many people wonder: can you bake bread in an outdoor pizza oven? The answer is a resounding yes. These versatile ovens are perfect for creating artisan loaves with incredible crusts and tender interiors.
This article explores how to transform your pizza oven into a high-performance bread bakery. We will cover everything from understanding oven heat to preparing your dough. You will learn the best techniques for perfect results. Get ready to expand your outdoor cooking skills beyond just pizza.
Takeaway:
- Outdoor pizza ovens are excellent for baking various types of bread.
- Temperature management is key; aim for falling heat after pizza baking.
- Use cast iron or Dutch ovens to manage heat and create steam.
- Proper dough preparation and scoring ensure beautiful, well-baked loaves.
Yes, you can absolutely bake bread in an outdoor pizza oven. These ovens provide the high, sustained heat and often the radiant heat needed for a beautiful crust and excellent crumb development, making them ideal for artisan bread.
The Versatility of Your Outdoor Pizza Oven
Your outdoor pizza oven is a powerhouse appliance. It excels at high-temperature cooking, which is ideal for pizza. This high heat capacity also makes it perfect for other dishes. Baking bread is one of its most rewarding alternative uses. I have found my oven incredibly versatile, far beyond just making pies.
The unique design of a pizza oven offers specific advantages for bread baking. It heats quickly and retains heat well. This creates a hot environment for bread to rise rapidly. The high heat also helps form a crisp, flavorful crust. Many home bakers use outdoor ovens for artisan loaves. This includes sourdough and crusty country breads.
Outdoor ovens often use wood or gas. This provides different flavors and heat profiles. Wood-fired ovens can impart a subtle smoky flavor to your bread. Gas ovens offer more precise temperature control. Both types work wonderfully for bread. The key is understanding how your specific oven operates. It takes some practice to get it right.
Think about the traditional brick ovens used in bakeries for centuries. Outdoor pizza ovens share many characteristics with these ovens. They both provide intense, even heat. This allows for a quick bake time and a superior product. You can truly elevate your bread game by using your outdoor oven. It is more than just a novelty; it is a serious baking tool.
Understanding Oven Heat for Optimal Bread Baking
Baking bread in an outdoor pizza oven requires understanding its unique heating characteristics. Unlike an indoor oven, temperature control is less precise. However, this natural variation is also what gives artisan bread its charm. I have learned to read my oven’s heat through experience.
For pizza, you need extreme heat, often 700-900°F (370-480°C). Bread, on the other hand, typically bakes at lower temperatures. A common temperature range for bread is 400-500°F (200-260°C). This means you usually bake bread as the oven cools down after pizza night. This falling heat is perfect for bread. You let the initial blaze die down. Then, the residual heat slowly bakes the loaves.
Monitoring the temperature is crucial. Many outdoor ovens have built-in thermometers. You can also use an infrared thermometer to check the stone surface. This gives you a quick and accurate reading. Knowing the actual temperature helps you decide when to load your bread. If the oven is too hot, your bread will burn quickly. If it is too cool, the bread will not rise properly.
Achieving consistent heat throughout the bake is important. Many outdoor ovens radiate heat from the dome. This helps bake the top of the bread. The hot stone base bakes the bottom. This combination provides an even bake. Learning how long does an Ooni pizza oven take to heat up for pizza will help you gauge when it’s cooled enough for bread. The heat retention of the oven’s materials plays a big role here. Brick or ceramic ovens hold heat longer than thin metal ones. This provides a more stable baking environment for your bread.
Prepping Your Outdoor Pizza Oven for Bread
Preparing your outdoor pizza oven for bread baking is different from preparing it for pizza. The goal changes from extreme heat to sustained, moderate heat. Proper preparation ensures a successful bake. I always follow a specific routine to get my oven ready. This helps me get consistent results.
First, you need to bring the oven up to temperature. For wood-fired ovens, build a fire and let it burn down to coals. Push the coals to one side, or remove them entirely. You want the oven walls and floor to be thoroughly heated. This process can take 30-60 minutes, depending on your oven. For gas ovens, preheat to a higher temperature, then turn down the gas. Allow the oven to stabilize at your desired bread baking temperature. Aim for around 450-500°F (230-260°C) initially.
The next crucial step is allowing the oven to cool properly. If you bake pizza first, the oven will be very hot. Let it sit for 30-60 minutes after the last pizza. This allows the temperature to drop into the bread-baking range. Use an infrared thermometer to check the temperature of the oven floor. You are looking for that sweet spot, generally 400-450°F (200-230°C) for loading. I often aim for a slightly higher initial temperature, knowing it will drop as the bake progresses.
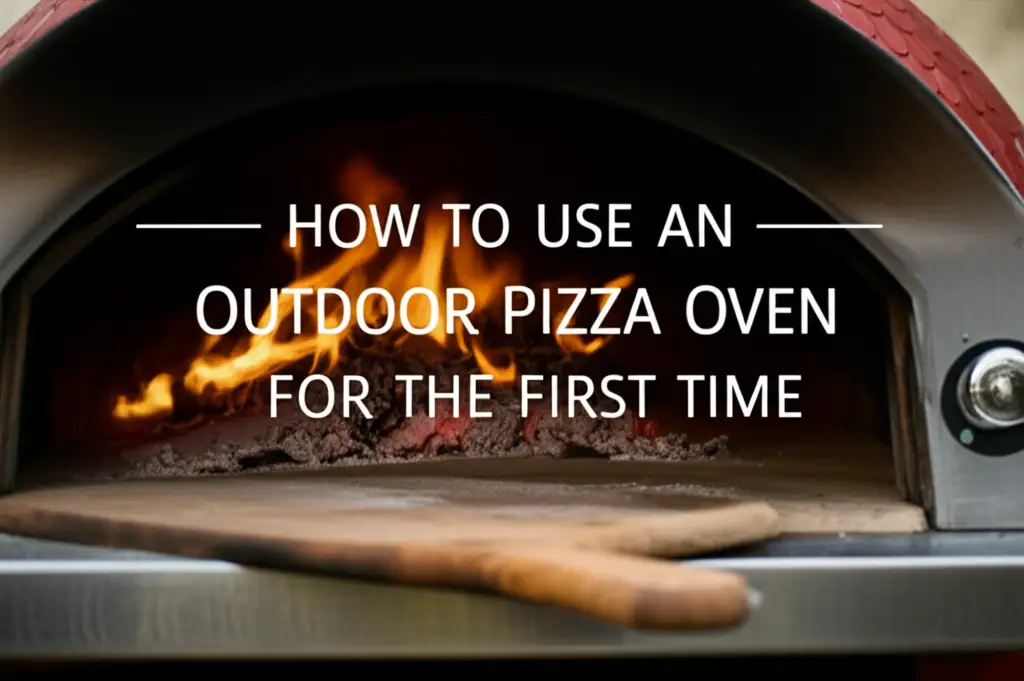
Consider using a cast-iron Dutch oven or a covered baking vessel. This creates a steamy environment for the bread. Place the empty Dutch oven inside the pizza oven as it heats up. This allows the Dutch oven to get very hot. The steam helps the bread expand and creates a beautiful, crispy crust. This technique works wonders in a dry, hot pizza oven. It mimics professional bakery ovens. You can find more tips on oven use, even when you use an outdoor pizza oven for the first time.
Essential Tools and Ingredients for Outdoor Bread Baking
Having the right tools and ingredients makes all the difference when baking bread in an outdoor pizza oven. You do not need a lot of specialized equipment, but some items are very helpful. I have gathered a few key tools that simplify the process. These help me achieve consistent, high-quality loaves.
Essential Tools:
- Cast Iron Dutch Oven: This is almost a must-have for baking bread in a pizza oven. It traps steam, which is critical for a good crust and crumb. A lid is essential for the first part of the bake.
- Infrared Thermometer: This tool helps you accurately measure the temperature of your oven floor. It tells you when the oven is ready for bread.
- Pizza Peel: While mostly for pizza, a metal peel is useful for transferring the hot Dutch oven or directly placing shaped loaves.
- Heat-Resistant Gloves: Your oven will be extremely hot. Protect your hands when moving hot pans.
- Dough Scraper and Bench Scraper: These help you handle sticky dough. They make shaping and transferring much easier.
- Banneton Baskets (Proofing Baskets): These help your dough hold its shape during the final proof. They also make transferring the dough simple.
- Lame or Sharp Knife: For scoring the top of your bread before baking. This controls where the crust splits.
Key Ingredients:
- High-Quality Flour: Use bread flour for strong gluten development. All-purpose flour also works for many recipes.
- Yeast or Sourdough Starter: Choose active dry yeast, instant yeast, or a fed sourdough starter.
- Water: Room temperature water is generally best for mixing dough.
- Salt: Essential for flavor and controlling yeast activity.
- Optional Ingredients: Consider adding seeds, herbs, or cheese for variations.
Using good ingredients will always yield better bread. Fresh flour and active yeast are foundational. Do not skimp on these. Having all your tools ready before you start mixing the dough saves a lot of stress. Setting up an efficient workspace near your oven is also a good idea. This prevents rushing when the oven is at optimal temperature.
The Bread Baking Process: Step-by-Step in Your Pizza Oven
Baking bread in an outdoor pizza oven involves several key steps. Each step contributes to the final quality of your loaf. I break it down into manageable parts to ensure success every time. Follow this process for beautiful, delicious bread.
1. Preparing Your Dough
Start with your favorite bread recipe. This could be a simple no-knead dough, a classic sourdough, or a yeasted artisan loaf. Mix your ingredients well. Allow the dough to ferment and rise, usually for several hours at room temperature or overnight in the refrigerator. The long fermentation develops flavor. Once bulk fermentation is complete, gently shape your dough into a round or oval. Place it in a floured banneton basket or a bowl lined with a floured cloth. Let it proof for its final rise. This could be 1-2 hours at room temperature, or longer in the fridge.
2. Preheating Your Oven and Dutch Oven
As your dough finishes its final proof, begin preheating your outdoor pizza oven. Aim for the oven floor to reach 450-500°F (230-260°C). If using wood, let the flames die down and push embers aside. If gas, reduce the flame once the oven is hot. Place your empty cast iron Dutch oven with its lid into the pizza oven for at least 30 minutes. This ensures it gets very hot. A hot Dutch oven helps achieve a great oven spring and crust. You can learn more about oven heating times by checking how long does an Ooni pizza oven take to heat up.
3. Loading the Bread
Once the Dutch oven is blazing hot, carefully remove it from the pizza oven using heat-resistant gloves. Carefully invert your proofed dough into the hot Dutch oven. Scoring the top of the dough with a lame or sharp knife is crucial. This controls how the bread expands. Put the lid back on the Dutch oven. Carefully place the Dutch oven back into the pizza oven. Close the oven door or opening if your model has one.
4. Baking with the Lid On (Steam Phase)
Bake the bread with the lid on for the first 20-25 minutes. This creates a steamy environment inside the Dutch oven. The steam prevents the crust from forming too quickly. It allows the bread to expand fully, leading to a great “oven spring.” The high initial heat sets the crust quickly. Monitor your oven’s temperature during this phase. If it is too hot, the bottom might burn. Adjust the oven’s heat or move the Dutch oven slightly.
5. Baking with the Lid Off (Crust Browning Phase)
After 20-25 minutes, carefully remove the lid from the Dutch oven. The bread should look puffy and lightly set. Continue baking for another 15-25 minutes, or until the crust is deeply golden brown and sounds hollow when tapped. This phase develops the final crust color and flavor. The internal temperature of the bread should reach 200-210°F (93-99°C) for a fully baked loaf. If one side is browning faster, rotate the Dutch oven.
6. Cooling the Bread
Once baked, carefully remove the Dutch oven and the bread. Transfer the loaf to a wire rack. Let it cool completely before slicing. This is perhaps the hardest part! Cooling allows the internal structure of the bread to set and steam to escape. Slicing too early can result in a gummy texture. This entire process takes practice. Each outdoor oven is unique. Your results will improve with experience.
Troubleshooting Common Bread Baking Challenges Outdoors
Baking bread in an outdoor pizza oven can present some unique challenges. The variable heat and outdoor environment require adaptation. I have faced these issues myself and found solutions. Here are common problems and how to fix them.
Problem 1: Burnt Bottom Crust
The intense heat of the pizza oven floor can quickly scorch the bottom of your bread.
- Solution:
- Lower Oven Temperature: Ensure your oven floor temperature is within the ideal range (400-450°F / 200-230°C) when loading.
- Elevate the Bread: Place a layer of cornmeal or rice flour under your Dutch oven. This creates a small buffer. You can also place the Dutch oven on a small metal trivet or a second, slightly elevated pizza stone if your oven allows.
- Use a Baking Sheet: If not using a Dutch oven, place your bread on a baking sheet, then put the sheet on the pizza stone. This diffuses the direct heat.
- Move Location: In a wood-fired oven, move the Dutch oven further from the direct flame or hot coals.
Problem 2: Pale or Thin Crust
A lack of crisp, golden crust can be disappointing. This often means the oven was not hot enough or the baking time was too short.
- Solution:
- Increase Oven Temperature: Make sure your oven is adequately preheated. The high initial heat helps set the crust.
- Bake Longer (Lid Off): Extend the baking time in the lid-off phase. The radiant heat will brown the crust.
- More Steam: Ensure the Dutch oven is hot and sealed well in the initial baking phase. The steam helps create a thinner, crispier crust that then browns beautifully.
- Rotate the Loaf: Rotate the Dutch oven during the lid-off phase to ensure even browning on all sides.
Problem 3: Dense or Gummy Crumb
If your bread is not light and airy, several factors could be at play.
- Solution:
- Proper Proofing: Ensure your dough has proofed sufficiently. Under-proofed dough will be dense. Over-proofed dough can also collapse and be dense.
- Sufficient Steam: The steam in the initial bake phase helps the bread rise properly. Make sure your Dutch oven is hot and covered.
- Full Bake: Ensure the bread is fully baked. Use an instant-read thermometer to check the internal temperature (200-210°F / 93-99°C).
- Cool Completely: Always cool bread on a wire rack until it reaches room temperature. Slicing hot bread traps moisture, leading to a gummy texture.
Problem 4: Difficulty with Temperature Control
Outdoor oven temperatures fluctuate more than indoor ovens.
- Solution:
- Use a Thermometer: Invest in a good infrared thermometer. It is your best friend for precise readings of the oven floor.
- Practice and Observation: Each oven is different. Pay attention to how long it takes to heat up and cool down. Keep a baking journal. Note down temperatures and times. This helps you learn your oven’s quirks.
- Fuel Management: For wood-fired ovens, manage your fire carefully. Small, consistent additions of wood maintain heat. For gas, make small adjustments to the flame.
- Embrace Imperfection: Part of the charm of outdoor baking is the slight variation. Do not strive for absolute perfection on every loaf.
Problem 5: Dough Sticking to the Dutch Oven
If your dough sticks after baking, it can be frustrating.
- Solution:
- Flour Your Dutch Oven: Lightly dust the bottom of your hot Dutch oven with flour before placing the dough.
- Parchment Paper: Line the bottom of your Dutch oven with parchment paper. This prevents sticking and makes transfer easier.
- Season Your Dutch Oven: Ensure your cast iron is well-seasoned. A non-stick surface helps.
Troubleshooting is part of the learning process. Do not get discouraged by less-than-perfect loaves. Every bake provides valuable experience. Keep experimenting with your outdoor pizza oven. You will soon master baking beautiful bread.
Beyond Basic Loaves: Creative Bread Ideas for Your Pizza Oven
Once you master the basic loaf in your outdoor pizza oven, a world of creative possibilities opens up. Your oven’s unique heat is perfect for many different types of bread. I love experimenting with new recipes once I feel confident with the basics.
1. Focaccia
Focaccia is incredibly simple to make and shines in a pizza oven. Its flat shape allows for even baking on the hot stone. The high heat creates a crispy bottom and a tender, airy crumb. Drizzle with olive oil, sprinkle with flaky sea salt, and add toppings like rosemary, olives, or cherry tomatoes. Bake directly on the stone at around 450°F (230°C) until golden.
2. Pita Bread and Flatbreads
The intense, direct heat of a pizza oven is ideal for puffing up pita bread. Roll out thin rounds of dough. Place them directly on the hot stone. They will inflate like balloons in minutes. Serve warm with hummus or dips. Other flatbreads like naan or lavash also cook beautifully. The high heat creates charring and a tender texture very quickly.
3. Rolls and Buns
You can bake dinner rolls, hamburger buns, or even cinnamon rolls in your outdoor pizza oven. Place them on a baking sheet or in a cast iron pan. Bake at a slightly lower temperature, around 375-400°F (190-200°C). Monitor closely, as smaller items cook faster. The radiant heat helps them brown evenly.
4. Artisan Sourdough Variations
Once you have a good sourdough recipe, start adding inclusions.
- Cheese and Herb Loaves: Incorporate cheddar, Gruyere, or herbs like thyme and chives into your dough.
- Nut and Seed Breads: Add walnuts, pecans, sunflower seeds, or flax seeds for extra texture and nutrition.
- Dried Fruit Breads: Try cranberries, raisins, or apricots for a sweeter loaf. The oven’s heat will perfectly bake these flavorful variations.
5. Enriched Breads
Breads containing eggs, butter, or milk, like brioche or challah, can also be baked. These usually require a slightly lower temperature to prevent burning due to their sugar content. Bake them in a covered pan initially to protect the crust. Then remove the lid to achieve a beautiful golden-brown finish.
6. Pizza Oven Baguettes
Achieving a good baguette crust is challenging. However, the high heat and steam potential of an outdoor oven can help. You will need to create significant steam around the baguettes. One method is to place a tray of hot water in the oven alongside them. The long, narrow shape might require careful placement.
Experimentation is key to discovering what works best in your specific oven. Do not be afraid to try new recipes. Each bake is a learning experience. Your outdoor pizza oven can become a versatile outdoor bakery, producing a wide array of delicious bread.
Maintenance and Care for Your Outdoor Bread Oven
Proper maintenance ensures your outdoor pizza oven remains a reliable tool for both pizza and bread baking. Regular cleaning and care extend its lifespan. It also ensures consistent cooking performance. I make sure to clean my oven after every few uses. This keeps it in top shape. You can find general tips for cleaning the pizza stone here: how to clean pizza stone.
1. Cleaning the Oven After Use
- Ash Removal (Wood-Fired): Once the oven has cooled completely, remove any ash. A small metal shovel and brush are useful. Do not remove ash while hot.
- Brush the Stone: Use a stiff-bristled brush to sweep away any flour, cornmeal, or burnt food debris from the cooking stone.
- Wipe Down Surfaces: Wipe down the exterior surfaces of your oven. Use a damp cloth to remove soot or dust.
- Avoid Harsh Chemicals: Do not use chemical cleaners on the cooking stone. It is porous and will absorb them. High heat usually sanitizes the stone.
2. Protecting Your Oven
- Cover It: When not in use, cover your outdoor oven with a weather-resistant cover. This protects it from rain, snow, and UV rays. This is especially important if you use an outdoor pizza oven in winter.
- Store in Dry Area: If possible, store portable ovens in a garage or shed during extended periods of disuse or harsh weather.
- Protect from Moisture: Moisture can damage oven materials, especially ceramic or refractory concrete. Ensure good drainage around your oven.
3. Inspecting for Wear and Tear
- Check the Stone: Periodically inspect your pizza stone for cracks or severe discoloration. Minor cracks are common and usually not an issue. Deep cracks might indicate it is time for a replacement.
- Inspect Mortar/Joints (Brick Ovens): For built-in brick ovens, check the mortar joints. Repair any cracks or crumbling sections.
- Examine Metal Parts: Look for rust on metal components. Treat rust spots or replace affected parts if necessary.
- Check Fuel Lines (Gas Ovens): For gas ovens, regularly inspect the gas lines for kinks, leaks, or damage. Ensure connections are secure.
4. Re-seasoning (If Applicable)
Some cast iron components, like oven doors or even some pizza oven models, may benefit from re-seasoning. Follow the manufacturer’s instructions for this. Seasoning helps prevent rust and improves performance.
5. Manufacturer’s Guidelines
Always refer to your specific oven’s manufacturer’s manual. They provide detailed instructions for care and maintenance tailored to your model. Following their advice ensures optimal performance and longevity.
By investing a little time in maintenance, you will keep your outdoor pizza oven ready for many more baking adventures. It will continue to produce fantastic pizzas and artisan breads for years to come.
Frequently Asked Questions About Baking Bread in Outdoor Pizza Ovens
What kind of bread can I bake in an outdoor pizza oven?
You can bake almost any type of bread in an outdoor pizza oven. This includes sourdough, rustic country loaves, focaccia, pita bread, dinner rolls, and even enriched breads like brioche. The oven’s high heat and heat retention are perfect for developing great crust and crumb.
How do I control the temperature for bread baking?
Temperature control in an outdoor pizza oven for bread is mainly about managing the fire and residual heat. For wood-fired ovens, let the fire burn down to coals and remove or push them aside. For gas ovens, lower the flame. Use an infrared thermometer to monitor the oven floor, aiming for 400-450°F (200-230°C) for loading.
Do I need special dough for a pizza oven?
No, you do not need special dough. Most standard bread recipes work well. However, doughs with a higher hydration (more water) often perform better. The high heat can dry out lower hydration doughs too quickly. Using a Dutch oven helps maintain moisture.
Can I bake sourdough in an outdoor pizza oven?
Yes, outdoor pizza ovens are excellent for sourdough bread. The intense, even heat helps create a fantastic “oven spring” and a beautifully crisp, chewy crust. The process is similar to baking in a conventional oven, but the oven’s unique characteristics enhance the sourdough’s qualities.
How long does bread take to bake in an outdoor pizza oven?
Baking time varies based on bread size, dough type, and oven temperature. Generally, a standard loaf bakes for 35-50 minutes. This usually involves 20-25 minutes with a lid on (if using a Dutch oven) and another 15-25 minutes with the lid off to brown the crust. Always check for an internal temperature of 200-210°F (93-99°C).
How do I clean my pizza stone after baking bread?
After baking bread, wait for your pizza stone to cool completely. Use a stiff brush or a bench scraper to remove any stuck-on flour or burnt bits. Avoid using soap or harsh detergents, as the stone is porous. The high heat of the oven usually sanitizes the stone effectively.
Conclusion: Expanding Your Outdoor Culinary Horizons
You can absolutely bake bread in an outdoor pizza oven. This versatile appliance is far more than just a pizza maker. It provides the ideal environment for creating artisan loaves with incredible crusts and tender interiors. From managing the falling heat to utilizing a Dutch oven for steam, you now have the knowledge to transform your backyard into a bread-making haven.
I encourage you to try baking bread in your outdoor pizza oven. Start with a simple recipe and get familiar with your oven’s unique characteristics. Each loaf you bake will teach you something new. Soon, you will be producing delicious, homemade bread that rivals any bakery. Embrace the challenge and enjoy the rewarding experience of baking perfect loaves in your outdoor oven.
- outdoor pizza oven
- baking bread
- homemade bread

Katria Melrose
Cleaning Specialist
With over 12 years of experience in commercial cleaning and a certification in workplace ergonomics, I’ve developed a deep understanding of what makes a workspace truly productive. At HEG, I specialize in helping people transform their home offices into clean, efficient, and comfortable environments. Through smart cleaning routines and strategic organization solutions, I empower readers to create spaces that support focus, comfort, and success—one well-organized desk at a time.