· Todd Martin · Home Maintenance · 18 min read
Can You Repair Existing Carpet
Fix Your Floors: Can You Repair Existing Carpet?
Have you looked at your carpet and noticed a stain, a tear, or a frustrating ripple? Many homeowners face these common carpet issues. You might wonder if you need to replace the entire floor. It feels like a big job.
I understand this concern. Replacing carpet is expensive and time-consuming. Fortunately, the answer is often no. You do not always need new carpet. This guide explores how you can repair existing carpet. We will cover common types of damage. We will also discuss effective repair methods. You will learn when to handle repairs yourself and when to hire a professional. This article helps you make informed decisions about your carpet.
Takeaway
Repairing existing carpet is often possible and cost-effective.
- Address minor damage like stains, small tears, and dents with DIY methods.
- Use specific tools and techniques for different types of carpet issues.
- Consider professional help for major damage, large areas, or complex problems.
- Regular maintenance extends carpet life and prevents future damage.
The Short Answer: Yes, You Can Often Repair Existing Carpet.
Yes, you can often repair existing carpet. Many common carpet problems are fixable. These include stains, burns, small tears, and ripples. The ability to repair depends on the damage type and severity. Minor issues are suitable for DIY. Larger problems may need a professional.
Understanding Common Carpet Damage
Carpets endure a lot of wear. Daily foot traffic, spills, and accidents cause damage. Recognizing the type of damage helps you plan the right repair. Each problem needs a specific solution. Knowing what you are dealing with saves time and effort.
Different Types of Carpet Issues
Common carpet issues include various forms of damage. Stains are perhaps the most frequent problem. They range from small spills to deep-set marks. Burns from dropped cigarettes or hot objects create visible, damaged spots. Tears and snags happen from sharp objects or heavy furniture. Fraying occurs along edges or in high-traffic areas. Ripples and buckles appear when carpet stretches or loosens. Pet damage involves scratches, tears, or repeated stains. Understanding these distinct issues is the first step toward effective repair.
- Stains: These are discolorations on the carpet fibers. They come from spills, dirt, or pet accidents. Some stains sit on the surface. Others penetrate deep into the carpet pile. Learning how to clean old stains from carpet can be very helpful.
- Burns: Hot objects, like an iron or a dropped cigarette, can singe or melt carpet fibers. This creates a hard, discolored spot. The damage is often permanent if not addressed.
- Tears and Snags: Sharp objects or dragging heavy furniture can rip carpet fibers. Snags are individual loops pulled out from Berber or loop pile carpets. These can worsen quickly if not fixed.
- Fraying: This happens when carpet edges or seams unravel. It is common in doorways or areas with heavy friction. Loose fibers can spread and worsen the fray.
- Ripples and Buckles: Over time, carpets can stretch. Humidity changes, heavy foot traffic, or improper installation cause this. The carpet forms waves or bumps on the floor. Knowing how to get wrinkles out of carpet without a stretcher is a valuable skill.
- Pet Damage: Pets can scratch, chew, or have accidents on the carpet. This leads to torn fibers, urine stains, or lingering odors. Cleaning pet urine from carpet quickly is crucial to prevent lasting damage.
Addressing damage early prevents it from getting worse. Small issues are easier to repair. Waiting can turn a minor fix into a major one. Regular checks of your carpet help identify problems early.
DIY Carpet Repair Methods
Many common carpet problems are fixable without professional help. Doing it yourself can save you money. It also gives you a sense of accomplishment. These methods are suitable for minor damage. Always gather the right tools before you start.
Tackling Minor Stains
Stains are a frequent issue. Different types of stains need different approaches. Act fast for best results. Fresh spills are easier to remove than old ones.
- Liquid Spills: Blot liquids immediately with a clean cloth. Do not rub the stain. Rubbing spreads the liquid and pushes it deeper into the fibers. Mix a small amount of mild dish soap with warm water. Apply this solution to the stain with a clean cloth. Blot again. Repeat until the stain lifts. Finish by blotting with plain water to rinse. You can also use specialized carpet cleaning products. For specific issues, like how to get tempera paint out of carpet, specialized guides exist.
- Solid Stains: For mud or food, let it dry first. Then, scrape off as much solid material as possible. Use a butter knife or spoon. After scraping, follow the steps for liquid spills. For pet accidents, immediate action is vital. Learning how to clean cat urine out of carpet is essential for pet owners. Proper cleaning prevents odors and re-soiling.
Fixing Small Burns or Holes
Small burn marks or holes can be frustrating. You do not need to replace the whole carpet. Patching is an effective solution. This method replaces the damaged section with a new piece of carpet.
- Find a Scrap Piece: You need a carpet remnant that matches your existing carpet. This could be from an attic, a closet, or a hidden area. A perfect match is essential for an invisible repair.
- Cut the Damaged Area: Use a sharp utility knife. Cut out the damaged carpet section. Make it a perfect square or rectangle. Cut through the carpet backing. Be careful not to cut the padding underneath.
- Prepare the Patch: Place the cut-out damaged piece on your scrap carpet. Use it as a template. Cut a new patch that is exactly the same size. Ensure the pile direction matches the existing carpet.
- Install the Patch: Apply carpet adhesive or double-sided carpet tape to the subfloor. Place the new patch into the opening. Press it down firmly. Ensure the edges align perfectly. You can use a heavy book or weight on top for a few hours. This helps the adhesive set. For very small burns, you might trim scorched fibers with scissors.
Repairing Frayed Edges and Snags
Fraying often occurs at seams or transitions. Snags are common in loop pile carpets. These issues worsen if not addressed.
- Frayed Edges: Apply a small amount of carpet seam sealer or strong fabric glue. Use a thin bead along the frayed edge. Press the fibers back into place. Let it dry completely. This prevents further unraveling.
- Snags: Do not pull a snagged loop. Pulling can unravel more of the carpet. Instead, carefully trim the loop even with the carpet pile. Use sharp scissors. For larger snags, you might need to re-glue the loop back into the backing.
Removing Furniture Dents and Indentations
Heavy furniture leaves depressions in carpet. These dents can make your carpet look old. Luckily, they are often easy to fix.
- Ice Cube Method: Place an ice cube directly on the dent. Let it melt completely. The water swells the carpet fibers.
- Blot and Lift: Blot up the excess water with a clean cloth. Use your fingers or a coin to gently fluff up the wet fibers.
- Vacuum or Brush: Once dry, vacuum the area. Or, use a stiff brush to further lift the pile. Getting furniture dents out of carpet makes a big difference in a room’s appearance.
DIY methods are great for minor issues. They keep your carpet looking good without major costs. Always work carefully to avoid causing more damage.
When to Call a Professional Carpet Repairer
While many minor issues are DIY-friendly, some carpet problems demand professional expertise. Knowing when to step back and call a pro saves you time, frustration, and potential further damage. Professionals have specialized tools and experience. They can handle complex repairs effectively.
Extensive or Complex Damage
Some damage goes beyond simple fixes. These situations require skilled hands and specific equipment. Attempting a complex repair without proper knowledge can worsen the problem. It might even make a professional fix harder or impossible.
- Large Tears or Holes: If a tear spans more than a few inches or a hole is bigger than a golf ball, professional help is usually best. They can seamlessly patch large areas. They ensure the new carpet piece blends perfectly. Their techniques prevent the patch from becoming noticeable.
- Widespread Water Damage: Water damage leads to mold, mildew, and carpet delamination. If the carpet padding is soaked, or the subfloor is wet, professional intervention is necessary. They have powerful drying equipment. They can also treat for mold. This prevents health hazards and structural damage.
- Full Carpet Restretching: Significant ripples or buckles across a large room indicate the carpet has stretched. This needs a power stretcher, a tool most homeowners do not own. Professionals use this tool to pull the carpet taut. They re-secure it to the tack strips. This removes all waves. They can often get wrinkles out of carpet even without a traditional stretcher using specific methods.
- Severe Pet Damage: While you can clean pet stains, extensive pet damage is different. This includes multiple large urine spots, deep scratching, or widespread chewing. Professionals can replace sections of padding and subfloor if necessary. They also provide deep odor removal treatments that penetrate all layers.
- Color Matching and Dyeing: If a bleach spill or faded spot creates a significant color difference, a professional carpet dyer can help. They use specialized dyes to match the existing carpet color. This makes the damaged area disappear. This is a highly specialized skill.
Benefits of Professional Repair
Hiring a professional offers several advantages. They bring expertise, efficiency, and peace of mind.
- Expertise: Professionals know various carpet types and their specific repair needs. They understand carpet construction. This allows them to choose the correct repair method.
- Specialized Tools: They have tools like power stretchers, patching irons, and specialized adhesives. These tools are expensive for a single repair. They also require training to use correctly.
- Seamless Results: A skilled professional can make repairs virtually invisible. They match patterns and textures carefully. They blend new sections with old carpet. This provides a clean, finished look.
- Warranty: Many professional carpet repair services offer warranties on their work. This gives you protection and reassurance.
- Time-Saving: Repairs can be time-consuming for a novice. Professionals complete the job quickly and efficiently. This minimizes disruption to your home.
When you face a carpet problem that seems too big or too complicated, a professional is your best resource. They ensure the job is done right the first time. This protects your investment in your carpet.
Essential Tools and Materials for Carpet Repair
Having the right tools is crucial for successful DIY carpet repair. You do not need a full professional kit. A few specific items will cover most common repairs. These tools help you work safely and effectively. Gather them before starting any project.
Must-Have Repair Tools
These tools are essential for cutting, stretching, and bonding carpet. They ensure clean cuts and strong repairs. Investing in good quality tools makes the job easier.
- Utility Knife: A sharp utility knife is indispensable. It cuts carpet cleanly. Use heavy-duty blades for thick carpet. Change blades often to maintain sharpness. Dull blades can tear carpet fibers.
- Measuring Tape: Accurate measurements are key for patching. A standard measuring tape works well. Measure the damaged area precisely.
- Straightedge or Metal Ruler: Use this with your utility knife to ensure straight cuts. It provides a guide for clean lines. This is especially important for patches.
- Carpet Seam Roller: This tool helps press down new patches or seams. It creates a flat, professional finish. It ensures good adhesion between carpet layers or the carpet and subfloor.
- Staple Gun: For securing edges or certain patches. A heavy-duty staple gun with long staples works best. Ensure staples penetrate the carpet backing and padding.
- Trowel or Spreader: Used for applying carpet adhesive evenly. A notched trowel is ideal for spreading adhesive. This ensures good coverage for a strong bond.
Repair Materials You Will Need
Beyond tools, you need specific materials to complete repairs. These include adhesives, patches, and sometimes specialized cleaners. Always match materials to your carpet type.
- Carpet Adhesive: This is a strong glue designed for carpet. It creates a permanent bond. Choose an adhesive suitable for your carpet backing. Follow manufacturer instructions for application and drying times.
- Double-Sided Carpet Tape: A good alternative for smaller, lighter repairs. It provides a strong temporary or semi-permanent bond. Ideal for securing small patches or loose edges.
- Carpet Seam Sealer: A liquid adhesive that prevents carpet seams from unraveling. It adds durability to patched areas. Apply it along cut edges for extra security.
- Carpet Scraps/Remnants: The most important material for patching. Always save leftover carpet pieces after installation. If you do not have any, take a piece from an inconspicuous area. A closet or under furniture works well.
- Clean Cloths/Sponges: For cleaning stains and applying solutions. Use white cloths to avoid color transfer.
- Rubbing Alcohol (for some stains): Effective on ink or permanent marker stains. Test it in an inconspicuous area first.
- Hydrogen Peroxide (for some stains, like pet urine): Use on light-colored carpets. Always dilute it and test first. It can bleach carpet.
- Baking Soda/Cornstarch (for absorbing spills): Excellent for fresh liquid spills. It absorbs moisture and odors.
- Vacuum Cleaner: Essential for post-repair cleanup. It helps fluff the carpet pile. Regular vacuuming is also part of how to keep carpet clean and helps prevent damage.
Having these tools and materials ready makes any carpet repair project more manageable. It also ensures you achieve the best possible results. Proper preparation is key to a successful repair.
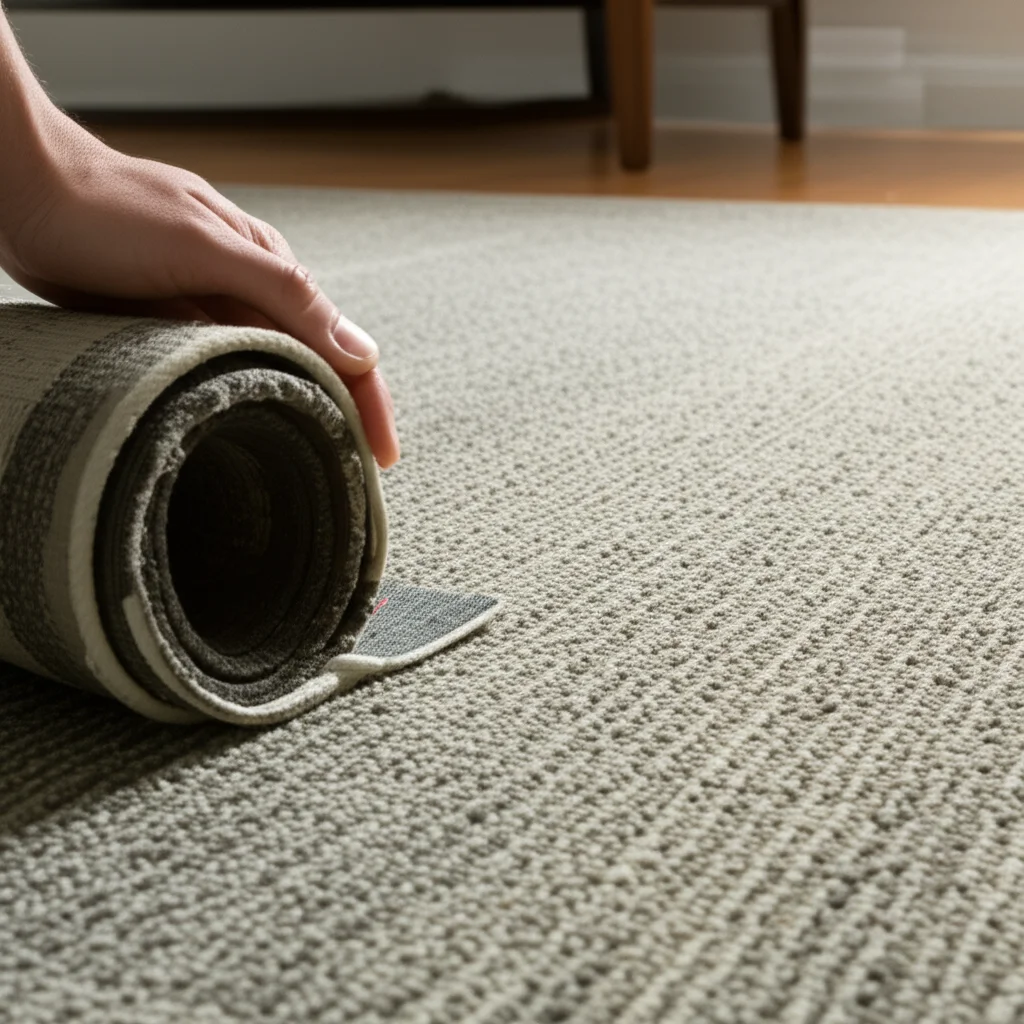
Step-by-Step Guide to Patching Carpet
Patching is a common and effective method for fixing localized damage. This includes burns, small holes, or stubborn stains. The goal is to replace the damaged section with an identical piece. Precision is important for a seamless result.
Preparing for the Patch Job
Good preparation makes the job easier and more successful. Before you start cutting, ensure you have everything ready. This prevents mid-project delays.
- Gather Supplies: Collect your utility knife, straightedge, carpet adhesive or double-sided tape, and a suitable carpet remnant. Ensure your remnant matches the existing carpet’s color and pile direction. If you do not have a remnant, cut a small piece from an inconspicuous area, like inside a closet or under a large appliance.
- Clean the Area: Vacuum the damaged spot. Remove any loose dirt or debris. This ensures a clean surface for adhesive bonding.
- Inspect the Damage: Look at the size and shape of the damage. Plan your cut. You want to remove only the damaged part. Make the cut as small as possible.
Cutting the Damaged Section
This step requires careful handling of your utility knife. A clean, straight cut is crucial for a good patch.
- Define the Cut Area: Place your straightedge over the damaged area. Position it to form a perfect square or rectangle around the damage. Ensure the lines are parallel to the carpet’s weave.
- Make the First Cut: Press down firmly on the straightedge. Carefully cut through the carpet. Use a new, sharp blade in your utility knife. Cut through the carpet backing. Be careful not to cut into the padding or subfloor underneath. Repeat for all four sides.
- Remove the Damaged Piece: Gently lift out the cut carpet piece. Dispose of it properly. The opening should be a clean, uniform shape.
Creating and Installing the New Patch
Now you will prepare your new carpet piece. This piece will fill the void. Careful attention to pile direction is vital.
- Cut the New Patch: Place the removed damaged piece on your carpet remnant. Align the pile direction of the remnant with the existing carpet. This is very important. If the pile direction is off, the patch will stand out. Use the old piece as a template. Cut a new patch that is exactly the same size and shape.
- Prepare the Opening: If using carpet adhesive, ensure the subfloor within the opening is clean and dry. If using double-sided tape, apply strips around the perimeter of the opening on the subfloor.
- Apply Adhesive (if applicable): Apply a thin, even layer of carpet adhesive to the subfloor within the opening. You can use a small trowel or a stiff brush. Do not over-apply. Excess glue can seep through the carpet.
- Insert the Patch: Carefully place the new carpet patch into the opening. Align it perfectly with the existing carpet. Make sure the pile direction matches. Press down firmly on the patch.
- Secure and Set: Use a carpet seam roller or a heavy object (like a stack of books) to press down on the patch. This helps the adhesive bond. If using tape, ensure strong contact. Let the adhesive cure for several hours. Refer to the adhesive’s instructions for drying time. Avoid walking on the patch during this period.
- Blend the Seams: Once the adhesive is dry, gently fluff the carpet fibers around the seams. You can use your fingers or a stiff brush. This helps hide the cut lines. Vacuuming the area can also help blend the fibers.
Patching takes patience and precision. A well-done patch can make damaged carpet look new again.
Preventing Future Carpet Damage
Preventing damage is always better than repairing it. Simple routines and protective measures significantly extend your carpet’s life. Regular maintenance keeps your carpet looking fresh and new. It also reduces the need for frequent repairs.
Regular Cleaning and Maintenance
Consistent cleaning is the first line of defense against damage. Dirt and debris wear down carpet fibers over time. Stains become harder to remove if left untreated.
- Vacuum Regularly: Vacuuming removes dirt, dust, and allergens. High-traffic areas need more frequent vacuuming. Aim for at least once a week. This prevents grime from settling deep into the carpet pile. Learning how to keep carpet clean effectively is key to long-term carpet health.
- Prompt Stain Removal: Address spills immediately. Blot, do not rub. Different stains require specific cleaning agents. Always test any cleaner in an inconspicuous area first. Knowing how to spot clean carpet quickly prevents permanent marks. For common household accidents, learn how to clean throw up out of carpet to manage those tough spills.
- Deep Clean Periodically: Professional deep cleaning or using a carpet cleaner removes embedded dirt. Do this every 12-18 months. This revitalizes carpet fibers and improves indoor air quality. If you want to tackle it yourself, you can deep clean carpet without a machine using household items.
Protecting Your Carpet from Wear and Tear
Beyond cleaning, proactive measures shield your carpet from daily abuse. These steps minimize physical damage and extend its lifespan.
- Use Area Rugs and Mats: Place rugs in high-traffic areas. Entryways, hallways, and in front of sofas benefit from rugs. They absorb wear and tear. This protects the underlying carpet.
- Furniture Pads: Attach felt or rubber pads to furniture legs. This prevents scratches and tears when moving furniture. It also helps get furniture imprints out of carpet when furniture is repositioned.
- Rearrange Furniture: Periodically shift furniture. This distributes wear evenly across the carpet. It prevents permanent dents and pathways.
- Trim Pet Claws: Long pet claws can snag and damage carpet fibers. Keep your pet’s claws trimmed. Provide scratching posts for cats. This helps prevent them from damaging the carpet.
- Control Humidity: Maintain a consistent humidity level in your home. Extreme humidity changes can cause carpet to expand and contract. This leads to ripples and buckles.
- Avoid Direct Sunlight: Prolonged exposure to direct sunlight can fade carpet colors. Use blinds or curtains to protect sunny areas.
By implementing these preventive measures, you can significantly reduce the likelihood of needing major carpet repairs. Proactive care ensures your carpet remains a beautiful and comfortable part of your home for years.
Repair Versus Replacement: Cost-Effectiveness
When carpet damage occurs, you face a choice: repair or replace. This decision often comes down to cost. It also involves the extent of the damage. Understanding the financial implications helps you make a wise choice.
Analyzing the Repair Cost
Repairing carpet is almost always cheaper than full replacement. The cost of repair varies. It depends on the damage type and if you DIY or hire a pro.
- DIY Repair: This is the most cost-effective option. You only pay for materials and tools. Small patch kits, adhesives, and utility knives are inexpensive. For instance, fixing a small burn might only cost $20-$50 in materials. Your time is the biggest investment.
- Professional Repair: Hiring a pro costs more, but it guarantees quality. Professionals charge based on the type and complexity of the repair.
- Patching: A small professional patch might cost $75-$200. This depends on the size and location.
- Stretching: Stretching a room to remove ripples typically costs $150-$350. This varies by room size.
- Large-scale repairs or dyeing: These can range from $300 to several hundred dollars. It is still less than new carpet. Many professionals have minimum service fees. Get multiple quotes.
Repair is a good option when:
- Damage is localized (e.g., one stain, a small tear).
- The carpet is still in good condition overall.
- You have a matching remnant.
- The repair will blend well.
Considering the Replacement Cost
Replacing carpet involves significant expenses. This includes the new carpet itself, padding, and installation labor.
- Carpet Material: Carpet costs range widely. Budget options might be $1-$3 per square foot. Mid-range carpets are $3-$7 per square foot. High-end or specialty carpets can be $8-$20+ per square foot.
- Padding: New padding is essential for comfort and durability. It costs $0.50-$2 per square foot.
- Installation Labor: Professional installation costs $0.50-$2 per square foot. This includes old carpet removal and disposal.
- Additional Costs: Tack strips, transition pieces, and moving furniture add to the total.
Total replacement for an average 15x15 foot room (225 sq ft) can easily cost $700 for budget carpet. Mid-range options might push it to $1,500-$3,000. Luxury carpets can be much more.
Replacement is often necessary when:
- Damage is widespread (e.g., severe fading, extensive pet damage throughout, major water damage).
- The carpet is very old and worn out.
- Multiple areas need repair. The cost of many small repairs might approach replacement.
- You want a complete style change.
Making the Decision
Weigh the costs against the condition and age of your carpet.
- Short-term Fix vs. Long-term Solution: Repair is a short-term fix if the carpet is already old. Replacement offers a fresh start.
- Aesthetics: Will the repair blend well? A noticeable repair might detract from your home’s appearance.
- Overall Value: Does the carpet add or detract from your home’s value? If selling soon, a minor repair might suffice.
- carpet repair
- DIY home repair
- carpet maintenance
- floor care
- carpet damage

Todd Martin
Senior Writer
With over 15 years of experience in home renovation and design, I started HEG to share what I’ve learned with homeowners who want to create spaces that are both beautiful and functional. I’ve always believed in a hands-on approach, and over the years, I’ve picked up practical solutions that actually work. Through HEG, I aim to make home improvement more approachable, sharing real tips that help you create a home you truly love.