· Todd Martin · Home Appliances · 21 min read
Can You Use An Electric Oven Straight Away
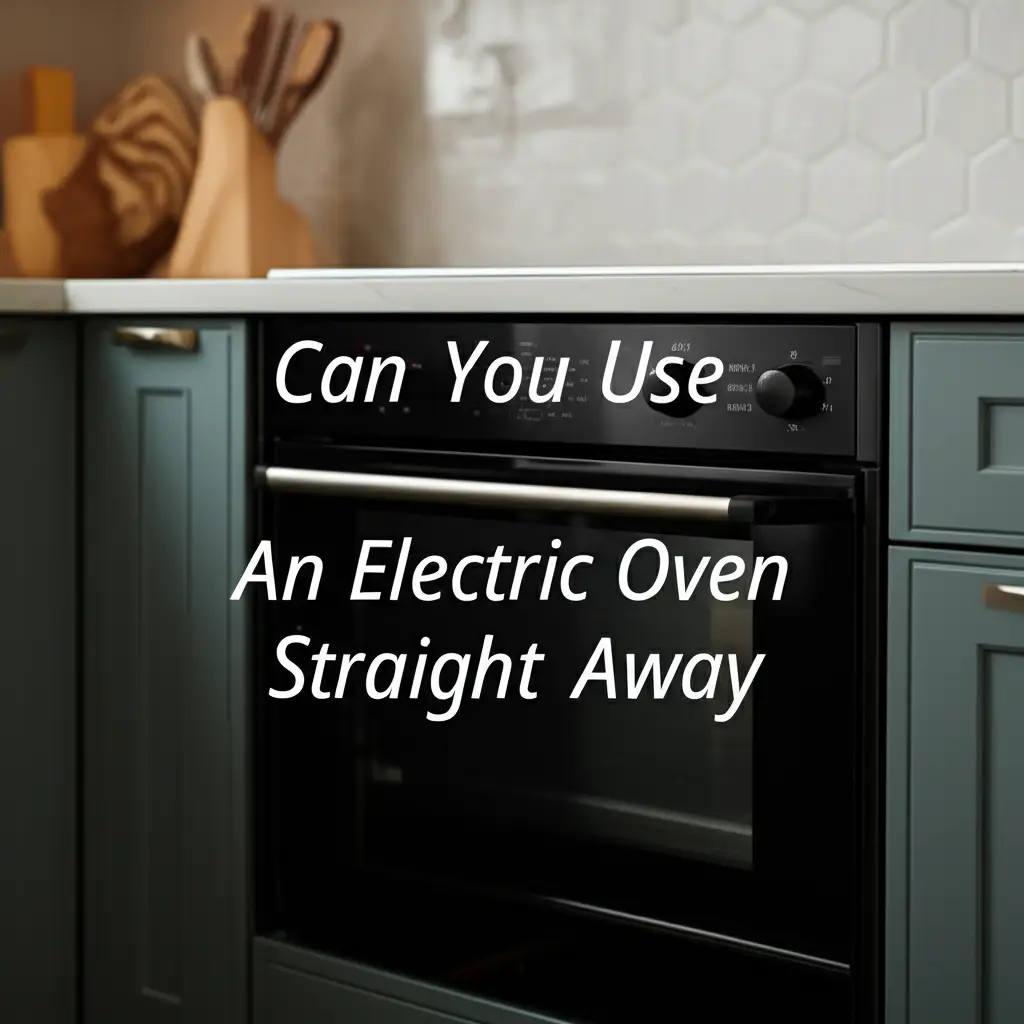
Using Your New Electric Oven: Can You Use It Straight Away?
The moment a new electric oven arrives is exciting. You might imagine baking cookies or roasting dinner right away. Many people wonder, “Can you use an electric oven straight away?” It seems natural to plug it in and start cooking. However, there are important steps to take first. Skipping these steps can affect your food’s taste or even pose a health risk. This guide explains why immediate use is not recommended. We will cover the essential preparations for your new electric oven. You will learn about the burn-in process, safety checks, and initial cleaning.
Takeaway: Your New Electric Oven Needs Preparation
- Do not use your new electric oven for cooking immediately after installation.
- Perform an initial “burn-in” cycle to remove manufacturing residues.
- Ensure proper ventilation during the burn-in process.
- Clean the oven interior after the burn-in, once it cools down.
- Always consult your oven’s specific owner’s manual for detailed instructions.
Clear Answer
You cannot use a new electric oven straight away for cooking. New ovens have manufacturing oils and protective coatings that must burn off. This process, known as burn-in, prevents a chemical smell from affecting food. It also ensures safe operation for you and your family.
Why You Can’t Use Your Electric Oven Immediately: Understanding the “New Oven Smell”
When you first turn on a brand-new electric oven, you will likely notice a distinct smell. This is often called the “new oven smell.” It does not mean your oven is faulty. This smell comes from various manufacturing residues. These residues include protective oils, greases, and sealants. They are applied to metal parts during assembly. This protects the oven during shipping and storage.
Heating these substances causes them to vaporize. This creates the odor you smell. If you cook food during this process, the food can absorb these chemical smells and tastes. This makes your meal unappetizing. More importantly, inhaling these fumes directly can be harmful. It is crucial to allow these substances to burn off completely. This ensures your oven is safe for food preparation. The burn-in process creates a clean cooking environment. It removes any lingering factory odors and helps “cure” the oven’s interior. Skipping this step means your first few meals might taste off. It also means you expose yourself to unnecessary fumes. Taking the time for burn-in protects your health and culinary results.
Manufacturing Oils and Protective Coatings
Oven manufacturers apply a layer of oil or other protective coatings to the interior components. This protects the metal from rust and corrosion. It happens during transit and storage. These coatings are not food-safe. They are designed to burn off at high temperatures. When you power on the oven for the first time, these substances heat up. They release fumes into the air. This is a normal part of the process.
Think of it like seasoning a new cast-iron pan. You prepare it before cooking. Similarly, your oven needs preparation. The initial heating allows these materials to evaporate. This leaves a clean, ready-to-use surface. Ignoring this step means these chemicals remain. They could leach into your food. This could impact flavor. It could also pose health concerns over time. Always prioritize this initial cleaning and burn-in.
Lingering Fumes and Their Impact
The fumes released during the first use are mostly harmless in small amounts. However, concentrated exposure can be irritating. You might experience eye irritation or respiratory discomfort. This is especially true for those with asthma or sensitivities. The smell can also be quite strong and unpleasant. It can linger in your home for hours. Proper ventilation is key during this initial period. Open windows and use exhaust fans.
This ensures the fumes exit your living space. It makes the burn-in process safer and more comfortable. Even if the smell is faint, it still suggests chemicals are present. These chemicals need to be removed before cooking. Your goal is a completely odor-free oven. Only then is it truly ready for your culinary creations.
The Essential First-Time Burn-In Process for Electric Ovens
The burn-in process is a critical first step for any new electric oven. It removes all residual manufacturing oils and protective coatings. This procedure involves heating the empty oven to a high temperature for a specific duration. This allows those chemicals to vaporize safely. The goal is to eliminate the “new oven smell” and any potential contaminants. You will also confirm proper oven function during this time.
Always refer to your oven’s owner’s manual for precise instructions. Manufacturers often have specific temperature and time recommendations. Following these guidelines ensures a thorough and safe burn-in. This preparation guarantees your oven is clean and ready for cooking. It protects your food from unwanted tastes. It also protects your health from potentially harmful fumes. This step is a small investment of time for long-term safety and enjoyment. Many people ask, “how to use electric oven for the first time,” and this burn-in is the absolute starting point. how to use electric oven for the first time
Step-by-Step Burn-In Procedure
Performing the burn-in correctly is simple. First, remove all racks, accessories, and packing materials from inside the oven. Ensure the oven cavity is completely empty. Then, wipe down the interior with a damp cloth. Use only water, no cleaning products. This removes any loose debris or dust.
Next, open nearby windows or turn on your kitchen’s exhaust fan. Good ventilation is essential to dissipate the fumes. Set your oven to a high temperature, typically between 400°F and 550°F (200°C to 290°C). Check your manual for the exact recommended temperature. Let the oven run at this temperature for at least 30 minutes to an hour. Some manuals recommend up to two hours. You will likely smell the “new oven smell” during this time. Do not be alarmed. It is part of the process. Once the time is up, turn off the oven and let it cool completely. Keep the room ventilated until the smell fully disappears.
Temperature and Time Recommendations
Most manufacturers suggest a burn-in temperature range of 400°F to 550°F (200°C to 290°C). The duration typically varies from 30 minutes to 2 hours. A common recommendation is 450°F for 60 minutes. Always consult your specific oven’s manual. This document provides the most accurate instructions for your model. Different brands or models may have slightly different requirements.
Adhering to these recommendations ensures all residues are properly vaporized. It also prevents unnecessary wear on the oven components. Running the oven for too short a time may not remove all residues. Running it too long is generally not harmful but wastes energy. The key is to find the balance recommended by the manufacturer. This ensures your oven is prepared correctly.
Importance of Ventilation During Burn-In
Ventilation is paramount during the oven burn-in process. The fumes released can be strong and irritating. Proper airflow prevents these fumes from accumulating inside your home. Open windows and doors in the kitchen area. Turn on your kitchen’s exhaust fan or range hood to its highest setting.
If you have a window fan, consider placing it in a window to draw air out. Keep children, pets, and individuals with respiratory issues away from the kitchen. This ensures their safety. The smell will dissipate over time with adequate ventilation. Do not close up the kitchen until the odor is completely gone. Good ventilation protects your health and makes the process more tolerable.
Preparing Your Electric Oven for First Use: Step-by-Step Guide
After the initial burn-in, your electric oven needs a final cleaning and check. This prepares it for actual cooking. The burn-in process helps eliminate fumes. However, it can also leave a fine ash or residue inside the oven cavity. This is normal. A quick wipe-down ensures a truly clean cooking surface. Also, checking components like racks and trays confirms everything is in place.
This pre-cooking preparation step is simple. It ensures hygiene and optimal performance. You want your first culinary creations to be perfect. A clean oven is essential for this. It also builds good habits for future oven maintenance. By taking these few extra minutes, you set your oven up for success.
Post-Burn-In Cleaning
Once your electric oven has completely cooled down after the burn-in, it’s time for cleaning. Use a damp cloth or sponge to wipe down the interior surfaces. A mild dish soap can be used for stubborn spots. Avoid harsh chemical cleaners inside the oven. Most manufacturers recommend only water or a very mild solution. Focus on the oven walls, bottom, and ceiling. Wipe down the oven racks as well.
Ensure you rinse the cloth thoroughly after cleaning. Then, wipe the surfaces again with a clean, damp cloth. This removes any soap residue. Finally, dry the interior with a clean, dry cloth. This prevents water spots and ensures a pristine cooking environment. A properly cleaned oven ensures no residues transfer to your food. This makes your first meal delicious. For more detailed cleaning advice, you can learn how to clean electric oven or specifically how to clean GE oven before first use if your model is a GE.
Checking Oven Racks and Accessories
After cleaning, replace all oven racks and accessories. Make sure the racks slide smoothly into their designated slots. Some ovens have specific rack positions for different types of cooking. Refer to your manual if you are unsure. Check that any included baking sheets or broiler pans fit correctly. Ensure they are clean too.
This step confirms everything is in its proper place. It helps you become familiar with your new oven’s layout. Knowing where everything fits makes future cooking easier. It also ensures proper air circulation inside the oven during cooking. This is important for even heat distribution. A well-organized oven is a joy to use.
Initial Preheating and Calibration Check
Before your first meal, consider a final short preheating cycle. Set the oven to a common baking temperature, like 350°F (175°C). Let it preheat and run for about 15-20 minutes. This helps confirm the oven reaches and holds temperature accurately. You can use an oven thermometer to verify the temperature. Place the thermometer inside the oven. Read it after the oven has been preheating for some time.
Most ovens have a slight temperature variance. A difference of 25-50 degrees Fahrenheit is usually acceptable. If the difference is significant, your oven might need calibration. This is rare for new ovens. However, it is a good initial check. This final preheat ensures your oven is ready for precise cooking. It gives you confidence in its performance.
Understanding Electric Oven Safety Features and Best Practices
Modern electric ovens come equipped with several safety features. These features protect you and your home. Understanding them is crucial for safe operation. Beyond built-in features, adopting best practices further enhances safety. This includes proper installation and mindful use. For example, knowing can I put an electric oven in my garage requires understanding electrical requirements and ventilation.
Always read your oven’s manual carefully. It provides model-specific safety information. Prioritizing safety prevents accidents like burns or fires. It also extends the life of your appliance. A safe oven is a functional oven.
Automatic Shut-Off and Overheat Protection
Many electric ovens feature automatic shut-off mechanisms. These systems turn the oven off after a certain period of continuous operation. This prevents the oven from running indefinitely if forgotten. It saves energy and reduces fire risk. Overheat protection is another vital feature. This system monitors internal oven temperatures. If the oven exceeds a safe operating temperature, it automatically shuts down.
This prevents damage to internal components. It also protects your home from extreme heat. These features work silently in the background. They provide an extra layer of safety. Always ensure these features are functioning correctly. Do not try to bypass them. They are there for your protection. If your oven repeatedly turns off by itself, it might indicate an issue. You might want to understand why does my electric oven turn off by itself.
Child Lock Features
Most new electric ovens include a child lock feature. This prevents accidental activation by children. It also stops little hands from changing settings during cooking. This feature often engages by pressing and holding a specific button. Or it might involve a combination of buttons. When activated, the control panel becomes unresponsive.
This makes the oven safe when children are present. Always engage the child lock when the oven is not in use. It is a simple step that provides significant peace of mind. Check your manual for instructions on activating and deactivating this feature. Child safety in the kitchen is always paramount.
Proper Installation and Electrical Requirements
Correct installation is fundamental for electric oven safety. Ensure the oven is connected to a dedicated electrical circuit. This circuit must match the oven’s voltage and amperage requirements. Incorrect wiring can cause electrical fires or damage the appliance. Always hire a qualified electrician for installation if you are unsure. Do not attempt complex electrical work yourself.
Ensure the oven is level once installed. This prevents food from cooking unevenly. It also ensures door seals properly. Adequate clearance from walls and cabinets is also necessary. This prevents heat buildup. The back of an electric oven can get hot. Understanding does the back of an electric oven get hot helps ensure proper placement and safety clearances. This is critical for preventing heat-related damage to surrounding structures. Adhering to installation guidelines prevents many potential issues. It ensures safe and efficient oven operation.
What to Avoid When Using Your Electric Oven for the First Time
Starting with a new electric oven is exciting. But some common mistakes can lead to problems. Avoiding these pitfalls ensures a smooth transition. It also protects your new appliance and ensures your safety. Many first-time users might be eager to jump into cooking. However, patience and awareness are key.
This section highlights actions to avoid. It covers everything from improper cleaning to neglecting the manual. These are simple points, but they significantly impact your oven’s performance and longevity. Being aware of these avoids unnecessary troubleshooting later on.
Using Harsh Chemical Cleaners Immediately
Never use harsh chemical cleaners inside your electric oven, especially before the first use. These chemicals can damage the oven’s interior finish. They can also leave behind toxic residues. These residues can become hazardous when heated. The fumes can be harmful to inhale. They can also affect the taste of your food.
Stick to mild soap and water for initial cleaning. Even after the burn-in, most oven manufacturers recommend gentle cleaning methods. If your oven has a self-cleaning feature, wait until after several uses to try it. Always check your oven’s manual for recommended cleaning agents. Following these guidelines protects your oven’s interior. It also protects your health.
Neglecting the Owner’s Manual
The owner’s manual is your best friend when operating a new appliance. Many people skip reading it entirely. This is a mistake. The manual contains vital information specific to your oven model. It details installation instructions, safety warnings, and operating procedures. It also provides troubleshooting tips and maintenance advice.
Neglecting the manual means you might miss critical steps. You could also misunderstand a feature. For example, the manual tells you the precise burn-in temperature and time. It also explains child lock activation. Taking time to read the manual prevents user errors. It ensures you maximize your oven’s potential. It also helps with how to know if you have an electric oven by detailing its specifications. Treat your manual as the ultimate guide for your specific oven.
Overloading the Oven on First Use
Avoid overloading your new electric oven during its very first cooking session. Placing too many dishes inside can restrict airflow. This leads to uneven cooking. It can also put undue strain on the heating elements. Your oven is still new. It is adjusting to its environment.
Start with a single, simple dish. This allows you to observe how your oven heats and cooks. It helps you understand its nuances. Overloading can also make temperature recovery slower. This impacts the quality of your food. Give your oven space to breathe. Let it prove its capabilities before challenging it with a full load. Gradually increase the amount of food you cook as you become more familiar with your oven.
Maintaining Your Electric Oven: Tips for Long-Term Performance
Proper maintenance is key to ensuring your electric oven performs well for years. It prevents premature wear and tear. It also maintains efficiency. Regular cleaning and small checks keep your oven in top shape. Neglecting maintenance can lead to issues like uneven heating or appliance breakdown.
A well-maintained oven is a reliable oven. It also means you spend less on repairs over time. These tips are simple to follow. They extend the life of your valuable kitchen appliance. Make maintenance a regular part of your kitchen routine.
Regular Cleaning Routine
Regular cleaning prevents grease and food buildup. This buildup can affect cooking performance. It can also pose a fire hazard. After each use, wipe down spills and splatters. This prevents them from baking onto the surface. For deeper cleaning, use a damp cloth with mild soap or a baking soda paste. Avoid abrasive cleaners or scouring pads. They can scratch the oven’s enamel.
Most ovens have a self-cleaning cycle. Use this sparingly, as it uses very high heat. It can cause wear on oven components. Follow the manufacturer’s recommendations for self-cleaning. Always remove racks before a self-clean cycle. A clean oven is more efficient and safer. It also ensures food tastes its best. For comprehensive guidance, you can refer to resources like how to clean electric oven with baking soda.
Inspecting Door Seals and Gaskets
The oven door seal is crucial for maintaining heat. It is typically a rubber or silicone gasket around the oven door. Inspect this seal regularly for any cracks, tears, or hardening. A damaged seal allows heat to escape. This makes your oven less efficient. It also increases cooking times.
If you notice a damaged seal, replace it promptly. Replacement seals are usually available from the oven manufacturer or appliance parts stores. You can test the seal by closing the door on a piece of paper. If you can pull the paper out easily, the seal may be faulty. A good seal keeps heat inside. It ensures even cooking and energy efficiency.
Avoiding Aluminum Foil on Racks or Bottom
Many people place aluminum foil on oven racks or the oven bottom. They do this to catch spills. However, this is generally not recommended for electric ovens. Foil can trap heat. This affects the oven’s temperature sensing. It can lead to uneven baking. More critically, foil on the oven bottom can melt onto the enamel. This creates permanent marks.
It can also interfere with the lower heating element. This can cause damage. If you need to catch spills, use a baking sheet or foil-lined pan on a rack below your food. Never place foil directly on the oven floor or cover entire racks. This simple habit protects your oven’s interior. It ensures proper heat distribution.
Understanding Error Codes and Professional Servicing
Modern electric ovens often display error codes when a problem occurs. These codes indicate specific issues. They can range from a minor sensor malfunction to a serious component failure. Consult your owner’s manual to understand what each code means. The manual usually provides basic troubleshooting steps.
If an error code persists or indicates a significant problem, contact a qualified appliance technician. Do not attempt complex repairs yourself unless you are experienced. Trying to fix complex issues without proper knowledge can cause more damage. It can also void your warranty. Regular professional servicing can identify potential problems early. This extends your oven’s lifespan and maintains safety. Trust experts for complex issues.
Troubleshooting Common First-Use Electric Oven Issues
Even after proper burn-in, new electric ovens can present minor issues. These are often easy to fix. Understanding common problems helps you react quickly. It also prevents unnecessary frustration. This section addresses typical first-use concerns. We cover issues like initial smoke, persistent smells, and uneven heating.
Knowing what to look for helps you determine if a problem is normal or requires attention. It empowers you to enjoy your new appliance without worry. Most first-time glitches are minor. They can be resolved with simple steps.
Initial Smoke or Lingering Odor
A small amount of smoke or a lingering odor might occur after the initial burn-in. This is often normal. It means some residual manufacturing oils are still present. They are now burning off completely during actual cooking. Ensure your kitchen is well-ventilated. Continue to use your exhaust fan.
If the smoke or smell is excessive or persists for more than a few uses, there might be a problem. Check for any plastic or paper left inside the oven. Ensure no food spills have accumulated. If the issue continues, contact the manufacturer’s customer service. They can provide further guidance. Minor smoke and smell are usually temporary.
Uneven Heating or Browning
If your food cooks unevenly, or browns more on one side, it could be a sign of uneven heating. For a new oven, this might be due to minor factory calibration differences. It could also be from improper rack placement. First, ensure your oven is level. An unlevel oven can cause heat to distribute unevenly.
Also, check your oven thermometer. This verifies the actual temperature inside. If the temperature is significantly off, the oven might need calibration. This usually requires a technician. Sometimes, it is simply a matter of learning your new oven’s hot spots. Rotate your food halfway through cooking. This helps achieve more consistent results. Most ovens have slight variations. Understanding them improves your cooking. A common issue to troubleshoot with any oven, new or old, is when why does my electric oven burn the bottom of everything.
Tripping Circuit Breaker
If your electric oven trips the circuit breaker upon first use, it indicates an electrical issue. This is a serious concern. Immediately turn off the oven and unplug it if possible. Do not attempt to reset the breaker repeatedly without addressing the cause. The most common reason is that the oven is on a circuit that cannot handle its power draw.
Electric ovens require dedicated, high-amperage circuits. Check your home’s electrical panel. Confirm the breaker size matches the oven’s requirements. If the wiring is insufficient, contact a licensed electrician. They can assess your electrical system. They can also install the correct circuit. Electrical problems require professional attention. This ensures your safety and prevents damage to your home.
Frequently Asked Questions About Using a New Electric Oven
Q1: How long does the “new oven smell” last after burn-in?
The “new oven smell” should largely disappear after the initial burn-in cycle. You might notice a faint smell during the first few cooking sessions. This is usually residual. With proper ventilation, it should completely vanish within 3-5 uses. If the smell persists beyond this, re-check for any packaging material or contact the manufacturer.
Q2: Can I put food in the oven during the burn-in process?
No, you absolutely should not put food in the oven during the burn-in process. The burn-in is specifically designed to vaporize manufacturing oils and chemicals. These fumes are not safe for consumption. Food can absorb these chemical smells and tastes, making it unappetizing or potentially harmful. Always complete the burn-in before cooking.
Q3: Do all new electric ovens need a burn-in?
Yes, almost all new electric ovens require an initial burn-in cycle. This includes traditional electric ovens, convection ovens, and those with air fryer features. The process removes protective coatings and manufacturing residues. Always consult your specific oven’s owner’s manual to confirm the recommended procedure, temperature, and duration.
Q4: What if I accidentally cooked in my new oven without burning it in first?
If you accidentally cooked in your new oven without burning it in first, do not panic. Turn off the oven. Remove the food. Discard the food, as it may have absorbed chemical tastes or fumes. Then, perform the burn-in process as recommended in your oven’s manual. Ensure proper ventilation. After the burn-in, clean the oven thoroughly before cooking again.
Q5: How often should I clean my new electric oven?
For a new electric oven, clean up spills and splatters as they happen. This prevents them from baking on and becoming harder to remove. Perform a light cleaning of the interior surfaces every 1-2 months, depending on usage. If your oven has a self-cleaning feature, use it sparingly, perhaps every 6-12 months, or as needed for heavy buildup.
Q6: Can a new electric oven affect my smoke detector?
Yes, a new electric oven can sometimes trigger a smoke detector during the initial burn-in process. This is due to the fumes and smoke released from manufacturing residues burning off. Ensure proper ventilation by opening windows and using an exhaust fan. You may need to temporarily disconnect or silence your smoke detector if it becomes overly sensitive during this time.
Conclusion
Bringing a new electric oven into your home is a fantastic upgrade. The desire to use it immediately is completely understandable. However, as we have explored, patience is truly a virtue here. You cannot use an electric oven straight away. The initial burn-in process is not just a suggestion; it is a critical step for safety, food quality, and the longevity of your appliance. Taking the time to properly prepare your new electric oven ensures a clean, safe, and efficient cooking environment.
By understanding the reasons behind the burn-in, following the step-by-step preparation, and adopting sound maintenance practices, you are setting yourself up for years of delicious meals. Always keep your owner’s manual handy. It is your specific guide to your appliance. Your kitchen is now ready for countless culinary adventures. For more essential home and kitchen guides, feel free to explore our other articles.
- electric oven
- oven safety
- new appliance
- kitchen guide
- oven maintenance

Todd Martin
Senior Writer
With over 15 years of experience in home renovation and design, I started HEG to share what I’ve learned with homeowners who want to create spaces that are both beautiful and functional. I’ve always believed in a hands-on approach, and over the years, I’ve picked up practical solutions that actually work. Through HEG, I aim to make home improvement more approachable, sharing real tips that help you create a home you truly love.