· Todd Martin · Home Appliance Care · 22 min read
How Can I Make My Whirlpool Refrigerator Quieter
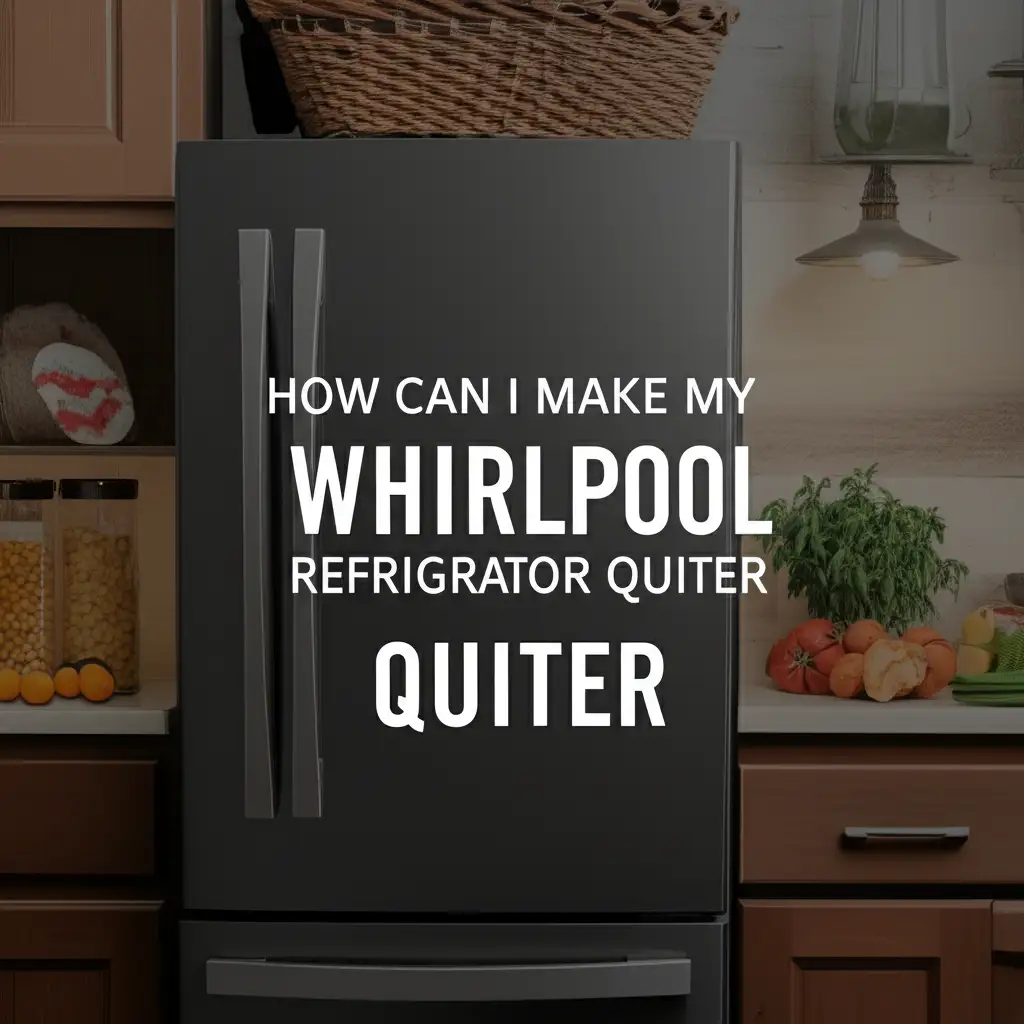
Silence Your Whirlpool Refrigerator: A Guide to Quieter Operation
Is your kitchen constantly filled with the hums, buzzes, or rattles of your refrigerator? A noisy appliance can disrupt the peace of your home. If you own a Whirlpool refrigerator, you might wonder, “How can I make my Whirlpool refrigerator quieter?” This is a common question, and I am here to help you find effective solutions. Many factors contribute to refrigerator noise, from simple maintenance needs to component issues.
In this guide, I will walk you through common reasons for a noisy Whirlpool refrigerator. You will learn practical steps to troubleshoot and resolve these issues. We will cover cleaning condenser coils, inspecting fan components, and checking leveling. We will also look at the compressor, defrost system, and ice maker. By the end, you will have a clear path to make your Whirlpool refrigerator quieter, bringing peace back to your home.
Takeaway
- Regularly clean condenser coils and fan blades to reduce humming.
- Ensure your refrigerator is level to prevent rattling and vibration.
- Inspect fan motors and the compressor for wear or obstructions.
- Check the drain pan and ice maker for noise-causing issues.
- Maintain proper clearances around the appliance for efficient operation.
A clear and concise answer to the main query:
You can make your Whirlpool refrigerator quieter by cleaning condenser coils, ensuring the unit is level, checking fan components for obstructions or wear, and inspecting the defrost system and compressor. Addressing these common issues often resolves most refrigerator noise problems.
Understanding Common Whirlpool Refrigerator Noises
Your Whirlpool refrigerator makes different sounds for different reasons. Knowing what each noise means helps you fix the problem. I find that identifying the sound is the first step to making my Whirlpool refrigerator quieter. Let’s look at the common noises you might hear and what they indicate.
Normal Operating Sounds
First, understand that refrigerators are not silent. They produce various normal sounds. You might hear a gentle hum from the compressor running. Water flowing through lines or ice dropping into the bin is also normal. A slight gurgle as refrigerant moves is common. These sounds are part of the appliance’s normal function. They typically do not indicate a problem. However, if a normal sound becomes louder or more persistent, it might be an issue.
Identifying Problematic Sounds
When a new, louder, or unusual noise starts, it often signals a problem. A buzzing sound can point to issues with the defrost timer or water inlet valve. A rattling noise suggests loose parts or something vibrating against the fridge. If you hear a loud squealing or screeching, a fan motor might be failing. Thumping or knocking sounds often relate to the compressor or motor mounts. Understanding these specific sounds helps pinpoint the exact problem area.
For instance, a consistent clicking noise, especially after the compressor cycles off, might be a relay issue. A persistent hum that is louder than usual often points to dirty condenser coils or a struggling compressor. I always pay attention to how a new sound differs from the usual background noise. This helps me narrow down the cause when I am trying to make my Whirlpool refrigerator quieter.
It is important to address these noises promptly. Ignoring them can lead to more serious issues down the road. Sometimes, a simple adjustment or cleaning can prevent a costly repair. By listening carefully, you can often identify the culprit quickly. This proactive approach saves time and money. It also keeps your appliance running efficiently.
Cleaning Condenser Coils for a Quieter Whirlpool Refrigerator
One of the most frequent causes of excessive noise in a Whirlpool refrigerator is dirty condenser coils. These coils release heat from the refrigerant. When they get covered in dust and pet hair, they cannot dissipate heat effectively. This makes the compressor work harder, leading to louder operation. I always start here when I want to make my Whirlpool refrigerator quieter.
Why Dirty Coils Cause Noise
Think of it like this: your refrigerator needs to cool air inside and push heat out. The condenser coils are key to pushing heat out. If they are dirty, the heat gets trapped. This forces the compressor to run longer and more often to maintain the set temperature. A struggling compressor makes a louder humming or buzzing sound. It works overtime, causing more wear and tear. This constant, strained operation translates directly to increased noise.
Steps to Clean Condenser Coils
Cleaning condenser coils is a simple maintenance task. You should do it at least once or twice a year. Here is how I clean my Whirlpool refrigerator coils:
- Unplug the refrigerator: Safety first. Always disconnect power before working on any appliance.
- Locate the coils: Most Whirlpool refrigerators have coils at the back, accessible by pulling the unit away from the wall. Some models have coils underneath, behind a kickplate at the front. You might need to consult your owner’s manual to be sure.
- Use a vacuum cleaner: Attach a brush or crevice tool to your vacuum. Gently vacuum the dust, dirt, and pet hair from the coils. Be thorough.
- Use a coil brush (optional but recommended): For stubborn dust or hard-to-reach areas, a specialized condenser coil brush works well. It can reach deep into the fins.
- Clean the surrounding area: Dust often collects on the floor or cabinet area around the coils. Clean this as well to prevent dust from quickly returning to the coils.
- Restore power: Once clean, push the refrigerator back into place and plug it in.
After cleaning, you should notice a significant reduction in the refrigerator’s overall noise level. The compressor will not have to work as hard, resulting in a quieter appliance. This simple step is a powerful way to make your Whirlpool refrigerator quieter and improve its energy efficiency. For more detailed instructions on cleaning these essential parts, you can read about how to clean Whirlpool side-by-side refrigerator coils.
Inspecting and Cleaning Fan Components
Beyond the condenser coils, two other critical components that generate noise are the fans: the condenser fan and the evaporator fan. When these fans malfunction or get obstructed, they can create annoying sounds like squealing, buzzing, or rattling. Checking and cleaning them is a crucial step to make your Whirlpool refrigerator quieter.
The Condenser Fan
The condenser fan is usually located near the compressor at the bottom rear of your refrigerator. Its job is to pull air over the condenser coils to cool them. If this fan blade is dirty, bent, or if the motor is failing, it can create significant noise.
- Access the fan: Unplug your refrigerator. Move the unit away from the wall. You will typically see a metal or plastic cover that needs to be removed to access the fan.
- Inspect and clean: Look for dust, debris, or pet hair accumulated on the fan blades. Use a soft brush or vacuum to clean the blades thoroughly. Spin the blades by hand. They should spin freely without wobbling or hitting anything.
- Check the motor: If cleaning does not reduce the noise, the fan motor might be failing. A failing motor often makes a loud grinding or squealing sound. You might need a professional to replace the motor if this is the case.
I often find that a quick clean of the condenser fan blades can make a noticeable difference in reducing the overall hum of my refrigerator.
The Evaporator Fan
The evaporator fan is located inside the freezer compartment, behind a panel. This fan circulates cold air throughout the freezer and into the fresh food section. When ice builds up on the fan blades or the motor starts to fail, it can cause a loud buzzing, chirping, or rattling sound inside the refrigerator.
- Access the fan: Unplug the refrigerator. Empty your freezer. You will need to remove the back panel inside the freezer compartment. This panel usually has screws holding it in place.
- Inspect for ice buildup: Look for ice around the fan blades. If ice has built up, it means your defrost system might be faulty. You may need to manually defrost the freezer to melt the ice. Leave the freezer door open for several hours, or use a hairdryer on a low setting.
- Clean and inspect blades: Once the ice is gone, clean any dust or debris from the fan blades. Spin the blades to ensure they move freely.
- Check the motor: If the fan continues to make noise after cleaning and defrosting, the motor may be faulty. A faulty evaporator fan motor is a common source of loud internal noise and often requires replacement.
Addressing issues with both the condenser and evaporator fans is essential for making your Whirlpool refrigerator quieter. These components work hard, and regular inspection helps catch problems early.
Leveling and Placement Adjustments
A significant source of unwanted noise from your Whirlpool refrigerator often relates to its physical setup. Improper leveling or inadequate clearance can cause vibrations and rattling sounds that are easily preventable. I always check these simple factors first when trying to make my Whirlpool refrigerator quieter.
The Importance of Leveling
Refrigerators need to be level to operate correctly and quietly. If your fridge is not level, its internal components, especially the compressor, can vibrate against the floor or the appliance’s frame. This creates buzzing or rattling noises. Over time, an unleveled fridge can also strain the cooling system.
- Use a level: Place a carpenter’s level on top of your refrigerator, both front-to-back and side-to-side.
- Adjust leveling legs: Most Whirlpool refrigerators have adjustable leveling legs or rollers at the bottom. Use a wrench or pliers to turn them.
- Raise the front slightly higher than the back to ensure the doors swing shut easily.
- Adjust the side-to-side level until the bubble on your level is centered.
- Check for stability: Once adjusted, gently rock the refrigerator to ensure it sits firmly on the floor without wobbling.
Proper leveling reduces vibration and creates a more stable, quiet environment for your appliance. This simple adjustment can often make a big difference in reducing overall refrigerator noise.
Ensuring Proper Clearance and Placement
The space around your refrigerator also impacts its noise level and efficiency. Proper airflow is vital for the condenser coils and compressor to dissipate heat. If the fridge is too close to walls or cabinets, heat gets trapped, making the unit work harder and louder.
- Side and Back Clearance: Your Whirlpool refrigerator manual will specify minimum clearances. Generally, you need at least 1 inch of space on the sides and 2 inches at the back. This allows air to circulate freely around the condenser coils.
- Top Clearance: Ensure there is enough space above the refrigerator for heat to rise and escape.
- Hard, Flat Surface: Place your refrigerator on a hard, flat surface. Carpeting or uneven floors can absorb vibrations or cause the unit to wobble, increasing noise. If you have carpet, a plywood or hard mat underneath can help.
- Check for Obstructions: Make sure nothing is touching the back or sides of the refrigerator. Power cords, water lines, or even other appliances can vibrate against the fridge.
By ensuring your Whirlpool refrigerator is properly leveled and has adequate clearance, you provide optimal conditions for quiet operation. These adjustments often resolve mysterious rattling or loud humming sounds. For broader tips on keeping the area around your refrigerator clean and clear, consider learning about how to clean under a refrigerator.
Troubleshooting the Compressor and Defrost System
The compressor and defrost system are core components of your Whirlpool refrigerator. Issues with either can lead to distinct and often loud noises. Understanding how to troubleshoot these can significantly help make your Whirlpool refrigerator quieter.
Compressor Noise
The compressor is the heart of your refrigerator. It pumps refrigerant through the system. A healthy compressor makes a low hum. However, if it starts making a loud buzzing, rattling, or thumping sound, it might have a problem.
- Loose Mounting Bolts: Sometimes, the compressor’s mounting bolts loosen over time. This causes the compressor to vibrate against the frame. You might be able to tighten these bolts.
- Worn Mounts: The compressor sits on rubber or spring mounts that absorb vibration. If these mounts wear out, the compressor can vibrate excessively. Worn mounts usually require professional replacement.
- Compressor Failure: A consistently loud, grinding, or extremely hot compressor might be failing. This is a serious issue that often requires a costly repair or appliance replacement. Before jumping to conclusions, ensure the condenser coils are clean, as dirty coils make the compressor work much harder and louder. If your refrigerator frequently cycles on and off, this could indicate a related issue with the compressor or electrical system, which might also contribute to noise. For insights into related problems, consider checking why does my Whirlpool refrigerator keep turning on and off.
It’s important to differentiate normal compressor hum from problem noises. If the noise is new, persistent, and unusually loud, it warrants further investigation.
Defrost System Issues
Modern refrigerators have automatic defrost systems. This system periodically heats coils to melt frost buildup. If parts of this system malfunction, they can cause noise.
- Defrost Timer: This component controls when the defrost cycle starts. A failing defrost timer can make a loud clicking or buzzing sound as it tries to cycle.
- Defrost Heater: If the heater is not working correctly, ice can build up excessively on the evaporator coils. This ice can then interfere with the evaporator fan, leading to loud grinding or scraping noises.
- Defrost Drain Pan: As ice melts, water drains into a pan beneath the refrigerator. If this pan is cracked, misaligned, or overflowing, it can cause dripping or gurgling sounds, or even lead to leaks. For issues related to water leaks, you might find information on why is my Whirlpool side-by-side refrigerator leaking water from the bottom helpful.
To check these components:
- Listen for the defrost cycle: Pay attention to when your refrigerator normally runs its defrost cycle (usually every 8-12 hours). If you hear unusual sounds during this time, it might be the defrost timer or heater.
- Inspect for ice: Open the freezer and check for excessive ice buildup on the back panel. This indicates a defrost system problem.
- Check the drain pan: Pull the refrigerator out and look at the drain pan for cracks or overflow.
Addressing compressor and defrost system issues often requires specialized knowledge. If you suspect these components are the source of your refrigerator’s noise, I recommend consulting a qualified technician.
Addressing Ice Maker and Water Line Noises
The ice maker and its associated water lines are common culprits for peculiar noises in a Whirlpool refrigerator. From strange thumps to gurgling sounds, these components can be surprisingly noisy. Understanding these specific sounds helps make your Whirlpool refrigerator quieter.
Ice Maker Sounds
Your ice maker naturally makes sounds during its operation. You will hear water filling the tray, ice cubes dropping into the bin, and the motor ejecting ice. These are normal. However, unusual or excessively loud noises indicate a problem.
- Loud Water Filling: If the water fill line produces a loud banging or hammering sound, it might be due to water hammer effect. This happens when water flow suddenly stops, causing pressure waves. A water hammer arrestor can be installed on the water line to mitigate this.
- Grinding or Squealing During Ejection: If the ice maker module itself makes grinding or squealing sounds, the internal gears or motor might be worn. Sometimes, ice buildup around the mechanism can cause these noises.
- Ice Buildup in Bin: If ice cubes freeze together or block the chute, the ice maker might struggle, leading to louder ejection cycles. Break up any clumps and clear the chute.
- Lack of Ice Production: If your ice maker is making strange noises but not producing ice, this can indicate a more serious issue with the water supply or the ice maker unit itself. For related troubleshooting, you might look into why is my Whirlpool side-by-side refrigerator not making ice.
Water Valve and Line Noises
The water inlet valve controls the flow of water to the ice maker and water dispenser. Problems with this valve or the water lines can cause noise.
- Humming or Buzzing Valve: A continuous loud hum or buzz from the back of the refrigerator, especially when the ice maker is calling for water, might indicate a failing water inlet valve. The valve can vibrate excessively as it opens and closes.
- Water Dripping Sounds: A dripping sound could mean a leak in the water line or a faulty water valve that is not fully closing. This can also lead to water pooling in the bottom of the freezer or fridge.
- Restricted Water Flow: If the water filter is old or clogged, it can restrict water flow, causing the water valve to work harder and make more noise. Regularly replacing your water filter can prevent this. While you can operate your refrigerator without a filter in some cases, a new filter is always recommended for optimal performance and water quality. Learn more about filter options here: can I use my Whirlpool refrigerator without the water filter.
To troubleshoot these:
- Isolate the sound: Listen closely to determine if the noise comes specifically from the ice maker area or the water valve behind the unit.
- Check water pressure: Ensure your home’s water pressure is adequate. Low pressure can make the valve struggle.
- Inspect water lines: Look for kinks or damage in the water lines leading to the refrigerator.
Addressing ice maker and water line issues often involves simple adjustments or part replacements. If you are unsure, consulting your Whirlpool appliance manual or a professional technician can provide clarity.
Checking for Loose Parts and Vibrations
Sometimes, the simplest causes are the hardest to find. Loose parts or objects inside or around your Whirlpool refrigerator can create annoying rattling, buzzing, or vibrating noises. These sounds can be intermittent or constant, making them frustrating to diagnose. I always conduct a thorough check for loose elements when I aim to make my Whirlpool refrigerator quieter.
Internal Components
Many items inside your refrigerator can become loose or cause vibrations against the shelves or walls.
- Shelves and Bins: Glass shelves, plastic bins, and door shelves can sometimes vibrate if not seated properly. Remove and re-seat all shelves and bins. Ensure they fit snugly. If a shelf has rubber stoppers or clips, check that they are all present and intact.
- Food Items: Bottles, cans, or containers can vibrate against each other or the refrigerator walls. Rearrange items to prevent contact. Place softer items between vibrating hard containers.
- Ice Bin: If the ice bin is not correctly positioned, it can rattle as ice drops or as the refrigerator vibrates. Ensure it sits flat and is securely in place.
- Drain Pan: As mentioned earlier, the defrost drain pan can rattle if it’s not seated correctly beneath the refrigerator. Pull out the fridge and ensure the drain pan is securely in its bracket.
These small, seemingly insignificant vibrations can sum up to a noticeable amount of noise. A quick check of these internal elements can often resolve a persistent rattling sound.
External Components and Surroundings
The outside of your refrigerator and its immediate surroundings can also contribute to noise.
- Back Panel and Compressor Cover: The thin metal or plastic panel at the back of the refrigerator, or the cover over the compressor compartment, can sometimes vibrate loose. Gently press on these panels while the fridge is running to see if the noise stops. If it does, you can often secure them with a piece of electrical tape or by tightening any visible screws.
- Side Panels: The side panels of the refrigerator itself can sometimes vibrate against each other or against nearby cabinets. Ensure there is adequate space around the unit, as discussed in the leveling section. You can also place thin foam insulation strips between the refrigerator and adjacent cabinets if the vibration persists.
- External Objects: Check for anything touching the refrigerator’s exterior. This includes power cords, water lines, or even decorative items on top of the fridge. Make sure they are not vibrating against the appliance.
- Floor: If the floor itself is uneven or flimsy, it can transfer vibrations to the refrigerator. Ensuring the fridge is perfectly level helps, but sometimes a reinforcing mat or plywood sheet under the unit on soft floors can reduce transferred noise.
Systematically checking for and securing any loose parts, both inside and outside, is a simple yet effective way to make your Whirlpool refrigerator quieter. This often fixes mysterious rattling or buzzing sounds without needing professional help.
Optimizing Refrigerator Placement and Airflow
Beyond just leveling, the overall placement of your Whirlpool refrigerator plays a huge role in its operational noise. Proper airflow around the appliance is essential for its cooling system to work efficiently and quietly. If your refrigerator cannot breathe, it will work harder and get louder. I always consider the environment when troubleshooting to make my Whirlpool refrigerator quieter.
Adequate Clearance is Key
Refrigerators are designed to dissipate heat into the surrounding air. If this heat cannot escape, the compressor runs more often and more intensely to maintain internal temperatures. This leads to increased noise.
- Back Clearance: The condenser coils and compressor are typically at the back or bottom-back of the refrigerator. You need sufficient space behind the unit for air to flow over these components and carry away heat. Most manufacturers recommend at least 2-3 inches of clearance from the wall.
- Side Clearance: While less critical than back clearance, having 1/4 to 1/2 inch on each side allows for better air circulation and prevents vibrations against adjacent cabinets or walls.
- Top Clearance: Heat rises. Ensure there is enough open space above the refrigerator. If your fridge is tucked into a tight cabinet enclosure, heat can get trapped, leading to louder operation and decreased efficiency.
By providing proper clearance, you allow your Whirlpool refrigerator to run more efficiently. This directly translates to less stress on the components, which means a quieter appliance.
Avoiding Heat Sources and Direct Sunlight
The location of your refrigerator also affects how hard it has to work.
- Away from Heat Sources: Do not place your Whirlpool refrigerator next to heat-producing appliances like ovens, dishwashers, or radiators. These external heat sources force the refrigerator to work harder to maintain its internal temperature, increasing compressor run time and noise.
- Out of Direct Sunlight: Similarly, direct sunlight hitting the refrigerator, especially the sides or front, can significantly raise its external temperature. This also forces the appliance to run more frequently and louder to counteract the added heat load.
Stable and Solid Surface
The surface your refrigerator sits on affects noise levels.
- Hard Flooring: A refrigerator operates best on a hard, solid, and level floor. Concrete, tile, or hardwood floors are ideal. They provide a stable base and do not absorb vibrations.
- Avoid Carpeting: Carpeting can absorb some sound, but it can also prevent proper airflow beneath the unit if the kickplate is too low. More importantly, it can make it harder to level the refrigerator precisely, leading to wobbling and increased noise. If your fridge must be on carpet, consider placing a sturdy plywood sheet or a large, rigid appliance mat underneath it to create a stable, level surface.
Optimizing your refrigerator’s placement and ensuring excellent airflow are fundamental steps in managing appliance noise. These adjustments create a healthier operating environment for your Whirlpool refrigerator, helping it run more quietly and efficiently for years to come.
When to Call a Professional for Refrigerator Noise
While many refrigerator noise issues can be resolved with simple DIY troubleshooting and maintenance, some problems require the expertise of a professional appliance technician. Knowing when to call for help can save you time, effort, and potentially prevent further damage to your Whirlpool refrigerator.
Persistent or Severe Noises
If you have tried all the common fixes—cleaning coils, checking fans, leveling the unit, and inspecting for loose parts—but the noise persists, it is a clear sign that a deeper issue might be present. This is especially true if the noise is:
- Extremely Loud: A sudden, very loud bang, grind, or screech often indicates a serious mechanical failure.
- Unchanging: If the noise remains constant, regardless of what you do, it points to a continuous problem.
- Accompanied by Performance Issues: If the noise comes with other problems, such as the refrigerator not cooling, freezing food excessively, or leaking water, a professional diagnosis is essential. For instance, if your Whirlpool refrigerator is freezing food and making odd noises, it could be a complex defrost system issue. Learn more about why is my Whirlpool side-by-side refrigerator freezing food if you encounter this issue.
Suspected Component Failure
Certain components are complex and best left to certified technicians.
- Compressor: As mentioned earlier, a failing compressor can be very noisy. Replacing a compressor requires specialized tools, handling of refrigerants, and technical knowledge. This is not a DIY task.
- Sealed System Issues: If the noise is related to refrigerant leaks or blockages within the sealed cooling system, only a licensed technician can diagnose and repair it. These are high-cost repairs that need specific certifications.
- Control Board Malfunctions: Sometimes, an electronic control board malfunction can cause erratic cycling or component operation, leading to unusual noises. Diagnosing and replacing control boards can be tricky and requires electrical expertise.
- Defrost System Components: While you can inspect for ice buildup, replacing a defrost timer, heater, or thermistor involves accessing electrical components within the appliance, which is safer with professional help.
Safety Concerns
If you notice any of the following, do not attempt to fix it yourself; call a professional immediately:
- Burning Smell: This indicates an electrical issue or overheating component. Unplug the refrigerator and call for service.
- Sparking or Smoking: These are serious electrical hazards. Disconnect power immediately.
- Unusual Heat: If the exterior of the refrigerator, especially the back or bottom, feels excessively hot to the touch, it indicates a significant problem.
Calling a professional technician provides several benefits. They have the training, tools, and experience to accurately diagnose complex issues. They can safely replace faulty parts and ensure your Whirlpool refrigerator operates correctly and safely. While there is a cost involved, it can prevent further damage, prolong your appliance’s life, and restore the quiet operation you desire. Do not hesitate to seek expert help when the problem is beyond simple maintenance.
- Whirlpool refrigerator
- noisy fridge
- refrigerator troubleshooting
- appliance maintenance
- quiet refrigerator
- compressor noise
- fan noise

Todd Martin
Senior Writer
With over 15 years of experience in home renovation and design, I started HEG to share what I’ve learned with homeowners who want to create spaces that are both beautiful and functional. I’ve always believed in a hands-on approach, and over the years, I’ve picked up practical solutions that actually work. Through HEG, I aim to make home improvement more approachable, sharing real tips that help you create a home you truly love.