· Todd Martin · Sustainable Living · 17 min read
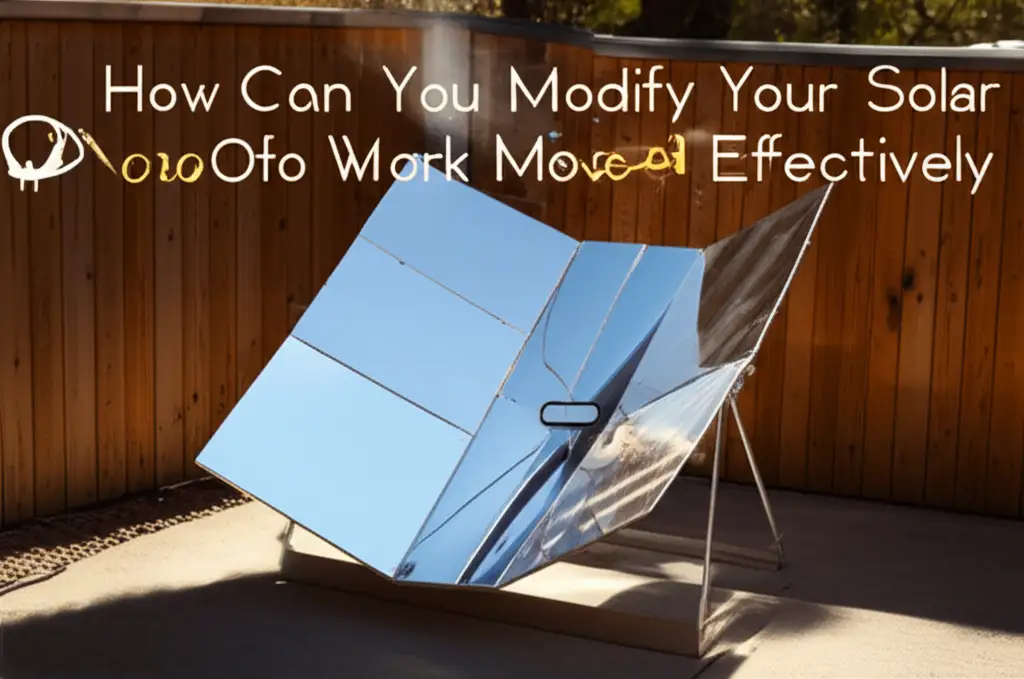
How Can You Modify Your Solar Oven To Work More Effectively
Unlock Peak Performance: How to Modify Your Solar Oven for Effective Cooking
Imagine harnessing the sun’s power to cook your meals. Solar ovens make this a reality, offering an eco-friendly way to prepare food outdoors. Maybe you already own a solar oven, but you notice it takes a long time to cook, or it does not get hot enough on cooler days. You might wonder, “How can you modify your solar oven to work more effectively?” The good news is that with a few simple yet impactful changes, you can significantly boost its performance.
Modifying your solar oven allows you to achieve higher temperatures and faster cooking times. This means less waiting for your food and more reliable results, even when the sun isn’t at its absolute peak. We will explore key areas for improvement, from enhancing insulation to optimizing light collection. You will learn practical steps to transform your solar cooker into a true culinary powerhouse. Get ready to cook with the sun like never before.
Takeaway
To significantly improve your solar oven’s performance, focus on these key areas:
- Enhance Insulation: Add more thermal barriers to keep heat inside.
- Improve Reflectors: Use highly reflective materials and optimize their angles to focus more sunlight.
- Optimize Cooking Chamber: Darken interior surfaces and use dark, thin cookware to absorb maximum heat.
- Seal Air Leaks: Eliminate drafts that allow heat to escape.
- Position Correctly: Align your oven perfectly with the sun throughout the cooking process.
Clear Answer
You can modify your solar oven to work more effectively by improving insulation, maximizing solar collection through enhanced reflectors, optimizing the cooking chamber with dark, heat-absorbent materials, and meticulously sealing all air leaks. These changes minimize heat loss and boost internal temperatures, allowing faster, more consistent cooking.
Boosting Heat Retention: Upgrading Your Solar Oven’s Insulation
One of the most critical aspects of an effective solar oven is its ability to hold heat. Think of your home oven; it keeps heat inside because of its thick, well-insulated walls. A solar oven needs the same care. If heat escapes, the internal temperature drops, and cooking slows down. You want to trap as much solar energy as possible inside the cooking chamber.
Improving insulation is often the first step to a more powerful solar oven. Many commercial or DIY solar ovens use basic insulation. You can add extra layers to make a big difference. This simple change reduces heat loss, letting your oven reach higher temperatures and cook food faster. It also helps maintain a steady temperature, even if clouds briefly pass by.
Types of Insulation Materials
Many materials work well for insulation. Common choices include rigid foam boards, such as polystyrene or polyisocyanurate. These materials are lightweight and easy to cut. You can also use natural options like straw, wool, or even crumpled newspaper. The goal is to create air pockets that slow down heat transfer.
For my oven, I added an extra layer of polyisocyanurate foam board around the outside. I cut pieces to fit snugly against the existing walls. This created a much thicker thermal barrier. Remember, the thicker the insulation, the better it will perform.
Sealing Gaps and Cracks
Even the best insulation loses effectiveness if heat can sneak out through gaps. Inspect your solar oven for any small openings, especially around the door or lid. Heat loves to find any escape route. Sealing these gaps is vital for overall oven performance.
Use high-temperature silicone caulk or weatherstripping to seal any cracks or seams. I found some small gaps where my oven’s lid met the body. I applied a thin bead of silicone caulk along these edges. For areas that open, such as the door, adhesive weatherstripping works wonders. This simple step stops precious heat from escaping. Just like insulating your home how to modify wall oven cabinet helps maintain temperature, insulating your solar oven is key.
Maximizing Sunlight Collection: Enhancing Reflectors and Angles
Your solar oven relies entirely on sunlight. The more sunlight you can direct into the cooking chamber, the hotter your oven will get. Reflectors play a huge role in this process. They are like mirrors, bouncing sunbeams directly onto your cooking pot. Many basic solar ovens come with small or less efficient reflectors.
Upgrading your reflectors can significantly boost the amount of solar energy entering your oven. You want materials that reflect nearly all the light, not just some of it. Also, the size and angle of these reflectors matter greatly. Proper reflector design ensures you capture sunlight from a wide area and concentrate it effectively.
Mirror vs. Foil Reflectors
When choosing reflector materials, you have a couple of main options. Mylar film or aluminum foil glued onto cardboard are common, affordable choices. These work, but their reflectivity can vary. True mirror sheets offer superior reflection. They bounce back almost all the light that hits them.
For my modified oven, I replaced the old foil with reflective Mylar film. This film is often used in grow tents and is highly reflective. I carefully adhered it to rigid boards, ensuring a smooth, wrinkle-free surface. This instantly increased the amount of light reaching the oven’s interior.
Optimizing Reflector Size and Shape
Larger reflectors capture more sunlight. If your current reflectors are small, consider making them bigger. You can extend their reach by adding panels. The shape also matters; parabolic or curved reflectors focus light more intensely. Flat panels arranged at angles can also work well, creating a “funnel” of sunlight.
I experimented with the angle of my reflector panels. I found that adjusting them throughout the day made a big difference. I built a simple hinge system that allowed me to change the angle easily. The goal is to make sure the sun’s rays hit the reflectors and then bounce directly into the oven’s window.
Adjusting for Sun’s Path
The sun moves across the sky throughout the day. For optimal performance, your solar oven needs to “track” the sun. This means repositioning the oven or adjusting its reflectors every 30 minutes to an hour. If you do not adjust, the oven quickly loses efficiency.
I set a timer to remind myself to re-angle the oven. This small effort ensures a continuous flow of concentrated sunlight. Think of it like aligning how to clean solar lights to get maximum sun exposure; proper orientation is key for power. Some advanced solar ovens have automatic tracking systems, but manual adjustment works perfectly for most home setups.
Optimizing the Cooking Chamber: Absorption and Conduction
Once sunlight enters your solar oven, you need it to be absorbed efficiently. The interior of the oven and your cooking pot play a crucial role here. Light needs to turn into heat inside the chamber, and then that heat needs to transfer effectively to your food. A bright, shiny interior reflects light back out, wasting energy.
The goal is to maximize heat absorption within the cooking area. This involves selecting the right cookware and ensuring the oven’s internal surfaces absorb as much solar radiation as possible. Better absorption means higher internal temperatures, directly leading to faster cooking.
Choosing the Right Cookware
The type of pot you use makes a significant difference. Dark, non-reflective pots absorb heat much better than light-colored or shiny ones. Cast iron or dark enamelware are excellent choices. Thin-walled pots also conduct heat more quickly than thick, heavy ones. I always use my darkest, thinnest pots for solar cooking.
Glass lids are also beneficial. They allow sunlight to penetrate and heat the food directly, while also trapping steam and heat inside the pot. Avoid pots with very thick bases, as these can slow down heat transfer. A simple change of pot can shave minutes off your cooking time.
Darkening the Interior Surfaces
Just as your pot should be dark, the interior of your solar oven should be dark too. Black surfaces absorb nearly all light wavelengths and convert them into heat. If your oven’s interior is light-colored or metallic, it will reflect some light, reducing efficiency. I painted the inside walls of my oven with a high-temperature, non-toxic black paint.
This dark coating helps absorb any light that doesn’t directly hit your pot. It then re-radiates this absorbed energy as heat within the oven chamber. This creates a hotter, more stable environment for cooking. It is a simple modification that yields noticeable results.
Enhancing Thermal Mass
Adding thermal mass inside the oven can help stabilize temperatures. Thermal mass refers to materials that can absorb a lot of heat and release it slowly. This helps prevent rapid temperature drops if a cloud passes or the sun’s angle changes slightly. Bricks, dark-colored tiles, or even a heavy, dark pan placed under your cooking pot can act as thermal mass.
I placed a few small, dark ceramic tiles on the bottom of my oven. They heat up slowly but stay hot for a long time. This gives the oven more inertia, preventing significant temperature fluctuations. This is a subtle but effective way to maintain consistent cooking temperatures. Just like you might clean the internal surfaces of your conventional oven how to deep clean your oven, ensuring a dark, clean surface inside your solar oven is equally important for performance.
Minimizing Heat Loss: Air Sealing and Glazing Improvements
After you have collected sunlight and absorbed it, the next challenge is keeping that heat inside. Any tiny gap or inefficient window can allow precious heat to escape. This is similar to how a drafty window in your house lets cold air in during winter. Your solar oven needs to be a well-sealed box to perform its best.
Minimizing heat loss is crucial for reaching and maintaining high cooking temperatures. Even a small air leak can significantly reduce your oven’s efficiency. Focusing on the door seal and the glazing material can make a big difference in preventing heat escape.
Improving the Oven Door Seal
The door or lid of your solar oven is a common point of heat loss. If the seal isn’t tight, warm air will escape, and cooler air will enter. Inspect your door carefully. Look for any visible gaps when it’s closed. You want a tight, insulated seal all around.
I added more weatherstripping around the perimeter of my solar oven door. I used a self-adhesive, high-temperature foam strip. This created a much tighter seal when the door closed. You can also use clips or latches to press the door firmly against the seal, ensuring no air can sneak out.
Selecting Efficient Glazing
The glazing is the transparent cover that lets sunlight into the oven. Common materials include glass or polycarbonate sheets. While both allow light in, they differ in how well they trap heat. Single-pane glass can let a lot of heat escape through conduction.
Double-paned glass or polycarbonate creates an insulating air gap. This air gap acts as an additional barrier to heat transfer. If your oven has a single pane, consider upgrading to a double-paned system if possible. You can create a simple double pane by adding a second layer of glass or polycarbonate, leaving a small air space between them.
Double-Paned Windows
This modification involves adding a second layer of glazing material, usually with an air gap of about 1/2 to 1 inch between the two panes. This air pocket acts as an excellent insulator, dramatically reducing heat loss from the top of the oven. While it might slightly reduce the amount of light entering, the heat retention benefits usually outweigh this small loss.
For my oven, I built a small frame to hold a second sheet of tempered glass above the original one. This created an effective double-paned window. The oven started reaching higher temperatures much more quickly and held heat for longer, especially on breezy days. This is a powerful upgrade for any solar oven.
Strategic Placement and Tracking: Positioning Your Solar Oven
Even the most highly modified solar oven will fail to perform effectively if it’s not positioned correctly. The sun is your fuel source. You need to ensure your oven receives direct, unobstructed sunlight for the entire cooking duration. This means thinking about location and actively tracking the sun’s movement.
Strategic placement and consistent tracking are fundamental to maximizing solar oven performance. These steps ensure your oven is constantly collecting the maximum amount of energy available. Overlooking this simple aspect can negate all other modification efforts.
Ideal Location Considerations
Choose a spot for your solar oven that gets full sun all day. Avoid areas shadowed by trees, buildings, or fences. Even a small shadow can significantly reduce the oven’s internal temperature. I always check my chosen spot at different times of the day to confirm it gets continuous sun exposure.
Consider accessibility too. You will need to adjust the oven periodically, so pick a place where you can easily reach it. Also, ensure the ground is stable and level. A wobbly oven can be a safety hazard and can shift out of optimal alignment.
Manual vs. Automated Tracking
Most solar ovens require manual tracking. This means you physically turn or adjust the oven every 30 to 60 minutes to keep it pointed directly at the sun. While this requires attention, it is crucial for efficiency. I set a timer on my phone to remind me to adjust the oven. This ensures I get the most out of every ray of sunshine.
Some advanced solar ovens offer automated tracking systems, using sensors and motors to follow the sun. While these are convenient, they are often complex and expensive for DIY projects. For most users, manual tracking is perfectly effective and provides hands-on engagement with the cooking process. Like running an can i run an air source heat pump with solar panels for your home, maximizing sun exposure is vital for any solar-powered device.
Advanced Modifications for Extreme Performance
Once you’ve mastered the basic modifications, you might want to push your solar oven’s performance even further. These advanced techniques involve more complex materials or designs. They are for those who want to achieve the highest possible temperatures or extend cooking times into evening hours. These modifications are not always necessary but can offer significant improvements.
These advanced methods can transform a good solar oven into an exceptional one. They involve harnessing more complex physics principles to capture and retain heat even more effectively. These are often integrated into larger, more specialized solar cooking systems.
Vacuum Tube Integration
Some high-performance solar ovens integrate vacuum tubes, similar to those used in solar water heaters. A vacuum is an excellent insulator because it contains no air to conduct heat away. These tubes are highly efficient at trapping solar energy. They can achieve very high temperatures, sometimes exceeding those of conventional ovens.
Integrating vacuum tubes typically involves a more complex build. You would direct concentrated sunlight into the vacuum tubes, where the cooking takes place. This approach minimizes heat loss almost entirely through the cooking vessel itself. It’s a significant leap in technology for a solar oven.
Phase Change Materials (PCMs)
Phase Change Materials, or PCMs, can store and release large amounts of latent heat. They absorb heat as they melt and release it as they solidify, often at a specific, controlled temperature. Including PCMs in your solar oven can extend cooking times, even after the sun goes down. They act like a thermal battery.
You could embed sealed containers of PCMs within the insulation or around the cooking chamber. During the day, as the oven heats up, the PCMs melt and store energy. As the oven cools in the evening, the PCMs solidify, releasing their stored heat and keeping the food warm or continuing to cook it. This is a cutting-edge way to manage solar heat.
Hybrid Solar-Electric Ovens
For ultimate flexibility, you might consider a hybrid solar-electric oven. This design combines solar heating with a small electric heating element. The solar component does most of the work, but if clouds appear or you need a quick temperature boost, the electric element can kick in. This ensures consistent cooking regardless of weather.
This modification requires careful integration of electrical components with the solar design. It gives you the best of both worlds: energy efficiency from solar power and reliability from electric power. It’s an excellent solution for those who rely on solar cooking but need guaranteed results.
Maintaining Your Modified Solar Oven for Longevity
You have put effort into modifying your solar oven. Now, it is important to keep it in top condition. Regular maintenance ensures your oven continues to perform effectively for many years. Neglecting simple cleaning or inspection tasks can lead to reduced efficiency and a shorter lifespan for your cooker.
Proper care preserves the effectiveness of your modifications. It also prevents small issues from becoming larger, more costly problems. A well-maintained solar oven will consistently deliver excellent cooking results.
Regular Cleaning Schedules
Clean your solar oven regularly. Dust, dirt, and grime can accumulate on reflectors and the glazing. These particles block sunlight, reducing the amount of energy that reaches your cooking pot. A dirty reflector simply does not reflect as well.
I wipe down my reflectors and glazing with a soft, damp cloth before each use. For tougher spots, a mild soap solution works well. Avoid abrasive cleaners that can scratch reflective surfaces or the glazing. Keeping these surfaces spotless is as important as cleaning the bottom of your traditional oven how to clean bottom of oven.
Inspecting for Wear and Tear
Periodically inspect all parts of your solar oven. Check the insulation for any damage or compression. Look at the seals around the door and glazing for cracks or deterioration. Over time, materials can degrade from sun exposure and temperature changes.
If you find damaged weatherstripping, replace it promptly. Repair any tears in reflective film with suitable adhesive tape or replace the panel if necessary. Catching small issues early prevents them from becoming major performance problems. My experience with cleaning my gas oven how to clean gas oven or electric oven how to clean electric oven taught me the value of regular checks; the same applies to solar ovens. Regular inspection is key to maintaining peak functionality and ensuring your solar oven remains a reliable cooking tool.
FAQ Section
Q1: What is the most important modification for a solar oven’s effectiveness?
Improving insulation is arguably the most crucial modification. It directly prevents heat loss, allowing the oven to reach and maintain higher temperatures. Combined with highly reflective surfaces, good insulation ensures maximum energy retention, leading to faster and more consistent cooking results.
Q2: Can I use regular pots and pans in a modified solar oven?
Yes, you can use regular pots and pans. However, dark-colored, thin-walled pots work best as they absorb solar radiation efficiently and transfer heat quickly to the food. Avoid shiny or light-colored cookware, as they reflect too much light. Glass lids are also highly recommended for better heat trapping.
Q3: How long does it take to cook in a modified solar oven compared to an unmodifed one?
Cooking times in a modified solar oven are significantly shorter. An unmodifed oven might take 3-4 hours to cook a meal, while a well-modified one can often cook the same meal in 1.5-2.5 hours on a sunny day. This reduction comes from higher internal temperatures and better heat retention.
Q4: Are solar ovens safe to use for cooking food?
Yes, solar ovens are generally very safe to use. They do not use flame or electricity, eliminating many common kitchen hazards. Always use food-grade, high-temperature-resistant materials for the cooking chamber. Ensure your food reaches safe internal temperatures, just as you would with any other cooking method.
Q5: Can these modifications be applied to commercial solar ovens?
Absolutely. Many commercial solar ovens can benefit greatly from these modifications. You can often add extra layers of insulation, upgrade reflector materials, or improve door seals on existing models. These enhancements can push a commercial oven’s performance beyond its original design specifications.
Q6: What materials should I avoid using for solar oven modifications?
Avoid using materials that off-gas harmful chemicals when heated, such as certain plastics or adhesives not rated for high temperatures. Also, avoid highly flammable materials near the cooking chamber. Always opt for non-toxic, heat-resistant, and food-safe components for any part of your solar oven.
Conclusion
Modifying your solar oven is a rewarding endeavor. You take an already sustainable cooking method and push its efficiency to new heights. We have explored many ways to achieve this, from reinforcing insulation to perfecting your reflectors. Every small change you implement adds up to a significantly more effective and reliable cooking experience.
You now understand how crucial insulation is for retaining heat, and how enhanced reflectors can capture more of the sun’s energy. Optimizing your cooking chamber and meticulously sealing air leaks ensures that heat stays where it belongs. By applying these techniques, you transform your solar cooker. I encourage you to begin experimenting with these modifications. Take the step to modify your solar oven. Embrace the power of the sun for faster, more efficient, and truly satisfying meals.
- solar cooking
- renewable energy
- energy efficiency

Todd Martin
Senior Writer
With over 15 years of experience in home renovation and design, I started HEG to share what I’ve learned with homeowners who want to create spaces that are both beautiful and functional. I’ve always believed in a hands-on approach, and over the years, I’ve picked up practical solutions that actually work. Through HEG, I aim to make home improvement more approachable, sharing real tips that help you create a home you truly love.