· Todd Martin · Rug Cleaning · 12 min read
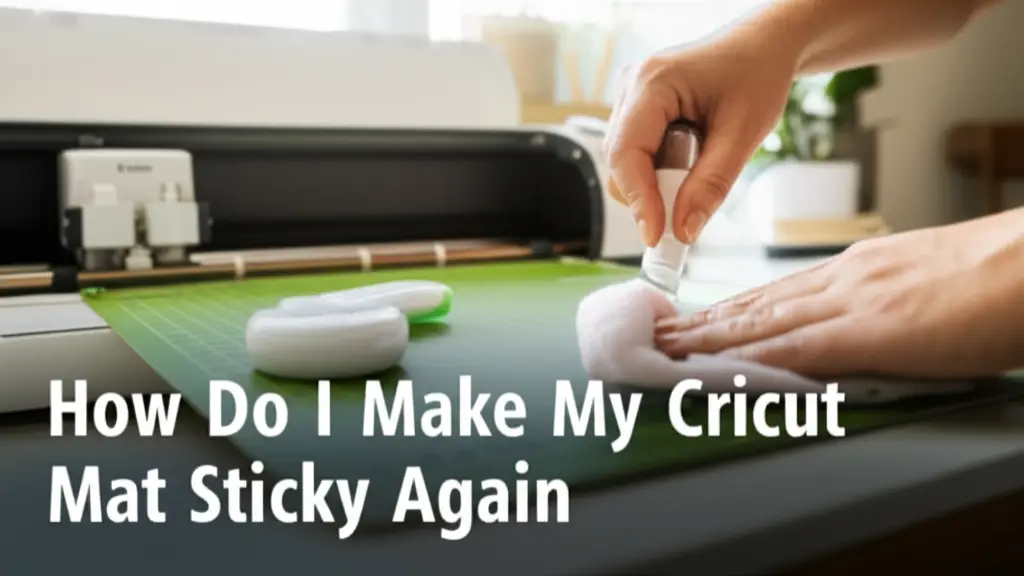
How Do I Make My Cricut Mat Sticky Again

How to Make Your Cricut Mat Sticky Again: Complete Guide
Are you frustrated with materials slipping off your Cricut mat during cutting projects? A non-sticky Cricut mat can ruin your crafting experience and waste expensive materials.
The good news is that you don’t need to immediately replace your mat when it loses its grip. In this comprehensive guide, we’ll explore multiple proven methods to make your Cricut mat sticky again, helping you extend its lifespan and save money.
Key Takeaways
- Clean your Cricut mat thoroughly before attempting to restore stickiness
- Multiple household methods exist to revive mat adhesiveness, including soap and water, adhesive sprays, and homemade solutions
- Regular maintenance can significantly extend your mat’s lifespan
- Different mat types require different cleaning and resticking approaches
Quick Answer: To make your Cricut mat sticky again, first clean it thoroughly with mild soap and warm water, let it dry completely, then either apply a repositionable adhesive spray, use a glue stick, or try the baby wipe method to restore its tackiness.
Why Do Cricut Mats Lose Their Stickiness?
Before diving into solutions, it’s important to understand why your Cricut mat becomes less sticky over time. This knowledge will help you both restore stickiness and prevent premature adhesive loss in the future.
The primary reasons Cricut mats lose their stickiness include:
- Material residue buildup - Paper fibers, fabric lint, and tiny material particles gradually accumulate on the mat’s surface, covering the adhesive layer
- Dust and debris collection - Even when not in use, exposed mats gather dust that diminishes stickiness
- Excessive use - Each time you place and remove materials, some adhesive strength is lost
- Improper cleaning techniques - Using harsh chemicals or scrubbing too vigorously can damage the adhesive layer
- Incorrect storage - Not replacing the protective cover or storing mats in extreme temperatures can degrade adhesive properties
Understanding these factors helps in both restoring and maintaining your mat’s stickiness. A typical Cricut mat can last for 40-50 uses with proper care, but this number can vary significantly based on usage patterns and maintenance.
How to Clean Your Cricut Mat Before Resticking
Before attempting to restore stickiness, you must thoroughly clean your Cricut mat to remove all debris and residue. This critical first step ensures any resticking method will be more effective and long-lasting.
Gentle Soap and Water Method
One of the most effective cleaning approaches uses materials you already have at home:
- Remove the protective cover (if still attached)
- Hold the mat at an angle under lukewarm (not hot) water
- Apply a small amount of mild dish soap to the sticky surface
- Gently rub with your fingers in circular motions across the entire surface
- For stubborn residue, use a soft plastic scraper at a 45-degree angle (avoid metal tools)
- Rinse thoroughly with clean water until no soap remains
- Allow to air dry completely (patience is key - usually 30-60 minutes)
This method works particularly well for light and standard grip mats. For heavy-duty mats with stronger adhesive, you might need a slightly more aggressive approach.
“A clean mat is the foundation for any resticking method. Skip this step, and you’re just trapping debris under a new adhesive layer,” notes experienced Cricut crafter Rebecca Thompson.
Baby Wipe Cleaning Technique
Many crafters swear by the baby wipe method for quick cleaning:
- Use alcohol-free, unscented baby wipes
- Gently wipe the entire surface in one direction
- Repeat with a fresh wipe until no more residue transfers to the wipe
- Allow to air dry completely
This technique works well for light cleaning between projects but may not remove deeply embedded debris.
7 Methods to Make Your Cricut Mat Sticky Again
Now that your mat is clean and dry, let’s explore the most effective methods to restore its stickiness.
1. Repositionable Adhesive Spray
Adhesive sprays designed specifically for cutting mats provide excellent results and are widely recommended by crafting professionals.
What you’ll need:
- Clean, dry Cricut mat
- Repositionable adhesive spray (Krylon Easy-Tack or Quilt Basting Spray work well)
- Masking tape
- Large cardboard sheet or newspaper
Steps:
- Place your mat on cardboard or newspaper in a well-ventilated area
- Cover the edges and non-sticky parts with masking tape to protect them
- Shake the spray can thoroughly
- Hold the can 10-12 inches away from the mat
- Apply a light, even coat using sweeping motions
- Let dry for 30-60 minutes until completely tacky but not wet
- Replace the protective cover until ready to use
This method typically restores your mat to near-original stickiness and can be repeated multiple times. For more consistent results, consider specialized Cricut mat adhesive sprays.
2. The Windex Revival Method
This surprising household solution has gained popularity for its effectiveness and simplicity:
- Spray a small amount of Windex on your clean mat
- Spread evenly with a lint-free cloth
- Allow to dry completely (about 15-20 minutes)
- Test stickiness on a small scrap of paper
The slight residue left behind creates a tacky surface that works well for lighter materials. This method is ideal when you need a quick fix and don’t have specialized products on hand.
3. Glue Stick Technique
Using a washable glue stick is an affordable and effective option:
What you’ll need:
- Clean, dry Cricut mat
- Washable glue stick (Elmer’s or similar)
- Lint-free cloth
Steps:
- Apply a thin layer of glue across the entire mat surface
- Use a lint-free cloth to spread evenly, removing any excess
- Let dry until clear and tacky (approximately 5-10 minutes)
This method works best for paper crafting projects and may need more frequent reapplication for fabric or heavier materials. For more detailed instructions on the glue stick method, check out this comprehensive guide to cleaning Cricut mats.
4. Painter’s Tape Trick
For targeted stickiness restoration:
- Apply strips of low-tack painter’s tape across your mat
- Press firmly and then peel off
- The tape transfers some of its adhesive to the mat
Repeat as needed until the desired stickiness level is achieved. This works particularly well for reviving specific areas of your mat that have lost adhesion.
5. Homemade Adhesive Solution
For crafters who prefer DIY solutions:
Recipe:
- 2 parts water
- 1 part white craft glue
- 1 tablespoon of glycerin (available at pharmacies)
Application:
- Mix ingredients thoroughly
- Apply a thin, even coat with a foam brush
- Allow to dry completely (1-2 hours)
This homemade solution creates a repositionable adhesive similar to commercial products but costs significantly less. The glycerin adds flexibility to prevent cracking.
6. Heat Reactivation Method
Sometimes your mat still has adhesive but needs reactivation:
- Use a hair dryer on low heat setting
- Hold 6-8 inches from the mat surface
- Move continuously to avoid overheating any area
- Heat for 30-60 seconds until the surface becomes tacky
- Let cool before using
This method works best on relatively new mats that have only slightly lost their stickiness. Be careful not to overheat, as excessive heat can damage the mat structure.
7. Rubber Cement Method
For a longer-lasting solution:
- Apply a thin layer of rubber cement to the clean mat
- Let dry until clear and tacky
- Use immediately or cover until needed
Rubber cement creates a strong repositionable bond but can be more difficult to clean off when it’s time to reapply. This method works well for heavy-duty projects.
Resticking Your Cricut Mat
If cleaning doesn’t restore enough stickiness, you can add adhesive to make your Cricut mat sticky again. This is especially useful for heavily used mats.
When to Restick
Restick your mat if it still fails to hold materials securely after thorough cleaning or if the adhesive is significantly worn. Signs include materials shifting during cutting or cuts not being clean.
Resticking Methods
- Spray Adhesives: Repositionable sprays like Quilt Basting Spray, Krylon Easy-Tack, or Spray n Bond Basting Adhesive are popular. They provide a temporary adhesive layer.
- Zig Glue Stick: A Zig 2-Way Glue Stick offers a controlled application for resticking. It’s ideal for precise adhesive placement.
Step-by-Step Resticking
- Clean First: Ensure the mat is clean and dry using one of the cleaning methods above.
- Protect Edges: Cover the mat’s non-sticky borders with painter’s tape to prevent adhesive from getting on areas that contact the machine’s rollers.
- Apply Adhesive:
- Spray Adhesive: In a well-ventilated area, spray a thin, even layer over the mat’s adhesive surface. Let it dry for 10-15 minutes.
- Zig Glue Stick: Apply a thin, even layer across the mat’s surface. Let it dry completely (about 10 minutes).
- Remove Tape: Carefully remove the painter’s tape.
- Test the Mat: Place a test material on the mat to ensure it sticks properly without residue transfer.
Precautions
- Avoid getting adhesive on the mat’s borders, as this can gum up your machine’s rollers and affect cutting accuracy.
- Let the adhesive dry fully to prevent it from transferring to your materials.
- Be aware that resticking may void your Cricut machine’s warranty, as excess adhesive could damage the machine.
Maintaining Your Cricut Mat
Proper maintenance can significantly extend your mat’s life and keep it sticky longer. Here are some tips:
- Use the Protective Cover: Always cover your mat with the plastic sheet it came with when not in use. This prevents dust and debris from sticking to the adhesive.
- Avoid Touching the Adhesive: Oils from your fingers can break down the adhesive, so handle the mat by its edges.
- Clean Regularly: Clean after every 2-4 cuts, especially when using messy materials like felt, denim, or glitter vinyl.
- Choose the Right Mat: Use the appropriate grip level for your material to avoid unnecessary wear. For example, don’t use a strong grip mat for delicate paper, as it may be harder to remove and wear out the adhesive faster.
- Press Materials Firmly: Use a brayer or scraper tool to press materials onto the mat, ensuring better adhesion and reducing wear.
When to Replace Your Mat
Even with proper care, Cricut mats are consumables and will eventually need replacement. Replace your mat if:
- It no longer holds materials securely, even after cleaning and resticking.
- Materials shift during cutting, leading to inaccurate cuts.
- The mat shows significant wear, such as cuts or tears in the adhesive surface.
On average, mats last 3-6 months with regular use, but proper maintenance can extend this lifespan.
Tips for Different Mat Types
Cricut offers several mat types with varying adhesive strengths. Each requires slightly different restoration approaches:
Light Grip (Blue) Mat
- Best cleaned with gentle soap method
- Responds well to glue stick or Windex methods
- Needs more frequent resticking
- Ideal for lightweight papers and thin materials
Standard Grip (Green) Mat
- Can handle more thorough cleaning
- Works well with adhesive sprays and homemade solutions
- Generally easiest to restore
- Most versatile for various materials
Strong Grip (Purple) Mat
- May require multiple cleaning cycles to remove residue
- Benefits most from commercial adhesive sprays
- Heat reactivation often effective
- Designed for heavier materials like chipboard and fabric
Fabric Grip (Pink) Mat
- Special consideration needed to maintain fabric-specific adhesive
- Avoid soap-based cleaners when possible
- Specialized fabric mat sprays work best
- Gentler restoration methods preferred
Matching your restoration method to your specific mat type will yield better results. If you’re dealing with particularly stubborn fabric residue, you might find techniques for cleaning fabric mats helpful.
Preventing Sticky Mat Problems
Extending your mat’s lifespan isn’t just about restoration—it’s about prevention:
- Always replace the protective cover immediately after use
- Store mats flat in a cool, dust-free environment
- Use the right mat for each material to prevent excessive adhesive wear
- Avoid overloading the mat with heavy or dense materials
- Clean lightly between uses rather than waiting for significant buildup
These simple habits can dramatically extend the time between deep cleanings and resticking processes.
Troubleshooting Common Issues
Even with proper restoration techniques, you might encounter some challenges:
Mat Too Sticky After Restoration
- If materials tear or can’t be removed easily, your mat is too sticky
- Solution: Pat the surface gently with a clean towel to reduce some adhesive
- Try the “sticky breaking” technique: press and remove a clean cotton t-shirt several times
Uneven Stickiness
- Caused by inconsistent application of resticking solutions
- Solution: Clean completely and reapply with more attention to even coverage
- Consider using a foam brush for more consistent application
Material Still Not Adhering
- If resticking doesn’t help, your mat may be beyond restoration
- Try a stronger restoration method before replacing
- Consider whether your material needs a stronger grip mat type
For persistent issues with materials not sticking properly, you might need to explore alternative material preparation techniques.
FAQ About Cricut Mat Stickiness
How do I make my Cricut mat Restick?
Clean your mat thoroughly with mild soap and water, let it dry completely, then apply a repositionable adhesive spray, use a glue stick, or try the Windex method to restore stickiness. Each method has different strengths depending on your mat type and materials.
What can I spray on my Cricut mats to make them sticky again?
You can use repositionable adhesive sprays like Krylon Easy-Tack, Quilt Basting Spray, or Cricut’s own branded adhesive spray. For household alternatives, a light mist of Windex or homemade adhesive solution (diluted craft glue with glycerin) can work effectively.
How to make Cricut mat sticky again without a heat gun?
The glue stick method, adhesive sprays, and Windex technique all work well without requiring heat. Simply clean your mat thoroughly, apply your chosen adhesive method, and allow sufficient drying time before using.
Can you make a cutting mat sticky again?
Yes, cutting mats can be restored multiple times before requiring replacement. The key is thorough cleaning before applying any new adhesive layer. Different restoration methods work better for different levels of wear and mat types.
How long do Cricut mats stay sticky?
With proper care, a Cricut mat typically remains adequately sticky for 40-50 uses, though this varies based on materials used and maintenance practices. Regular cleaning and proper storage can significantly extend this lifespan.
Final Thoughts on Restoring Your Cricut Mat
Making your Cricut mat sticky again doesn’t have to be complicated or expensive. With the techniques outlined in this guide, you can extend the life of your crafting tools and maintain consistent cutting results. Remember that prevention through proper cleaning and storage is just as important as restoration techniques.
The best approach often combines regular maintenance with timely resticking when needed. By understanding the specific needs of your mat type and preferred crafting materials, you can develop a maintenance routine that keeps your mats in excellent condition for longer periods.
For more crafting tips and home maintenance guides, explore our other articles on cleaning specialized materials and maintaining craft supplies. Happy crafting!


