· Todd Martin · Kitchen Essentials · 12 min read
How To Bring Non Stick Pan Back To Life
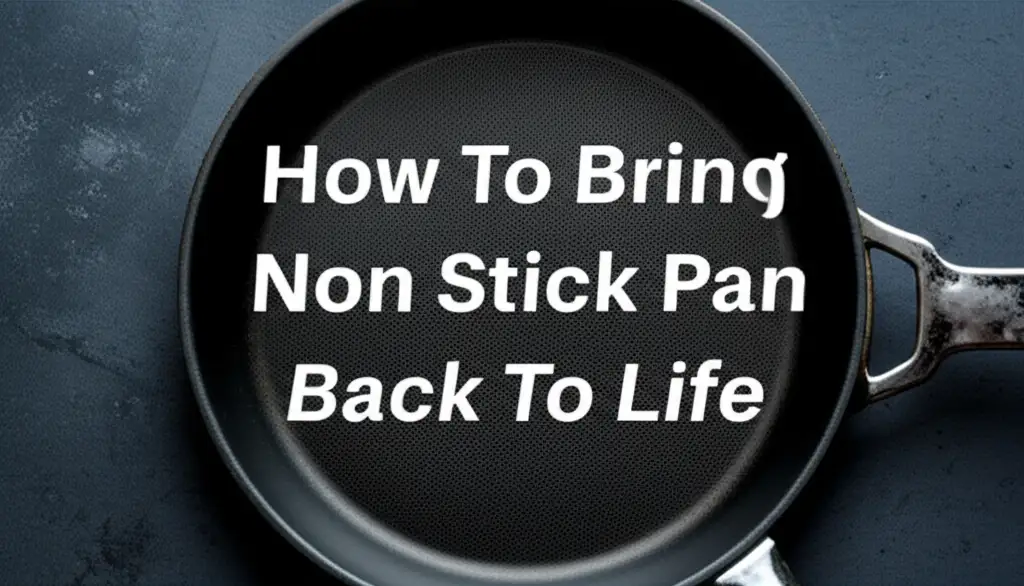
Restore Your Non-Stick Pan: Bring It Back to Life
Is your once-trusty non-stick pan suddenly betraying you? Food is sticking, cleanup is a chore, and cooking feels frustrating. It happens to the best of us! You bought that pan for its promise of easy cooking and effortless release, but now it feels like a regular sticky mess. The good news is, you can often bring non-stick pan back to life with a few simple steps.
I know how disheartening it feels when a kitchen essential stops performing. Before you toss your pan and buy a new one, consider giving it a second chance. We will explore the common reasons why non-stick pans lose their effectiveness. Then, I will show you practical solutions, from deep cleaning methods to proper care techniques. My goal is to help you restore your pan’s non-stick properties, save money, and enjoy cooking again. Let us get started on restoring your pan!
Takeaway
- Identify why your non-stick pan is failing.
- Deep clean the pan to remove hidden residue.
- Re-season the pan using cooking oil.
- Adopt gentle cooking and cleaning habits.
- Know when it is time for a replacement.
Your non-stick pan can often regain its original properties. You just need proper cleaning and re-seasoning with cooking oil. Regular maintenance, avoiding high heat, and using soft utensils also help. This process can extend the life of your cookware.
Understanding Why Your Non-Stick Pan Loses Its Magic
Non-stick pans offer wonderful convenience in the kitchen. However, their special coating can degrade over time. Several factors contribute to your pan losing its non-stick effectiveness. Understanding these causes helps you prevent future damage and bring non-stick pan back to life. It is important to identify the root of the problem.
One major culprit is high heat. Non-stick coatings, particularly PTFE (Teflon), are not designed for extreme temperatures. Overheating a pan can cause the coating to break down. This breakdown leads to stickiness and can even release harmful fumes. Always use low to medium heat when cooking with non-stick pans. Even empty pans can get too hot on a strong burner.
Abrasive tools also damage the delicate surface. Metal spatulas or scour pads scratch the non-stick layer. These scratches create tiny imperfections where food can stick. Over time, these small scratches grow larger. This exposes the pan’s base material and destroys the non-stick property. Always use silicone, wood, or plastic utensils.
Improper cleaning can also be an issue. Harsh detergents and dishwashers strip away the seasoning. They can also leave residue that feels sticky. Accumulation of burnt food or oil residue is another common problem. This invisible layer builds up and traps food, making the pan appear to have lost its non-stick quality. For more information, you can read about how to know if your non-stick pan is bad. Regular gentle cleaning is key to preservation.
Deep Cleaning: The First Step to Revive Non-Stick Pans
When food starts sticking, often the problem is not a ruined coating but accumulated residue. Burnt oil, food particles, and grime build up over time. This layer prevents the pan from performing as it should. A thorough deep clean can strip away these stubborn deposits. This process can significantly help to bring non-stick pan back to life.
One effective method involves using water, baking soda, and vinegar. First, fill the pan with water, just enough to cover the bottom. Add 2 tablespoons of baking soda to the water. Place the pan on the stove and bring the mixture to a simmer for about 5-10 minutes. The hot baking soda solution helps loosen stubborn residue. This step lifts burnt-on food and grease.
After simmering, remove the pan from heat and let it cool completely. Once cool, pour out the water. Then, add a few drops of dish soap and a tablespoon of vinegar. Use a non-abrasive sponge or cloth to gently scrub the pan. The vinegar reacts with any remaining baking soda and helps dissolve grime. For detailed guidance, you might find it useful to learn how to clean a burnt non-stick pan and how to clean non-stick pan with vinegar and baking soda. Rinse the pan thoroughly with clean water afterwards.
This deep cleaning process lifts away the sticky layer. It reveals the true surface of your pan underneath. You will notice a smoother, cleaner cooking area. If the non-stick coating is still intact, this cleaning alone can restore its functionality. If there are still sticky spots, you might need to proceed with re-seasoning.
Gentle Scrubbing Techniques
After the pan has cooled, use a soft cloth or sponge. Avoid steel wool or abrasive scrubbers. These tools can scratch and permanently damage the non-stick surface. Gentle circular motions work best to lift the softened residue. Rinse the pan well to remove all cleaning agents. Leftover soap can cause new sticking issues. A clean pan is essential for optimal performance.
Re-Seasoning Your Non-Stick Pan for Optimal Performance
Even with non-stick pans, a little seasoning can go a long way in improving their performance. While not as critical as with cast iron, a light re-seasoning can help bring non-stick pan back to life. This is especially true after a deep clean. This process creates a thin, slick layer that enhances the non-stick properties. It helps fill in micro-imperfections.
To re-season your non-stick pan, start with a clean, dry pan. Make sure there is no food residue or water left. Place the pan on your stovetop over low heat. Pour about one teaspoon of cooking oil into the pan. High smoke point oils like vegetable oil, canola oil, or grapeseed oil work best. Avoid olive oil for this process as its smoke point is too low.
Next, use a paper towel to carefully rub the oil all over the pan’s interior surface. Ensure you coat the bottom and sides evenly. Make sure to wipe away any excess oil. You want a very thin, almost invisible layer of oil. Too much oil will make the pan sticky and gummy instead of smooth. You are essentially baking a protective layer onto the surface.
Continue heating the pan on low heat for about 1-2 minutes. You might see a little smoke. This means the oil is polymerizing and forming a bond with the surface. After a couple of minutes, remove the pan from the heat. Let it cool completely. Once cool, wipe any remaining oil residue with a clean paper towel. Your pan should now feel slicker. For more insight, see can I make my frying pan non-stick again. Repeat this process every few months or after deep cleaning to maintain effectiveness.
Avoiding Common Mistakes That Damage Non-Stick Surfaces
Many habits can unknowingly degrade your non-stick pan’s performance. Understanding and correcting these common mistakes is crucial. This helps to extend your pan’s life. It also ensures it stays non-stick. Avoiding these pitfalls is key to keeping your pan in top condition.
First, never use metal utensils in a non-stick pan. Metal spatulas, spoons, or whisks can scratch the delicate coating. Even a small scratch compromises the non-stick layer. These scratches lead to peeling and sticking over time. Always opt for silicone, wooden, or plastic utensils. These materials are gentle on the surface. For detailed information, consider can we use steel spoon in non-stick pan.
Second, avoid using high heat. Non-stick pans are designed for low to medium heat cooking. High heat can cause the coating to break down rapidly. It can also release fumes. Always preheat your pan gradually. Use a moderate flame or setting. This protects the coating and ensures even cooking. Empty pans on high heat are especially damaging.
Third, stay away from abrasive cleaners and scrub pads. Steel wool, scouring powders, and harsh chemicals will strip the non-stick layer. They create micro-abrasions that make food stick. Always use soft sponges or cloths with mild dish soap. This gentle approach preserves the integrity of the surface. Hand washing is almost always better than a dishwasher for non-stick pans.
Finally, do not put a hot non-stick pan directly into cold water. This sudden temperature change can warp the pan. It can also damage the non-stick coating. Let your pan cool down completely before washing it. Following these simple rules will greatly improve your pan’s longevity. They help maintain its ability to release food easily.
Proper Care and Maintenance for Lasting Non-Stick Pans
Once you have managed to bring non-stick pan back to life, ongoing proper care is essential. Regular maintenance extends the pan’s lifespan. It also ensures consistent cooking performance. Simple habits in your daily routine make a big difference. These practices prevent future sticking issues.
Always wash your non-stick pan by hand after each use. Use warm water, mild dish soap, and a soft sponge or cloth. Avoid harsh detergents and abrasive scrubbers. Dishwashers can also be too harsh for non-stick coatings. The high heat and strong detergents in dishwashers can degrade the coating faster. Rinse the pan thoroughly and dry it immediately to prevent water spots.
Proper storage is also important. Stacking pans directly on top of each other can cause scratches. This happens even with careful placement. The edges of one pan can scratch the cooking surface of another. To prevent this, place a soft cloth, paper towel, or pan protector between stacked pans. Hanging pans is an even better option if you have the space.
Always use appropriate cooking oils. Some oils, like cooking sprays, can build up sticky residue over time. This happens even on non-stick surfaces. Instead, use a small amount of liquid oil. Spread it evenly to lightly coat the cooking surface. You might be interested in learning how to clean non-stick pan before first use to start with proper habits. This will set your pan up for success from the beginning.
Knowing When It’s Time to Replace Your Non-Stick Pan
While you can often bring non-stick pan back to life, sometimes the damage is beyond repair. It is important to recognize when your pan has reached the end of its useful life. Using a severely damaged non-stick pan can affect your cooking experience. It can also pose health risks. Knowing when to replace it is a smart decision.
One clear sign is when the non-stick coating starts to peel, chip, or flake. If you see tiny pieces of the coating coming off into your food, the pan is no longer safe to use. These flakes are not meant for consumption. They indicate that the protective layer is compromised. Continuing to use such a pan means you are ingesting small particles of the coating.
Deep scratches that expose the pan’s base metal are another sign. Superficial scratches might not cause immediate problems. However, deep gouges destroy the non-stick property in that area. They also make the pan harder to clean. Food will stick stubbornly to these exposed spots. This makes cooking frustrating and uneven.
Warping is also a problem that cannot be fixed. If your pan’s bottom is no longer flat, it will not sit evenly on the stove. This leads to uneven heat distribution and poor cooking results. Warping often occurs from extreme temperature changes, like putting a hot pan under cold water. Once a pan is warped, its performance is permanently affected.
Finally, if food consistently sticks despite deep cleaning and re-seasoning, it is time for a new pan. This indicates that the non-stick properties have degraded beyond repair. No amount of cleaning or oil will fix it. Prioritize your health and cooking enjoyment. Replace pans showing these clear signs of irreversible damage.
FAQ Section
Can all non-stick pans be re-seasoned?
Most non-stick pans, especially those with some remaining coating integrity, can benefit from re-seasoning. This process involves applying a thin layer of oil and heating it. It helps enhance the existing non-stick properties. However, pans with severely chipped or peeling coatings will not benefit from re-seasoning.
How often should I re-season my non-stick pan?
Re-seasoning is not a daily task for non-stick pans. You should re-season your pan after a deep clean, or if you notice minor sticking issues. For regular use, re-seasoning every few months can help maintain its slick surface. Listen to your pan; if food starts to stick a little, it is a good time to re-season.
Is it safe to cook on a scratched non-stick pan?
Minor, superficial scratches might be okay for a short time. However, if the coating is peeling, chipping, or deeply scratched to expose the metal, it is not safe. Small pieces of the coating can flake into your food. This can potentially harm you. It is best to replace pans with significant damage.
What causes food to stick to a non-stick pan?
Food often sticks due to a buildup of burnt oil and food residue on the pan’s surface. Using high heat can also break down the non-stick coating. Abrasive utensils or harsh cleaning methods can scratch the surface. These actions all compromise the pan’s ability to release food easily.
Can I use olive oil to season my non-stick pan?
It is generally not recommended to use olive oil for seasoning non-stick pans. Olive oil has a low smoke point. It can burn and leave a sticky residue. Instead, opt for oils with higher smoke points like vegetable oil, canola oil, or grapeseed oil. These oils polymerize better and create a more durable, non-sticky layer.
How do I remove burnt food from a non-stick pan without damage?
To remove burnt food, fill the pan with water and add a few tablespoons of baking soda. Simmer this mixture for 5-10 minutes to loosen the residue. Let it cool, then gently scrape with a wooden or silicone spatula. Wash with mild soap and a soft sponge. Avoid harsh scrubbers.
Conclusion
Bringing your non-stick pan back to life is often simpler than you think. You do not always need to rush out and buy a new one. By understanding the common culprits behind sticky surfaces, you can take proactive steps. Deep cleaning helps remove invisible residue that hinders performance. Re-seasoning provides a fresh, slick layer that revitalizes the cooking surface.
Remember that gentle care is paramount. Use appropriate utensils, cook on low to medium heat, and wash by hand. These habits are crucial for maintaining the pan’s integrity. They ensure your efforts to bring non-stick pan back to life are not in vain. If your pan shows signs of significant damage like peeling or deep scratches, it is time for a replacement. Safety and cooking enjoyment come first.
Apply these tips and give your beloved non-stick pan a second chance. You will save money and enjoy effortless cooking once more. Start today and reclaim the joy of a truly non-stick experience!
- non-stick pan
- pan care
- cooking tips

Todd Martin
Senior Writer
With over 15 years of experience in home renovation and design, I started HEG to share what I’ve learned with homeowners who want to create spaces that are both beautiful and functional. I’ve always believed in a hands-on approach, and over the years, I’ve picked up practical solutions that actually work. Through HEG, I aim to make home improvement more approachable, sharing real tips that help you create a home you truly love.