· Todd Martin · Home Improvement · 17 min read
How To Build A Tv Lift Cabinet

Build Your Own TV Lift Cabinet: A Comprehensive DIY Guide
Imagine a living space where your television appears only when you want it. This dream becomes real when you build a TV lift cabinet. A custom TV lift cabinet offers a sleek way to hide your television, keeping it out of sight when not in use. This project adds a touch of modern sophistication to any room. It also helps you save space and maintain a clean design aesthetic.
In this guide, I will walk you through each step of building your own TV lift cabinet. We will cover planning, selecting materials, construction techniques, and integrating the lift mechanism. We will also discuss finishing touches and customization options. Get ready to transform your entertainment area with a functional and stylish piece of furniture.
Takeaway
Building a TV lift cabinet transforms your living space. Here are the key takeaways for your DIY project:
- Plan Meticulously: Measure your TV and lift mechanism carefully before you begin.
- Choose Wisely: Select durable materials and the right lift mechanism for your needs.
- Build Strong: Construct a sturdy cabinet box to support the TV and lift system.
- Integrate Smart: Install the lift mechanism and secure the TV platform correctly.
- Finish Flawlessly: Apply a beautiful finish and manage cables for a polished look.
Building a TV lift cabinet involves constructing a custom piece of furniture designed to house and conceal a television, integrating a motorized lift mechanism that raises and lowers the screen on demand, offering a sleek and hidden entertainment solution.
Planning Your TV Lift Cabinet Project
Starting any woodworking project requires good planning. When you build a TV lift cabinet, planning is even more important. You need to consider the size of your television and the dimensions of the lift mechanism you choose. Precise measurements ensure everything fits and works correctly. I recommend drawing a detailed sketch or using design software to map out your cabinet.
Your design should fit the style of your home. Think about the room where the cabinet will sit. Should it look like a chest, a console, or part of a built-in unit? Also, remember ventilation. Electronics need airflow to prevent overheating. Plan for openings or fans to keep your TV cool.
Measuring Your Space and TV
Before you cut any wood, measure your television carefully. Note its height, width, and depth. You also need to know the dimensions of your chosen TV lift mechanism. Manufacturers provide these specifications. Make sure the lift can handle your TV’s weight.
Consider the space where the cabinet will go. Measure the available floor space. Think about how tall the cabinet can be when closed and when the TV is fully extended. These measurements will guide your cabinet’s overall size. I find that taking extra time on measurements prevents many problems later on.
Selecting the Right Lift Mechanism
The TV lift mechanism is the core of your cabinet. You have different types available. Linear actuators are common and work by extending a single column. Scissor lifts offer more stability for larger TVs. Some lifts come with remote controls, while others integrate with smart home systems.
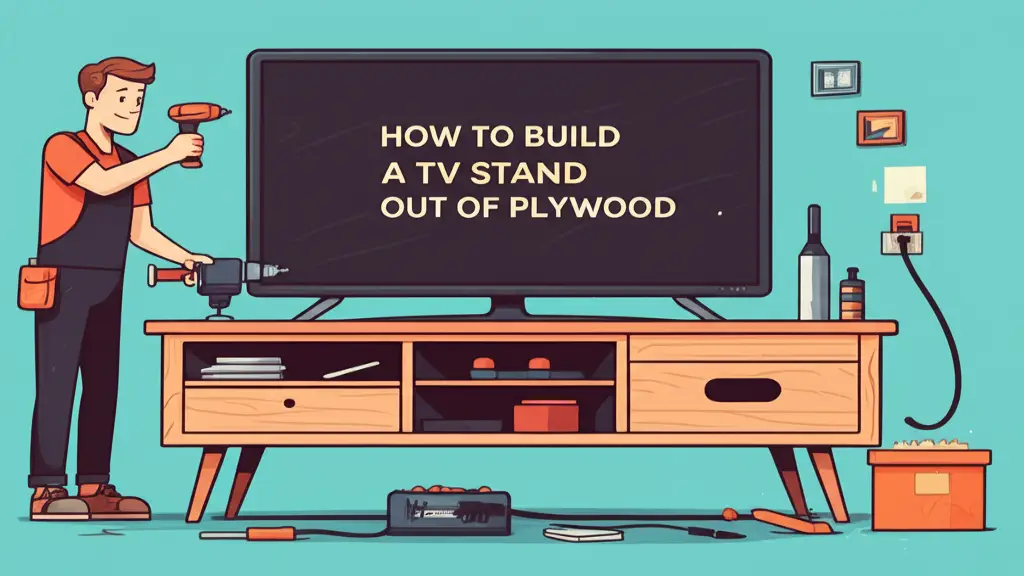
Consider the travel distance of the lift. This is how high the TV will rise. Ensure it is enough for comfortable viewing. Look at the weight capacity too. Your lift must support the TV’s weight, plus the weight of the mounting platform. Picking the right lift ensures smooth, quiet operation. You can learn more about how different TV stands are built, including their dimensions and features, by checking out how to build a tv stand out of plywood. This will give you a good base for understanding furniture sizing.
Essential Materials and Tools
Building a TV lift cabinet needs the right materials and tools. Choosing quality materials ensures your cabinet lasts for a long time. The right tools make the building process smoother and safer. I always make a list before I start shopping.
Wood is the main material. Plywood is a good choice because it is stable and strong. MDF (medium-density fiberboard) is smooth and good for painting. Hardwoods like oak or maple offer a beautiful, durable finish. Your choice depends on your budget and desired look.
Hardware includes hinges for any access panels and drawer slides if you add drawers. You will also need screws, wood glue, and possibly a power strip for your TV and accessories. Do not forget cable management accessories to keep wires tidy.
Wood and Other Materials
For the cabinet body, I often use ¾-inch thick plywood. This thickness provides good strength and stability. If you plan to paint your cabinet, cabinet-grade plywood or MDF works well. For a natural wood finish, consider hardwood plywood or solid wood boards. Make sure your wood is flat and free of warps.
You will also need materials for the cabinet’s top and front panel. These are often made from the same wood as the cabinet body. Remember to get proper wood glue for strong joints. Consider veneer if you want a premium look without the cost of solid hardwood throughout. If you’re planning on building a cabinet with doors, like a pantry, the material considerations for strength and finish are very similar. You can find more details on materials and techniques by reading about how to build a pantry cabinet with doors.
Required Tools for Construction
You will need a few essential power tools for this project. A circular saw or table saw is vital for cutting large panels accurately. A drill is necessary for pre-drilling holes and driving screws. A router helps create dados or decorative edges. Clamps are very useful for holding pieces while glue dries.
Measuring tools like a tape measure, speed square, and a combination square are critical for accuracy. Safety gear, such as safety glasses and hearing protection, is a must. Hand tools like hammers, screwdrivers, and chisels will also come in handy. Having the right tools makes the work easier and more enjoyable. Knowing how to assemble basic cabinet boxes is a useful skill for this project. I found a great resource on how to build a simple wall cabinet box that can help you understand the fundamental steps for box construction.
Cabinet Construction: The Basic Box
Building the cabinet box is the first major step. This box will house your TV lift mechanism and television. Accuracy is key here. Any mistakes in the box dimensions can affect the lift’s operation. I always double-check my measurements before making any cuts.
Start by cutting all your wood panels to size. You will need panels for the bottom, top, sides, and back of the cabinet. Use a table saw or circular saw with a straight edge for precise, square cuts. Label each piece as you cut it.
Cutting and Assembling Panels
Once your panels are cut, it is time to assemble the main box. I prefer using pocket hole joinery for quick and strong connections, but dados or rabbets also work well. Pocket holes are drilled at an angle into one piece of wood. Screws then connect it to another piece.
Apply wood glue to the joints before securing them with screws. This creates a stronger bond. Assemble the bottom panel first, then attach the sides. Ensure the box is square by checking diagonals. A square box prevents the lift mechanism from binding later on. Building face frames for cabinets, which are often added to the front of a cabinet box, can also give you insight into strong joint techniques. You can learn more about this by checking out how to build face frames for cabinets.
Reinforcing the Structure
A TV lift cabinet needs to be very sturdy. The lift mechanism and TV are heavy, especially when moving. Add internal supports and braces where the lift mechanism will attach. These supports should be solid wood or thick plywood. They provide a strong anchor point for the lift.
You might also consider adding a back panel made of ¼-inch or ½-inch plywood. This helps square the cabinet and adds rigidity. Screw the back panel into all the surrounding edges. Remember to leave openings for ventilation and cable access in the back panel. A strong structure ensures safe and reliable operation of your TV lift for years to come.
Integrating the TV Lift Mechanism
This is the exciting part of the project: installing the TV lift mechanism. Proper installation ensures your TV rises and retracts smoothly. Take your time with this step. Follow the instructions that come with your specific lift mechanism closely. Each model might have unique mounting requirements.
The lift typically mounts to the bottom of the cabinet. You will also need to create a platform that attaches to the lift’s top plate. Your television then mounts onto this platform. This platform, often called a “sled,” needs to be strong enough to hold your TV securely.
Securing the Lift to the Cabinet Base
Position the lift mechanism inside your cabinet. Make sure it is centered and has enough clearance from the sides. Most lifts come with pre-drilled holes for mounting screws. Use strong wood screws to attach the lift firmly to the cabinet’s bottom panel and any internal supports you built. Do not skimp on screws here; this connection is crucial.
Check the alignment of the lift. It should be perfectly plumb (straight up and down). Misalignment can cause the lift to bind or operate unevenly. Test the lift without the TV first to ensure it moves freely through its full range of motion. This confirms your base mounting is correct.
Building the TV Mount Platform
Next, you need to build the platform that holds your TV. This platform attaches to the top of the lift mechanism. It should be slightly larger than the base of your TV but small enough to fit within the cabinet’s internal dimensions. I usually use ¾-inch plywood for this platform.
You will mount your TV to this platform. Most TVs use VESA mounting patterns. You can attach a VESA mounting bracket to the platform, then attach your TV to the bracket. Ensure the platform is level and sturdy. Test the lift again with the TV attached. Watch for any rubbing or clearance issues as the TV moves. Creating a frame for your TV to display it, even without a lift, involves understanding mounting points and aesthetics. You can explore how to build a frame for tv to get more ideas on TV enclosure design.
Designing and Attaching the Lid & Front Panel
The lid and front panel are key to concealing your TV. They make your TV lift cabinet look like a regular piece of furniture when the TV is down. The design of these parts needs to be thoughtful. They must move smoothly with the TV or provide easy access.
There are different ways to design the lid. Some lids are hinged and open automatically as the TV rises. Others might be fixed to the TV’s top and lift with it. A third option involves a sliding lid that moves back. Your choice depends on the lift mechanism and your design preference.
Types of Lid Mechanisms
For a hinged lid, you would attach hinges to the back of the cabinet and the lid. As the TV rises, a special arm or linkage pushes the lid open. This is a common and reliable method. Ensure the hinges are strong enough.
A fixed lid attaches directly to the top of the TV or its mounting platform. The lid then becomes the top surface of the TV when it is fully extended. This design creates a very clean look. However, it requires precise alignment. For the front panel, if it is a separate piece, it usually stays stationary. If it is part of the lifting mechanism, it moves with the TV.
Crafting the Seamless Finish
The goal is to make the lid and front panel blend seamlessly with the cabinet. This means careful sanding and finishing. The gap around the lid when closed should be minimal. This makes the cabinet look like a solid piece of furniture. You might need to add trim around the opening to hide any small gaps.
Test the lid and front panel operation multiple times before final finishing. Ensure there is no binding or catching. Adjust the hinges or connections as needed. A well-crafted lid completes the illusion of a hidden TV. Thinking about how to add trim to cabinet doors can give you valuable insights into achieving clean, professional-looking edges and finishes. I found some useful tips on how to put trim on cabinet doors that might help with this step.
Finishing Touches and Cable Management
Once the main structure and lift mechanism are in place, it is time for the finishing touches. This stage makes your cabinet look complete and professional. It also ensures long-term functionality and safety. Do not rush this part. A good finish enhances the beauty of your craftsmanship.
First, sand all wood surfaces. Start with a coarser grit sandpaper and gradually move to finer grits. This prepares the wood for staining or painting. A smooth surface is essential for an even finish. Wipe away all dust before applying any finish.
Surface Preparation and Finishing
Apply your chosen finish. If you are staining, use a wood conditioner first for an even color. Then apply several coats of stain, wiping off excess. Follow with multiple coats of clear topcoat, like polyurethane, for durability. If painting, use a good primer, then apply several thin coats of paint. Lightly sand between coats for a smooth finish.
Consider the interior of the cabinet as well. While it is hidden, a clean interior looks better. You might paint the inside black to help hide shadows when the TV is up. This attention to detail sets a professional build apart. After you build and finish your cabinet, knowing how to keep it clean will help maintain its beauty. I often refer to guides like how to clean cabinet for best practices.
Optimizing Airflow and Cables
Proper ventilation is crucial for your TV and other electronics. Cut out vents near the bottom and top of the cabinet. These vents allow warm air to escape and cool air to enter. You can use decorative grilles to cover the vents. For better airflow, consider adding small, quiet computer fans.
Cable management keeps your cabinet tidy and safe. Route all power cords and video cables neatly. Use cable ties or wraps to bundle them. Leave enough slack for the cables to move freely as the TV lifts and lowers. Install a power strip inside the cabinet for all your components. This minimizes external wires and creates a clean look. Keeping your TV screen clean is also important for enjoying your new setup. You can find helpful tips on how to clean tv screen to maintain clarity.
Customization and Advanced Features
Building your own TV lift cabinet gives you the freedom to add custom features. You are not limited to standard designs. Think about how you use your entertainment system. What would make it more functional or enjoyable? Adding shelves, drawers, or smart home integration can elevate your cabinet.
Consider incorporating storage. You can add adjustable shelves for media devices like soundbars, game consoles, or streaming boxes. Drawers can hold remotes, movies, or game controllers. Design these elements into your cabinet plans from the start for seamless integration.
Adding Storage and Access
If you decide to add shelves, make them adjustable. This allows flexibility for different device sizes. You can use shelf pins and pre-drilled holes. For drawers, use full-extension drawer slides for easy access to contents. Ensure all storage areas have proper ventilation if they house electronics.
Think about access panels. You might need a way to reach the back of your TV or the lift mechanism for maintenance or new cable hookups. A hinged access panel on the back or side can be very useful. This avoids having to disassemble the whole cabinet later. Building other types of storage, like a nightstand with drawers, uses similar joinery and planning skills. You can explore how to build a nightstand with 2 drawers for more ideas on integrating drawers.
Smart Home Integration
Many TV lift mechanisms come with remote controls. Some also offer integration with smart home systems. This allows you to control the TV lift using voice commands or through a smart home app. Check if your chosen lift mechanism supports this feature. You might need an additional bridge or module.
Consider adding smart lighting inside the cabinet. LED strips can illuminate the TV area when it is raised. This adds to the viewing experience. You can also integrate outlets that turn on and off with the TV. This ensures all your components power up and down automatically. These advanced features make your TV lift cabinet truly modern and convenient. If you are interested in building other types of storage, like a seating bench with storage, the principles of sturdy construction and functional design apply. You might find ideas from how to build a seating bench with storage useful.
FAQ Section
How much does it cost to build a TV lift cabinet?
The cost to build a TV lift cabinet varies widely. It depends on the materials you choose and the lift mechanism. A basic lift mechanism can cost a few hundred dollars. High-end mechanisms are much more. Wood and hardware costs also add up. Expect to spend between $500 and $2,000 or more for a DIY project.
What type of wood is best for a TV lift cabinet?
Plywood is a popular choice for TV lift cabinets due to its stability and strength. Cabinet-grade plywood offers a smooth surface for painting or veneering. Hardwoods like oak, maple, or cherry provide a durable and beautiful natural finish. MDF is also an option for painted cabinets but is not as strong as plywood or hardwood.
How do I choose the right TV lift mechanism?
When choosing a TV lift mechanism, consider your TV’s size and weight. The mechanism must support these. Look at the travel distance to ensure the TV lifts high enough. Check features like remote control options and smart home compatibility. Read reviews and compare warranties before making your final decision.
Can I build a TV lift cabinet without advanced woodworking skills?
Yes, you can build a TV lift cabinet with basic woodworking skills. Many plans use simple cuts and joinery methods like pocket holes. The most critical parts are accurate measurements and careful assembly. Take your time and follow instructions. Start with a simpler design if you are new to woodworking.
How do I ensure proper ventilation for electronics?
Proper ventilation is crucial. Design cutouts or grilles in the cabinet for airflow. Position them low for air intake and high for hot air exhaust. You can add small, quiet computer fans to improve circulation. Make sure the vents are not blocked by the TV or other components. This prevents overheating and extends device life.
Conclusion
Building your own TV lift cabinet is a rewarding project. It allows you to create a custom piece of furniture that perfectly fits your home and needs. You gain the satisfaction of building something unique with your own hands. The result is a hidden television solution that enhances your living space. It combines technology with elegance, providing a clean and modern look.
From careful planning to selecting the right materials and integrating the lift mechanism, each step brings you closer to your goal. Remember to focus on precision and safety throughout the build. Do not forget the finishing touches and proper cable management. They make a big difference in the final product. I hope this guide gives you the confidence to start your own custom TV lift cabinet. Begin your project today and transform your home entertainment experience.
- TV lift cabinet
- DIY furniture
- Hidden TV
- Woodworking
- Home theater

Todd Martin
Senior Writer
With over 15 years of experience in home renovation and design, I started HEG to share what I’ve learned with homeowners who want to create spaces that are both beautiful and functional. I’ve always believed in a hands-on approach, and over the years, I’ve picked up practical solutions that actually work. Through HEG, I aim to make home improvement more approachable, sharing real tips that help you create a home you truly love.