· Todd Martin · Appliance Maintenance · 21 min read
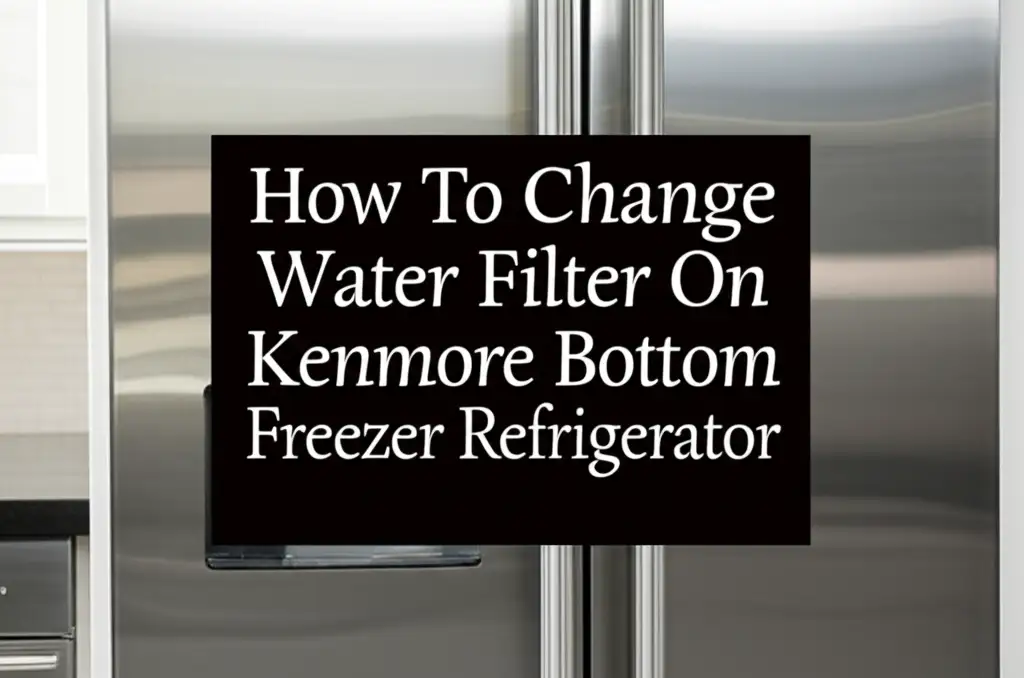
How To Change Water Filter On Kenmore Bottom Freezer Refrigerator
Easily Change Your Kenmore Bottom Freezer Refrigerator Water Filter
Having fresh, clean water from your refrigerator is a small luxury many of us enjoy daily. Your Kenmore bottom freezer refrigerator provides this convenience. It uses a water filter to remove impurities from the water. Over time, this filter collects many particles. It needs regular replacement.
Changing the water filter on your Kenmore bottom freezer refrigerator is a simple task. You do not need a technician to do it. This guide will walk you through the entire process. We will cover why you need to change it, how to find your filter, and the steps to replace it. We will also address common issues and tips for maintenance.
Takeaway
Changing your Kenmore bottom freezer refrigerator water filter is essential for clean water and appliance health.
- Locate the filter, typically inside the fresh food compartment or behind the grille.
- Turn off the water supply if your model requires it.
- Twist the old filter counter-clockwise to remove it.
- Insert the new filter and turn it clockwise until it locks.
- Flush the system with several gallons of water after replacement.
Changing the water filter on a Kenmore bottom freezer refrigerator involves locating the filter, typically inside the fresh food compartment or behind the kick plate. Twist the old filter counter-clockwise to unlock and remove it. Insert the new filter, twisting clockwise until it secures. Finally, flush the water system for a few minutes to clear air and carbon dust.
Why You Must Replace Your Kenmore Refrigerator Water Filter
Clean drinking water is very important for your health. Your Kenmore refrigerator water filter plays a big part in this. It helps remove many unwanted substances from your tap water. These substances include chlorine, sediment, rust, and even some harmful chemicals.
Ignoring your water filter can lead to several problems. First, the quality of your drinking water declines. You might notice a strange taste or smell. The ice from your dispenser may also taste bad. This is a clear sign the filter is no longer working well.
Second, an old filter can hurt your refrigerator. A clogged filter restricts water flow. This puts stress on the water dispenser system. It can reduce water pressure. It may also lead to costly repairs down the line. Regular replacement keeps your appliance working correctly. It also ensures you always have pure, refreshing water.
Think about the health benefits. Filters remove tiny particles. These particles can cause health problems over time. By changing your filter, you protect yourself and your family. It is a small effort with big health rewards.
Many Kenmore refrigerators have indicator lights. These lights tell you when to change the filter. Do not wait for water quality to get bad. Follow the manufacturer’s recommendations or watch for the indicator light. Most filters need changing every six months. If you use your dispenser often, you might need to change it sooner. This simple act keeps your refrigerator efficient. It also keeps your water safe and clean.
Locating the Water Filter on Your Kenmore Bottom Freezer Refrigerator
Finding your Kenmore bottom freezer refrigerator water filter is the first step. Kenmore models vary, so the filter location can differ. Most bottom freezer models place the filter in one of two main spots. Knowing where to look saves you time and effort.
One common location is inside the fresh food compartment. You will often find it in the upper right-hand corner. Sometimes it is in the upper left-hand corner. It might be behind a small cover or a flip-down panel. This design makes it easy to reach. You simply open the refrigerator door. Look up at the ceiling of the fresh food section. The filter usually has a twist-and-lock mechanism.
Another frequent location is at the bottom of the refrigerator. It is often behind the base grille or kick plate. This is the removable panel at the very bottom front of the appliance. You might need to gently pull this grille off to access the filter. This type of filter usually slides in and out. It may have a push-button release.
To confirm your specific model’s filter location, check your owner’s manual. The manual provides precise instructions and diagrams. If you do not have the manual, look up your refrigerator model number online. Kenmore’s website or appliance parts sites often provide this information. Knowing the exact location and filter type ensures a smooth replacement process. It also helps you buy the correct replacement filter. Some Kenmore filters are universal, but many are model-specific.
Essential Tools and Supplies for Filter Replacement
Before you start changing your Kenmore bottom freezer refrigerator water filter, gather your tools. Having everything ready makes the process faster and smoother. You do not need many special tools. Most items are common household supplies. Preparing ahead prevents interruptions once you begin.
First, you need the correct replacement water filter. This is the most crucial item. Make sure it is compatible with your Kenmore bottom freezer model. Check your owner’s manual for the filter model number. You can also find this number on your existing filter. Using the wrong filter can cause leaks or poor water quality. It may even damage your refrigerator.
Next, have a shallow pan or old towels ready. Some water will drip when you remove the old filter. This is normal. The pan or towels will catch any spills. This prevents water from getting on your floor or inside the refrigerator. A small amount of water is expected.
You might also want a small flat-head screwdriver. This is sometimes useful for prying open stubborn filter covers or the base grille. Do not force anything. Use it gently if a panel feels stuck. Most filters require only hand tools.
Finally, have a large pitcher or bucket. You will use this to flush the new filter. Flushing the filter is an important step. It removes air from the lines and carbon dust from the new filter. This ensures your water tastes clean. It also prevents sputtering when you first use the dispenser. Gather these items before you start. This preparation makes filter replacement simple.
Step-by-Step Guide: Changing Your Kenmore Bottom Freezer Refrigerator Water Filter
Changing the water filter on your Kenmore bottom freezer refrigerator is a straightforward process. Follow these steps carefully to ensure a smooth replacement. This guide covers the most common filter locations. Always refer to your owner’s manual for model-specific details.
Step 1: Turn Off the Water Supply (Optional but Recommended)
For most Kenmore models, you can change the filter without turning off the main water supply to the house. This is because the filter housing has a built-in shut-off valve. However, it is a good idea to turn off the water supply to the refrigerator itself. This prevents any large spills. Find the shut-off valve behind the refrigerator or under the sink. Turn the valve clockwise to close it. If you are unsure, you can also turn off your home’s main water supply. Some brands, like Samsung, often allow filter changes without this step, but for Kenmore, it adds safety. For more details on other brands, you can check Can you change Samsung refrigerator water filter without turning off water.
Step 2: Locate and Access the Old Filter
As mentioned, your filter is either inside the fresh food compartment or behind the bottom grille.
- For filters inside the fresh food compartment: Open the main refrigerator door. Look at the top right or left corner of the compartment. You will see a small, round or rectangular cover. It may have a push-button release or a small handle. Gently push the release button or pull the handle to open the cover.
- For filters behind the bottom grille: Locate the grille at the very bottom front of your refrigerator. Gently pull it outwards to remove it. Some grilles might have clips or screws. If so, unscrew them or unclip them carefully. Once the grille is off, you will see the filter housing. It usually slides out.
Place your pan or towels underneath the filter area to catch any drips.
Step 3: Remove the Old Water Filter
Now, remove the old filter. The method depends on your filter type.
- Twist-and-Lock Filters (inside compartment): Grasp the filter firmly. Turn it counter-clockwise about a quarter turn. You will feel it release. Pull the filter straight out from its housing. A small amount of water might drip out.
- Push-to-Release Filters (behind grille): If your filter has a push button, push it in. The filter will pop out a little. Pull the filter straight out. If there is no button, simply pull the filter out. It might be a little stiff if it has been in a long time.
Dispose of the old filter properly. Some parts are recyclable.
Step 4: Prepare the New Water Filter
Take the new filter out of its packaging. Remove any protective caps or covers from the ends. Many filters come with a small amount of water inside. This is normal and helps with initial flushing. Look for O-rings on the filter ends. These are important for a good seal. If they are dry, you can moisten them slightly with water.
Step 5: Install the New Water Filter
Insert the new filter into the housing.
- Twist-and-Lock Filters: Align the new filter with the housing. Push it in firmly until it stops. Then, turn it clockwise a quarter turn. You will feel it lock into place. It should be snug. Close the filter cover.
- Push-to-Release Filters: Push the new filter straight into the housing. You will feel it slide in. Push it until it clicks into place. This click means it is seated correctly. Replace the bottom grille if you removed it.
Ensure the filter is fully seated. If it is not, water can leak.
Step 6: Turn the Water Supply Back On
If you turned off the water supply, turn it back on now. Turn the valve counter-clockwise. Listen for the sound of water filling the lines. This means water is flowing back to the refrigerator.
Step 7: Flush the New Filter
This is a critical step. Dispense water from your refrigerator for several minutes. Use a large pitcher or bucket to collect the water. The first few gallons of water may appear cloudy or discolored. This is common. It is due to air in the lines and carbon dust from the new filter. Continue flushing until the water runs clear. This usually takes about 2 to 3 gallons, but some models may require more. Check your manual for the exact amount. Flushing removes air bubbles and ensures clean, clear water.
Step 8: Reset the Filter Indicator Light
After replacing the filter and flushing the system, reset the filter indicator light. The method for resetting varies by Kenmore model. Common ways include:
- Pressing and holding the “Filter” or “Reset” button on the dispenser panel for 3-5 seconds.
- Pressing a combination of buttons, like “Ice Type” and “Child Lock” simultaneously.
- Unplugging the refrigerator for a few minutes, then plugging it back in (less common for filter lights).
Your owner’s manual will have the precise instructions for resetting the light. Resetting the light ensures you are reminded for the next replacement cycle. If you face issues like leaks after changing the filter, you can troubleshoot specific problems. For common issues, you might find this guide helpful: Why is my Kenmore refrigerator leaking water from the water dispenser.
Flushing the Water System After Filter Replacement
Flushing the water system after replacing your Kenmore bottom freezer refrigerator water filter is very important. Many people skip this step. Skipping it can lead to problems. It is simple to do. It ensures your water is clean and clear from the start.
When you install a new filter, it contains a small amount of air. The filter also has loose carbon particles. These carbon particles are harmless. However, they can make your water look cloudy or grey. They can also affect the taste. Flushing pushes this air and carbon out of the water lines.
To flush the system, simply dispense water from the refrigerator’s water dispenser. Use a large container, such as a pitcher or a bucket. Do not use small cups. You need to dispense a significant amount of water. Typically, you should dispense 2 to 3 gallons. Some manuals might recommend more, up to 5 gallons.
During the flushing process, you may hear air sputtering from the dispenser. This is normal. You might also see cloudy water or small black specks. These are the carbon particles. Continue dispensing water until it runs clear. The sputtering should also stop. This indicates that all the air is out of the lines.
Flushing not only clears air and carbon but also activates the new filter. It helps to saturate the filter media. This ensures the filter works at its best capacity. Once the water runs clear and smooth, your Kenmore refrigerator is ready to provide fresh, filtered water. This small extra step protects your water quality and your appliance. It is a critical part of the filter replacement process.
Troubleshooting Common Issues After Filter Change
Sometimes, you might encounter issues after changing your Kenmore bottom freezer refrigerator water filter. Do not worry. Most problems are simple to fix. Knowing how to troubleshoot helps you quickly resolve them. I will go through common scenarios.
Water Leaks
One common problem is water leaking from the filter area. If you see leaks, first check if the filter is seated correctly. It might not be fully twisted or pushed into place. Remove the filter and reinsert it, ensuring it locks securely. Make sure the O-rings are not pinched or damaged. Sometimes, the new filter might have a faulty seal. If reinstallation does not work, you might have a defective filter. Contact the manufacturer for a replacement. For more general issues with leaks from your Kenmore dispenser, refer to Why is my Kenmore refrigerator leaking water from the water dispenser.
Slow Water Flow or No Water Dispensing
If water comes out slowly or not at all, it usually means there is air in the lines or the filter is not properly installed. First, flush the system again. Dispense several gallons of water continuously. This helps remove trapped air. If the flow remains slow, check that the filter is correctly aligned and fully inserted. A misaligned filter can restrict water flow. Also, ensure your home’s water supply to the refrigerator is fully open. If the issue persists, the new filter might be faulty or a wrong type.
Cloudy or Bad-Tasting Water
Cloudy water with small black specks is usually carbon dust from a new filter. This is normal. Continue flushing the system. Dispense more water until it runs clear. If the water tastes strange, it is also likely due to not enough flushing. Keep flushing until the taste improves. If the problem continues after flushing several gallons, the filter might be defective. Consider contacting the filter manufacturer.
Filter Indicator Light Not Resetting
After installing a new filter, you need to reset the indicator light. If the light stays on, you might be using the wrong reset method. Check your Kenmore owner’s manual for specific instructions. Most models require pressing and holding a “Filter Reset” or “Options” button for 3 to 5 seconds. If the light still does not reset, try unplugging the refrigerator for a few minutes. Then plug it back in and try the reset again. This can sometimes clear minor electronic glitches.
Always remember to check your owner’s manual first for any specific model issues. Most Kenmore bottom freezer refrigerator filter issues are simple fixes.
Maintaining Your Kenmore Refrigerator for Optimal Water Quality
Changing your Kenmore bottom freezer refrigerator water filter regularly is key. But, other maintenance tasks also contribute to optimal water quality. These tasks ensure your entire water system stays clean. They also help your refrigerator run efficiently. I perform these steps myself to keep things running smoothly.
First, keep the water dispenser nozzle clean. Over time, mineral deposits and grime can build up around the dispenser. This can affect water taste. Use a small brush and warm, soapy water to clean the nozzle. Rinse it well afterwards. This simple cleaning prevents external contaminants from entering your drinking water.
Next, periodically clean the ice maker. Ice can absorb odors from foods in the freezer. Empty the ice bin completely. Wash the bin with mild soap and water. Rinse it thoroughly before putting it back. If you have an in-door ice dispenser, make sure any chutes are clear. An article about how to clean freezer can provide more tips. This prevents stale ice or odd smells in your drinks.
It is also a good idea to clean the water lines, even if less frequently. This is typically done by running a cleaning solution designed for refrigerator water systems. Follow product instructions carefully. This can help remove any build-up that the filter does not catch. However, a properly functioning filter should prevent most issues.
Finally, keep an eye on the refrigerator’s general cleanliness. Clean under the refrigerator and around the condenser coils. Dust and debris can build up there. This makes the refrigerator work harder. It also impacts overall performance, though less directly linked to water quality. Knowing how to clean under a refrigerator can be a helpful guide. A well-maintained refrigerator works better. It provides cleaner water and lasts longer. These simple steps, combined with regular filter changes, ensure you always have the best quality water.
What is the Lifespan of a Kenmore Refrigerator Water Filter?
The lifespan of a Kenmore refrigerator water filter is typically six months. This recommendation is standard for most refrigerator water filters. It ensures you always have clean, fresh-tasting water. However, the exact lifespan can vary. It depends on several factors.
One main factor is how much water you use. If your household dispenses a lot of water and ice, the filter will reach its capacity faster. You might need to change it more often than every six months. For example, a large family will likely need more frequent changes than a single person.
Another factor is your local water quality. If your tap water has many impurities, such as high sediment or chlorine levels, the filter will work harder. It will clog more quickly. In areas with very hard water or older plumbing, you might find your filter’s efficiency drops before the six-month mark.
Most Kenmore refrigerators have a filter indicator light. This light turns on when it is time to change the filter. It is usually based on a timer or the amount of water dispensed. Pay attention to this light. Do not wait until your water tastes bad or the flow becomes slow. These are signs the filter is already past its prime. Replacing the filter at least every six months is a good habit. It ensures your water stays clean. It also protects your appliance from strain.
Replacing Your Kenmore Water Filter Without Shutting Off Water
Many Kenmore bottom freezer refrigerators feature a design that allows you to change the water filter without turning off the main water supply. This is a convenient feature. It prevents the need to go behind the refrigerator or under the sink. It makes the filter replacement process quicker.
The reason this is possible is due to an automatic shut-off valve. This valve is built into the filter housing itself. When you twist or pull out the old filter, this valve automatically closes. It stops water from flowing through the lines. This prevents leaks during the change.
To confirm if your specific Kenmore model has this feature, check your owner’s manual. Most newer models do. When you remove the old filter, you might hear a small hiss or see a tiny drip. This is normal. It is just residual water in the line.
While the automatic shut-off feature works well, always have a towel or shallow pan ready. A few drops of water can still escape. If you are unsure or nervous, you can still turn off the water supply to the refrigerator. This provides extra peace of mind. For comparison, some other brands also have this feature. You might wonder, for instance, if Can you change an LG refrigerator water filter without turning off water? The answer is often yes, for similar reasons.
This feature simplifies maintenance. It empowers you to change your filter easily and quickly.
Where to Buy Replacement Kenmore Water Filters
Finding the right replacement water filter for your Kenmore bottom freezer refrigerator is important. Many places sell them. Knowing where to look ensures you get a compatible and reliable filter. There are several good options for purchasing.
First, check with Sears PartsDirect or the official Kenmore website. Kenmore is a brand of Sears. Their official parts store will have genuine Kenmore filters. You can search by your refrigerator model number. This is often the safest bet for compatibility. Genuine filters ensure the best fit and performance.
Second, major appliance retailers like Lowe’s, Home Depot, or Best Buy often carry Kenmore replacement filters. They have a variety of brands. Make sure to match the filter model number. You can ask sales associates for help finding the correct one. These stores are good if you prefer to buy in person.
Third, online marketplaces are a popular choice. Websites like Amazon, eBay, and Walmart.com offer many options. Be careful when buying from third-party sellers. Always verify the seller’s reputation. Read customer reviews. Check that the filter is explicitly listed as compatible with your Kenmore model. Many generic filters are available. They claim to fit Kenmore refrigerators. Some generic filters work fine and save money. However, check their certifications. Look for NSF certification. This means the filter meets public health standards.
Finally, some local hardware stores might stock common Kenmore filters. It depends on their inventory. Always compare prices and read reviews before buying. Ensure the filter is certified to reduce the contaminants you want. Buying from a reputable source ensures you get a quality product. It also protects your refrigerator’s water system.
Understanding Kenmore Filter Indicator Lights
Your Kenmore bottom freezer refrigerator has a smart way to tell you when it needs a new water filter. This is the filter indicator light. Understanding what it means helps you keep your water clean. It also ensures you change the filter on time.
The filter indicator light is usually on the dispenser panel. It might be a small LED light. It often changes color. A common setup is a green light when the filter is new and working well. As the filter gets older, the light might turn yellow or orange. This means the filter is nearing the end of its life. It is time to order a new one.
When the light turns red, it means you need to change the filter now. At this point, the filter is likely less effective. It is probably no longer removing impurities efficiently. The light is usually programmed to turn red after six months of use or after a certain amount of water has been dispensed. This is typically about 200 gallons.
Some Kenmore models do not have color-changing lights. Instead, they might have a single light that simply turns on. Or, they might have a “Replace Filter” message on the display. Always check your specific model’s manual for details. It explains how your filter indicator works.
After you replace the filter, you must reset the indicator light. If you do not reset it, the light will remain on. It will not remind you for the next change. Resetting is usually a simple button press. Your manual provides the exact steps. Paying attention to this light makes filter maintenance easy. It takes the guesswork out of knowing when to act.
Conclusion
Changing the water filter on your Kenmore bottom freezer refrigerator is a vital maintenance task. It ensures your family always enjoys clean, fresh-tasting water and ice. This simple act also helps extend the life and efficiency of your appliance. I have personally found that staying on top of this task prevents many common issues.
By following the steps outlined in this guide, you can confidently replace your filter yourself. You now know how to locate the filter, gather the right tools, and perform the installation. Remember to always flush the new filter thoroughly. This removes air and carbon dust. Also, do not forget to reset the filter indicator light. This simple process keeps your refrigerator running smoothly. It maintains excellent water quality.
Regular filter changes protect your health. They also safeguard your Kenmore refrigerator’s water system. Make it a habit to replace your filter every six months, or when the indicator light tells you to. This proactive approach saves you from potential problems and ensures continuous access to purified water. Take control of your home’s water quality today. Get your replacement filter and change it now.
- Kenmore refrigerator
- water filter replacement
- bottom freezer

Todd Martin
Senior Writer
With over 15 years of experience in home renovation and design, I started HEG to share what I’ve learned with homeowners who want to create spaces that are both beautiful and functional. I’ve always believed in a hands-on approach, and over the years, I’ve picked up practical solutions that actually work. Through HEG, I aim to make home improvement more approachable, sharing real tips that help you create a home you truly love.