
· Todd Martin · Home Maintenance · 11 min read
How To Clean 3d Print Bed
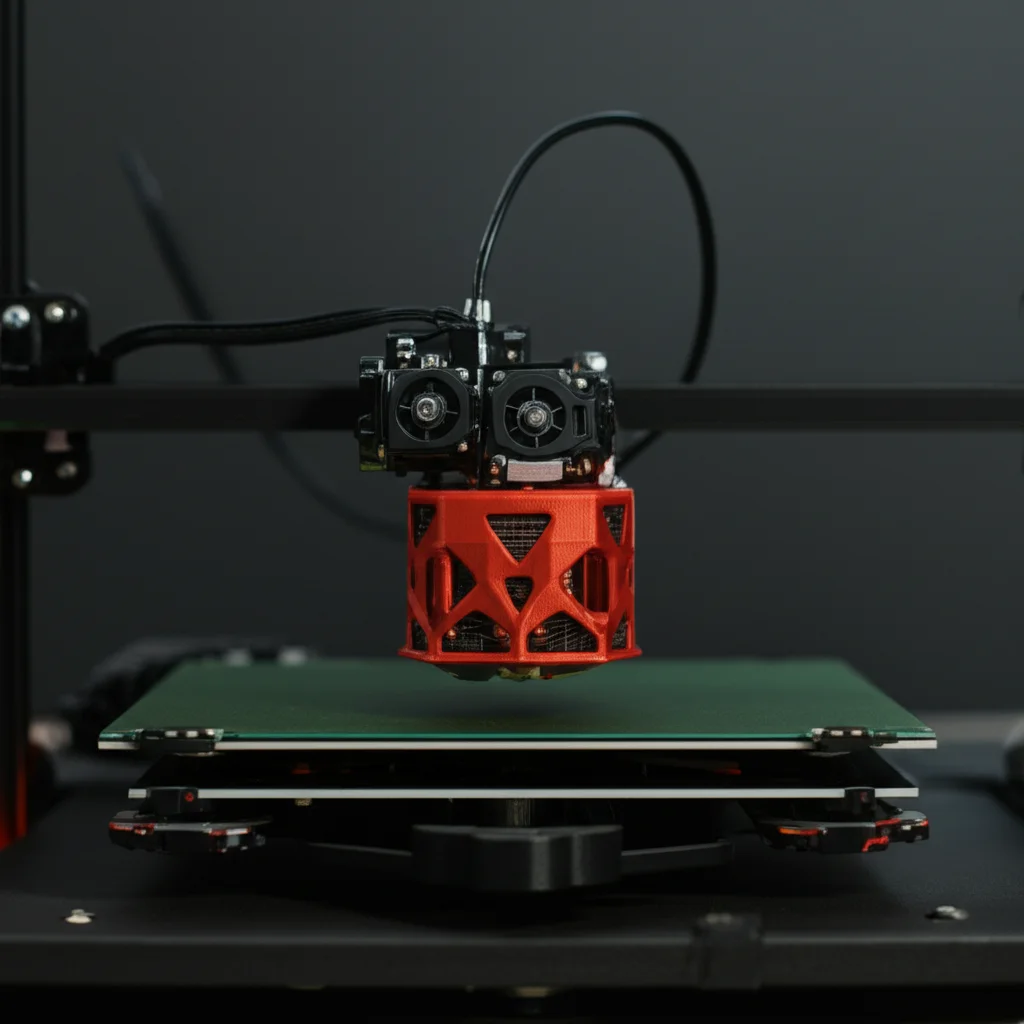
Achieve Perfect First Layers: How To Clean Your 3D Print Bed
Ever wondered why your 3D prints sometimes fail right at the start? Often, the problem traces back to a dirty print bed. A clean surface is truly the secret to perfect first layer adhesion. I have seen many good prints ruined simply because the bed was not prepared. This guide will show you exactly how to clean your 3D print bed. We will discuss different bed materials, essential tools, and both routine and deep cleaning methods. You will also learn about common challenges, maintenance, and safety tips. Get ready to improve your 3D printing success.
Takeaway
- Always clean your 3D print bed regularly for good first layer adhesion.
- Match your cleaning method to your specific bed material.
- Isopropyl alcohol (IPA) works best for routine cleaning on most surfaces.
- Acetone safely removes stubborn ABS or ASA residue from glass beds.
- Ensure your print bed is completely cool before starting any cleaning process.
To effectively clean your 3D print bed, first, ensure it is cool. Then, wipe it down with isopropyl alcohol for routine maintenance. For tougher residues, consider specific cleaning agents like soap and water, or acetone for glass beds with ABS or ASA grime. This process ensures good first layer adhesion.
Understanding Your 3D Print Bed Materials
Knowing your 3D print bed material is the first step to proper cleaning. Different surfaces react differently to various cleaning agents. Using the wrong cleaner can damage your bed or reduce its adhesion properties. Understanding your bed type helps you choose safe and effective methods. This knowledge ensures a long life for your print surface.
Glass Print Beds
Glass print beds are popular due to their flatness and excellent adhesion properties with certain coatings. These beds typically consist of borosilicate glass or tempered glass. They offer a smooth, even surface for your prints. Residue from PLA, ABS, or PETG can build up over time. This makes proper cleaning crucial for consistent first layers.
PEI Sheets (Smooth and Textured)
PEI (Polyetherimide) sheets are common build surfaces, available in smooth or textured finishes. Smooth PEI offers a glossy bottom layer for prints. Textured PEI creates a matte finish with a distinctive texture. These sheets provide great adhesion for many filaments. They require specific care to maintain their surface integrity. Improper cleaning can damage the PEI and reduce its stickiness.
Flexible Build Plates (Spring Steel, Magnetic)
Flexible build plates, often made from spring steel, are very convenient. They usually have a PEI or similar coating. You can easily remove prints by flexing the plate. These plates attach to a magnetic base on your printer. Their flexibility makes print removal simple. Cleaning these surfaces is similar to cleaning PEI sheets, but you can remove them from the printer for easier washing.
Other Surfaces (BuildTak, Garolite)
Some printers use specialized surfaces like BuildTak or Garolite. BuildTak is a textured adhesive sheet that offers strong adhesion. Garolite, often used for nylon, has a fibrous texture. These surfaces have specific cleaning requirements. Always check the manufacturer’s recommendations for these less common materials. Using the wrong cleaner can ruin these specialized surfaces.
Essential Tools for Cleaning Your 3D Print Bed
Having the right tools makes cleaning your 3D print bed simple and effective. You do not need many specialized items, but the right ones make a difference. Using inappropriate tools can scratch your bed or leave behind residues. I always keep these basic supplies nearby my printer. Preparing your cleaning station saves time and effort.
Basic Supplies
You will need a few basic items for routine cleaning. Isopropyl alcohol (IPA) is your primary cleaner for most surfaces. Use lint-free cloths or paper towels to wipe the bed. A plastic scraper is useful for removing stubborn bits of filament. Ensure your scraper has no sharp edges that could damage the print surface. A soft brush can help clear away loose debris.
- Isopropyl Alcohol (IPA): Look for 70% or higher concentration. This evaporates quickly and leaves no residue. It dissolves common filament residues like PLA and PETG.
- Lint-Free Cloths or Microfiber Towels: These prevent fibers from sticking to your clean bed. Paper towels can work but sometimes leave tiny bits.
- Plastic Scraper or Spatula: Use this to gently push off stuck filament. Avoid metal scrapers on delicate surfaces.
- Soft Brush: A small paintbrush or detailing brush helps sweep away dust and small debris.
Specialized Cleaners
For some materials and tougher messes, you might need more specialized cleaners. Acetone is excellent for cleaning glass beds when printing with ABS or ASA. It dissolves these specific plastic types effectively. For other surfaces, mild dish soap and water can be a gentle, safe option. Always test specialized cleaners in a small, hidden area first.
- Acetone (Pure): This solvent is highly effective for ABS and ASA residue on glass. Always use pure acetone, not nail polish remover with additives. Remember to use it in a well-ventilated area.
- Mild Dish Soap and Warm Water: For a general wash, mild soap and water can remove greasy fingerprints and light residue. It works well on most surfaces when used sparingly. This method is effective for a general clean, similar to how you would clean a shower with vinegar.
- Bed Adhesion Sprays/Solutions: Some users apply adhesion aids like hairspray or glue stick. These also need removal during cleaning. They leave sticky residue that must be cleaned off.
Routine Cleaning for Optimal Print Adhesion
Routine cleaning is critical for consistent 3D print results. It prevents the buildup of oils, dust, and filament residues that cause print failures. A quick clean between prints or at the start of a print session maintains ideal adhesion. This simple habit makes a big difference in print quality. I clean my bed almost every time I start a new print.
IPA Wipes and Sprays
Isopropyl alcohol (IPA) is the go-to solution for everyday print bed cleaning. It effectively dissolves most filament residues, oils from fingerprints, and dust. Using IPA is fast and leaves no residue after it evaporates. This makes it perfect for quick wipes between prints or before a new project. I always keep a spray bottle of IPA handy.
- Ensure Bed is Cool: Never clean a hot bed with IPA. It can evaporate too quickly or cause thermal shock. Wait until the bed temperature is at room temperature.
- Spray or Apply IPA: Lightly spray 70% or 90%+ IPA directly onto the print surface. You can also dampen a lint-free cloth with IPA.
- Wipe Thoroughly: Use a clean, lint-free cloth to wipe the entire surface. Wipe in one direction to push contaminants off the bed. Repeat with a fresh side of the cloth until clean.
- Allow to Dry: Let the IPA evaporate completely before starting a print. This takes only a few seconds.
For glass beds, IPA is particularly effective. It cleans without leaving streaks. This ensures clarity and proper adhesion. Achieving a spotless glass surface is similar to how to clean glass without streaks in other applications, focusing on proper wiping technique.
Gentle Soap and Water Wash
Sometimes, IPA alone is not enough to remove all contaminants. Greasy fingerprints or stubborn sugary residues from certain filaments might need more. A gentle wash with dish soap and warm water can be very effective. This method safely cleans most bed surfaces, including glass and PEI. Always remove the bed from the printer before washing it.
- Remove the Build Plate: Unclip or unmagnetize your build plate from the printer. This prevents water from getting into electronics.
- Wash with Mild Soap: Use a small amount of mild dish soap and warm water. Gently scrub the surface with a soft sponge or cloth. Focus on areas with visible grime or oil. This method is effective for removing general residues, much like how you might clean a dirty shower with baking soda and mild soap.
- Rinse Thoroughly: Rinse the plate under running warm water. Make sure to remove all soap residue. Soap film can cause adhesion problems.
- Dry Completely: Dry the bed with a clean, lint-free cloth. You can also let it air dry completely. Ensure no water spots or moisture remain before putting it back on the printer.
Deep Cleaning Techniques for Stubborn Residue
Routine cleaning handles most messes, but sometimes you face truly stubborn residue. These tough spots can ruin print adhesion and quality. Deep cleaning methods target these persistent issues. They require more effort and specific chemicals. Always use caution and follow safety guidelines for these advanced cleaning steps. I only use these methods when basic cleaning fails.
Acetone for Specific Filaments
Acetone is a powerful solvent. It is highly effective for dissolving ABS and ASA filament residue on glass print beds. These plastics often leave a very strong bond or residue. Acetone breaks down these polymers, making cleanup easy. Crucially, never use acetone on PEI sheets or other coated surfaces. It will damage them beyond repair.
- Verify Bed Material: Confirm your bed is glass. Acetone will ruin PEI, BuildTak, and most other plastic-based surfaces.
- Ensure Ventilation: Acetone fumes are strong. Work in a well-ventilated area. Open windows or use a fan.
- Apply Acetone: Dampen a clean, lint-free cloth with pure acetone. Do not use nail polish remover, as it contains additives.
- Wipe Stubborn Areas: Gently wipe the areas with stuck ABS or ASA residue. The plastic will soften and dissolve quickly.
- Clean Residue: Use a fresh part of the cloth to wipe away the dissolved plastic. Repeat as needed until the glass is clear. When removing stubborn marks, it can feel similar to trying to clean wax off glass surfaces – patience and the right solvent are key.
- Final IPA Wipe: After acetone, give the glass bed a final wipe with IPA. This removes any acetone residue and ensures a perfectly clean surface.
Scrapers and Razors (Carefully!)
For extremely stuck prints or hardened filament blobs, a scraper can be necessary. Always use a plastic scraper first. Metal razor blades are a last resort and require extreme caution. They can scratch or damage the print bed surface if not used properly. I only use a razor blade if a print is absolutely fused to the bed.
- Allow Bed to Cool: Always let the bed cool down completely. This reduces the bond of the plastic and makes removal easier.
- Plastic Scraper: Use a sturdy plastic scraper with a wide, flat edge. Position it at a low angle to the bed. Gently push under the stuck filament. Apply steady, even pressure.
- Razor Blade (Glass Beds Only, Extreme Caution): For glass beds with exceptionally stubborn, flat residue, you can use a single-edge razor blade. Hold the blade almost flat against the glass, at a very shallow angle. Slowly and carefully slide it under the residue. Avoid digging into the glass. This method is only for glass and requires a very light touch. It is like carefully removing stains from wood where you are working with a hard surface but trying not to damage it.
- Clean Debris: After scraping, wipe away all loosened filament pieces. Follow up with an IPA wipe to remove any remaining residue or dust.
Isopropyl Alcohol Baths
For flexible PEI sheets that have heavy, widespread residue or a waxy feel, a full IPA bath can revitalize the surface. This is a more thorough cleaning than just wiping. It helps to deep clean the micro-textures of the PEI. Only do this if your PEI sheet is removable and you can submerge it safely.
- Remove PEI Sheet: Detach the PEI sheet from your printer’s magnetic base or clips.
- Prepare Bath: Find a shallow tray or container larger than your PEI sheet. Pour enough 90%+ IPA to submerge the sheet.
- Soak: Place the PEI sheet into the IPA bath. Let it soak for 5-10 minutes. The IPA will work to loosen and dissolve accumulated oils and filament residues.
- Scrub and Rinse: While still submerged, gently scrub the surface with a soft brush or sponge. This helps dislodge stubborn material. Remove the sheet and rinse it under warm water.
- Dry Completely: Dry with a clean, lint-free cloth or air dry completely. Ensure no IPA or water spots remain before returning to the printer.
Troubleshooting Common Print Bed Cleaning Challenges
Even with the best cleaning practices, you might encounter specific challenges. Prints might not stick well after cleaning, or you might worry about damaging your bed. Knowing how to troubleshoot these issues keeps your printing smooth. I have faced these problems myself and learned how to solve them. Understanding these challenges helps you keep your 3D printer running efficiently.
Filament Adhesion Issues After Cleaning
Sometimes, you clean your bed, but prints still fail to stick. This can be frustrating. The issue might not be dirt, but something else. It is important to check other factors. A perfectly clean bed can still have problems if other settings are wrong.
- Residual Films: Even if it looks clean, an invisible film might remain. This could be from poor quality IPA, soap residue, or even a previous adhesion aid. Try another IPA wipe or a full soap and water wash.
- Worn Surface: Over time, PEI sheets can degrade, losing their texture or coating. Glass can develop micro-scratches
- 3D printer maintenance
- print bed cleaning
- first layer adhesion
- PLA residue
- build plate
- print quality
- 3D printing tips

Todd Martin
Senior Writer
With over 15 years of experience in home renovation and design, I started HEG to share what I’ve learned with homeowners who want to create spaces that are both beautiful and functional. I’ve always believed in a hands-on approach, and over the years, I’ve picked up practical solutions that actually work. Through HEG, I aim to make home improvement more approachable, sharing real tips that help you create a home you truly love.


