· Todd Martin · Home Cleaning · 18 min read
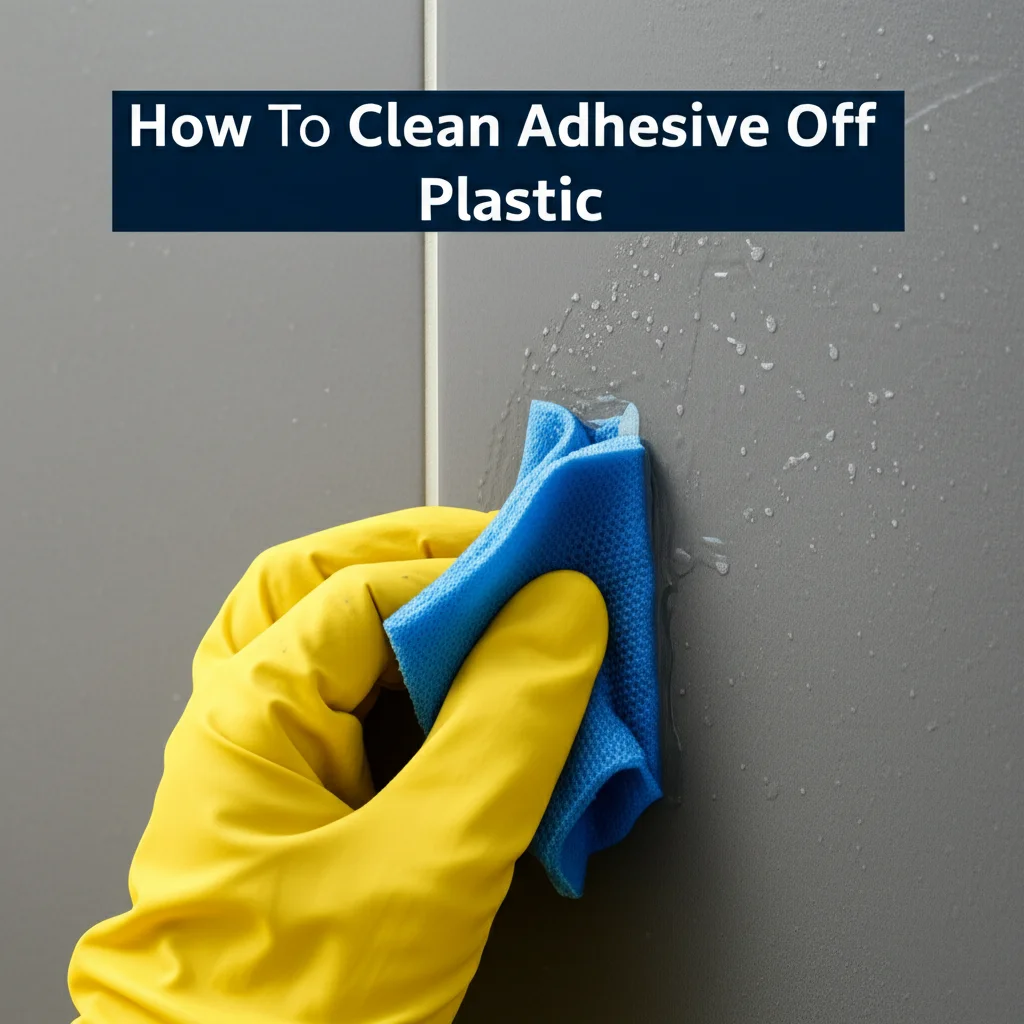
How To Clean Adhesive Off Plastic

Easily Clean Adhesive Off Plastic Surfaces
Sticky residue on plastic is a common problem. It appears from old stickers, tape, or labels. This adhesive makes plastic surfaces feel rough and look unsightly. You want to remove this sticky mess without damaging the plastic.
I often face this issue myself with plastic storage bins or toy parts. Getting adhesive off plastic requires the right approach. This article will show you simple, effective methods. We cover household items and commercial products. You will learn how to clean adhesive off plastic safely and completely.
Takeaway
- Test any cleaning solution on a hidden area of the plastic first.
- Start with gentler methods like rubbing alcohol or oil.
- Use a plastic scraper or old credit card for stubborn bits.
- Always clean the area with soap and water after adhesive removal.
Cleaning adhesive off plastic involves choosing the right solvent or mechanical method for the specific type of adhesive and plastic. Start with gentle options like rubbing alcohol or oil. Apply a small amount, let it sit, then gently rub and scrape the residue away without damaging the surface.
Understanding Adhesive Types and Plastic Surfaces
Not all adhesives are the same. Different glues and sticky residues need different cleaning methods. Knowing what kind of adhesive you are dealing with helps choose the best remover. Common adhesives include sticker glue, tape residue, or super glue.
Plastic surfaces also vary widely. Some plastics are tough, like PVC pipes. Others are delicate, such as clear acrylic or certain electronic casings. Using the wrong cleaner can harm your plastic. It might cause discoloration, cloudiness, or even melting. Always check the plastic type if possible.
Common Adhesive Types
You find various adhesives in your home. Each has different properties. Sticker residue often comes from paper labels. This type is usually water-soluble or oil-soluble. Tape residue, like from masking tape or packing tape, can be very stubborn. It leaves a gummy film.
Super glue, or cyanoacrylate adhesive, bonds quickly and strongly. It needs a different approach than regular sticker residue. Epoxy glues are two-part adhesives that create a very strong bond. They are often difficult to remove once cured. Understanding these differences helps you pick the right cleaning method.
Identifying Plastic Types
Many different plastics exist. Each reacts uniquely to chemicals. Polyethylene (PE) and polypropylene (PP) are common for containers. They are usually quite resistant. Acrylic and polycarbonate are clear plastics, like those in phone cases or shower walls. These can easily scratch or cloud with strong solvents.
Styrofoam is a very delicate plastic. It reacts poorly to many solvents. PVC is strong and common in pipes and outdoor furniture. Always check for a recycling symbol on your plastic item. This symbol often includes letters that tell you the plastic type. This information helps you choose a safe cleaning agent. Remember to test any cleaner in an inconspicuous spot before applying it to the entire surface. This small step protects your plastic from harm.
Safe Household Solvents for Adhesive Removal
Many common household items can effectively remove adhesive. These options are usually safe for plastic and gentle on your hands. They are also readily available. You likely already have them in your pantry or medicine cabinet.
Starting with these gentle solutions is a good first step. If one does not work, you can try another. Always test a small, hidden area of the plastic first. This ensures the cleaner will not cause damage or discoloration. Safety is key when working with any cleaning agent.
Rubbing Alcohol (Isopropyl Alcohol)
Rubbing alcohol is a fantastic general-purpose cleaner. It dissolves many types of adhesive residue. Most plastics are safe with isopropyl alcohol. I often use it for sticker residue on plastic toys. It works well on old tape marks too.
Apply a small amount of rubbing alcohol to a clean cloth. Gently rub the sticky area. For stubborn residue, let the alcohol sit on the adhesive for a few minutes. Then, gently scrape with a plastic scraper or an old credit card. Finish by wiping the area clean with a damp cloth and drying. You can also use rubbing alcohol to clean a clear plastic phone case or clean sharpie off plastic.
Vinegar and Baking Soda Paste
Vinegar is a mild acid, useful for some adhesives. Baking soda is a gentle abrasive. Together, they form a powerful, natural cleaner. This combination is great for general cleaning tasks around the house. It’s especially useful for removing stubborn glue on plastic.
Mix equal parts baking soda and white vinegar to create a paste. Apply this paste directly to the adhesive. Let it sit for 15-30 minutes. The paste helps to loosen the adhesive. Then, gently scrub with a soft brush or a cloth. Rinse the area thoroughly with water. You can find more tips on how to clean with vinegar and baking soda for other cleaning tasks.
Cooking Oils (Olive Oil, Vegetable Oil)
Oils are surprisingly effective at breaking down adhesive. The oils in cooking products often loosen the bond. This method is very gentle on plastic surfaces. It also leaves no harsh chemical smell. This is a good choice for delicate plastics.
Dab a small amount of olive oil or vegetable oil onto the adhesive. Let the oil soak into the residue for a few minutes. You can also use a cotton ball soaked in oil. The adhesive will start to soften. Then, gently rub it away with a soft cloth. Repeat the process if needed. After removal, clean the area with dish soap and water to remove any oily residue.
Peanut Butter
Peanut butter works similarly to cooking oils. The natural oils in peanut butter help break down the adhesive bond. Its slightly abrasive texture also assists in lifting the residue. This method is safe for most plastics.
Apply a generous dollop of peanut butter directly onto the adhesive. Let it sit for about 10-15 minutes. The oils will start to work on the sticky mess. Then, use a soft cloth or paper towel to rub the adhesive away. Wipe the surface clean with a damp cloth. Wash the area with soap and water to remove any peanut butter residue.
Commercial Products for Stubborn Residue
When household methods do not work, commercial adhesive removers are an option. These products are formulated to tackle tough glue and sticky messes. They are usually more potent than natural remedies. Always read the product instructions carefully before use.
Commercial removers often contain stronger chemicals. This means you must take extra precautions. Ensure good ventilation when using them. Wear gloves to protect your skin. Test these products on a hidden spot first. This helps prevent damage to your plastic.
Goo Gone and Other Citrus-Based Cleaners
Goo Gone is a popular choice for adhesive removal. It contains citrus oils that dissolve many sticky substances. Other citrus-based cleaners work similarly. They are often effective on sticker residue, crayon marks, and tape goo. These cleaners usually have a pleasant citrus scent.
Apply Goo Gone directly to the adhesive. Allow it to sit for a few minutes to penetrate the glue. The waiting time helps it break down the sticky bond. Then, gently wipe away the residue with a clean cloth. For thick layers of adhesive, you might need to repeat the process. Always rinse the area with soap and water afterward to remove any oily film.
Acetone-Free Nail Polish Remover
Nail polish remover that is acetone-free can be effective. Acetone itself is too strong for most plastics. It can melt or discolor them. However, acetone-free versions use different solvents. These solvents might be safe for some plastics. They work on certain types of super glue and other tough adhesives.
Always check the label to ensure it is acetone-free. Test it on an inconspicuous area first. Apply a small amount to a cotton swab. Dab it onto the adhesive. Gently rub the area. If the adhesive starts to soften, continue. Wipe away the residue. Clean the plastic thoroughly with soap and water after the adhesive is gone.
Denatured Alcohol
Denatured alcohol is a stronger solvent than rubbing alcohol. It is ethanol mixed with other chemicals to make it undrinkable. This makes it effective against tougher adhesives. However, it can be harsher on some plastics. Use it with caution.
Apply denatured alcohol to a clean rag. Work in a well-ventilated area. Rub the adhesive gently. Do not let it sit on the plastic for too long. If the adhesive is very thick, you may need multiple applications. Always test on a hidden area of the plastic first. Finish by washing the area with soap and water.
Mechanical Methods for Adhesive Scraping
Sometimes, a solvent alone is not enough. You might need to use a mechanical method to scrape off adhesive. This involves physically removing the sticky substance. It is crucial to use the right tools to avoid scratching or damaging the plastic surface. Gentle and patient scraping is key here.
Always combine mechanical methods with a softening agent. Applying a solvent first makes the adhesive easier to scrape. This also reduces the risk of scratching the plastic. Work slowly and carefully. Do not rush the process.
Using a Plastic Scraper or Old Credit Card
A plastic scraper is an ideal tool for this job. It is firm enough to lift adhesive but soft enough not to scratch most plastics. An old credit card or a plastic spatula also works well. These tools are readily available and safe for many surfaces. I often use a defunct store loyalty card for this purpose.
First, apply your chosen solvent to the adhesive. Let it sit for a few minutes to soften the glue. Then, hold the plastic scraper at a low angle. Gently push and scrape the adhesive away. Work slowly in one direction. Wipe away the lifted residue as you go. Be careful not to press too hard.
Soft Cloth or Microfiber Towel
For less stubborn adhesive, a soft cloth or microfiber towel can be enough. The texture of these cloths helps to grip and lift the residue. They are also non-abrasive, which protects your plastic. This method is best for freshly applied adhesive or light residue.
Dampen the cloth with a suitable solvent. Gently rub the adhesive in small circular motions. Apply light pressure. The friction combined with the solvent helps to roll the adhesive off the surface. As the residue transfers to the cloth, use a clean section of the cloth. This prevents spreading the glue around. This method is also great for cleaning plastic shower walls gently.
Heat Application (Hair Dryer)
Heat can soften many types of adhesive, making them easier to remove. A hair dryer is a safe way to apply controlled heat. The warmth makes the glue more pliable. This allows you to peel it off or scrape it more easily. This method is particularly useful for stubborn stickers or tape.
Set your hair dryer to a low or medium heat setting. Hold it a few inches away from the adhesive. Move the dryer back and forth over the sticky area. Heat the adhesive for about 30 seconds to a minute. Do not overheat the plastic. Once the adhesive feels warm and soft, try to peel it off with your fingers or gently scrape it with a plastic scraper.
Preventing Adhesive Damage to Plastic
Removing adhesive is one thing, but preventing damage is another. You want your plastic items to look new after cleaning. Taking precautions saves you time and frustration. It also protects your belongings. Always be mindful of the plastic type and the cleaning agent you use.
Proper preparation and testing are key. These steps minimize risks. They ensure a successful cleaning process. A little patience goes a long way. Do not rush the removal process.
Test in an Inconspicuous Area
This is the most important rule. Before applying any cleaner to the main surface, test it. Choose a small, hidden spot on the plastic item. An underside or back surface works well. Apply a tiny amount of your chosen cleaner.
Wait a few minutes. Check for any discoloration, cloudiness, or softening of the plastic. If there is no negative reaction, the cleaner is likely safe to use. If you see any change, choose a different method. This simple step prevents irreversible damage.
Avoid Abrasive Tools and Harsh Chemicals
Rough scrubbers or metal scrapers can scratch plastic easily. Steel wool or abrasive sponges will leave permanent marks. Avoid these tools at all costs. Stick to plastic scrapers, old credit cards, or soft cloths.
Harsh chemicals like acetone or paint thinner can dissolve or cloud many plastics. They can also strip away finishes. Always verify the safety of a chemical for your specific plastic. When in doubt, choose a gentler, more natural option.
Clean and Condition After Removal
After successfully removing the adhesive, clean the plastic thoroughly. Use warm water and a small amount of dish soap. This removes any leftover residue from the adhesive or the cleaning agent. Rinse well and dry with a clean, soft cloth.
For some plastics, especially clear ones, you might want to apply a plastic polish or conditioner. This can help restore shine. It also helps to prevent future stickiness. Some products can even fill minor scratches. Always follow the product’s instructions for conditioning plastic.
Advanced Tips for Tricky Adhesive Situations
Some adhesive removal tasks are more challenging. Very old, dried adhesive can be tough. Super glue or specific industrial adhesives also pose difficulties. These situations demand a bit more patience and specialized techniques.
Do not give up if the first few methods fail. There are advanced tips that can help. Sometimes, combining methods works best. Remember to prioritize safety and plastic protection. A persistent but gentle approach often yields the best results.
Dealing with Dried or Old Adhesive
Dried adhesive can be brittle or rock-hard. Simply rubbing it will not work. You need to rehydrate or soften it. A longer soaking time with your chosen solvent is often necessary. Cover the solvent-soaked area with plastic wrap to prevent evaporation. This keeps the adhesive wet for longer.
Leave it covered for several hours, or even overnight. This extended contact helps the solvent penetrate the dried glue. After soaking, try scraping again with a plastic tool. You might also try using a bit of a scrubbing motion with a soft cloth. Persistence is key for old, stubborn residue. For general persistent stains, see how to clean glue off plastic with various methods.
Removing Super Glue from Plastic
Super glue (cyanoacrylate) is particularly tricky. Acetone is the common remover for super glue, but it can damage most plastics. You need to be extremely careful. Test acetone-free nail polish remover first. If it is safe for your plastic, dab a very small amount onto the super glue.
Let it sit for a few seconds. The glue should start to soften. Gently scrape with a plastic tool. If this does not work, try carefully applying mineral spirits or lacquer thinner, but only after testing on a hidden spot. These are stronger solvents. Work in a well-ventilated area. Always rinse thoroughly with water afterwards.
Using Specialist Adhesive Removers
For truly difficult adhesives, consider specialist removers. These are found at hardware stores. They are designed for specific types of tough glues or resins. Examples include specialty removers for epoxy or construction adhesives. Read the product label carefully. It will specify what types of glue it removes and which surfaces it is safe for.
Follow all instructions regarding application, dwell time, and safety. These products are potent. They may require specific ventilation or protective gear. Always do a small patch test. These removers are a last resort when other methods fail.
Safety First: Protecting Yourself and Your Plastic
When cleaning adhesive off plastic, safety is paramount. You are working with chemicals, even mild household ones. Protecting your skin and breathing easy is important. Also, you want to protect the plastic item itself from damage.
Careful preparation and adherence to safety guidelines prevent accidents. A little caution goes a long way. Always think about ventilation and protective gear. Your well-being and the integrity of your plastic are worth the extra effort.
Ventilation is Crucial
Working in a well-ventilated area is very important. Many cleaning solutions, even mild ones, release fumes. Inhaling these fumes can cause dizziness or headaches. Stronger solvents can be harmful to your respiratory system.
Open windows and doors to allow fresh air to circulate. If working indoors, consider using a fan to direct fumes away from you. For very strong chemicals, working outdoors is the best option. Good airflow helps disperse any chemical odors quickly.
Wear Protective Gear
Protect your hands and eyes from chemical exposure. Disposable gloves are a good idea when using any cleaning solution. This prevents skin irritation. Regular cleaning gloves also work.
Safety glasses or goggles protect your eyes from splashes. Even a small splash can cause irritation. If you are dealing with very strong fumes, consider wearing a respirator mask. This provides an extra layer of protection for your lungs.
Patch Test Every Time
I cannot stress this enough: always perform a patch test. This means applying a small amount of the cleaner to an inconspicuous area of the plastic. This could be the underside or a hidden corner. Wait a few minutes.
Check for any adverse reactions. Look for discoloration, cloudiness, or softening of the plastic. If the plastic shows any negative effects, do not use that cleaner. Switch to a milder option. This simple step prevents permanent damage to your item. This step is critical for methods like how to clean plastic windows on a boat.
Proper Disposal of Materials
After cleaning, dispose of any used cloths or leftover solutions properly. Do not simply pour chemicals down the drain. Some solvents can harm plumbing or the environment. Check local regulations for chemical disposal.
Used cloths soaked in solvents might be flammable. Allow them to air dry completely outdoors before disposal. For larger quantities of chemical waste, contact your local waste management facility. They can advise on safe disposal methods.
Frequently Asked Questions
What household item removes sticky residue from plastic?
Many common household items effectively remove sticky residue from plastic. Rubbing alcohol is a top choice, dissolving many adhesives without harming most plastics. Cooking oils like olive or vegetable oil work well by breaking down the glue’s bond. Peanut butter also works due to its natural oils. White vinegar mixed with baking soda can create a paste for scrubbing.
Can rubbing alcohol damage plastic?
Rubbing alcohol (isopropyl alcohol) is generally safe for most common plastics, especially polyethylene (PE) and polypropylene (PP). However, it can potentially cloud or crack more delicate plastics like acrylic or polycarbonate if left on for too long or used excessively. Always perform a small patch test on a hidden area of the plastic first to ensure compatibility and prevent damage.
How do you remove old sticker residue from plastic?
To remove old, dried sticker residue from plastic, start by applying a generous amount of rubbing alcohol or a citrus-based cleaner like Goo Gone. Let it soak into the residue for several minutes to rehydrate and soften the glue. Then, gently scrape it away with a plastic scraper, an old credit card, or a soft cloth. Repeat the process if necessary for stubborn bits.
Are natural methods effective for adhesive removal?
Yes, natural methods can be very effective for adhesive removal. Cooking oils, such as olive or vegetable oil, work by lubricating the adhesive and breaking its bond. White vinegar, often combined with baking soda as a paste, can help loosen sticky residue. These methods are generally safer for delicate plastics and produce fewer fumes, making them good first choices for many cleaning tasks.
What removes super glue off plastic without damage?
Removing super glue from plastic without damage is tricky because many super glue removers contain acetone, which harms most plastics. First, try non-acetone nail polish remover on a hidden spot. If safe, dab it on the glue, let it sit briefly, then gently scrape. For some plastics, mineral spirits or denatured alcohol might work, but extreme caution and thorough testing are essential.
What should I do if the plastic becomes cloudy after cleaning?
If plastic becomes cloudy after cleaning, it often means the solvent used was too strong or the plastic was damaged. To fix it, clean the area with dish soap and water. For minor cloudiness, a plastic polish or a fine automotive rubbing compound can sometimes restore clarity. Apply with a soft cloth and buff gently. For severe clouding, the damage might be permanent, requiring replacement.
Conclusion
Cleaning adhesive off plastic does not have to be a frustrating chore. By understanding the different types of adhesives and plastics, you can choose the right approach. We explored a range of effective methods, from everyday household items like rubbing alcohol and cooking oils to specialized commercial products. Remember that gentle techniques and patience are key for successful removal.
Always prioritize safety by testing cleaning solutions on a hidden area. Use protective gear and ensure good ventilation. Whether you are tackling sticky residue from labels, tape, or even tough super glue, these tips will help you restore your plastic items. With the right tools and knowledge, you can confidently clean adhesive off plastic, leaving your surfaces smooth and clean. Try out these methods on your next sticky challenge.
- plastic cleaning
- adhesive removal
- sticky residue
- glue remover
- home hacks


