· Todd Martin · Automotive Maintenance · 16 min read
How To Clean Aem Air Filter
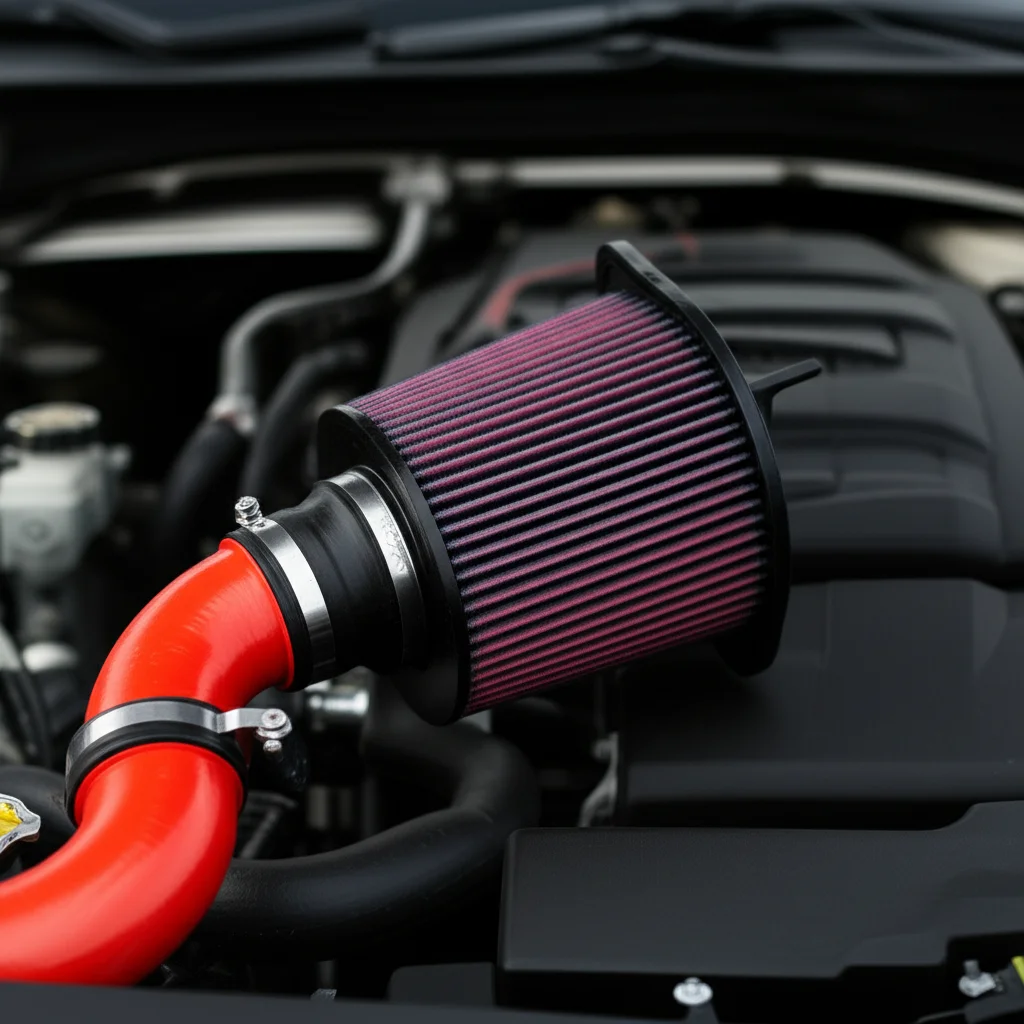
Revitalize Your Ride: How To Clean AEM Air Filter
Is your car feeling a bit sluggish? Is your engine not breathing as freely as it once did? A dirty air filter might be the culprit. Specifically, if you own an AEM air filter, understanding its maintenance is key to unlocking your vehicle’s full potential. These performance filters are designed to last, but they require periodic cleaning to maintain peak efficiency and protect your engine from harmful contaminants.
Cleaning your AEM air filter is a simple task. It restores airflow, improves fuel economy, and extends the life of your engine. This guide will walk you through everything you need to know. We will cover the specific tools you need, the step-by-step process for both Dryflow and oiled filters, and important tips to avoid common mistakes. Get ready to give your car a breath of fresh air and boost its performance.
Takeaway:
- Regularly clean your AEM air filter to maintain engine performance and fuel efficiency.
- Identify your AEM filter type (Dryflow or oiled) to use the correct cleaning kit.
- Follow specific drying and, if applicable, re-oiling instructions for best results.
- Avoid harsh chemicals or high-pressure water that can damage the filter media.
To clean an AEM air filter, first determine if it is a Dryflow (dry) or oiled filter. Use the appropriate AEM filter cleaning kit; Dryflow filters require only a cleaner, while oiled filters need both cleaner and specific filter oil. Carefully apply the cleaner, rinse thoroughly, allow to air dry completely, and re-oil if necessary before reinstallation.
Why AEM Air Filter Cleaning Is Essential for Performance
You might wonder why cleaning your AEM air filter matters so much. A clean air filter is like an athlete with clear lungs; it allows the engine to breathe freely. A dirty, clogged filter restricts airflow to your engine. This restriction has a direct impact on your vehicle’s performance.
When airflow is restricted, your engine struggles to get the oxygen it needs for combustion. This can lead to a decrease in horsepower and torque, making your car feel less responsive. You might notice slower acceleration or less power when driving uphill. Furthermore, a dirty filter can also negatively affect your fuel economy. The engine works harder to compensate for reduced airflow, consuming more fuel in the process. Regular cleaning ensures your AEM air filter maintains optimal airflow, leading to better engine response and improved fuel efficiency. It is a small task that yields significant benefits for your vehicle.
An AEM air filter is designed to capture dirt, dust, and debris before these particles can enter your engine. Over time, these contaminants accumulate on the filter media, reducing its effectiveness. A clogged filter not only starves the engine of air but can also allow finer particles to slip through, potentially causing wear and tear on internal engine components. Protecting your engine from these abrasive particles is crucial for its longevity. A clean AEM filter acts as a strong barrier, safeguarding your engine from damage. Just as you would clean other essential components like an ATV air filter or a Spectre air filter, your AEM filter deserves the same attention to ensure your vehicle runs smoothly for years to come.
Gathering Your Supplies: What You Need to Clean Your AEM Filter
Before you begin the cleaning process, you need to gather the right tools and supplies. Having everything ready beforehand makes the job much smoother. The most important item is the correct AEM filter cleaning kit. AEM offers specific kits for their “Dryflow” (dry) filters and their traditional oiled filters.
Make sure you know which type of AEM filter you have. Dryflow filters do not use oil, so their kit only includes a cleaner. Oiled filters require both a cleaner and the specific AEM filter oil. Using the wrong product, like trying to oil a Dryflow filter or using generic oil on an oiled filter, can damage the filter or negatively impact its performance. Always read your filter’s instructions or check AEM’s website if you are unsure.
Here is a list of supplies you will likely need:
- AEM Filter Cleaning Kit: Ensure it matches your filter type (Dryflow or Oiled).
- Soft Brush or Shop Towel: For gentle removal of loose debris.
- Water Hose or Faucet: For rinsing the filter.
- Buckets (optional): For soaking or rinsing if working indoors.
- Safety Glasses and Gloves: To protect your eyes and hands from cleaning solutions.
- Clean, Lint-Free Cloths: For wiping down surfaces.
- Clean Work Area: A place where you can get a little messy, like a garage or driveway.
Having these items ready will ensure a safe and efficient cleaning process. Proper preparation is the first step to successful maintenance. If you’ve ever cleaned a foam air filter, you’ll find some similarities in the preparation, but AEM’s specific kits are crucial for their unique materials.
Step-by-Step Guide to Cleaning Your AEM Dryflow or Oiled Filter
Cleaning your AEM air filter is a straightforward process, but it requires careful attention to detail. The steps vary slightly depending on whether you have an AEM Dryflow filter or an AEM oiled filter. Always refer to the instructions provided with your specific AEM cleaning kit for the most accurate guidance.
Disconnecting the Filter
First, you need to safely remove the air filter from your vehicle. Locate the air intake system, which typically leads from the front of the car to the engine. The AEM filter is usually housed within an airbox or directly attached to the intake tube. Use a screwdriver or wrench to loosen any clamps or bolts holding the filter in place. Gently disconnect any sensors or hoses attached to the airbox. Once loose, carefully pull the filter free. Be careful not to damage the filter media or surrounding components during removal.
Cleaning an AEM Dryflow Filter
AEM Dryflow filters are designed for dry use and do not require oil. This makes their cleaning process simpler.
- Remove Loose Debris: Tap the filter gently against a hard surface to dislodge larger pieces of dirt. You can also use a soft brush or a shop towel to wipe away surface grime. Do not use compressed air, as it can damage the dry filter media.
- Apply Cleaner: Generously spray the AEM Dryflow cleaner onto the entire filter element. Make sure to saturate both the inside and outside surfaces. Allow the cleaner to soak for 10-15 minutes. This gives the cleaner time to break down stubborn dirt and contaminants.
- Rinse Thoroughly: Rinse the filter with low-pressure water. Always rinse from the inside out to push dirt away from the filter media. Continue rinsing until the water runs clear and no suds remain. Avoid using high-pressure water, which can damage the filter.
- Air Dry Completely: Shake off excess water. Place the filter in a clean, dry area and allow it to air dry completely. This can take several hours, or even up to 24 hours, depending on humidity and temperature. Do not use heat sources like a hairdryer or direct sunlight, as this can warp the filter frame or media. The filter must be bone dry before reinstallation.
Cleaning an AEM Oiled Filter
AEM oiled filters require an additional step: re-oiling after cleaning and drying.
- Remove Loose Debris: Gently tap the filter to remove loose dirt. You can use a soft brush to carefully sweep away larger particles. Do not use compressed air.
- Apply Cleaner: Spray the AEM filter cleaner generously onto all surfaces of the filter. Let it soak for about 10-15 minutes. The cleaner penetrates the dirt and oil, making them easier to rinse away.
- Rinse Thoroughly: Rinse the filter with low-pressure water from the clean side (inside) out. This pushes contaminants out of the pleats. Keep rinsing until all traces of dirt and cleaner are gone. The water running off should be clear. Again, avoid high pressure.
- Air Dry Completely: Shake off excess water. Place the filter in a clean, dry area. Allow it to air dry naturally and completely. This step is critical; never re-oil a damp filter. It can take 24 hours or longer for the filter to dry completely. Patience here prevents future problems.
Drying and Re-oiling (If Applicable): The Crucial Final Steps
Proper drying and re-oiling are critical to maintaining the performance and longevity of your AEM air filter, especially for oiled models. Skipping or rushing these steps can compromise your engine’s protection.
The Importance of Complete Drying
After rinsing, your AEM air filter must be completely dry before it is reinstalled or re-oiled. Any residual moisture can hinder the re-oiling process for oiled filters, preventing the oil from adhering properly. For both Dryflow and oiled filters, moisture can also promote mildew growth or even freeze in cold weather, potentially damaging the filter media. Never try to speed up the drying process with heat. Direct sunlight, a hairdryer, or a heat gun can melt the plastic frame or damage the delicate cotton gauze. This will ruin your filter. Instead, find a clean, well-ventilated area, like a garage or a shaded outdoor spot. Place the filter on a clean towel or paper to allow air to circulate around it. Depending on the environment, this drying process can take 12 to 24 hours. Patience ensures your filter is ready for its next stage.
The Re-oiling Process for AEM Oiled Filters
This step is exclusive to AEM oiled filters. It restores the filter’s ability to trap fine dirt particles. Applying the correct amount of oil is essential. Too little oil means less effective filtration; too much oil can restrict airflow, foul your mass airflow sensor (MAF), and even damage it.
- Shake the AEM Filter Oil: Before application, thoroughly shake the AEM filter oil bottle. This ensures the oil is well-mixed and ready for use.
- Apply Oil Evenly: Hold the filter in a way that allows you to see the pleats clearly. Apply a bead of AEM filter oil along the top of each pleat on the clean side (outside) of the filter. Allow the oil to wick down the pleat naturally. Do not saturate the filter.
- Allow Oil to Absorb: Let the oil absorb into the filter media for about 20-30 minutes. You will see the red or blue color spread evenly across the pleats. If you see any white spots, apply a small amount of oil to those areas and allow it to wick.
- Check for Even Coverage: Hold the filter up to a light source. You should see a consistent, even color across all the pleats. There should be no dark, saturated spots or untouched white areas. A light, even coating is what you want.
Once the filter is completely dry and, if applicable, correctly re-oiled, you can reinstall it into your vehicle. Ensure all clamps, hoses, and sensors are reconnected securely. Proper drying and oiling are critical steps in filter maintenance, ensuring optimal engine performance and protection. This attention to detail is similar to the care you might take when cleaning an air filter on a lawn mower, ensuring the equipment performs at its best.
Common Mistakes to Avoid When Cleaning AEM Filters
While cleaning an AEM air filter is straightforward, it is easy to make mistakes that can damage the filter or your engine. Knowing what to avoid can save you time, money, and potential headaches. I have seen many people unknowingly compromise their filter’s integrity.
One common mistake is using the wrong cleaning products. AEM filters, whether Dryflow or oiled, are made with specific materials that require their own cleaning solutions. Using harsh household cleaners, degreasers, or strong detergents can degrade the filter media or damage the adhesive holding the pleats together. Always use the specific AEM cleaning kit designed for your filter type. Generic cleaners often contain chemicals that are too aggressive for the delicate filter fibers.
Another frequent error is improper rinsing. Many people try to rinse from the dirty side in, which pushes contaminants deeper into the filter media. Always rinse your AEM filter from the inside out using low-pressure water. This method effectively flushes the dirt away from the pleats. High-pressure water from a garden hose nozzle or pressure washer is also a definite no-go. The force of the water can tear or distort the filter’s pleats, creating pathways for unfiltered air and debris to enter your engine.
Finally, inadequate drying and incorrect re-oiling (for oiled filters) are critical mistakes. Reinstalling a damp filter can lead to mold or mildew growth, and even hinder proper re-oiling. Never use heat sources like a hairdryer, oven, or direct sunlight to dry the filter. This can warp the plastic frame or melt the filter media. For oiled filters, applying too much oil is a common problem. Excess oil can restrict airflow, and worse, it can coat and damage your vehicle’s sensitive Mass Air Flow (MAF) sensor, leading to engine performance issues and costly repairs. Apply oil sparingly and allow it to wick evenly. By avoiding these pitfalls, you ensure your AEM air filter lasts longer and performs as intended.
Maintenance Schedule and When to Clean Your AEM Air Filter
Knowing when to clean your AEM air filter is just as important as knowing how. A consistent maintenance schedule ensures your engine always gets clean air. The frequency of cleaning depends on several factors, including your driving conditions and habits. Ignoring a dirty filter leads to decreased performance and potential engine damage.
A general guideline for AEM air filters is to inspect them every 10,000 to 15,000 miles. However, this is just a starting point. If you frequently drive in dusty or dirty conditions, such as unpaved roads, construction zones, or desert environments, you will need to clean your filter more often. I usually recommend checking it every 5,000 miles in such conditions. Conversely, if you primarily drive on clean highways, you might be able to extend the interval slightly. Pay attention to how your car performs; a noticeable drop in acceleration or fuel economy can signal a dirty filter.
Visual inspection is your best tool for determining cleaning urgency. Remove your AEM filter and hold it up to a light source. If you cannot see light through the filter media, or if the pleats are heavily caked with dirt and debris, it is definitely time for a cleaning. For oiled filters, the color of the oil (red or blue) will be obscured by grime. Do not wait until the filter is completely black. Regular, proactive checks prevent severe clogging and ensure optimal engine health.
Establishing a cleaning routine based on your specific driving environment is essential for extending the life of your AEM air filter and maintaining peak engine performance. Think of it like maintaining other critical home components, such as cleaning an air conditioner filter or a range hood filter – regular attention prevents bigger problems.
Benefits of Regular AEM Air Filter Maintenance
Regularly cleaning your AEM air filter offers a range of significant benefits for your vehicle. It is a simple maintenance task that yields impressive returns. Many drivers underestimate the impact of a clean air filter on overall vehicle health and performance.
One primary benefit is improved engine performance. A clean air filter allows for maximum airflow into the engine. This optimized airflow ensures that the engine receives the oxygen it needs for complete combustion. The result is better horsepower, increased torque, and a more responsive throttle. You will notice your car accelerating more smoothly and feeling more powerful. A dirty filter chokes the engine, making it work harder and feel sluggish. Keeping it clean means your engine can perform at its peak, as it was designed to do.
Beyond performance, a clean AEM air filter contributes to better fuel efficiency. When your engine struggles for air, it compensates by burning more fuel. This means more frequent trips to the gas station and higher running costs. By ensuring a steady supply of clean air, you allow your engine to operate more efficiently, which translates to better miles per gallon. Saving money on fuel is a tangible benefit that adds up over time. It is a smart financial decision to keep your filter clean.
Finally, regular cleaning extends the lifespan of both your filter and your engine. An AEM filter is designed to be reusable and last for many years. By cleaning it correctly and on schedule, you prevent premature wear and tear on the filter media. More importantly, a clean filter effectively stops harmful contaminants like dirt, dust, and debris from entering your engine. These particles can cause abrasion and damage to internal engine components over time, leading to costly repairs. A clean filter acts as a robust first line of defense, safeguarding your engine from damage. Investing a little time in filter maintenance helps ensure your engine runs smoothly and reliably for a long time.
FAQ Section
How often should I clean my AEM air filter?
You should typically inspect your AEM air filter every 10,000 to 15,000 miles. However, if you drive in very dusty or dirty environments, you may need to clean it every 5,000 miles or sooner. Regular visual checks will help you determine the exact frequency based on your driving conditions.
Can I use dish soap to clean my AEM filter?
No, you should not use dish soap or other household cleaners to clean your AEM air filter. These products can contain chemicals that are too harsh and can damage the filter media or the adhesive. Always use the specific AEM filter cleaning kit designed for your filter type, whether it’s a Dryflow or an oiled filter.
What happens if I don’t re-oil my AEM oiled filter after cleaning?
If you have an AEM oiled filter and do not re-oil it after cleaning, its filtration efficiency will be significantly reduced. The oil layer is crucial for trapping fine dust particles. An unoiled filter will allow more contaminants to pass through, potentially causing accelerated wear and damage to your engine’s internal components.
How long does an AEM air filter take to dry?
An AEM air filter needs to air dry completely after rinsing. This process can take anywhere from 12 to 24 hours, depending on humidity levels and ambient temperature. It is crucial not to rush this step or use heat sources like a hairdryer, as they can damage the filter material.
Can I use compressed air to clean my AEM filter?
No, never use compressed air to clean any AEM air filter, whether Dryflow or oiled. Compressed air can damage the delicate filter media, creating microscopic holes or tearing the pleats. This damage can reduce the filter’s effectiveness and allow unfiltered air into your engine.
Conclusion
Taking care of your AEM air filter is a vital part of vehicle maintenance. By understanding how to clean AEM air filter models properly, you empower yourself to significantly impact your car’s performance, fuel efficiency, and engine longevity. We have covered why cleaning is essential, what supplies you need, and the specific steps for both Dryflow and oiled filters. We also highlighted critical mistakes to avoid and established a maintenance schedule.
Remember, a clean AEM filter ensures your engine breathes freely. This translates directly to better power, improved fuel economy, and protection against harmful contaminants. This simple maintenance task extends the life of your filter and safeguards your engine. Do not let a dirty filter compromise your vehicle’s potential. Take the time to clean your AEM air filter regularly. Your car will thank you with smoother operation and lasting performance. Start your cleaning routine today and experience the difference a well-maintained filter makes.
- AEM
- air filter
- car maintenance
- engine performance
- DIY cleaning
- automotive filter
- vehicle care
- filter cleaning guide

Todd Martin
Senior Writer
With over 15 years of experience in home renovation and design, I started HEG to share what I’ve learned with homeowners who want to create spaces that are both beautiful and functional. I’ve always believed in a hands-on approach, and over the years, I’ve picked up practical solutions that actually work. Through HEG, I aim to make home improvement more approachable, sharing real tips that help you create a home you truly love.