· Todd Martin · Home Maintenance · 21 min read
How To Clean Air Gap
Unlock Efficiency: How to Clean Air Gap Systems
Have you ever noticed standing water in your sink or a strange gurgling sound when your dishwasher runs? The culprit might be a neglected air gap. Learning how to clean air gap devices is a simple maintenance task that can prevent bigger plumbing problems and ensure your appliances work correctly. Many people overlook this small but crucial component. I find that keeping up with these minor cleanings saves a lot of headaches later on.
An air gap is a vital backflow prevention device. It ensures contaminated water from your sink or dishwasher drain does not flow back into your clean water supply. Over time, food particles, grease, and mineral deposits can accumulate inside the air gap. This buildup causes clogs, which then hinder proper drainage. A clogged air gap can lead to unsanitary conditions and inefficient appliance operation. This article will guide you through the process of cleaning your air gap. We will cover common tools, detailed steps for different types, troubleshooting tips, and preventative measures. Let’s make sure your home’s systems run smoothly and hygienically.
Takeaway
- Regularly inspect and clean your air gap to prevent clogs and ensure proper drainage.
- Use basic household tools like screwdrivers, brushes, and mild cleaning solutions.
- Disassemble, clean, and reassemble your kitchen sink air gap in a few straightforward steps.
- Address clogs promptly to avoid water backups and potential health hazards.
- Implement preventative practices to minimize debris buildup and maintain system efficiency.
How to clean an air gap: To clean an air gap, first locate it, usually on the sink deck. Remove its cap and then the inner plastic cylinder. Clear any visible debris with a small brush or toothpick. Rinse the components thoroughly with warm, soapy water. Reassemble the air gap once all parts are clean.
What Exactly Is an Air Gap and Why Does It Need Cleaning?
An air gap is a small but critical plumbing device. It creates a physical gap between a water outlet and a drain. This gap stops dirty drain water from siphoning back into your potable water supply. This process is called backflow prevention. Many local plumbing codes require air gaps. They are essential for protecting public health. Think of it as a barrier that keeps your drinking water safe.
Without an air gap, contaminated water could mix with clean water. This could happen if there is a sudden drop in water pressure. For instance, if a water main breaks, suction can pull water backward. An air gap makes sure this dirty water cannot enter your home’s plumbing system. Its design involves two openings separated by an air space. Water flows through this space, preventing any reverse suction. This simple design provides a powerful safety mechanism.
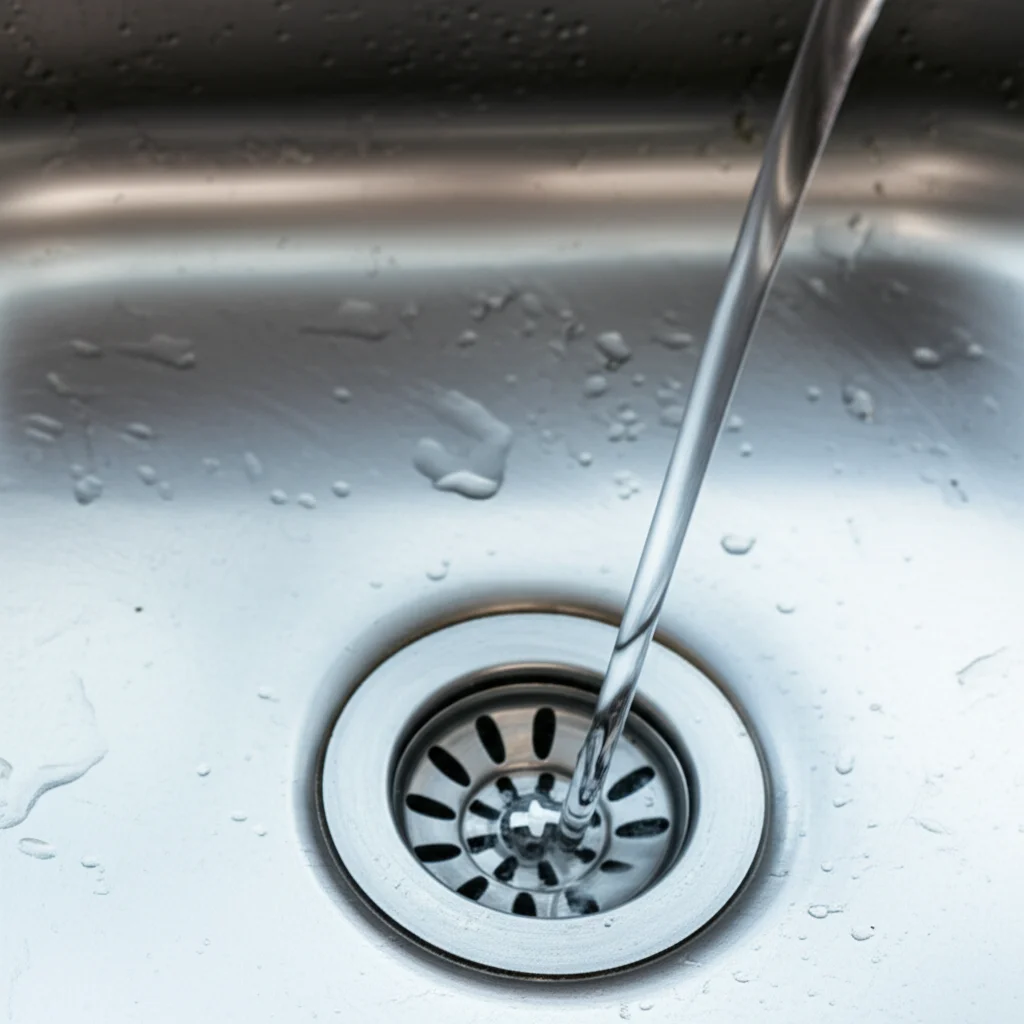
Air Gap in Kitchen Sinks
Kitchen sinks often have an air gap. It usually appears as a small, cylindrical cap on the sink deck. This device is typically connected to your dishwasher drain hose. It helps prevent dirty water from your dishwasher from backing up into your sink or, worse, into your clean water lines. The dishwasher pumps water up to the air gap. From there, it flows down to the garbage disposal or drain pipe.
Over time, food particles, grease, and mineral deposits build up inside this kitchen sink air gap. This accumulation is a natural result of daily use. These common substances can restrict water flow. They can eventually cause a full blockage. When the air gap clogs, your dishwasher might not drain properly. You might see water overflow from the air gap itself. You may also notice standing water in your sink after running the dishwasher. Regular cleaning is important to keep this system functioning.
Air Gaps in Dishwashers and Appliances
While the kitchen sink air gap is most common, other appliances can use similar principles. Dishwashers specifically rely on this device for proper drainage and backflow prevention. The air gap serves as an overflow point for the dishwasher hose. If the drain line gets blocked, water might come out of the air gap instead of backing up into the dishwasher itself. This prevents potential damage to the appliance.
Maintaining this component is vital for appliance longevity. A clogged air gap puts strain on your dishwasher’s pump. This can lead to premature wear and tear. It also means your dishes might not get as clean. The dirty water can sit longer or re-enter the wash cycle. Ensuring this air gap is clear helps your dishwasher operate at peak efficiency. It also keeps your dishes sparkling and your kitchen hygienic.
Common Issues Caused by a Clogged Air Gap
A clogged air gap can cause several noticeable problems. The most common sign is water backing up into your sink. This happens especially when the dishwasher is draining. You might also hear unusual noises from your drain or dishwasher. Gurgling sounds are often a clear indicator. These noises come from water struggling to pass through the blockage.
Another issue is water leaking from the air gap cap itself. This happens when the blockage is so severe that water cannot flow down the drain pipe. Instead, it exits the easiest path, which is through the top of the air gap. This creates a mess on your countertop. If left unaddressed, it can cause water damage. A persistent clog can also lead to foul odors. Trapped food particles and stagnant water create an unpleasant smell. Cleaning the air gap fixes these issues.
Essential Tools and Supplies for Air Gap Cleaning
Cleaning an air gap is a straightforward task. You do not need many specialized tools. Most items are readily available in your home. Having the right supplies makes the job much easier and quicker. Before you begin, gather everything you need. This prevents interruptions during the cleaning process. I always like to have my tools ready before I start any home project.
The basic tools include items for disassembly and cleaning. You might need a screwdriver for certain air gap models. A small brush or pipe cleaner is useful for scrubbing. A bucket or towel will help catch any spills. Having these items organized saves time. It also ensures you can complete the task efficiently. Always prioritize safety first by wearing gloves.
Basic Cleaning Supplies
For most air gap cleaning, you will need a few standard household items. These include warm water and dish soap. A mild detergent is effective at breaking down grease and food residue. You will also need a clean cloth or sponge for wiping components. A small brush, such as a bottle brush or an old toothbrush, is perfect for scrubbing tight spaces. Pipe cleaners can also reach deep into the air gap’s internal channels.
Vinegar is another excellent cleaning agent. It is natural and effective at dissolving mineral deposits and mild grime. You can mix it with water for a gentle but powerful solution. Avoid harsh chemical drain cleaners. These can damage your plumbing lines. They are also harmful to the environment. Stick to simple, safe solutions. For tackling stubborn grime, you might find a link on how to clean mold with vinegar helpful, as it shares good practices for using this common household item.
Specialized Tools for Stubborn Clogs
Sometimes, a basic cleaning might not be enough. If the air gap has a very stubborn clog, you might need a few specialized tools. A small wire brush can remove tough mineral buildup. Flexible drain snakes or wire hangers straightened out can help clear deeper blockages. Be careful when using these tools. Do not force them, as you could damage the internal components or the drain line.
A wet/dry vacuum can also be useful for clearing clogs. You can use it to create suction and pull out the blockage. This method is effective for both the air gap and the connected drain line. Always ensure the area is dry before using electrical tools. For blockages further down the line, similar principles apply to other plumbing components. For example, understanding how to clear a clogged air conditioner drain line involves some similar concepts of clearing blockages in drainage systems.
Step-by-Step Guide: How to Clean a Kitchen Sink Air Gap
Cleaning your kitchen sink air gap is a straightforward process. You do not need to be a plumbing expert. Following these steps will help you clear most clogs. It ensures your dishwasher drains properly and your sink stays clear. I recommend doing this at least once a year, or more often if you notice issues.
This guide focuses on the most common type of air gap found on kitchen sinks. These are usually connected to dishwashers. The process involves simple disassembly and cleaning. Take your time with each step. This ensures you clean the component thoroughly and reassemble it correctly.
Preparation and Safety First
Before you start any cleaning project, preparation is key. First, make sure your dishwasher is not running. It should be completely off. Turn off the water supply to your sink if you are concerned about accidental spills. This step is important for safety. It also prevents water from flowing while you work.
Gather all your tools and supplies. Place a bucket or old towels under the air gap. This will catch any water or debris that might spill out. Wear protective gloves to keep your hands clean. This also protects them from grime or cleaning solutions. Working in a well-lit area also helps you see all the components clearly. I always make sure I have good lighting for detailed tasks.
Disconnecting and Disassembling the Air Gap
The air gap usually has a decorative cap on top. This cap simply twists or pulls off. Sometimes, it might be a bit stiff. Use gentle force to remove it. Underneath, you will find an inner plastic cylinder or housing. This is the main body of the air gap. Some models require a screwdriver to loosen a retaining nut or clip.
Once the cap is off, lift out the inner plastic cylinder. You might need to twist it slightly. Be careful not to lose any small parts. These inner components are where most of the clogs occur. You will likely see a buildup of slime, food particles, or mineral deposits. Note how the pieces fit together before you take them apart. This makes reassembly much easier.
Cleaning the Components Thoroughly
With the air gap components disassembled, it’s time to clean them. Use warm, soapy water to scrub all parts. A small bottle brush or an old toothbrush is perfect for reaching into crevices. Pay close attention to the small holes and channels within the plastic cylinder. These are often where blockages form. Scrub until all visible debris is gone.
For stubborn mineral deposits, you can soak the parts in a solution of equal parts white vinegar and water. Let them soak for 30 minutes to an hour. Vinegar helps dissolve hard water stains. After soaking, scrub again and rinse thoroughly. For areas under the sink that might harbor grime, similar cleaning solutions can be used. Consider this guide on how to clean mold under sink for other cleaning needs around your plumbing.
Reassembly and Testing
After cleaning, make sure all parts are completely dry. Reassemble the air gap in reverse order. Place the inner plastic cylinder back into its housing. Ensure it is seated properly. If there was a retaining nut or clip, tighten it gently. Finally, replace the decorative cap. Make sure it fits securely.
Once reassembled, turn your water supply back on if you turned it off. Then, run your dishwasher for a short cycle. Watch the air gap and sink closely. Water should drain freely without any backups or leaks. If water still backs up, the clog might be further down the drain line. In that case, you might need to address the garbage disposal or the main drain pipe. If you have concerns about water quality issues related to your plumbing, knowing how to clean a water filter can provide additional peace of mind.
Addressing Different Types of Air Gaps and Their Cleaning Needs
While kitchen sink air gaps are the most common for homeowners to clean, the principle of air gaps extends to various plumbing and drainage systems. Each type has its unique context but shares the core function of backflow prevention. Understanding these differences helps in proper maintenance. I often encounter various air gap setups in different homes.
The general approach to cleaning involves identifying the specific air gap. Then you observe its connection points. Lastly, you apply appropriate cleaning methods. The tools and techniques might vary slightly. However, the goal remains the same: to ensure a clear path for water flow and protect your water supply. Knowing your home’s setup is key here.
Dishwasher Air Gap Maintenance
The dishwasher air gap, usually located on the kitchen sink or countertop, is the primary concern for most homeowners. This is what we have largely covered. Its purpose is to prevent wastewater from your sink or disposal from re-entering your dishwasher. Regular cleaning, as detailed in the previous section, is crucial for its function. This prevents unsanitary conditions. It also protects your dishwasher from potential damage.
If you don’t have a visible air gap on your sink, your dishwasher might have a “high loop” drain hose installation. This serves a similar backflow prevention purpose. However, it’s not a physical air gap device that needs direct cleaning. The high loop uses gravity and elevation to prevent backflow. While it doesn’t collect debris like a physical air gap, ensuring the hose isn’t kinked or blocked further down is still important for drainage.
Preventing Future Clogs in Plumbing Air Gaps
Preventative measures are essential for any air gap. They extend its clean state and reduce the frequency of deep cleaning. For kitchen sink air gaps, the primary cause of clogs is food debris and grease. Being mindful of what goes down your drain can make a huge difference. Scrape plates thoroughly before rinsing them. Avoid pouring grease or oil down the sink. These substances solidify and quickly trap other particles.
Running hot water down the drain after each use can help. This helps flush away minor residues before they accumulate. You can also run your garbage disposal regularly. Make sure it is clear of debris. For homes with hard water, mineral buildup is common. A monthly flush with a vinegar and hot water solution can help dissolve these deposits. This proactive approach saves time and effort in the long run.
Troubleshooting Common Air Gap Cleaning Challenges
Even after cleaning, you might encounter issues with your air gap. Sometimes the clog is more stubborn. Other times, the problem lies elsewhere in the plumbing system. It is important to identify the root cause. This helps you address it effectively. I have seen many instances where a simple cleaning did not solve the problem.
This section covers common challenges. It provides solutions for persistent issues. Do not get discouraged if the first cleaning attempt does not completely resolve the problem. Plumbing systems are interconnected. A blockage in one area can affect another. Knowing how to diagnose these challenges is very helpful.
When Simple Cleaning Isn’t Enough
If water still backs up or overflows after cleaning the air gap, the clog is likely further down the drain line. The most common culprit is the garbage disposal. Food particles can get stuck in the disposal’s drain hose. This hose connects the disposal to the air gap. Check if your disposal is working correctly. Run it with plenty of cold water to clear any blockages.
Another possibility is a clog in the main kitchen sink drain pipe. This pipe connects the disposal and air gap to your home’s sewer line. If the main drain is partially or fully blocked, water cannot flow freely. This will cause backups in the sink and potentially out of the air gap. For a drain line that is clogged, you might need to use a drain snake. Or you might need to try a solution of baking soda and vinegar. Be careful with chemical drain cleaners. They can sometimes damage pipes.
Identifying and Fixing Leaks
If water leaks from the base of the air gap, it usually indicates a loose connection. It could also point to a damaged washer or seal. First, check all hose clamps connecting to the air gap. Ensure they are tight and secure. Do not overtighten, as this can crack plastic components. Sometimes, the rubber washers inside the air gap or at its connections can wear out.
If you suspect a worn washer, you might need to replace it. These are inexpensive parts available at most hardware stores. Disassemble the air gap again. Inspect the rubber seals. If they look cracked, brittle, or flattened, replace them with new ones. Reassemble everything carefully, ensuring a snug fit. Leaks can cause water damage over time. So, fixing them promptly is essential. For general liquid containment, methods for cleaning various parts of a home, like how one might approach cleaning mold from window air conditioner or any other water-prone appliance, sometimes involves checking seals.
Preventative Measures and Regular Maintenance for Air Gaps
Regular maintenance is key to keeping your air gap functioning perfectly. Prevention is always easier than a cure. By taking a few simple steps, you can significantly reduce the chances of clogs. This will save you time and potential repair costs. I always advise homeowners to adopt a proactive approach to their home’s plumbing.
These preventative measures are not time-consuming. They integrate easily into your regular cleaning routine. They extend the life of your air gap. They also ensure the continuous safety of your drinking water. A little effort now goes a long way. This ensures your home systems stay efficient and hygienic.
Establishing a Cleaning Schedule
Creating a consistent cleaning schedule for your air gap is beneficial. I recommend a monthly quick check. This involves simply removing the cap and looking for any visible debris. A thorough cleaning, like the one described earlier, can be done every three to six months. This frequency can vary based on your household’s usage. For instance, a large family that cooks a lot might need more frequent cleaning.
Marking it on a calendar helps you remember. You can also set a reminder on your phone. This makes maintenance a routine. Combining it with other kitchen cleaning tasks is a good strategy. For example, clean the air gap when you clean the garbage disposal. This ensures that essential components of your kitchen’s drainage system are maintained together. This also aligns with the advice for maintaining other crucial home systems, such as regular cleaning schedules suggested for air filters. You can find more tips on this topic through resources on topics such as how to clean an air purifier filter to understand the importance of routine maintenance across various home devices.
Tips for Minimizing Debris Buildup
Minimizing debris is the best way to prevent clogs. The kitchen sink air gap primarily collects food particles and grease. Always scrape food scraps from plates into the trash before rinsing dishes. Avoid putting anything that expands with water, like rice or pasta, down the drain. These items can quickly create blockages.
Use a drain screen or strainer in your sink. This catches larger food particles before they enter the drain. It also prevents them from reaching the air gap. When running your garbage disposal, always use plenty of cold water. This helps flush the debris completely through the system. Cold water also solidifies grease, allowing it to be chopped up more effectively by the disposal. Periodically, pour a mixture of hot water and a few tablespoons of baking soda down the drain. Follow it with white vinegar to create a fizzy reaction that helps break down grease and minor clogs. For effective use of such natural cleaning agents, similar methods are described in guides like how to clean glass with vinegar.
The Health and Efficiency Benefits of a Clean Air Gap
Maintaining a clean air gap offers more than just convenience. It provides significant benefits for your health and the efficiency of your home appliances. These small devices play a huge role in overall home hygiene. Ignoring them can lead to problems that impact your daily life. I believe understanding these benefits motivates people to perform this simple maintenance.
A clean air gap contributes to a healthier living environment. It also ensures your plumbing system runs without issues. This translates to savings in potential repair costs. It also means you have a more reliable and sanitary home. These advantages highlight why learning how to clean air gap systems is worthwhile.
Protecting Your Drinking Water
The most critical benefit of a clean air gap is protecting your drinking water supply. The air gap acts as a physical barrier. It prevents contaminated water from your sink or dishwasher drain from flowing back into your potable water lines. This is crucial for preventing the spread of waterborne illnesses. Backflow is a serious health hazard. It can introduce harmful bacteria, chemicals, and other pollutants into your clean water.
Even a partial clog can compromise this barrier. It can create conditions where back-siphonage is more likely to occur. By keeping your air gap clear, you are actively safeguarding your family’s health. You are ensuring that the water coming out of your tap is safe for drinking, cooking, and bathing. This simple device provides a layer of security that often goes unnoticed.
Ensuring Appliance Longevity
A clean air gap also directly impacts the longevity and performance of your dishwasher. When the air gap is clogged, your dishwasher’s drain pump has to work harder. It struggles to push water through the restricted passage. This increased strain can lead to premature wear and tear on the pump motor. This can result in costly repairs or even the need for a new dishwasher.
Proper drainage is also essential for efficient dishwashing. If water backs up, dirty water can linger in the machine. It can also re-enter the wash cycle. This leads to less clean dishes. It can also cause unpleasant odors inside your dishwasher. A clear air gap allows for quick and complete drainage. This ensures your dishwasher operates at its peak efficiency. It also extends its operational life.
FAQ Section
How often should I clean my air gap?
I recommend cleaning your kitchen sink air gap thoroughly every three to six months. If you notice symptoms like slow drainage, gurgling sounds, or water leaking from the cap, clean it immediately. High usage households or those with hard water might need more frequent cleaning. Regular visual checks for debris are good practice.
Can a dirty air gap affect my dishwasher?
Yes, a dirty or clogged air gap can significantly affect your dishwasher. It can cause improper drainage, leading to standing water in the bottom of the dishwasher or in your sink. This can also put strain on your dishwasher’s pump, potentially leading to costly repairs. Dirty dishes and foul odors can also result.
What if water comes out of my air gap?
If water comes out of your air gap, it usually means the air gap itself or the drain line connected to it is clogged. The water cannot flow down the drain, so it overflows through the air gap’s cap. This is a clear sign that the air gap needs immediate cleaning to clear the blockage.
Is an air gap necessary?
For dishwashers, air gaps are often required by local plumbing codes to prevent backflow. They are essential for protecting your potable water supply from contamination. While some dishwashers use a “high loop” drain hose instead, a physical air gap offers a more robust backflow prevention mechanism. It is a critical safety device.
Can I use chemical cleaners on an air gap?
I do not recommend using harsh chemical drain cleaners on your air gap or connected plumbing. These chemicals can damage plastic components and seals. They can also harm your pipes over time. For effective and safe cleaning, stick to warm, soapy water, vinegar, or baking soda solutions. These are much gentler and just as effective for typical air gap clogs.
Conclusion
Cleaning your air gap is a small task with significant benefits for your home’s health and efficiency. I have shown you that understanding how to clean air gap systems is not complex. It ensures your drinking water remains safe and your appliances run smoothly. Regular maintenance prevents unsanitary backflow, extends the life of your dishwasher, and eliminates frustrating clogs. By following the simple steps outlined, you can easily keep this vital component in top condition.
Remember to gather your tools, prepare your workspace, and approach the task systematically. From disassembling and scrubbing with natural cleaners to reassembling and testing, each step contributes to a well-functioning system. Implement preventative measures like mindful scraping of food and periodic flushes to minimize future issues. Do not let a small device create big problems. Take control of your home’s maintenance today. Ensure your air gap is clean and clear. You will enjoy a healthier, more efficient home environment.
- air gap cleaning
- kitchen sink maintenance
- appliance hygiene
- drainage system
- preventative cleaning

Todd Martin
Senior Writer
With over 15 years of experience in home renovation and design, I started HEG to share what I’ve learned with homeowners who want to create spaces that are both beautiful and functional. I’ve always believed in a hands-on approach, and over the years, I’ve picked up practical solutions that actually work. Through HEG, I aim to make home improvement more approachable, sharing real tips that help you create a home you truly love.