· Todd Martin · Home Maintenance · 20 min read
How To Clean Aprilaire Humidifier Filter
How To Clean Aprilaire Humidifier Filter for Optimal Performance
Maintaining healthy indoor air quality is vital for every home. A well-functioning humidifier plays a key role in achieving this balance, especially during dry seasons. If you own an Aprilaire whole-house humidifier, regular maintenance ensures it works efficiently and effectively. Neglecting its upkeep can lead to issues like mineral buildup, reduced performance, and even the spread of airborne particles.
Cleaning your Aprilaire humidifier filter, also known as the water panel or evaporator pad, is a critical step in this maintenance routine. This guide will walk you through the precise steps to clean your Aprilaire humidifier filter thoroughly. We will cover preparation, the cleaning process itself, reinstallation, and tips for ongoing care. My goal is to equip you with the knowledge needed to keep your Aprilaire humidifier running at its best, ensuring comfortable and healthy humidity levels in your home.
Takeaway
Cleaning your Aprilaire humidifier filter improves air quality and system efficiency. You should clean it regularly to prevent mineral buildup and mold growth. This process involves disconnecting power, removing the old water panel, cleaning components, and installing a fresh filter. Regular maintenance saves energy and extends your humidifier’s lifespan.
Clear, Concise Answer
To clean an Aprilaire humidifier filter, turn off the humidifier and water supply. Remove the water panel. Inspect the water distribution tray and humidifier housing for mineral deposits or mold. Clean these parts with a descaling solution or vinegar, then rinse. Replace the water panel, as Aprilaire filters are generally not cleaned but replaced.
Why Cleaning Your Aprilaire Humidifier Filter Matters
Understanding the importance of cleaning your Aprilaire humidifier filter goes beyond just maintenance. It directly impacts your home’s air quality and your system’s efficiency. A dirty filter can become a breeding ground for harmful substances. Mineral deposits reduce its ability to absorb water, lowering your humidifier’s output.
The Aprilaire humidifier uses a water panel to evaporate moisture into your home’s air. As water evaporates, minerals within it get left behind on this panel. Over time, these mineral deposits accumulate, hardening the filter and blocking water flow. This buildup makes your humidifier work harder, consuming more energy for less effective humidification.
Preventing Mineral Buildup and Mold Growth
Mineral buildup is a common issue, especially if you have hard water. These chalky deposits clog the filter’s pores, rendering it ineffective. Regular cleaning helps remove these deposits, ensuring the filter can properly absorb water. Without proper absorption, your humidifier cannot add enough moisture to the air.
Beyond minerals, humidifiers can also become a site for mold and mildew growth. Standing water and warm conditions create an ideal environment for these microorganisms. A dirty filter can harbor mold spores, which may then be released into your home’s air. This poses health risks, especially for individuals with allergies or respiratory conditions. Cleaning and inspecting the filter helps prevent mold from taking hold. For more detailed steps on combating mold, you might find our guide on how to clean mold with vinegar useful.
Enhancing Humidifier Efficiency and Lifespan
A clean Aprilaire humidifier filter allows for optimal water absorption and evaporation. This means your system can maintain desired humidity levels more efficiently. An efficient humidifier uses less energy to achieve the same results. This translates into lower utility bills for you.
Furthermore, proper maintenance extends the life of your entire Aprilaire humidifier unit. When the filter is clogged, other components, like the water solenoid or distribution tray, may experience undue strain. Keeping the water panel and surrounding parts clean reduces wear and tear on these vital components. Investing a little time in cleaning now saves you money on repairs or replacements later.
Essential Tools and Safety Precautions for Cleaning
Before you begin the cleaning process, gathering the right tools is important. Having everything at hand makes the job smoother and more efficient. I always make sure I have all my supplies ready before I start any cleaning task. It prevents interruptions and helps me work more effectively.
Safety is also a top priority. Working with electrical appliances and water requires careful attention. Ignoring safety steps can lead to electric shock or damage to your humidifier. I ensure I take all necessary precautions every time I clean my humidifier.
Gathering Your Cleaning Supplies
You will need a few simple items for this cleaning project. Most of these are common household products. I find that having a dedicated cleaning kit for my humidifier helps me stay organized.
Here is a list of what you will need:
- Protective Gloves: These protect your hands from cleaning solutions and mineral deposits. I always wear gloves for cleaning tasks.
- Safety Glasses: Protect your eyes from splashes of cleaning solution or dislodged debris. Eye protection is non-negotiable for me.
- White Vinegar: This is a natural descaling agent effective against mineral buildup. It is my preferred solution for hard water deposits. You can also learn more about general cleaning techniques using how to clean with vinegar and baking soda.
- Soft Brush or Old Toothbrush: Useful for scrubbing stubborn deposits in crevices. I keep an old toothbrush specifically for these kinds of detailed cleaning jobs.
- Bucket or Large Basin: For soaking parts in cleaning solution. A large basin helps contain the mess.
- Clean Cloths or Sponges: For wiping down surfaces and drying components. I always have a few lint-free cloths ready.
- Towel: To protect the floor from water spills. Laying down a towel prevents accidental messes.
- Replacement Aprilaire Water Panel (Filter): While the article discusses cleaning, Aprilaire water panels are generally disposable and need replacement for optimal performance, not deep cleaning. The cleaning primarily applies to the humidifier’s housing and water distribution system. Ensure you have the correct model number for your humidifier.
Prioritizing Safety Before Starting
Safety steps must come before you touch any part of the humidifier. Electrical current and water do not mix well. Skipping these initial steps can be dangerous.
Follow these critical safety precautions:
- Turn Off Power to the Humidifier: Locate the circuit breaker that controls your HVAC system and turn it off. This cuts power to the humidifier. Confirm the power is off by trying to turn on the humidifier or HVAC system. I always double-check the circuit breaker to be absolutely sure.
- Turn Off Water Supply to the Humidifier: Locate the water line connected to your Aprilaire humidifier. There should be a small shut-off valve on this line. Turn the valve to the closed position. This stops water from flowing into the unit. I make sure this valve is fully closed.
- Allow Cooling Time: If your HVAC system has been running recently, allow the humidifier to cool down. Components can be hot. Give it at least 15-30 minutes before handling any parts. I wait a bit to avoid accidental burns.
- Clear the Work Area: Make sure the area around the humidifier is free of obstructions. You need enough space to comfortably work. I clear out any boxes or tools that might be in the way.
- Wear Protective Gear: Put on your gloves and safety glasses. These simple items offer crucial protection during the cleaning process. I put on my gear before I even open the humidifier.
Step-by-Step Guide: Removing and Inspecting the Water Panel
Now that you have your tools and safety measures in place, it’s time to access the heart of your Aprilaire humidifier: the water panel. This process is straightforward, but it requires gentle handling. I approach this step with care to avoid damaging any components.
Understanding how to access the filter properly is the first practical step in maintaining your unit. It sets the stage for a thorough cleaning.
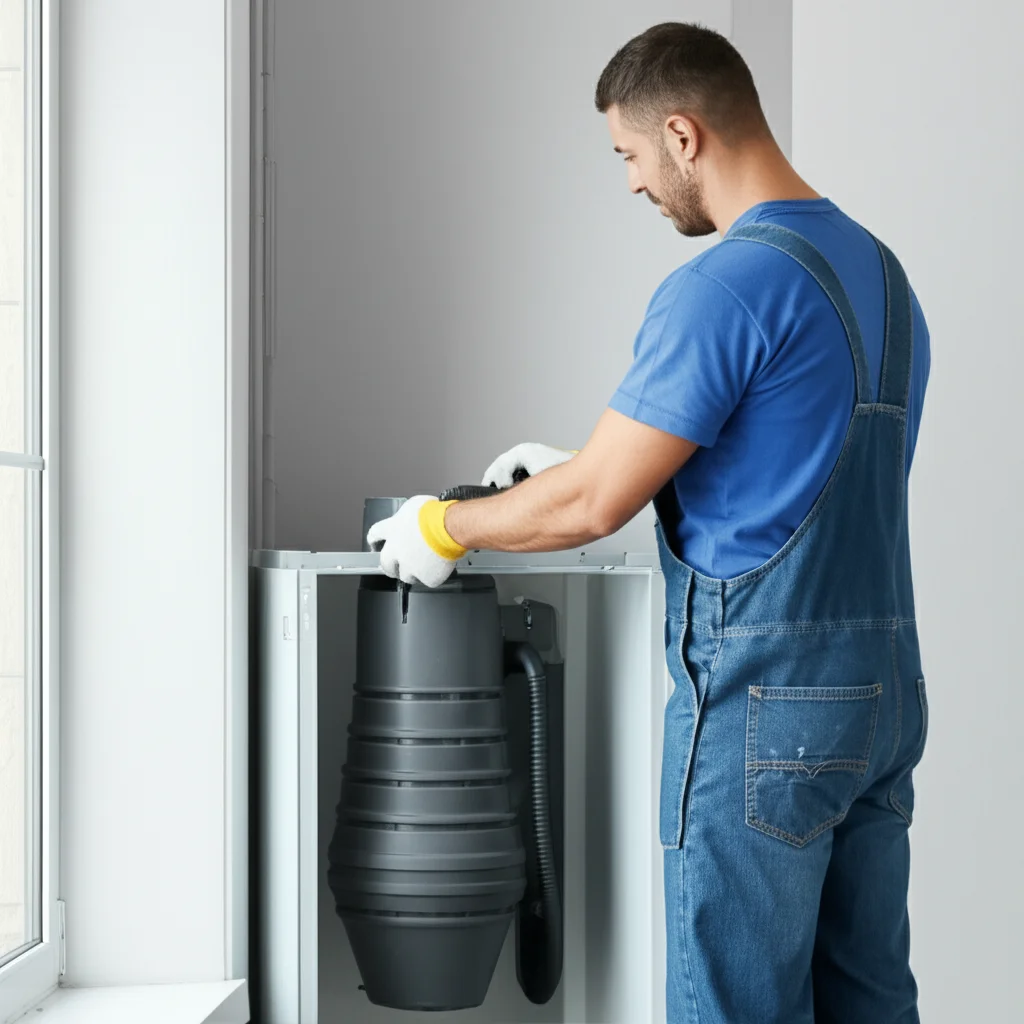
Locating and Opening the Humidifier
Aprilaire humidifiers are typically mounted directly to your HVAC system’s ductwork. You will find them near your furnace or air handler. They often have a distinctive gray or beige outer cover. My Aprilaire unit is easily identifiable next to my furnace.
Here’s how to locate and open it:
- Identify the Aprilaire Unit: Look for a box-like attachment on your main return or supply air duct. It will have “Aprilaire” branding on it.
- Locate the Access Panel: Most Aprilaire models have a single access panel or cover on the front or side. This panel allows you to reach the internal components.
- Release the Latches or Screws: Depending on your model, the access panel might be held in place by latches, clips, or a few screws. Gently release these fasteners. Some models have a single push-button latch on the top or bottom. I carefully unclip mine to avoid breaking the plastic.
- Remove the Cover: Once unlatched, the cover should swing open or pull straight off. Set it aside in a safe place where it won’t get damaged or misplaced. I place mine on a clean towel.
Extracting the Water Panel (Filter)
With the cover removed, you will see the internal frame that holds the water panel. This component is the primary focus of your cleaning efforts. It is usually a honeycomb-like pad encased in a plastic frame.
Follow these steps to safely remove it:
- Identify the Water Panel Frame: The water panel sits inside a plastic frame. This frame guides water distribution and holds the pad in place.
- Unlatch or Slide Out the Frame: The frame is typically held by clips or slides into grooves. Gently unclip it or slide it out. Be careful not to force it, as it may be slightly damp. I usually lift mine slightly and then pull it out.
- Remove the Water Panel from the Frame: Once the frame is out, you can usually slide the water panel directly out of its plastic housing. The water panel itself looks like a rigid, porous paper or aluminum honeycomb material. This is the part that accumulates mineral deposits.
- Inspect for Damage and Buildup: Examine the water panel closely. Look for signs of heavy mineral buildup, which appears as white or crusty deposits. Also, check for any dark spots, which could indicate mold or mildew. Aprilaire water panels are designed to be disposable, not cleaned extensively. If it shows significant buildup or damage, replacement is often the best course of action for optimal performance. You cannot effectively clean these porous materials once saturated with minerals. However, you can clean the plastic frame and the internal components of the humidifier itself.
Thorough Cleaning of Humidifier Components
While the Aprilaire water panel itself is generally replaced rather than deep-cleaned, the humidifier’s internal components surrounding it still require thorough cleaning. This includes the water distribution tray, drain pan, and humidifier housing. Mineral deposits and biological growth can accumulate on these surfaces, hindering performance and potentially spreading contaminants. My focus here is on these crucial parts.
This step is critical for maintaining overall system hygiene and efficiency. I make sure to clean every reachable surface meticulously.
Cleaning the Water Distribution Tray and Drain Pan
The water distribution tray sits above the water panel, ensuring water flows evenly across it. The drain pan, located below, collects excess water and directs it to the drain. Both are prone to mineral and slime buildup. Cleaning your humidifier’s water-related components is similar to how you might clean scale from a shower head. For more specific advice on tackling hard water deposits, see our guide on how to clean shower head with vinegar.
Here’s how to clean them:
- Remove Components: Gently remove the water distribution tray and the drain pan from the humidifier housing. They usually slide out or unclip. Be careful as they might contain standing water or loose mineral deposits. I carefully lift them out, making sure not to spill anything.
- Initial Rinse: Rinse both components under warm running water to remove loose debris and soft mineral deposits. This prepares them for deeper cleaning.
- Soak in Vinegar Solution: Place the tray and pan in a bucket or large basin. Pour enough undiluted white vinegar to submerge the components completely. Vinegar is excellent for dissolving hard water scale. If the parts are very dirty, you might need to combine vinegar with baking soda for a stronger reaction. Our article on how to clean with vinegar and baking soda offers great tips. Let them soak for at least 30 minutes, or longer if deposits are heavy. I often let them soak for a few hours or even overnight for stubborn buildup.
- Scrub and Rinse: After soaking, use a soft brush or an old toothbrush to scrub away any remaining mineral deposits or slimy residue. Pay attention to crevices and narrow passages. Once clean, rinse the components thoroughly with fresh, clean water. Make sure all vinegar residue is gone.
Cleaning the Humidifier Housing Interior
The interior of the humidifier housing also collects dust, debris, and potentially mold. Keeping this area clean ensures that air passing through the humidifier is free of contaminants. I always ensure the inside of the unit is spotless. This step also reduces the chance of mold spores developing, a common issue in damp environments like humidifiers. For extensive mold issues, consult our guide on how to clean mold from washing machine as humid environments are prone to similar issues.
Follow these steps for a thorough cleaning:
- Wipe Down Surfaces: Use a damp cloth or sponge to wipe down all interior surfaces of the humidifier housing. Remove any dust, dirt, or light mineral residue.
- Address Stubborn Stains/Deposits: If you find stubborn mineral deposits on the housing, lightly spray white vinegar directly onto the affected areas. Let it sit for a few minutes to break down the deposits, then scrub gently with a brush or sponge.
- Check for Mold/Mildew: Carefully inspect for any signs of mold or mildew. These appear as black, green, or fuzzy patches. If you find mold, create a solution of equal parts white vinegar and water. Spray the affected area, let it sit for 10-15 minutes, then scrub with a brush. Always wear gloves and safety glasses when dealing with mold. For persistent mold issues, our article on how to clean mold from drywall provides additional insights.
- Rinse and Dry: After cleaning, use a clean, damp cloth to wipe away all cleaning solution residue. Then, use a dry cloth to thoroughly dry all interior surfaces. Ensure no standing water remains before reassembly. A dry interior prevents immediate re-growth of mold.
Replacing the Aprilaire Water Panel and Reassembly
After thoroughly cleaning the internal components of your Aprilaire humidifier, the next critical step is to install a new water panel. As mentioned, Aprilaire water panels are designed for replacement, not rigorous cleaning, to maintain optimal performance. They are efficient but have a finite lifespan. I always make sure I have the correct replacement panel on hand before I start cleaning.
Reassembling the humidifier correctly ensures it functions properly and safely. This final stage requires careful attention to detail.
Installing a New Water Panel
A fresh water panel is crucial for efficient humidification. It ensures maximum water absorption and evaporation. Using a new panel prevents the issues associated with mineral buildup on an old one.
Follow these steps to install the new water panel:
- Unpack the New Water Panel: Carefully remove the new Aprilaire water panel from its packaging. Ensure it is the correct model number for your humidifier. Aprilaire water panels are model-specific.
- Insert into the Frame: Slide the new water panel into the plastic frame you removed earlier. Make sure it is oriented correctly according to the arrows on the panel or frame. The textured or “honeycomb” side often faces upwards or outwards, depending on the model. I check the instruction manual if I am unsure about the orientation.
- Place the Frame into the Humidifier: Gently slide the frame with the new water panel back into its designated slot within the humidifier housing. It should fit snugly into the grooves or clips. Do not force it. I make sure it slides in smoothly without any resistance.
- Ensure Proper Seating: Double-check that the water panel frame is fully seated and secure. A loose frame can lead to improper water distribution and reduced efficiency.
Reassembling the Humidifier Unit
Once the new water panel is in place, reassemble the humidifier’s other components. This involves returning the distribution tray, drain pan, and outer cover to their positions. Proper reassembly is vital for the unit’s functionality and to prevent leaks.
Here’s how to reassemble your Aprilaire humidifier:
- Replace the Water Distribution Tray: Carefully place the cleaned water distribution tray back into its position above the water panel frame. Ensure it sits securely and aligns with the water supply tube. I make sure it snaps into place if applicable.
- Replace the Drain Pan: Position the cleaned drain pan beneath the water panel frame. Confirm it connects properly to the drain line. This pan catches excess water and directs it away from your system.
- Close the Access Panel: Reattach the outer access panel or cover. Ensure all latches are secured or screws are tightened. The cover must be completely closed for the humidifier to operate effectively. I gently press on the cover to make sure it’s fully closed and latched.
- Reconnect Water and Power: Turn the water supply valve back on to allow water to flow into the humidifier. Then, return to your circuit breaker and turn the power back on to your HVAC system and humidifier.
- Test the Unit: Turn on your HVAC system and set your thermostat to a humidity level higher than your current indoor humidity. This should activate the humidifier. Listen for water flow and observe if the unit is operating as expected. I usually check for any immediate leaks around the connections.
Troubleshooting Common Issues and Maintenance Tips
Even with regular cleaning and replacement, you might encounter issues with your Aprilaire humidifier. Knowing how to troubleshoot common problems can save you time and money. Proactive maintenance extends the life of your unit and ensures consistent performance. I find that catching small problems early prevents bigger ones later.
I will share some valuable tips for keeping your Aprilaire humidifier in top condition year-round. These insights go beyond just cleaning the filter.
Common Troubleshooting Scenarios
Facing a problem with your humidifier can be frustrating. Here are some frequent issues and how to address them:
- No Humidity Output:
- Check Water Supply: Ensure the water supply valve is fully open and the water line is not kinked. I always start by checking the water connection.
- Verify Power: Confirm the humidifier has power and the circuit breaker is on. The humidistat might not be calling for humidity.
- Inspect Water Panel: A severely clogged or improperly installed new water panel can prevent water absorption. Ensure the new water panel is correctly seated.
- Solenoid Valve: The solenoid valve controls water flow. If it’s faulty, water won’t enter the unit. This often requires professional diagnosis and replacement.
- Water Leaks:
- Drain Line Clog: Check the drain line for clogs or kinks. A blocked drain line can cause water to back up and overflow. I clear any visible blockages.
- Loose Connections: Ensure all water line connections are tight. Check the hose clamps and fittings.
- Improperly Seated Drain Pan: The drain pan might not be correctly installed, causing water to miss the drain. Refer to the reassembly steps.
- Cracked Housing: Inspect the humidifier housing for cracks. This might require replacing the damaged component or the entire unit.
- Excessive White Dust:
- Hard Water: This is a common issue with hard water. When water evaporates, minerals are left behind and can be dispersed as fine white dust. While cleaning the humidifier helps, using a whole-house water filter can significantly reduce mineral content. You can learn more about general water filtration in our guide on how to clean water filter in fridge or even how to clean under sink water filter.
- Change Water Panel More Often: If hard water is severe, consider replacing your Aprilaire water panel more frequently than recommended.
Long-Term Maintenance and Best Practices
Regular, proactive maintenance keeps your Aprilaire humidifier running smoothly for years. It prevents common problems before they start. My approach to maintenance is always preventive rather than reactive.
Consider these best practices:
- Seasonal Cleaning: Plan a thorough cleaning and water panel replacement at the beginning of each heating season. This prepares your humidifier for heavy use. I schedule this annually.
- Monthly Checks: During peak use, perform a quick visual inspection monthly. Check for excessive mineral buildup on external parts and listen for unusual noises.
- Adjust Humidistat Settings: Set your humidistat to an appropriate level for your home and outdoor temperature. Over-humidification can lead to mold and condensation issues. I aim for 35-45% relative humidity indoors.
- Professional Servicing: Consider having your HVAC technician inspect your humidifier during their annual furnace tune-up. They can check electrical connections, solenoid valve function, and overall system integration.
- Use Genuine Aprilaire Parts: Always use genuine Aprilaire water panels. Off-brand filters may not fit correctly or perform as efficiently, potentially damaging your unit or voiding warranties. I stick to manufacturer-recommended parts for reliability.
- Monitor Water Quality: If you have exceptionally hard water, discuss options with a plumbing professional. Installing a water softener or dedicated humidifier pre-filter can extend the life of your water panel and reduce cleaning frequency.
When to Replace vs. Just Clean Your Aprilaire Filter
While this article focuses on how to clean your Aprilaire humidifier filter components, it is important to clarify the nature of the Aprilaire water panel itself. Aprilaire water panels, also known as evaporator pads or humidifier filters, are specifically designed for replacement, not deep cleaning. Their porous, treated material eventually becomes saturated with mineral deposits, making effective cleaning impossible. I emphasize this point to ensure proper maintenance.
Understanding when to simply clean the surrounding parts versus replacing the actual water panel is key to optimal humidifier performance and air quality. This distinction impacts both efficiency and hygiene.
The Disposable Nature of Aprilaire Water Panels
Aprilaire water panels are engineered to facilitate the evaporation process efficiently. They are made from a special material that maximizes water absorption. As water evaporates, it leaves minerals behind on the surface of the panel. Over time, these minerals build up, forming a hard, crusty layer. This layer prevents the panel from absorbing water properly, significantly reducing its humidification capacity.
Attempting to clean these panels vigorously, especially with harsh chemicals or scrubbing, can damage their delicate structure. This damage can reduce their effectiveness and potentially release fibers into your air. Furthermore, once heavily mineralized, the internal structure of the panel is compromised beyond simple surface cleaning. The purpose of cleaning in the context of an Aprilaire humidifier typically refers to descaling and sanitizing the water distribution system and the humidifier housing itself, not the water panel. I treat my Aprilaire water panel as a consumable part that needs regular replacement.
Signs It’s Time for a New Water Panel
Knowing when to replace your Aprilaire water panel is crucial for maintaining consistent humidity levels and preventing damage to your unit. The general recommendation is to replace it at least once per heating season, typically in the fall before you start using your humidifier. However, factors like water hardness can necessitate more frequent changes.
Look for these signs indicating it’s time for a replacement:
- Visible Mineral Buildup: The most obvious sign is a significant accumulation of white, chalky mineral deposits on the water panel. If it feels hard and rigid rather than somewhat pliable, it’s heavily saturated.
- Reduced Humidity Output: If your humidifier is running but your home’s humidity level is not reaching the desired setting, a clogged water panel is a likely culprit.
- White Dust Around Vents: While often a sign of hard water, excessive white dust can also indicate that minerals are becoming airborne from an overloaded, inefficient water panel.
- Foul Odor: Any musty or moldy smell emanating from the humidifier is a strong indicator of microbial growth on or around the water panel. This requires immediate replacement and a thorough cleaning of the housing.
- Dark Spots or Discoloration: Beyond mineral deposits, look for any dark or greenish spots, which can signify mold or algae growth. If you see this, replace the panel immediately and clean the housing rigorously.
- Age: Even without obvious signs, replacing the panel annually ensures peak performance and hygiene. I make it a point to replace mine at the start of each heating season, regardless of how it looks.
Advanced Tips for Aprilaire Humidifier Performance
To truly maximize your Aprilaire humidifier’s effectiveness and extend its life, consider some advanced tips beyond routine cleaning. These practices can make a significant difference in your indoor air quality and energy consumption. I am always looking for ways to optimize my home appliances.
Applying these strategies helps create a consistently comfortable and healthy home
- Aprilaire humidifier
- humidifier cleaning
- humidifier maintenance
- whole-house humidifier
- filter cleaning

Todd Martin
Senior Writer
With over 15 years of experience in home renovation and design, I started HEG to share what I’ve learned with homeowners who want to create spaces that are both beautiful and functional. I’ve always believed in a hands-on approach, and over the years, I’ve picked up practical solutions that actually work. Through HEG, I aim to make home improvement more approachable, sharing real tips that help you create a home you truly love.