· Todd Martin · Home Care · 20 min read
How To Clean Beauty Blender Powder Puff
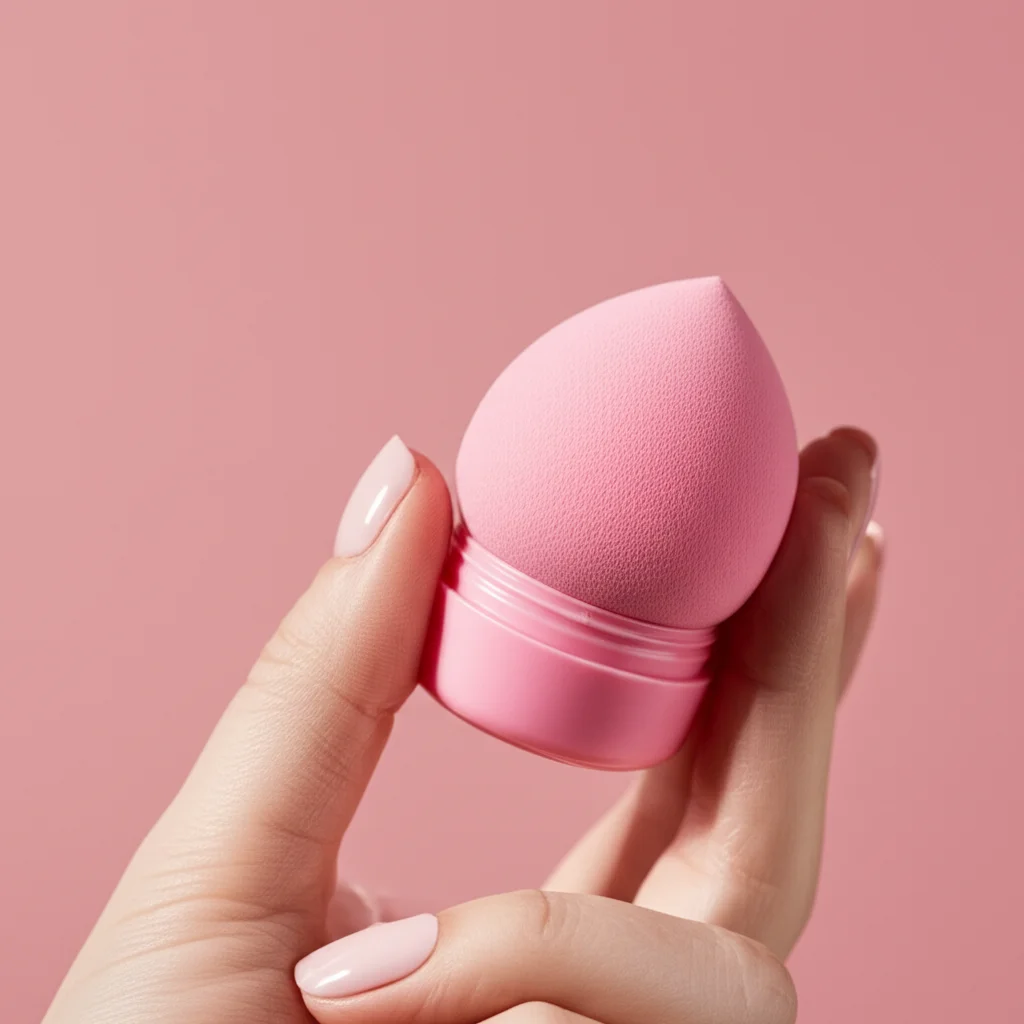
Clean Your Beauty Blender and Powder Puff Effectively
Do you know what builds up on your favorite makeup tools? Old makeup, oils, dead skin cells, and bacteria collect on your beauty blender and powder puff. This buildup can cause skin issues like breakouts. It also makes your makeup application uneven. Regularly cleaning these tools is not just a good habit; it is essential for clear skin and flawless makeup.
I often think about how many people forget this important step. Many people use their beauty blender and powder puff daily. They might not realize the hidden grime. A clean tool ensures hygienic makeup use. It also helps your products work better. This article will show you simple, effective ways to clean your beauty blender and powder puff. We will discuss why cleaning matters and proper drying techniques. You will learn how to keep your makeup tools fresh and ready.
Takeaway:
- Clean your beauty blender and powder puff often to prevent breakouts.
- Use gentle cleansers and proper techniques for thorough cleaning.
- Allow tools to air dry completely to stop mold growth.
- Regular cleaning extends the lifespan of your makeup tools.
Cleaning your beauty blender and powder puff involves using a gentle cleanser, like soap or makeup brush cleaner, with warm water. You gently massage the tools to release makeup buildup. Then, rinse thoroughly until the water runs clear. Finally, allow them to air dry completely in a well-ventilated area. This process ensures hygienic and effective makeup application.
Why Clean Your Beauty Blender and Powder Puff?
Cleaning your makeup tools is important for several reasons. Dirty beauty blenders and powder puffs collect many things. They gather old foundation, concealer, and setting powder. They also pick up natural oils from your skin. Dead skin cells stick to them too. Over time, these materials create a perfect place for bacteria to grow. This growth is not good for your skin.
Using a dirty tool can cause skin problems. You might experience breakouts. Your skin could get irritated. Some people develop infections from unclean makeup tools. I always make sure to clean mine. This prevents these issues. Clean tools help keep your skin healthy and clear. This is a simple step to add to your routine.
Dirty tools also impact your makeup application. When a beauty blender is full of old product, it cannot absorb new product correctly. This means your foundation or concealer will not blend smoothly. It might look streaky or uneven. A clean powder puff applies powder lightly. A dirty one might put too much product on. This results in a cakey look. Fresh tools give you a flawless finish. They pick up and distribute makeup evenly. I notice a big difference when I use a clean sponge. The makeup looks much better.
- Prevent Skin Issues: Unclean tools harbor bacteria. These bacteria can cause acne, rashes, and infections. Regular cleaning removes these harmful microbes. This protects your skin’s health.
- Improve Makeup Application: Clean tools perform better. They blend makeup seamlessly. They ensure an even product distribution. This leads to a smoother, more natural finish.
- Extend Tool Lifespan: Buildup can break down the material of your tools. Regular washing helps maintain their texture and shape. It prevents them from deteriorating quickly. This saves you money in the long run.
- Maintain Hygiene: Just like we wash our hands, we should wash our makeup tools. It is a basic hygiene practice. It ensures you are not transferring germs to your face. This creates a safer beauty routine.
Keeping your beauty blender and powder puff clean is a small task. However, it offers big benefits for your skin and makeup. It is worth the effort to ensure your tools are always fresh. This simple habit improves your overall beauty routine.
Daily Care and Quick Cleans for Your Tools
Regular, quick cleaning helps maintain your beauty blender and powder puff between deep washes. This daily care stops heavy buildup. It also keeps your tools more hygienic. After each use, you should do a quick clean. This prevents bacteria from multiplying quickly. It also stops makeup from drying hard on the tool.
For a beauty blender, a quick rinse under warm water is a good start. Add a small amount of mild soap, like baby shampoo or a specific beauty blender cleanser. Gently squeeze the sponge to work the soap through it. You will see makeup rinse out. Keep rinsing and squeezing until the water runs clear. This method removes most surface makeup. It is simple to do right after you finish your makeup.
Powder puffs also benefit from daily care. You can tap excess powder off after each use. For a quick clean, you can also gently wipe the surface with a damp cloth. Some people use a dry brush to remove loose powder. This stops powder from pressing deep into the puff’s fibers. It keeps the puff soft and ready for the next application. Remember that quick cleans are not a substitute for deep cleaning. They simply extend the time between full washes.
- Beauty Blender Quick Clean:
- Rinse the sponge under warm, running water.
- Apply a small amount of gentle soap (liquid or solid).
- Gently squeeze and massage the sponge to create a lather.
- Rinse until the water runs clear.
- Squeeze out excess water and let it air dry.
- Powder Puff Quick Clean:
- Tap the puff against a hard surface to remove loose powder.
- Use a clean, dry cloth to gently rub off surface makeup.
- For a slightly deeper quick clean, mist lightly with a brush cleaner spray and wipe.
- Ensure it is fully dry before storing.
These small steps make a big difference. They keep your tools fresher day to day. They also make the deep cleaning process easier later on. I always try to do a quick clean after using my tools. It saves me time in the long run. It also keeps my skin happy.
Deep Cleaning Your Beauty Blender for Best Results
Deep cleaning your beauty blender is important for thorough hygiene. This process removes stubborn makeup and bacteria. You should deep clean your beauty blender at least once a week. If you use it daily, consider cleaning it more often. This ensures the sponge stays soft and free of germs. Proper deep cleaning extends the life of your beauty blender.
You will need a few simple supplies for deep cleaning. Gather warm water, a mild soap, and a clean towel. Many people use liquid dish soap or baby shampoo. Special beauty blender cleansers also work well. Some also like to use a solid brush cleanser. This helps scrub the sponge without tearing it. The goal is to get all the old makeup out.
Start by wetting your beauty blender under warm running water. It will expand in size. Apply a generous amount of your chosen cleanser. Work the soap into the sponge by gently squeezing and massaging it. You will see makeup and dirt come out in the water. Continue squeezing, rinsing, and reapplying soap until the water runs completely clear. This part takes patience. Make sure no soapy residue remains. After cleaning, squeeze out excess water. Then, gently pat the sponge with a clean towel.
- Supplies Needed:
- Warm water
- Mild liquid soap (baby shampoo, dish soap, or dedicated beauty blender cleanser)
- Clean towel
- Step-by-Step Process:
- Wet the Sponge: Hold the beauty blender under warm, running water. Allow it to soak up water and expand.
- Apply Cleanser: Squeeze a good amount of your chosen cleanser directly onto the wet sponge.
- Lather and Squeeze: Gently massage the sponge, squeezing it repeatedly. This helps the soap penetrate all layers. You will see makeup and impurities coming out with the water.
- Rinse Thoroughly: Keep rinsing the sponge under running water. Continue squeezing until the water runs clear. Ensure no bubbles or makeup residue remain.
- Remove Excess Water: Squeeze the sponge firmly to remove as much water as possible.
- Pat Dry: Gently pat the sponge with a clean towel to absorb remaining moisture.
For extra stubborn stains, you can try a small amount of baking soda. Make a paste with baking soda and water. Rub this paste on the stained area. Gently work it in. Then, rinse as usual. Baking soda is a gentle abrasive. It can help lift tough spots. This can also be helpful for how to clean shoes in the washer or other tricky fabric stains. Just remember to always be gentle.
Deep Cleaning Your Powder Puff Effectively
Deep cleaning your powder puff removes ingrained makeup, oils, and bacteria. This process keeps your puff soft and hygienic. It also ensures it applies powder evenly. You should deep clean your powder puff every few weeks, or more often if you use it daily. A clean puff makes your makeup look better and keeps your skin clear.
You will need warm water and a gentle soap for cleaning your powder puff. Baby shampoo or a mild laundry detergent works well. Some people use solid brush soap too. The key is to avoid harsh chemicals. These can damage the delicate fibers of the puff. Gentle cleansers keep the puff soft. This is important for a smooth application.
Start by dampening your powder puff with warm water. Apply a small amount of soap directly to the puff. Gently rub the puff against itself or use your fingers to work the soap into the fibers. You will see makeup residue start to come out. Rinse the puff thoroughly under warm water. Keep rinsing until the water runs clear and no soap remains. It is important to remove all suds. After rinsing, gently squeeze out excess water. Do not twist or pull the puff. This can stretch or damage it.
- Supplies Needed:
- Warm water
- Mild liquid soap (baby shampoo, mild laundry detergent, or solid brush soap)
- Clean towel
- Step-by-Step Process:
- Dampen the Puff: Hold the powder puff under warm, running water until it is fully damp.
- Apply Cleanser: Dispense a small amount of soap onto the puff.
- Gently Lather: Rub the puff gently against itself or use your fingertips to work the soap into the fabric. You should see makeup rinsing away.
- Rinse Completely: Rinse the puff under warm running water. Continue until the water is clear and all soap is gone. This is similar to how to clean bathroom rugs for thorough rinsing.
- Squeeze Excess Water: Gently squeeze the puff to remove as much water as possible without twisting.
- Pat Dry: Use a clean towel to absorb remaining moisture.
For stubborn stains on your powder puff, a small amount of baking soda can be helpful. You can sprinkle baking soda on the damp puff. Gently rub it in with your fingers. Let it sit for a few minutes. Then, rinse thoroughly. This can help lift tough grease or oil stains. Baking soda is known for its cleaning power, which is also useful for things like how to clean shower with baking soda. Always be gentle with your puff to keep its soft texture.
Drying Your Beauty Blender and Powder Puff Properly
Drying your beauty blender and powder puff correctly is as important as cleaning them. Improper drying can lead to several problems. If tools stay damp, they can grow mold or mildew. This is unhealthy for your skin. It also makes your tools smell bad. Mold can also damage the material of your tools. A properly dried tool stays fresh and lasts longer.
After washing, gently squeeze out all excess water from your beauty blender. Do not wring or twist it hard. This can damage the sponge’s structure. Then, place it on a clean, dry towel. You can also use a special drying stand or a ventilated mesh bag. The key is to ensure air circulates around the entire sponge. Do not store it in an enclosed space like a makeup bag while it is still wet. This traps moisture and encourages mold.
For powder puffs, after gently squeezing out water, lay them flat on a clean, dry towel. You can also hang them if they have a loop. Make sure they are in an area with good airflow. Avoid direct sunlight, as this can break down the fibers over time. It is important that both your beauty blender and powder puff are completely dry before you use them again or store them. This might take several hours. Some larger tools could take overnight to dry.
- Beauty Blender Drying:
- Gently Squeeze: Remove excess water by gently squeezing the sponge.
- Air Circulation: Place it on a clean, dry towel or a special drying stand. Ensure air flows around all sides.
- Open Space: Let it dry in a well-ventilated room.
- Avoid Enclosures: Do not put it back in a makeup bag or closed drawer until it is completely dry. This helps prevent issues like mold, similar to preventing mold when learning how to clean mold from washing machine components.
- Powder Puff Drying:
- Gently Squeeze: Press out excess water without twisting.
- Lay Flat: Lay the puff flat on a clean, dry towel.
- Airflow: Place it in an area with good air circulation.
- Patience is Key: Allow ample time for the puff to dry completely. This might take several hours.
Proper drying ensures your tools remain hygienic and last longer. It is a simple step that protects your skin and your investment. I always make sure my tools are fully dry before I put them away. This gives me peace of mind.
Choosing the Right Cleanser for Your Makeup Tools
Selecting the correct cleanser is crucial for effective cleaning of your beauty blender and powder puff. The wrong product can damage the delicate materials. It can also leave residues that irritate your skin. A good cleanser removes makeup and dirt without harming the tool. It should also be gentle enough for frequent use. This keeps your tools in good condition.
Many options are available for cleaning makeup tools. Mild liquid soaps are a popular choice. Baby shampoo is very gentle and effective. It removes oils and makeup without harsh chemicals. Liquid dish soap can also work for deeper cleaning. Choose one that is mild and free of strong perfumes. These common household items are often readily available. They are also cost-effective.
Dedicated makeup brush and sponge cleansers are also excellent. These products are formulated to break down makeup easily. They often contain ingredients that condition the tools. They can be liquid or solid. Solid cleansers are great for rubbing the sponge directly on the soap. They offer a good scrubbing action. Choose a cleanser based on your preference and the specific needs of your tools. Consider what you already have at home.
- Mild Liquid Soaps:
- Baby Shampoo: Extremely gentle, effective for daily buildup, and safe for delicate materials. It rinses clean.
- Mild Dish Soap: Good for cutting through oil-based makeup and heavy buildup. Choose a sensitive skin formula. This is good for general cleaning, even how to clean with vinegar and baking soda methods often use a mild soap.
- Dedicated Makeup Cleansers:
- Liquid Cleansers: Designed specifically for makeup tools. They often contain conditioning agents. Follow product instructions.
- Solid Cleansers: Convenient for direct scrubbing. You rub the wet tool on the solid soap. They offer a deep clean.
- Natural Alternatives:
- Olive Oil (Pre-wash): For oil-based makeup, apply a small amount of olive oil to the dry tool first. This helps break down stubborn makeup. Then, follow with soap and water.
- Baking Soda Paste: Mix baking soda with a little water to form a paste. Apply to stubborn stains before washing. This is useful for many household cleaning tasks, such as how to clean pots with baking soda.
Always test a new cleanser on a small, less visible part of your tool first. This ensures it does not cause damage or discoloration. Rinse the tool thoroughly to remove all cleanser residue. Leftover soap can make your tools stiff. It can also irritate your skin. A well-chosen cleanser makes cleaning easier. It also keeps your beauty tools performing their best.
When to Replace Your Beauty Blender and Powder Puff
Knowing when to replace your beauty blender and powder puff is as important as cleaning them. Even with regular cleaning, these tools do not last forever. They break down over time. Their effectiveness decreases. Using old or damaged tools can affect your makeup application and hygiene. This section will help you decide when it is time for new ones.
A beauty blender typically lasts about three to six months. This depends on how often you use it and how well you clean it. Look for signs of wear. If your beauty blender starts to tear, crack, or flake, it is time for a new one. Discoloration that does not wash out is another sign. A sponge that feels mushy or loses its bounce is also ready for replacement. These changes mean the material is breaking down. It cannot apply makeup as smoothly.
Powder puffs generally last longer than beauty blenders, sometimes up to a year. However, they also show signs of wear. If your powder puff feels less soft, or if the fibers start to mat together, it is time to replace it. Permanent stains or an unpleasant smell that lingers after washing are clear indicators. A damaged puff cannot pick up or distribute powder evenly. It can make your makeup look patchy. Replacing tools promptly ensures better makeup results and skin health.
- Signs Your Beauty Blender Needs Replacement:
- Tears or Cracks: Physical damage means the sponge is losing its integrity.
- Flaking: Small pieces of the sponge material coming off indicates breakdown.
- Permanent Discoloration: Stains that do not wash out mean makeup has deeply penetrated the sponge.
- Loss of Bounce/Texture: If it feels mushy or less elastic, it cannot blend effectively.
- Unpleasant Odor: A persistent smell after cleaning suggests bacterial growth or mildew.
- Signs Your Powder Puff Needs Replacement:
- Matted or Hardened Fibers: The puff loses its softness and ability to pick up powder.
- Permanent Stains: Similar to beauty blenders, deep stains indicate embedded grime.
- Tears or Fraying: Physical damage affects application and can harbor dirt.
- Lingering Odor: An enduring bad smell is a sign of bacteria or mildew.
I always mark my calendar for when I buy new makeup tools. This helps me remember when it is time to check them. Replacing worn-out tools is a small investment. It protects your skin. It also ensures your makeup looks its best. Do not hold onto old tools for too long. Fresh tools make a big difference.
Storing Your Clean Beauty Tools
Proper storage of your clean beauty blender and powder puff is crucial. It protects them from dust, dirt, and bacteria. Good storage also helps them maintain their shape. It ensures they are ready for your next makeup application. Storing tools incorrectly can reverse all your cleaning efforts. It can also shorten their lifespan.
After cleaning and complete drying, store your beauty blender in a breathable container. Many beauty blenders come with a small plastic case. These cases often have holes. This allows air to circulate. A mesh bag or a dedicated beauty sponge holder also works well. Avoid airtight containers, as these can trap any remaining moisture. This encourages mold growth. Keep your beauty blender in a clean, dry place. A drawer or a vanity top away from humidity is ideal.
For powder puffs, a clean, dry container is also best. Many powder compacts include a puff holder. You can also use a small, clean cosmetic bag or a dedicated compartment in your makeup drawer. Ensure the puff is completely dry before storing it. Do not store it with dirty brushes or other used makeup tools. This can transfer germs. Keep your storage area free of dust. A clean storage environment keeps your tools sanitary and ready for use.
- Beauty Blender Storage:
- Breathable Container: Use a case with ventilation holes, a mesh bag, or an open-air stand. This ensures airflow.
- Dry Location: Store in a clean, dry place. Avoid damp bathrooms or humid areas.
- Avoid Airtight: Do not store in sealed plastic bags or airtight containers while there is any moisture.
- Separate: Keep it separate from dirty brushes or used makeup items.
- Powder Puff Storage:
- Clean Compartment: Store in its compact, a clean cosmetic bag, or a designated drawer section.
- Dryness is Key: Ensure the puff is entirely dry before putting it away.
- Protection from Dust: Choose a storage method that keeps dust and debris away from the puff’s surface.
- Organized Space: A tidy makeup area helps keep all your tools clean and easy to find.
I keep all my clean tools in separate, breathable containers. This makes finding them easy. It also gives me peace of mind that they are clean. Proper storage extends the life of your tools. It also keeps your skin healthier. It is a simple habit that has a big impact on your beauty routine.
FAQ Section
How often should I clean my beauty blender?
You should deep clean your beauty blender at least once a week if you use it daily. For those who use it less often, every two weeks is fine. Quick rinses after each use help maintain hygiene between deep cleans. Regular cleaning stops makeup buildup and bacterial growth, protecting your skin.
Can I put my powder puff in the washing machine?
No, you should not put your powder puff in a washing machine. The machine’s agitation can damage the delicate fibers. It can also cause the puff to lose its shape. Hand washing with mild soap and warm water is the safest and most effective method for cleaning powder puffs. This preserves their softness and integrity.
What is the best soap to clean a beauty blender?
A mild liquid soap is best for cleaning a beauty blender. Baby shampoo, gentle dish soap, or dedicated beauty blender cleansers work very well. These soaps break down makeup and oils without harsh chemicals. Avoid strong detergents or bar soaps with moisturizers, as they can leave residue or damage the sponge.
How long does it take for a beauty blender to dry completely?
A beauty blender can take anywhere from 4 to 24 hours to dry completely. This depends on humidity, airflow, and the size of the sponge. Always ensure it is fully dry before storing it. A damp sponge can develop mold and bacteria, which is harmful to your skin.
Can I use rubbing alcohol to clean my makeup tools?
Using rubbing alcohol alone is not recommended for regular cleaning of beauty blenders or powder puffs. While it sanitizes, it can dry out and damage the material over time. It can also leave a strong smell. A mild soap and water solution is much gentler and more effective for daily hygiene.
How do I remove stubborn stains from my beauty blender?
For stubborn stains, after a regular wash, try using a small amount of baking soda. Make a paste with baking soda and water. Gently rub it onto the stain. Let it sit for a few minutes. Then, rinse thoroughly with warm water until the stain lifts and no residue remains. This method is often effective without damaging the sponge.
Conclusion
Cleaning your beauty blender and powder puff is a simple yet vital part of your beauty routine. We have discussed the many reasons why this is important. Regular cleaning prevents skin problems. It improves how your makeup looks. It also helps your tools last longer. By following these steps, you keep your cosmetic tools hygienic and effective.
You learned about daily care and deep cleaning methods. We covered how to choose the right cleanser. We also discussed proper drying techniques. These steps ensure your beauty blender and powder puff remain in top condition. They are always ready for a flawless application. A clean tool means healthy skin. It means better makeup.
Remember, a little effort goes a long way. Make cleaning your beauty blender and powder puff a regular habit. Your skin will thank you. Your makeup will look amazing. Take action today. Implement these cleaning tips. Keep your beauty tools fresh and clean. Your face deserves the best care.
- beauty blender cleaning
- powder puff hygiene
- makeup tool care
- cosmetic cleaning tips

Todd Martin
Senior Writer
With over 15 years of experience in home renovation and design, I started HEG to share what I’ve learned with homeowners who want to create spaces that are both beautiful and functional. I’ve always believed in a hands-on approach, and over the years, I’ve picked up practical solutions that actually work. Through HEG, I aim to make home improvement more approachable, sharing real tips that help you create a home you truly love.