· Todd Martin · Personal Care · 15 min read
How To Clean Braun Series 7

Mastering Your Braun Series 7: A Deep Clean Guide
Do you want your Braun Series 7 shaver to perform its best every day? Regular cleaning is key. A well-maintained shaver provides a close, comfortable shave and lasts longer. This guide shows you exactly how to clean your Braun Series 7 shaver, covering both manual methods and the convenient Clean & Charge Station. We will explore simple steps, essential care tips, and common troubleshooting advice.
Takeaway:
- Regularly clean your Braun Series 7 shaver to maintain performance and hygiene.
- Utilize the Clean & Charge Station for automatic cleaning, drying, and lubrication.
- Perform manual deep cleaning when a cleaning station is unavailable or for extra thoroughness.
- Always ensure the shaver is dry before storing it to prevent odors and residue.
To clean your Braun Series 7 shaver, use either its Clean & Charge Station for automated cleaning, or manually rinse the shaver head under warm running water. For a deep manual clean, detach the foil and cutter block, rinse thoroughly, and use a small brush to remove trapped hair and debris.
Why Regular Cleaning of Your Braun Series 7 Matters
Keeping your Braun Series 7 shaver clean is more than just a chore. It directly impacts your shaving experience. A dirty shaver can pull hairs, cause skin irritation, and even lead to breakouts. I find that a clean shaver glides smoothly, giving me a much better shave.
Neglecting cleaning also shortens the life of your shaver’s essential parts. Hair, skin particles, and shaving cream residue build up over time. This gunk can clog the foil and cutters. It also puts extra strain on the motor. Regular cleaning ensures your shaver works efficiently for years.
The Impact of Daily Debris
Every time you shave, tiny hairs and dead skin cells get trapped in the shaver head. This debris accumulates quickly. If left uncleaned, it can block the cutting elements. This leads to a less effective shave. It also creates a breeding ground for bacteria, which can cause skin issues.
Preserving Shaving Performance
A clean shaver delivers peak performance. When the foil and cutters are free of debris, they can cut hair cleanly and efficiently. This provides a closer and more comfortable shave. Regular cleaning also helps maintain the sharpness of the blades, reducing the need for frequent replacements. Think of it like any other appliance you maintain for top performance. Just as you might clean a filter in a dishwasher for optimal operation, your shaver’s head needs similar attention.
Understanding Your Braun Series 7 Clean & Charge Station
Many Braun Series 7 models come with a Clean & Charge Station. This system offers an effortless way to maintain your shaver. It cleans, dries, lubricates, and charges your shaver automatically. I appreciate how convenient this system makes my routine. It saves me time and ensures a hygienic shaver every day.
The station uses a special alcohol-based cleaning solution. This solution sanitizes the shaver head, removing microscopic debris and bacteria. After cleaning, it dries the shaver with a fan. This ensures no water spots or mildew form. The lubricating agents in the solution also keep the blades running smoothly.
Automatic Cleaning Cycles
Using the Clean & Charge Station is simple. You just place your shaver head-down into the station. Press a button, and the station does the rest. It runs through a complete cycle tailored to your shaver’s needs. The intelligent system detects how dirty your shaver is. It then selects the appropriate cleaning intensity. This ensures a thorough clean without wasting solution.
Replacing the Cleaning Cartridge
The cleaning cartridge in the station needs regular replacement. The station usually indicates when the solution level is low. I typically replace mine every few weeks, depending on how often I shave. Replacing the cartridge is easy; you just slide out the old one and slide in a new one. Always ensure you dispose of the used cartridge responsibly. Proper maintenance of cleaning solutions prevents issues like those found when cleaning mold with vinegar in other areas, by keeping the environment clean from the start.
Step-by-Step Manual Cleaning for Your Braun Series 7 Shaver
Even if you have a Clean & Charge Station, knowing how to clean your Braun Series 7 manually is essential. This is especially true for travel or when you need a quick rinse. Manual cleaning ensures good hygiene. It also helps extend the life of your shaver. I often do a quick rinse after every shave, even before placing it in the station.
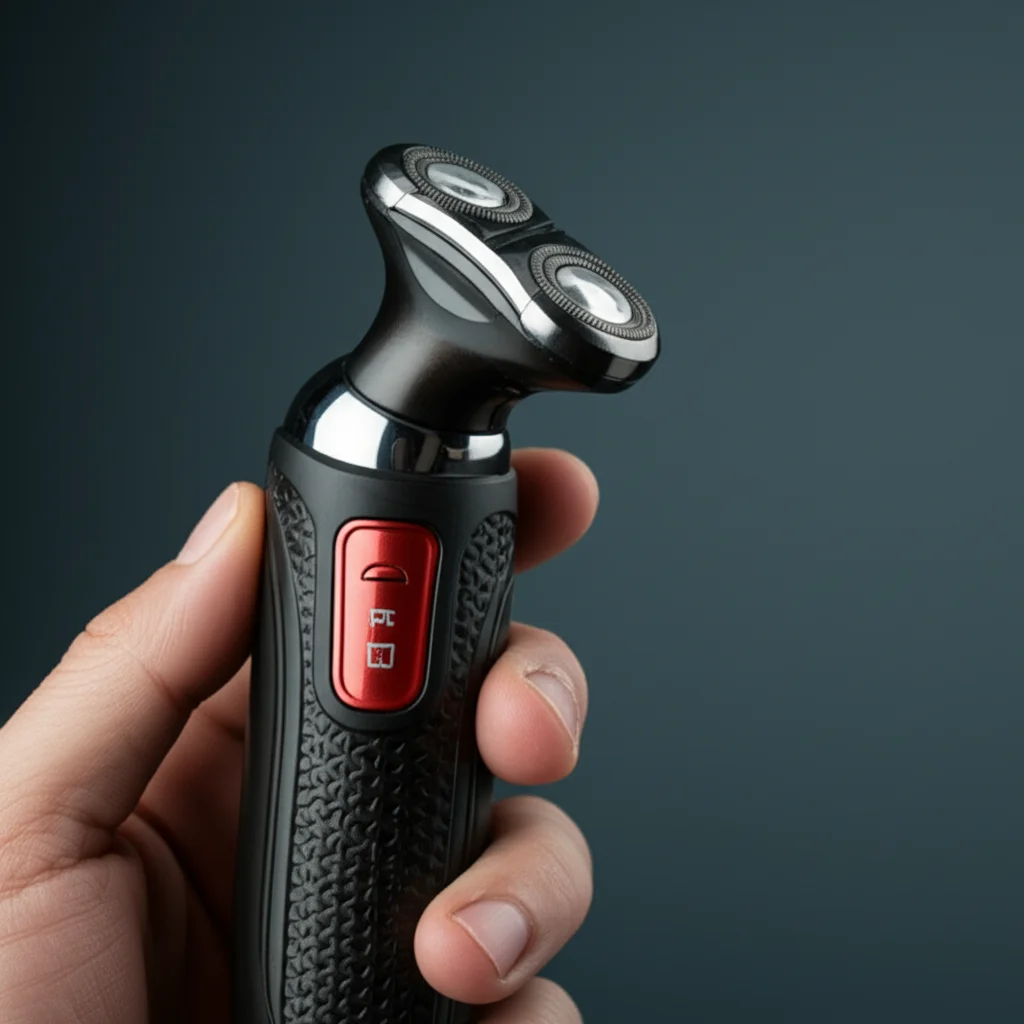
The Braun Series 7 is designed to be fully washable. This means you can safely rinse it under running water. Always disconnect the shaver from the power outlet before cleaning it with water. Never use abrasive cleaners or harsh soaps. These can damage the shaver’s delicate parts. Stick to water and a mild liquid soap if needed.
Quick Rinse After Each Shave
A quick rinse is perfect for daily maintenance. After you finish shaving, turn off the shaver. Then, simply hold the shaver head under warm running tap water. You can activate the shaver and let it run for a few seconds under the water. This helps flush out loose hairs. Turn it off, shake off excess water, and let it air dry completely before storing. I find this simple step prevents major build-up.
Deep Manual Clean Procedure
For a more thorough clean, follow these steps:
- Turn off and unplug the shaver: Safety first. Make sure it is completely disconnected from any power source.
- Remove the foil and cutter cassette: Gently press the release buttons on the sides of the shaver head. The cassette should pop off easily.
- Tap out loose hair: Hold the cassette over a wastebasket and gently tap it. This removes most of the dry hair clippings.
- Rinse thoroughly: Hold both the foil and cutter cassette and the shaver body (without the cassette) under warm running water. Rinse until all visible hair and residue are gone. You can use a mild liquid soap here if you wish, but rinse very well afterwards.
- Use a cleaning brush: Braun usually includes a small brush with the shaver. Use this brush to carefully clean between the cutters and under the foil. Be gentle to avoid damaging the delicate parts. Never use the brush on the foil itself, as it can cause damage. When dealing with cleaning household items that have small crevices, similar techniques for thoroughness apply, for instance when you clean a washing machine with vinegar.
- Rinse again: Give both parts a final rinse under warm water.
- Air dry completely: Shake off excess water. Place the foil and cutter cassette and the shaver body on a clean towel. Let them air dry for several hours. Ensure they are completely dry before reassembling. This prevents moisture-related issues and odors. Just like when you clean your bathroom with vinegar, allowing surfaces to dry completely is crucial for hygiene.
Drying and Storage Essentials
Proper drying is critical after any wet cleaning. Trapped moisture can lead to unpleasant odors or even mold growth. Always allow your shaver to air dry fully. Do not use a cloth to dry the foil or cutters, as this can damage them. Once dry, reattach the cassette. Store your shaver in a cool, dry place. Avoid leaving it in a humid bathroom cabinet. Proper storage protects your investment.
Essential Maintenance Beyond Cleaning for Your Braun Series 7
Cleaning your Braun Series 7 is a vital part of its upkeep, but it’s not the only thing. To ensure your shaver continues to perform at its peak and offers a comfortable shave, you need to consider other maintenance tasks. These tasks include proper lubrication and timely replacement of parts. These steps extend the lifespan of your shaver significantly. I have found that a little extra attention goes a long way in keeping my shaver running perfectly.
Ignoring these aspects can lead to a less efficient shave. It might even cause discomfort. The motor might work harder, and the blades could dull faster. Investing a small amount of time in these maintenance steps saves money in the long run. It avoids early replacement of expensive parts or even a whole new shaver.
Lubricating the Shaver Head
Lubrication is essential for maintaining the smooth operation of your shaver’s cutting elements. The Clean & Charge Station automatically lubricates the blades. However, if you primarily clean your shaver manually, you will need to lubricate it yourself. Braun recommends using a light machine oil, often included with the shaver. Apply a small drop of oil to the top of the foil and a drop on each of the outer cutters. Then, run the shaver for a few seconds. This helps distribute the oil evenly. This simple step reduces friction, which in turn reduces wear and tear on the blades.
When to Replace Shaver Parts
Even with the best cleaning and lubrication, shaver parts wear out over time. The foil and cutter cassette are the most important parts to monitor. Braun recommends replacing them every 18 months for optimal performance. However, this can vary based on your shaving frequency and beard type. I typically notice a difference in shave quality when it’s time for a replacement. Signs like a less close shave, increased irritation, or a pulling sensation indicate that new parts are needed. Replacing these parts ensures your shaver continues to deliver a like-new shave experience.
Battery Care for Longevity
The battery in your Braun Series 7 shaver also requires some care. Like all rechargeable batteries, it performs best with proper charging habits. Avoid completely draining the battery frequently. Instead, charge it when the low battery indicator comes on. Overcharging the battery also is not good. Disconnect the shaver once it is fully charged. Modern Braun shavers have smart charging features that prevent overcharging, but good habits always help. Storing the shaver at room temperature also preserves battery health. These small actions contribute to a longer battery life for your device.
Troubleshooting Common Cleaning Issues with Braun Series 7
Even with regular cleaning, you might encounter some issues with your Braun Series 7 shaver. These problems are usually simple to fix. Identifying the cause quickly saves you hassle and keeps your shaver in top condition. I’ve faced a few common issues myself and found the solutions are often straightforward.
Understanding how to troubleshoot these issues helps maintain the shaver’s hygiene and performance. It prevents minor annoyances from becoming major problems. Often, a small adjustment or a more thorough cleaning technique is all that is needed. Don’t let a minor issue deter you from enjoying a great shave.
Dealing with Stubborn Residue
Sometimes, despite regular rinsing, you might find stubborn residue or mineral deposits on your shaver head. This is common if you have hard water. For these cases, a simple water rinse might not be enough. You can gently clean these areas with a soft cloth dampened with a mild, alcohol-based cleaner or a solution of water and white vinegar. Be very careful not to get liquid into the shaver’s motor. Always ensure the shaver is unplugged and completely dry before reassembling and using it. Similar to how you might tackle stains on wood surfaces, patience and the right cleaning agent are key.
Addressing Unpleasant Odors
An unpleasant smell coming from your shaver often indicates a buildup of bacteria and old hair. This usually happens when the shaver isn’t dried properly or cleaned thoroughly enough. First, perform a deep manual clean as described earlier. Pay extra attention to all crevices. Ensure the shaver head dries completely after cleaning. You can also let the foil and cutter cassette air out separately overnight. If using the Clean & Charge Station, ensure the cleaning cartridge is fresh. A clean, dry shaver rarely smells bad. Persistent odors might mean mold, which requires a more aggressive approach, much like when you need to clean mold under a sink.
Post-Cleaning Power Problems
If your shaver doesn’t turn on or charge properly after cleaning, do not panic. The most common reason is moisture. Even a small amount of water in the charging contacts can prevent it from working. First, ensure the shaver is completely dry, especially the charging port. You can use a soft, dry cloth or cotton swab to gently wipe the contacts. If you use the Clean & Charge Station, ensure the shaver is seated correctly. Sometimes, resetting the shaver by letting it fully discharge and then recharging it resolves the issue. If the problem persists, check the power cord and charger for damage.
Maximizing Hygiene and Performance: Best Practices
To get the most out of your Braun Series 7 shaver, combine cleaning with smart daily habits. These practices extend the life of your shaver. They also ensure you always have a hygienic and effective shave. I have found that consistency is the most important factor. A little effort each day saves a lot of hassle later.
These best practices are not just about cleanliness. They also impact the longevity and efficiency of your shaver’s components. By following these simple guidelines, you prevent issues before they start. This keeps your shaver running smoothly and provides you with comfortable shaves for years to come.
Daily Rinse Routine
After every single shave, I recommend a quick rinse. Simply hold the shaver head under warm running tap water while the shaver is running. This washes away most of the loose hair and shaving cream residue. This small step prevents immediate build-up. It makes the deeper cleaning processes much easier and more effective. It takes only a few seconds but makes a big difference in maintaining daily hygiene.
Weekly Deep Clean (Manual or Station)
Once a week, perform a more thorough cleaning. If you have the Clean & Charge Station, just place your shaver in it. The station will run a complete cleaning cycle. If you clean manually, follow the deep manual clean steps we discussed earlier. This involves removing the foil and cutter cassette, rinsing both parts thoroughly, and letting them air dry completely. This weekly deep clean prevents stubborn residue from accumulating. It ensures the shaver operates at its best. Consider it like a more rigorous cleaning process, similar to when you clean grout in a shower, focusing on deeper layers of cleanliness.
Monthly Inspection
Beyond daily and weekly cleaning, dedicate a few minutes each month to a thorough inspection of your Braun Series 7. Check the foil for any signs of wear, dents, or holes. Inspect the cutters for dullness or damage. This is also a good time to check the charging contacts for corrosion or debris. A quick visual check can help you identify problems early. Early detection means you can replace parts before they significantly impact your shave quality. This proactive approach helps maintain optimal performance and extends the lifespan of your shaver parts.
Frequently Asked Questions
How often should I clean my Braun Series 7?
For optimal hygiene and performance, I recommend a quick rinse after every shave. Perform a deep manual clean or use the Clean & Charge Station at least once a week. If you shave frequently or have a heavy beard, you might need to clean it more often, perhaps every few days, to prevent buildup.
Can I use dish soap to clean my Braun Series 7?
Yes, you can use a small amount of mild liquid dish soap for manual cleaning. Apply it to the foil and cutter cassette, gently work it in, then rinse thoroughly under warm running water. Ensure you rinse all soap residue completely. Harsh detergents or abrasive cleaners should be avoided as they can damage the shaver.
How do I know when to replace the cleaning cartridge?
The Clean & Charge Station typically has an indicator light or icon that tells you when the cleaning cartridge is low or needs replacement. This indicator usually illuminates when there’s enough solution for only a few more cleaning cycles. It’s a clear signal that it’s time to get a new cartridge.
What causes a bad smell in my Braun Series 7 shaver?
A bad smell usually indicates a buildup of old hair, skin cells, and moisture that fosters bacterial growth. This happens if the shaver isn’t dried properly after cleaning or if deep cleaning isn’t performed regularly. A thorough manual deep clean and ensuring complete air drying after each wash can eliminate these odors.
Is it okay to clean my Braun Series 7 under running hot water?
Yes, it is generally safe to clean your Braun Series 7 under warm running water. Braun shavers are designed to be fully washable. Warm water helps loosen hair and dissolve residue more effectively than cold water. Always make sure the shaver is unplugged from its power source before rinsing it.
My shaver feels less efficient after cleaning, why?
If your shaver feels less efficient after cleaning, it could be due to a few reasons. The foil and cutter cassette might be worn out and need replacement. Sometimes, not allowing the shaver to dry completely can leave a film affecting performance. Ensure proper lubrication if you clean manually. Check for any hair still trapped, or if the cassette isn’t seated correctly.
Conclusion
Cleaning your Braun Series 7 shaver is a straightforward process that offers significant rewards. By following a regular cleaning routine—whether through the convenience of the Clean & Charge Station or with a thorough manual approach—you ensure your shaver remains hygienic and performs optimally for years. Remember, consistency is key to preventing buildup and maintaining blade efficiency.
Proper cleaning, lubrication, and timely parts replacement all contribute to a superior shaving experience. A clean Braun Series 7 not only delivers a closer, more comfortable shave but also reduces skin irritation and extends the lifespan of your investment. Make “how to clean Braun Series 7” a consistent part of your grooming regimen. Prioritizing this simple maintenance will keep your shaver in peak condition, ready for an excellent shave every time. Invest a few minutes today for a better shave tomorrow.
- Braun Series 7
- electric shaver
- shaver cleaning
- razor maintenance
- Clean & Charge
- personal hygiene
- grooming tips

Todd Martin
Senior Writer
With over 15 years of experience in home renovation and design, I started HEG to share what I’ve learned with homeowners who want to create spaces that are both beautiful and functional. I’ve always believed in a hands-on approach, and over the years, I’ve picked up practical solutions that actually work. Through HEG, I aim to make home improvement more approachable, sharing real tips that help you create a home you truly love.