· Todd Martin · Outdoor Maintenance · 18 min read
How To Clean Cedar Fence

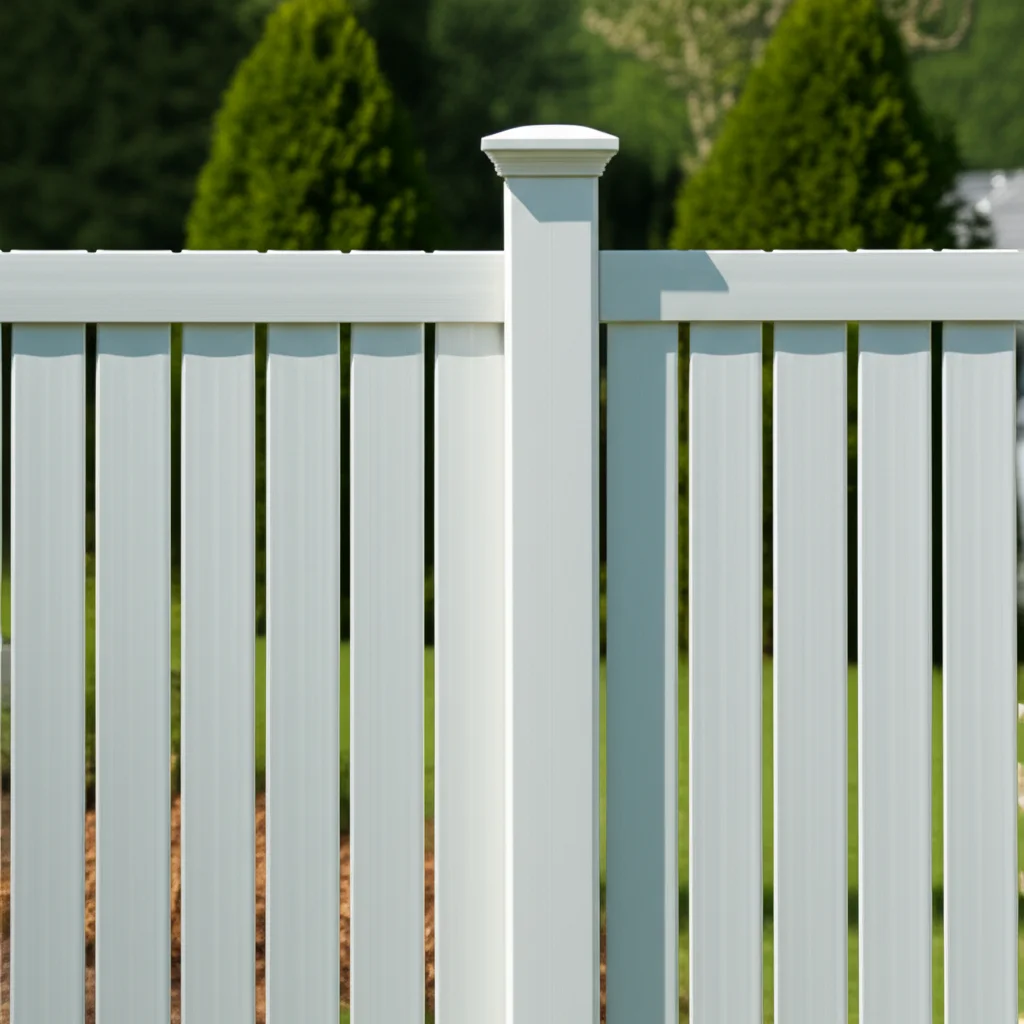
Clean Cedar Fence: Restore Its Natural Beauty
Your cedar fence is a beautiful part of your home’s exterior. It adds charm and privacy. Over time, however, exposure to weather elements can leave it looking dull, dirty, or even covered in unsightly mold and mildew. This can diminish its beauty and shorten its lifespan.
Learning how to clean cedar fence properly is important. It helps maintain the wood’s integrity and appearance. A regular cleaning schedule prevents damage and keeps your fence looking new. In this comprehensive guide, I will share the best methods and products to bring your cedar fence back to life. You will learn about safe cleaning solutions, effective techniques, and important safety tips. Get ready to transform your outdoor space.
Takeaway
Cleaning your cedar fence restores its beauty and extends its lifespan. Use gentle methods to protect the wood.
- Always clean your cedar fence gently to avoid damage.
- Prepare the area by clearing debris and protecting plants.
- Choose a suitable cleaning solution, such as oxygen bleach or a specific wood cleaner.
- Apply the cleaner evenly and allow it to work before rinsing.
- Consider pressure washing carefully, using low pressure and a wide nozzle.
- Apply a sealant or stain after cleaning to protect the wood.
How do you properly clean a cedar fence?
To properly clean a cedar fence, gently wash it with a soft brush and a mild cleaning solution. Use a mix of oxygen bleach and water, or a specialized wood cleaner. Rinse thoroughly with a garden hose at low pressure. Avoid high-pressure washing or harsh chemicals like chlorine bleach, which can damage the delicate cedar wood fibers.
Why Your Cedar Fence Needs Regular Cleaning
Cedar fences offer natural beauty and durability. However, they face constant exposure to outdoor elements. Rain, sun, dirt, and biological growth can impact their appearance and health. Regular cleaning helps your fence last longer and look better. It is an essential part of home maintenance.
Over time, your cedar fence can accumulate grime. Dirt and dust settle on the wood surface. Algae, mold, and mildew often grow in damp, shaded areas. These growths create an unsightly green, black, or gray film. They also hold moisture against the wood, which can lead to rot and decay. This weakens the fence structure.
Sunlight also affects cedar. UV rays break down wood fibers. This causes the wood to fade and turn a silvery-gray color. While some homeowners prefer this look, it also means the wood is aging. Cleaning removes surface discoloration and prepares the wood for protective treatments. These treatments restore the wood’s original warmth and protect it from further damage. Neglecting cleaning can lead to costly repairs or premature fence replacement.
Understanding Common Fence Blemishes
Your cedar fence can show different types of blemishes. Each type needs a specific cleaning approach. Knowing what you are dealing with helps you choose the right method. This ensures effective cleaning and prevents further damage to the wood.
- Dirt and Grime: This is the most common issue. It comes from soil, dust, and general outdoor debris. A simple wash often removes it.
- Algae, Mold, and Mildew: These are living organisms. They thrive in damp, shady conditions. They appear as green, black, or fuzzy patches. These need specific cleaners to kill the growth.
- Water Stains: These appear as dark spots or streaks. They form when water sits on the wood, especially if there’s mineral content.
- UV Graying: Sunlight causes the wood to oxidize and turn gray. This is a natural process for cedar. Cleaning can often remove some surface graying, making it ready for a new stain or sealant.
Gathering Your Tools: Essential Supplies for Cedar Fence Cleaning
Before you start cleaning your cedar fence, you need the right tools and supplies. Having everything ready saves time and makes the process smoother. Proper equipment also ensures your safety and protects your fence. I always make a checklist before I begin any outdoor project.
Your basic cleaning kit should include a soft-bristle brush or scrub brush. You will also need a few buckets. A garden hose with a spray nozzle is essential for rinsing. For your safety, wear protective eyewear and gloves. You may also want a long-sleeved shirt and pants to protect your skin from splashes and debris.
The type of cleaning solution depends on your fence’s condition. For general dirt, a mild soap and water solution might work. For tougher stains, mold, or mildew, you will need a stronger but still gentle cleaner. Oxygen bleach is often recommended for cedar. It brightens wood without damaging it. You might also consider a commercial wood cleaner designed for fences. Ensure the product states it is safe for cedar.
List of Recommended Tools and Materials
- Soft-bristle brush or scrub brush: Essential for applying cleaner and scrubbing away grime. Choose one that will not scratch the wood.
- Garden hose with adjustable spray nozzle: For wetting the fence and rinsing off the cleaning solution. A wide, gentle spray is best.
- Two large buckets: One for your cleaning solution, one for clean rinse water.
- Protective eyewear: To shield your eyes from splashes.
- Rubber gloves: To protect your hands from chemicals.
- Old clothes/long sleeves and pants: To protect your skin.
- Drop cloths or plastic sheeting: To protect nearby plants, landscaping, or surfaces.
- Pump sprayer (optional): For easier application of cleaning solutions over large areas.
- Pressure washer (optional, use with extreme caution): If using, ensure it has a low-pressure setting (1200-1500 PSI) and a wide-angle nozzle (25-degree or 40-degree).
Having these items ready will help you clean your cedar fence efficiently.
Preparing Your Fence for a Deep Clean
Preparation is key to a successful cleaning project. You cannot simply spray your fence with cleaner and hope for the best. Proper preparation protects your surrounding landscape and ensures the cleaning solution works effectively. It also helps prevent damage to your fence during the cleaning process. I always take the time to prepare thoroughly.
First, clear the area around your cedar fence. Remove any plants, decorations, or furniture that might get in the way. This gives you full access to the fence panels. It also prevents accidental overspray on items you do not want to clean. Make sure pathways are clear and there are no tripping hazards.
Next, protect your landscaping. Cedar cleaning solutions, even mild ones, can harm plants. Cover any shrubs, flowers, or delicate plants near the fence with plastic sheeting or tarps. Secure them firmly so they do not blow away. You can also thoroughly pre-wet the soil around the base of the fence. This helps dilute any runoff that might reach plant roots. Pre-wetting the fence itself is also important. It helps the cleaning solution absorb evenly and prevents streaks.
Finally, give your fence a preliminary rinse. Use your garden hose to spray down the entire fence. This removes loose dirt, cobwebs, and any debris. It also helps moisten the wood fibers. This initial rinse ensures that your cleaning solution can focus on the stubborn grime and stains, rather than just washing away surface dust. Think of it as preparing a clean canvas.
Gentle Cleaning Solutions for Cedar Fences
Choosing the right cleaning solution is crucial for cedar. Cedar is a soft wood. Harsh chemicals can damage its fibers, causing discoloration or even structural weakening. You want a solution that cleans effectively without harming the wood. Many gentle yet powerful options are available.
One of the most popular and safest options is oxygen bleach. This is different from chlorine bleach. Oxygen bleach uses sodium percarbonate, which breaks down into oxygen and soda ash. It effectively brightens wood and kills mold, mildew, and algae without stripping the wood’s natural color or damaging its cellular structure. Mix oxygen bleach powder with warm water according to package directions. It creates a foamy solution that you can apply easily.
For lighter cleaning or as a natural alternative, a vinegar solution works well. Mix equal parts white vinegar and water in a spray bottle or bucket. Vinegar is acidic and can help remove light mold, mildew, and general dirt. It’s especially good for removing stains. While effective, it may not be as powerful as oxygen bleach for heavy biological growth. You can learn more about using vinegar for cleaning how to clean mold with vinegar. This can be a good option for small areas or regular maintenance.
Commercial wood cleaners are also available. Look for products specifically formulated for cedar or wood fences. Read labels carefully to ensure they are bleach-free and safe for your type of wood. Some commercial cleaners contain oxalic acid, which is good for removing rust stains and brightening gray wood. Always follow the manufacturer’s instructions for mixing and application. Remember that different stains might need different approaches. For general wood stains, you might find useful tips on how to clean stains on wood.
DIY Cleaning Recipes
Here are a couple of simple, effective DIY cleaning recipes for your cedar fence:
Oxygen Bleach Solution:
- Ingredients: 1 cup powdered oxygen bleach, 2 gallons warm water.
- Instructions: Mix the oxygen bleach into the warm water in a large bucket until fully dissolved. Apply immediately as the solution starts to lose potency after a few hours. This is excellent for general cleaning and mold removal.
Vinegar and Water Mix:
- Ingredients: 1 part white vinegar, 1 part water.
- Instructions: Combine in a spray bottle or bucket. This is ideal for light dirt, mildew, and refreshing the wood’s appearance. It’s a very eco-friendly choice.
Always test any cleaning solution on an inconspicuous area of your fence first. This ensures it does not cause discoloration or damage. Wait for it to dry completely to see the full effect before applying it to the entire fence.
Mastering the Cleaning Process: Step-by-Step Guide
Once your fence is prepared and you have your chosen cleaning solution, you are ready to begin the actual cleaning. This process requires patience and attention to detail. Rushing through it can lead to uneven results or damage. Follow these steps for a sparkling clean cedar fence.
Start by applying the cleaning solution to a small section of the fence. Work from the bottom up to avoid streaks. This prevents dirty runoff from dripping onto areas you have not cleaned yet. Use a pump sprayer for large areas or a soft-bristle brush to apply the solution directly. Make sure the wood is thoroughly saturated but not dripping excessively.
Allow the cleaning solution to sit on the fence for the recommended time. This dwell time is crucial. It gives the cleaner a chance to break down dirt, algae, and mildew. For most oxygen bleach solutions, this might be 10-15 minutes. For milder solutions like vinegar, it could be a bit longer. Do not let the solution dry on the wood. If it starts to dry, mist it lightly with water.
After the dwell time, gently scrub the fence surface. Use your soft-bristle brush. Scrub in the direction of the wood grain. This helps lift away embedded dirt and stubborn growth without damaging the wood fibers. Apply gentle, even pressure. You will see the grime starting to loosen and lift away. For preparing your fence for other treatments, consider reading about how to clean fence before staining. This will give you a broader understanding of fence preparation.
Finally, rinse the fence thoroughly with your garden hose. Start from the top and work your way down. Use a wide, gentle spray. Ensure all traces of the cleaning solution are removed. Leftover cleaner can leave a residue or harm the wood over time. Rinse until the water runs clear. Allow the fence to air dry completely, which might take 24-48 hours depending on weather conditions. Avoid walking near the wet fence or letting plants touch it until it’s fully dry.
Tackling Tough Stains: Mold, Mildew, and Algae
Tough biological growth like mold, mildew, and algae can be a persistent problem on cedar fences. These growths thrive in damp, shady conditions. They not only look unsightly but also hold moisture against the wood, promoting rot. Addressing these stains requires specific attention beyond general cleaning.
For most mold, mildew, and algae, an oxygen bleach solution is very effective. As mentioned earlier, oxygen bleach kills the spores and lifts the stains without damaging the cedar. Apply the solution generously to the affected areas. Let it sit for 15-20 minutes, or even longer for very stubborn growth. The solution needs time to penetrate and kill the organisms. You might notice the growth bubbling or changing color as it works.
After the dwell time, gently scrub the areas with a soft brush. Work the solution into the wood grain. You should see the green, black, or gray stains beginning to disappear. Rinse the area thoroughly with a garden hose. Make sure all residue is gone. For larger infestations or very deep stains, you might need to repeat the application and scrubbing process.
For extremely stubborn black mold, a slightly stronger solution or specific mold remover might be necessary. However, always exercise caution with stronger products. Avoid chlorine bleach entirely on cedar, as it can severely damage the wood’s lignin and turn it an undesirable yellow color. Cedar shake siding often faces similar mold issues. Insights from how to clean cedar shake siding can offer additional context on cleaning similar cedar surfaces. Remember to always test a small, hidden spot before applying any new solution to the entire fence.
Preventing Future Growth
Once you have removed mold, mildew, and algae, consider steps to prevent their return:
- Improve Air Circulation: Trim back bushes and trees that cast too much shade or prevent air flow around the fence. Good airflow helps the wood dry quickly after rain.
- Keep it Dry: Address any sources of constant moisture, such as leaky sprinklers or downspouts that drip onto the fence.
- Apply a Protective Finish: After cleaning and drying, consider applying a mold-resistant stain or sealant. These finishes provide a barrier against moisture and UV rays. Some even contain fungicides to inhibit growth.
Regular maintenance and timely cleaning are the best defense against these tenacious growths.
The Role of Pressure Washing: When to Use and How
Pressure washing can seem like a quick solution for a dirty fence. However, it requires extreme caution, especially with a soft wood like cedar. Used incorrectly, a pressure washer can easily damage the wood fibers, leaving permanent gouges or furring. This type of damage can compromise the fence’s appearance and structural integrity.
I generally recommend using a pressure washer only for deeply ingrained dirt or widespread algae that regular scrubbing cannot remove. Even then, it is vital to use the lowest effective pressure setting. A pressure washer rated between 1200 and 1500 PSI is generally acceptable for wood, but even lower is better if it gets the job done. Use a wide-angle nozzle, such as a 25-degree or 40-degree tip. Never use a zero-degree or rotating turbo nozzle on cedar; these are far too powerful and will destroy the wood.
Hold the pressure washer wand at least 12-18 inches away from the fence surface. Maintain a consistent distance and always keep the wand moving. Work in even, overlapping strokes, following the direction of the wood grain. Do not blast one spot for too long, as this will carve into the wood. Start from a further distance and slowly move closer until you find the right balance of cleaning power without damage. It is always best to test on an inconspicuous area first.
If you are unsure about using a pressure washer, it is safer to stick with a garden hose and manual scrubbing. The gentle approach will take more time, but it significantly reduces the risk of damaging your beautiful cedar fence. If you do opt for pressure washing, remember that it’s just one step in the cleaning process. You still need to apply a cleaner and rinse thoroughly afterward.
Pressure Washer Safety Tips
- Wear Safety Gear: Always wear protective eyewear, gloves, and sturdy closed-toe shoes.
- Keep Your Distance: Never hold the nozzle too close to the wood.
- Use the Right Nozzle: Stick to wide-angle nozzles (25-degree or 40-degree).
- Lower PSI: Use the lowest pressure setting that gets the job done (1200-1500 PSI maximum for wood).
- Consistent Motion: Keep the spray moving steadily to avoid gouges.
- Test First: Always test on an hidden section of the fence.
Post-Cleaning Care: Protecting and Preserving Your Cedar Fence
After all your hard work cleaning, the next step is to protect your cedar fence. Cleaning removes dirt and stains, but it also leaves the wood vulnerable. Applying a protective finish is essential for preserving its beauty and extending its life. This crucial step prevents future damage from weather and biological growth.
Allow your cedar fence to dry completely before applying any finish. This can take 24 to 48 hours, or even longer, depending on humidity and temperature. The wood must be thoroughly dry to absorb the sealant or stain properly. Applying a finish to damp wood can trap moisture, leading to peeling, blistering, or mold growth beneath the finish.
You have a few options for protecting your fence:
- Sealants: These products create a clear or semi-transparent barrier. They repel water and protect against UV rays. Sealants help the wood resist moisture absorption, which prevents warping, cracking, and rot. They typically need reapplication every 1-3 years.
- Stains: Wood stains not only protect but also enhance the color of your cedar fence. They come in various opacities, from transparent (which allows the natural grain to show through) to solid (which provides a paint-like finish). Stains also contain pigments that offer better UV protection than clear sealants. They are often water-repellent too. Stains usually last longer than sealants, typically 3-5 years.
- Combination Stain and Sealers: Many products now offer both staining and sealing properties in one application. These are convenient and provide comprehensive protection.
Choose a product specifically designed for outdoor wood and compatible with cedar. Apply the finish evenly with a brush, roller, or sprayer, following the manufacturer’s instructions. Pay attention to end grains and areas prone to water collection. A good quality finish will keep your fence looking great for years.
Ongoing Maintenance Tips
Maintaining your cedar fence does not end with cleaning and sealing. Regular, simple steps can keep it in top condition.
- Annual Inspection: Walk around your fence yearly. Look for loose boards, damaged posts, or signs of wear. Address small issues before they become big problems.
- Keep Vegetation Trimmed: Ensure plants, bushes, and trees are not growing directly against the fence. This improves air circulation and reduces moisture buildup.
- Clear Debris: Remove leaves, dirt, or other organic matter that collects at the base of the fence. This prevents moisture from being held against the wood.
- Spot Clean: Address minor dirt or mildew spots as soon as they appear. A quick clean can prevent widespread growth.
- Reapply Finish: Check your sealant or stain periodically. If water no longer beads on the surface, it is time for reapplication. This proactive step saves you from doing a full deep clean and re-stain too often.
By following these post-cleaning care and maintenance tips, your cedar fence will remain a beautiful and lasting asset to your home.
FAQ Section
How often should I clean my cedar fence?
You should aim to clean your cedar fence every 2-3 years for general maintenance. If your fence is in a damp, shady area, or prone to mold and mildew, annual cleaning might be necessary. Regular cleaning prevents buildup and protects the wood. Adjust the frequency based on your local climate and specific fence condition.
Can I use bleach on my cedar fence?
You should avoid using chlorine bleach on your cedar fence. Chlorine bleach can damage the wood fibers, stripping its natural color and turning it yellow. It also weakens the wood over time. Instead, use oxygen bleach or a specialized wood cleaner, which are safer and more effective for cedar.
What is the best way to remove black mold from a cedar fence?
The best way to remove black mold from a cedar fence is by using an oxygen bleach solution. Mix oxygen bleach powder with warm water according to package directions. Apply it to the moldy areas, let it sit for 15-20 minutes, then gently scrub with a soft brush and rinse thoroughly. Repeat if necessary for stubborn mold.
How long does it take for a cedar fence to dry after cleaning?
A cedar fence typically takes 24 to 48 hours to dry completely after cleaning. This drying time can vary based on weather conditions such as temperature, humidity, and sunlight. Ensure the fence is thoroughly dry before applying any protective sealants or stains to prevent moisture entrapment and ensure proper adhesion.
Should I seal my cedar fence after cleaning?
Yes, it is highly recommended to seal your cedar fence after cleaning and once it is fully dry. A sealant or stain provides a protective barrier against moisture, UV rays, and biological growth like mold. This step helps preserve the wood’s natural beauty, prevents damage, and significantly extends the lifespan of your fence.
Conclusion
Cleaning your cedar fence is an important task that pays off in many ways. It brings back the fence’s natural beauty, making your outdoor space more inviting. More importantly, it protects the wood from damage caused by dirt, mold, and weather. By following the gentle methods and careful steps I have outlined, you can extend the life of your cedar fence for many years.
Remember, a little effort goes a long way. Use the right tools and solutions. Be patient with the process. After cleaning, apply a protective sealant or stain to lock in the freshness. Regular maintenance will keep your fence looking its best. Do not let your beautiful cedar fence lose its charm. Take action today to clean cedar fence and enjoy a truly transformed backyard. Your fence will thank you.
- cedar fence cleaning
- wood fence care
- fence maintenance
- outdoor cleaning
- mold removal fence
- pressure washing fence

Todd Martin
Senior Writer
With over 15 years of experience in home renovation and design, I started HEG to share what I’ve learned with homeowners who want to create spaces that are both beautiful and functional. I’ve always believed in a hands-on approach, and over the years, I’ve picked up practical solutions that actually work. Through HEG, I aim to make home improvement more approachable, sharing real tips that help you create a home you truly love.