· Todd Martin · Home & Garden · 19 min read
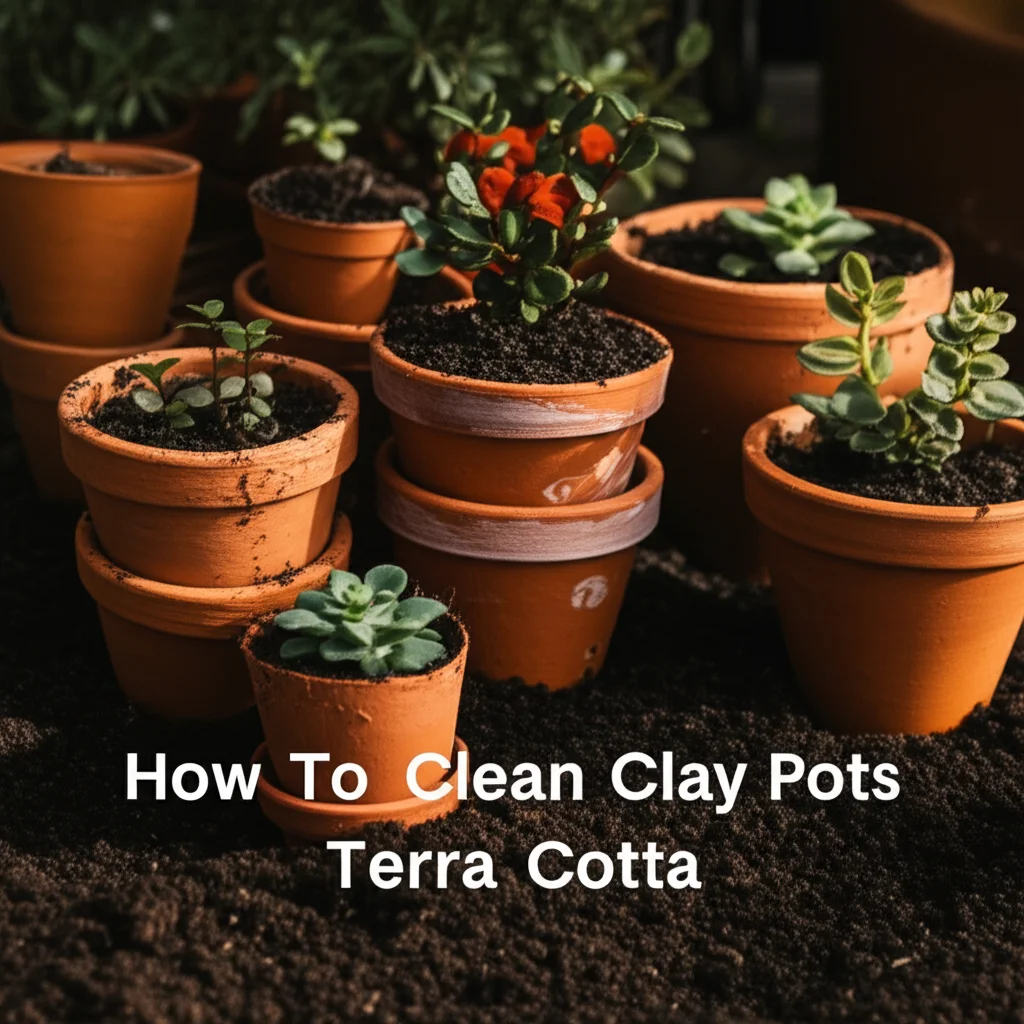
How To Clean Clay Pots Terra Cotta
Mastering Clay Pot Care: How To Clean Terra Cotta Effectively
Have you ever looked at your beautiful plants in their clay pots and noticed unsightly white crusts or green slime? You are not alone. Clay pots, often called terra cotta, add charm to any plant display. However, their porous nature makes them prone to accumulating mineral deposits, algae, and even harmful pathogens over time. Cleaning clay pots is important for both your plants’ health and the aesthetic appeal of your garden.
This article will guide you through simple and effective methods to clean clay pots. We will cover basic maintenance, deep cleaning for stubborn stains, and essential sterilization techniques. By following these steps, you can ensure your terra cotta pots remain beautiful and healthy environments for your beloved plants. I will share practical advice to keep your pots in top condition.
Takeaway
- Soak Thoroughly: Loosen dirt and mineral buildup by soaking pots in water.
- Scrub Actively: Use stiff brushes to remove all surface grime, including algae and mineral crusts.
- Sanitize Wisely: Disinfect pots with a bleach solution or vinegar to kill pathogens, especially for new plants.
- Rinse Completely: Ensure no cleaning residues remain on the porous surface of the pots.
- Dry Properly: Allow pots to air dry fully before use or storage to prevent mold.
Cleaning clay pots, or terra cotta, involves soaking them in water to loosen grime, scrubbing off mineral deposits and organic growth with a stiff brush, and sanitizing them with a diluted bleach or vinegar solution to kill harmful pathogens. Always rinse pots thoroughly after cleaning and allow them to dry completely to prevent future issues.
Why Cleaning Your Clay Pots is Important for Plant Health and Aesthetics
Imagine your plants thriving in fresh, clean homes. Cleaning your clay pots is not just about making them look good. It is a crucial step for the overall health of your plants. Over time, these pots can accumulate various substances that harm plant growth.
Terra cotta pots are naturally porous. This means they absorb water and minerals from the soil and fertilizer. As water evaporates through the pot walls, it leaves behind mineral salts. These salts appear as a white, crusty buildup on the pot’s exterior. This buildup can make your pots look old and neglected. It also affects the pot’s ability to “breathe.” A clean pot promotes better air circulation to plant roots.
Beyond minerals, clay pots can also harbor algae, moss, and even harmful bacteria or fungi. These organic growths are more than just an eyesore. They can compete with your plants for water and nutrients. Worse, if you reuse a pot from a sick plant without cleaning it, you risk spreading diseases to new, healthy plants. Think of it as sterilizing garden tools; cleaning plant pots is a similar concept for safety.
Regular cleaning helps maintain the pot’s integrity. It prevents excessive buildup that could degrade the pot material over many years. A clean pot offers an ideal environment for roots to grow strong and healthy. It also enhances the beauty of your garden or indoor space. I find that freshly cleaned pots truly make my plants look their best.
Understanding Terra Cotta’s Porous Nature and Common Issues
Terra cotta pots are beautiful and functional. They are made from baked clay, giving them a distinct reddish-brown color. Their popularity comes from their porous nature. This means the material has tiny holes that allow air and moisture to pass through. This porosity helps prevent root rot by promoting drainage and evaporation. It is one reason many gardeners prefer them.
However, this very quality makes them susceptible to certain issues. As water moves through the pot walls, dissolved minerals get left behind. This leads to the familiar white crust you often see on older pots. This crust is primarily calcium and other salts from hard water or fertilizers. It can look unsightly and, if severe, can even reduce the pot’s breathability.
Another common problem is the growth of algae, moss, or mold. These green or black growths appear on the exterior of the pots, especially in humid or shady conditions. Algae and moss are generally harmless to the plant itself. However, they indicate high moisture levels. Mold, on the other hand, can sometimes be a sign of poor air circulation or overwatering. These growths also detract from the pot’s appearance.
Lastly, used clay pots can retain plant pathogens. If a plant in a pot suffered from a disease, spores or bacteria might remain in the porous clay even after the plant is removed. Reusing such a pot without proper sanitation can infect a new plant. This is why thorough how to clean clay pot procedures are essential. Understanding these issues helps us choose the right cleaning methods for effective results.
Essential Tools and Supplies for Effective Clay Pot Cleaning
Before you start scrubbing, gather your tools. Having everything ready makes the cleaning process much smoother. You likely have most of these items around your home already. Preparation saves time and effort.
Here is what you will need for a successful clay pot cleaning session:
- Stiff-Bristled Brush: A wire brush works well for tough mineral deposits. A stiff nylon brush or scrub brush is good for general grime. Old toothbrushes are useful for small crevices.
- Large Buckets or Tubs: You will need these for soaking your pots. Make sure they are large enough to submerge the pots completely. A laundry tub or a large plastic storage bin can work perfectly.
- Rubber Gloves: Protect your hands from dirt, cleaning solutions, and any potential pathogens. This is a simple but important safety measure.
- Scrubbing Sponge or Cloth: Useful for lighter scrubbing and applying cleaning solutions. Choose one that can handle some abrasion.
- Dish Soap (Mild): A few drops can help loosen dirt and organic matter. Opt for an unscented, basic variety.
- White Vinegar: This acidic solution is excellent for dissolving mineral buildup. It is a natural and effective cleaner.
- Bleach (Household Chlorine Bleach): For sterilizing pots, especially if you suspect disease. Use it sparingly and with caution.
- Old Towels or Drying Rack: For air drying your pots after cleaning. You need a space where they can dry completely.
- Newspaper or Drop Cloth: To protect your work surface, especially if cleaning indoors.
- Hose or Running Water: For rinsing pots thoroughly. A strong spray helps remove loosened debris.
Having these supplies ready will make cleaning your terra cotta pots an easy task. I always lay out all my materials before I begin. This way, I can move efficiently from one step to the next.
Basic Cleaning for Light Dirt and Dust
Sometimes, your clay pots just need a quick refresh. For light dirt, dust, or minor superficial grime, a simple cleaning method is enough. This regular maintenance keeps your pots looking good without needing intense scrubbing every time. Think of it as a routine wash for your plant’s home.
First, remove any loose soil or debris from the pot. You can gently tap the pot to loosen old soil. Use a small hand brush or even your gloved hand to scoop out remaining dirt. Make sure the drainage hole is clear. A clear drainage hole is crucial for plant health.
Next, soak the pot in a bucket of plain water. Allow it to soak for about 15-30 minutes. This helps loosen any caked-on dirt and prepares the pot for scrubbing. The porous clay will absorb the water, pushing out some of the surface grime. You will notice the water turning cloudy.
After soaking, use a stiff brush or a scrubbing sponge to scrub the entire surface of the pot. Pay attention to both the inside and outside. For particularly dusty or slightly grimy areas, a few drops of mild dish soap can be added to your scrubbing water. Scrub firmly but not so hard that you damage the pot. The goal is to remove visible dirt and any slight discoloration.
Finally, rinse the pot thoroughly with clean water. Make sure no soap residue remains on the pot. Clay is very absorbent, and soap can linger if not fully rinsed. Allow the pot to air dry completely before reusing it. This basic cleaning keeps your pots looking neat and provides a healthy home for your plants. It is a quick and satisfying task.
Deep Cleaning Methods for Stubborn Stains: Mineral Buildup, Mold, and Algae
When basic cleaning is not enough, it is time for a deep clean. Stubborn stains like thick white mineral deposits, green algae, or black mold require stronger methods. These issues are common with terra cotta pots due to their porous nature and exposure to water and elements. Do not worry; there are effective solutions. How to clean terra cotta pot extensively involves tackling these persistent problems.
Tackling Mineral Buildup with Vinegar
The white crust on your pots comes from mineral salts. Vinegar is an excellent natural acid for dissolving these deposits.
- Prepare a solution: Mix equal parts white vinegar and water in a large bucket.
- Soak the pots: Submerge the pots completely in the vinegar solution. Let them soak for several hours, or even overnight for very heavy buildup. You might see bubbles forming as the acid reacts with the minerals.
- Scrub away: After soaking, use a stiff brush, such as a wire brush or a strong nylon brush, to scrub off the softened mineral crust. It should come off much more easily now.
- Rinse thoroughly: Rinse the pots extensively with clean water to remove all traces of vinegar. Residual vinegar can harm plants.
Eliminating Mold and Algae with Bleach (for Severe Cases)
Green algae and black mold thrive in damp environments. For light growth, scrubbing with a brush and plain water often works. For more severe or persistent issues, or if you suspect disease, bleach is an effective disinfectant.
- Create a dilute bleach solution: Mix one part household chlorine bleach with nine parts water (e.g., 1 cup bleach to 9 cups water). Always wear gloves and work in a well-ventilated area.
- Soak briefly: Submerge the pots in the bleach solution for no more than 30 minutes. Prolonged exposure can weaken the clay.
- Scrub and rinse: Use a stiff brush to scrub off any remaining algae or mold. Rinse the pots extremely well, multiple times, with fresh water. The goal is to remove all bleach residue. I soak them again in plain water for an hour after rinsing to be extra sure.
- Air dry completely: Allow the pots to dry thoroughly in the sun. Sunlight can also help kill remaining spores.
Using Baking Soda for Odors and Mild Stains
Baking soda is a gentle abrasive and a natural deodorizer. It is effective for mild stains and removing lingering odors. How to clean pots with baking soda is a simple, non-toxic method.
- Make a paste: Mix baking soda with a small amount of water to form a thick paste.
- Apply and scrub: Apply the paste to stained areas or inside the pot. Let it sit for 15-20 minutes. Use a damp sponge or brush to scrub the paste into the stains.
- Rinse well: Rinse the pots thoroughly with clean water. Baking soda is harmless to plants, but you still want a clean surface.
Always allow pots to dry fully after any deep cleaning method. This prevents new mold or algae growth and ensures the pot is ready for its next use. Choose the method based on the severity of your pot’s issues.
Cleaning Pots for Repotting or New Plants: Sterilization Matters
When you prepare a pot for a new plant, especially one that previously housed a struggling or diseased plant, sterilization is paramount. This step protects your new plant from potential pathogens that might linger in the porous clay. Skipping this step can quickly spread diseases, leading to disappointment. Think of it as a fresh start for your plant.
First, remove all old soil and debris from the pot. Use a stiff brush to scrub the inside and outside surfaces. Ensure no organic matter remains. This initial cleaning removes the bulk of potential contaminants. You can tap the pot to dislodge stubborn soil clumps.
Next, choose your sterilization method. The most common and effective method involves a bleach solution. Mix one part household bleach with nine parts water in a large tub. Submerge the pots completely in this solution. Allow them to soak for at least 20-30 minutes. This contact time is crucial for killing bacteria, fungi, and viruses. Always wear gloves when handling bleach. Work in a well-ventilated area, or outdoors if possible.
Alternatively, for a non-chemical method, you can bake the pots in an oven. After cleaning off all visible dirt, place the pots in an oven set to 220°F (104°C) for about 30 minutes. This high heat effectively kills most pathogens. Ensure the pots are completely dry before placing them in the oven to prevent cracking. This method is effective but consumes more energy.
After soaking in bleach, or after baking, rinse the pots thoroughly with clean, fresh water. Rinsing is extremely important to remove all chemical residues. For bleach-treated pots, I like to rinse them several times and then let them soak in plain water for an hour. This ensures all bleach is gone, as any residue can harm new plant roots.
Finally, allow the sterilized pots to air dry completely before using them. Placing them in direct sunlight can also help kill any remaining spores. A completely dry pot is ready for its new green tenant. This sterilization step gives your new plant the best possible chance to thrive in a truly clean environment.
Drying and Storing Clean Clay Pots Properly
After you have put in all that effort to clean your clay pots, the final steps of drying and storing are just as important. Improper drying can lead to new mold or mildew growth, undoing your hard work. Correct storage protects your pots from damage and keeps them ready for their next use. This stage ensures your pots remain in prime condition.
First, ensure your freshly cleaned pots are completely dry before stacking or storing them. Clay is highly porous, meaning it holds moisture. If you store damp pots, moisture becomes trapped, creating a perfect environment for mold, mildew, and even algae to grow quickly. This reintroduces the very problems you just cleaned away.
To dry them, place the pots in a well-ventilated area. Direct sunlight is ideal, as the sun’s warmth helps accelerate drying and its UV rays can act as an additional sanitizer. Lay them out individually so air can circulate around all surfaces. If drying indoors, ensure good airflow. You can use old towels or a drying rack to elevate them slightly. Depending on humidity and temperature, this drying process can take anywhere from a few hours to a couple of days. I always feel the inside and outside of the pot thoroughly to ensure no dampness remains.
Once dry, you can prepare them for storage. Proper storage prevents chips, cracks, and breakage, especially during off-seasons. Here are some tips for storing your clean clay pots:
- Stack Carefully: Stack pots of similar sizes. Place a piece of newspaper, cardboard, or bubble wrap between each pot. This prevents them from sticking together and reduces friction that could cause chips or cracks.
- Store Indoors or in a Protected Area: Clay pots are susceptible to freezing and thawing cycles. If left outdoors in winter, any absorbed moisture can freeze, expand, and crack the pot. Store them in a shed, garage, basement, or even a covered porch.
- Elevate from the Ground: If storing on a concrete floor, place them on pallets or wood scraps. This prevents moisture from wicking up into the pots.
- Organize by Size: Storing pots by size makes it easier to find what you need later. It also creates a more stable stack.
By following these drying and storage tips, your clean clay pots will stay pristine and ready for your next planting project. This attention to detail extends the life of your beautiful terra cotta.
Common Mistakes to Avoid When Cleaning Clay Pots
Cleaning clay pots seems straightforward, but some common errors can cause damage or reduce the effectiveness of your efforts. Avoiding these pitfalls will ensure your pots remain durable and safe for your plants. I have learned these lessons over time.
One major mistake is not removing all old soil and debris before cleaning. If you leave clumps of soil, they can harbor pathogens or minerals. These leftover bits make your cleaning less effective. Always empty the pot completely and brush out loose dirt first.
Another error is using harsh, undiluted chemicals. Bleach is effective for sterilization, but using it at full strength or soaking pots for too long can weaken the clay. Clay is porous and can absorb chemicals deeply. Always dilute bleach appropriately and rinse pots extensively afterward. Residual chemicals can harm sensitive plant roots.
Not rinsing thoroughly is a significant mistake. Whether you use soap, vinegar, or bleach, any residue left behind can negatively affect plant health. For example, soap can create a film that reduces the pot’s breathability, and lingering vinegar or bleach can burn roots. I always rinse my pots multiple times and sometimes even let them soak in plain water for an hour to leach out any remaining residues.
Scrubbing too aggressively with inappropriate tools can damage the pot. While a stiff brush is good for mineral deposits, a metal wire brush can scratch the surface of terra cotta, making it more prone to future buildup. Choose brushes with strong nylon bristles or non-abrasive scrub pads for general cleaning.
Finally, not drying pots completely before storage is a common oversight. As mentioned, damp stored pots are breeding grounds for mold and mildew. They also become vulnerable to cracking if moisture freezes within the clay during cold weather. Always allow pots to air dry for an extended period. This crucial step prevents future problems.
Avoiding these common mistakes ensures your cleaning process is efficient and beneficial. Your clay pots will stay healthy and attractive for years.
Maintaining Your Clay Pots Between Deep Cleanings
Keeping your clay pots in good shape does not always require a full deep clean. Regular, simple maintenance can significantly extend the time between thorough cleaning sessions. This proactive approach saves you effort and keeps your plants happy. I incorporate these small steps into my gardening routine.
First, brush off loose dirt regularly. As you tend to your plants, use a soft brush or a dry cloth to wipe away any surface dust or loose soil. This prevents accumulation that eventually becomes caked-on grime. A simple wipe-down every few weeks can make a big difference.
Next, address mineral buildup early. If you notice the first signs of white crust forming, you can often remove it with a quick scrub using a damp cloth and a little white vinegar. Dipping a paper towel in vinegar and wiping the affected area can prevent the crust from hardening. Catching it early makes removal much easier.
Avoid overwatering your plants, especially those in terra cotta. Excessive moisture promotes algae and moss growth on the pot’s exterior. Allow the top inch or two of soil to dry out between waterings. This not only benefits the plant by preventing root rot but also keeps the pot’s exterior drier. Proper watering habits reduce the conditions for unwanted growths.
When watering, avoid letting excess water sit in saucers for extended periods. While saucers catch drips, standing water creates a perpetually damp environment for the bottom of the pot. This encourages algae and can even lead to mineral leaching onto the saucer itself. Empty saucers after watering.
Finally, inspect your pots regularly. During your routine plant checks, take a moment to look at the pot’s condition. Note any signs of mold, algae, or heavy mineral buildup. Early detection allows for easier remediation. You can decide if a quick scrub is needed or if it is time for a more thorough cleaning session. This consistent attention keeps your clay pots looking good and performing well. It is a simple habit with great benefits.
FAQ Section
How often should I clean my clay pots?
The frequency depends on usage and environment. For pots used outdoors or with heavy mineral buildup, clean annually or semi-annually. Indoor pots or those with light use might only need cleaning every 1-2 years. Look for visible signs like white crust, green algae, or mold.
Can I use dish soap to clean clay pots?
Yes, you can use a mild dish soap for basic cleaning of dirt and grime. Add a few drops to water and scrub. However, always rinse the pots extremely thoroughly to ensure no soap residue remains. Clay is porous and can absorb soap, which might harm plant roots.
How do I remove the white crust from terra cotta pots?
The white crust is mineral buildup. Soak the pots in a solution of equal parts white vinegar and water. Let them soak for several hours or overnight. After soaking, scrub the softened crust with a stiff brush. Rinse the pots very well with clean water to remove all vinegar residue.
Is it necessary to sterilize pots for new plants?
Yes, sterilizing pots is crucial, especially if they previously held diseased plants or have been sitting unused for a long time. Sterilization kills harmful bacteria, fungi, and viruses that can linger in the porous clay. This protects your new plants from potential infections, ensuring a healthy start.
What causes green growth on the outside of clay pots?
Green growth is typically algae or moss. It thrives in damp, humid conditions with some light. Overwatering or placing pots in consistently shaded, moist areas encourages its growth. While generally harmless to the plant, it indicates high moisture and can be unsightly. Regular scrubbing removes it.
Can I put clay pots in the dishwasher?
While small clay pots might fit, it is not recommended. Dishwasher detergents can be harsh and may leave residues that are difficult to rinse out from the porous clay. The high heat and strong jets can also potentially cause damage or cracking to the terracotta over time. Hand washing is safer and more effective.
Conclusion
Cleaning clay pots, or terra cotta, is a simple yet vital task for any plant enthusiast. You have learned that these beautiful, porous vessels need regular attention to remain functional and attractive. By understanding the common issues like mineral buildup, mold, and hidden pathogens, you can effectively tackle them. We explored methods from basic scrubbing to deep cleaning with vinegar, baking soda, and bleach, ensuring your pots are pristine.
Remember, consistent cleaning of your clay pots helps your plants breathe and thrive. It prevents the spread of diseases and maintains the aesthetic appeal of your garden. Proper drying and careful storage also extend the life of your precious terra cotta. By following these comprehensive steps, you are well-equipped to keep your clay pots in excellent condition. Give your plants the clean home they deserve. Start your next cleaning project today!
- terra cotta pots
- clay pot cleaning
- plant pot care
- gardening tips
- mineral deposits
- mold removal
- natural cleaning

Todd Martin
Senior Writer
With over 15 years of experience in home renovation and design, I started HEG to share what I’ve learned with homeowners who want to create spaces that are both beautiful and functional. I’ve always believed in a hands-on approach, and over the years, I’ve picked up practical solutions that actually work. Through HEG, I aim to make home improvement more approachable, sharing real tips that help you create a home you truly love.