· Todd Martin · Jewelry Care · 23 min read
How To Clean Diamonds

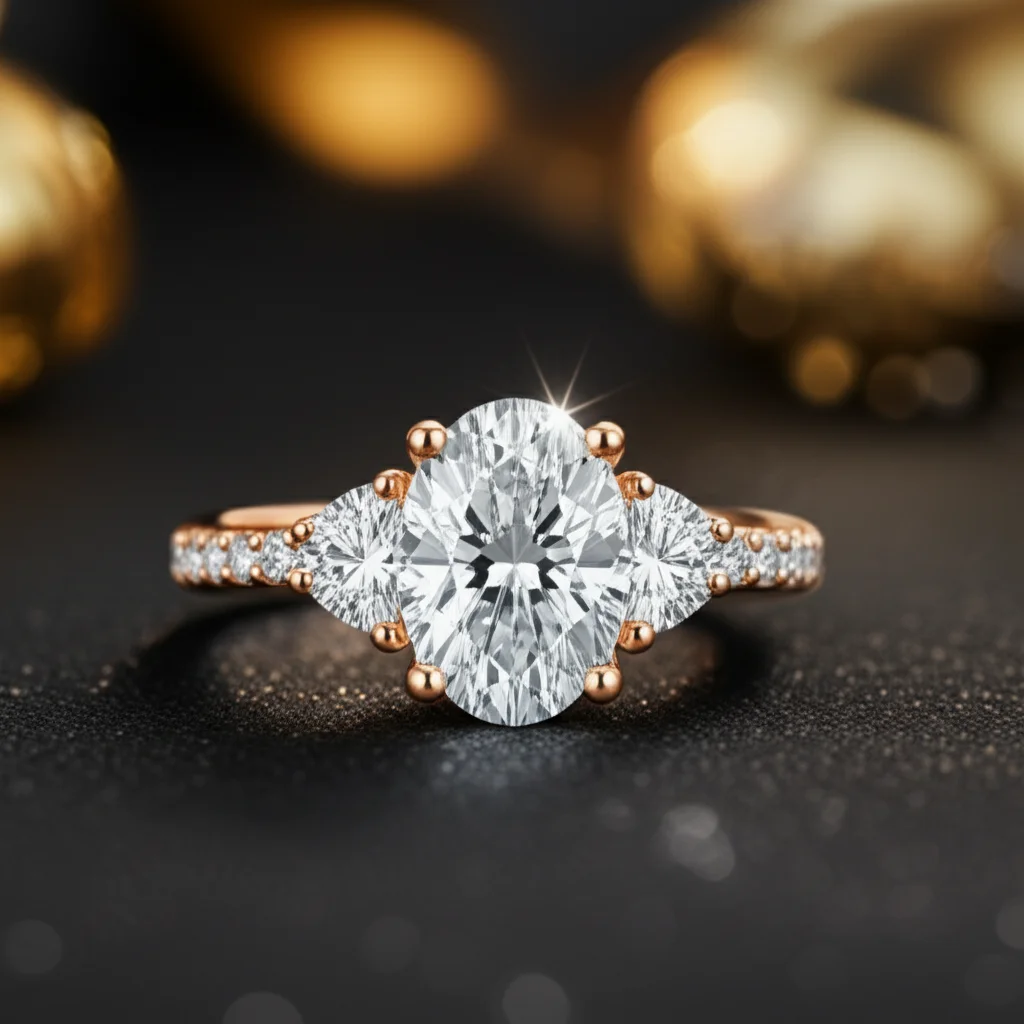
Unlock Your Diamond’s Sparkle: Why Cleaning Matters
Diamonds are symbols of lasting beauty and luxury. They capture light and send it dancing, creating a brilliant sparkle. Over time, however, even the most beautiful diamond can lose its luster. Daily life exposes your precious stone to dirt, oils, lotions, and soap residue. These common substances build up on the diamond’s surface and in its intricate settings. This buildup dulls the stone, preventing light from entering and reflecting properly. When you understand how to clean diamonds, you keep them looking their best.
Keeping your diamonds clean is not just about aesthetics; it also helps preserve their integrity. Grime can trap moisture or chemicals, potentially affecting the metal setting. A regular cleaning routine ensures your diamond remains a radiant focal point. It helps maintain its beauty for years to come. Think of it as a small investment in its lasting brilliance. My own engagement ring, for instance, gleams so much more after a proper cleaning. I find that this simple act brings back its initial magic.
Many people wonder if cleaning diamonds at home is safe. The good news is, for most diamonds, a gentle home cleaning is perfectly safe and effective. You do not need harsh chemicals or specialized equipment for routine maintenance. Simple household items can restore a diamond’s shine. Knowing the right techniques prevents damage while enhancing its natural beauty. We will explore easy, safe methods to make your diamonds sparkle again. This guide outlines everything you need to know.
A clean diamond reflects light optimally. This means more sparkle and fire. Dirt layers obscure the facets, making the stone appear lifeless and cloudy. Regular cleaning sessions reveal the diamond’s true brilliance. It also lets you inspect your jewelry for any potential issues. You can check for loose prongs or other damage more easily when the piece is clean. We will walk you through the simple steps. This helps you get your diamonds back to their dazzling best.
Takeaway: Restore Your Diamond’s Brilliance
- Gentle Soak: Use warm water and mild dish soap for routine cleaning.
- Soft Brush: Gently scrub the diamond and setting with a soft-bristled brush.
- Rinse Thoroughly: Rinse under running water to remove all soap residue.
- Pat Dry: Use a lint-free cloth or air dry for streak-free shine.
- Regular Care: Clean your diamonds regularly to prevent buildup and maintain sparkle.
To clean diamonds effectively, soak them in a solution of warm water and mild dish soap for 20-40 minutes, then gently scrub with a soft brush, rinse under clean water, and dry with a lint-free cloth, restoring their natural brilliance.
Gather Your Tools: Essential Supplies for Diamond Cleaning
Before you begin to clean diamonds, gathering the right supplies is important. Using the correct tools ensures a safe and effective cleaning process. You likely have most of these items around your home already. This makes home diamond cleaning both convenient and cost-effective. Avoid using abrasive materials or harsh chemicals. They can scratch your diamond or damage its metal setting. I always make sure I have these basics on hand before I start.
Here is a list of what you will need:
- A small bowl: Choose a clean bowl, preferably glass or ceramic. This will hold your cleaning solution. I use a small glass ramekin for this purpose.
- Warm water: Tap water is fine, but ensure it is warm, not hot. Hot water can cause sudden temperature changes that are not good for certain settings or stones, especially if they have inclusions.
- Mild dish soap: Select a gentle, liquid dish soap. Look for one that is free of dyes, perfumes, or harsh chemicals. Ammonia-based cleaners are usually okay for diamonds but avoid them if your jewelry has other gemstones, like emeralds or pearls. Dawn dish soap is a popular and safe choice.
- A soft-bristled brush: An old, soft toothbrush works perfectly. Make sure it is clean and has never been used for dental hygiene. The bristles need to be gentle enough not to scratch the metal or stone. A baby toothbrush is an excellent option because its bristles are extra soft.
- A lint-free cloth: Microfiber cloths are ideal. They absorb water well and leave no fibers behind. You can also use a soft cotton cloth, like an old T-shirt, but ensure it is completely clean and lint-free. Paper towels can be too abrasive and might leave lint.
- A small strainer or colander (optional but recommended): This is a safety measure. It prevents your diamond from accidentally falling down the drain when rinsing. I learned this the hard way once!
You may also consider a professional jewelry cleaning solution. Many brands offer diamond-specific cleaners that are safe and effective. Read the labels carefully to ensure they are appropriate for your specific jewelry. Some people opt for ultrasonic cleaners. These devices use high-frequency sound waves to agitate a cleaning solution. They can be very effective for diamonds. However, use them with caution. They are not suitable for all gemstones or settings. Always research your specific piece before using an ultrasonic cleaner. If you are cleaning other types of jewelry, such as fake diamonds or lab-created diamonds, ensure the cleaning method matches their specific material properties to prevent damage. This preparation step makes the actual cleaning process simple and stress-free.
Gentle Home Methods: How to Clean Diamonds Safely
Cleaning your diamonds at home is a straightforward process. The most popular and safest method involves a simple soak. This technique works for most diamond jewelry, including engagement rings. It loosens dirt and grime without damaging the stone or its setting. I use this method regularly for my own jewelry. It keeps my pieces sparkling without much effort. You will be surprised how much brighter your diamond looks afterward.
Here are the steps for the gentle soak method:
- Prepare the cleaning solution: Take your small bowl. Pour in about a cup of warm water. Add a few drops of mild dish soap to the water. Stir the solution gently to mix the soap. You should see a few bubbles forming. The water should be comfortably warm, not hot. This helps dissolve oils and dirt effectively.
- Soak the diamond jewelry: Carefully place your diamond jewelry into the cleaning solution. Ensure the entire piece is submerged. Let it soak for 20 to 40 minutes. For heavily soiled items, you can let it soak for up to an hour. This soaking period gives the soap time to break down accumulated oils and dirt. It lifts them away from the diamond’s surface and the setting’s crevices. I often let my ring soak while I do other chores.
- Gentle scrubbing: After soaking, remove the jewelry from the bowl. Use your soft-bristled brush. Gently scrub the diamond and its setting. Pay extra attention to the back of the diamond, where light enters. Grime often collects here. Brush around the prongs and any intricate details of the setting. The goal is to dislodge any remaining dirt. Be thorough but gentle. Do not apply too much pressure, especially around delicate settings.
- Rinse thoroughly: This step is crucial. Hold your diamond jewelry under warm, running water. Be careful not to let it slip from your grasp. If you have a small strainer, place it in the sink drain. This prevents the jewelry from falling down the drain. Rinse until all soap residue is gone. Any leftover soap can leave a film, dulling the diamond’s sparkle. Make sure water flows through the setting and around the diamond from all angles.
- Dry completely: Use a clean, lint-free cloth to pat the diamond dry. A microfiber cloth is excellent for this. It absorbs moisture without leaving any fibers. You can also let the jewelry air dry on a soft cloth. Avoid using paper towels or tissues, as they can leave tiny bits of paper on the jewelry. Once dry, your diamond should shine brightly again. This simple process can significantly improve its appearance. Remember, consistent cleaning prevents major buildup.
This gentle method is suitable for most natural diamonds set in gold, platinum, or silver. For specific diamond cuts like baguette diamonds, ensure you pay attention to the corners, as dirt can collect there. This method is also safe for most lab-created diamonds, as their chemical composition is the same as natural diamonds. Always prioritize gentle care to maintain your diamond’s beauty and integrity.
Targeting Tough Grime: Advanced Diamond Cleaning Steps
Sometimes, a simple soak and brush may not be enough. Diamonds, especially those worn daily, can accumulate tough grime. Lotions, hairspray, makeup, and cooking oils create a stubborn film. This layer makes your diamond appear cloudy and lifeless. When regular methods fall short, you can try a few advanced techniques. These methods help to cut through persistent buildup. They restore your diamond’s original brilliance. I often find I need these extra steps for my rings after a busy week.
One effective option is to use a mild ammonia-based cleaner. Ammonia is a strong degreaser. It can dissolve stubborn residues. However, it is vital to use ammonia cautiously and in a diluted form.
Here is how to use an ammonia-based cleaner safely:
- Prepare the solution: Mix one part clear ammonia with three parts warm water. Use a non-metallic bowl for this. The fumes from ammonia can be strong, so ensure you are in a well-ventilated area. I usually open a window.
- Soak briefly: Place your diamond jewelry into the diluted ammonia solution. Let it soak for no more than 10-15 minutes. Ammonia is potent, so a longer soak is not necessary and could potentially harm certain metals or softer gemstones if present with the diamond. This brief soak effectively breaks down greasy films.
- Brush gently: After soaking, remove the jewelry. Use your soft-bristled brush to gently scrub the diamond and its setting. Focus on areas where grime is most visible. The ammonia solution helps the brush dislodge stubborn dirt with ease.
- Rinse thoroughly: Rinse the jewelry under warm, running water. Use a strainer in the sink to prevent loss. Rinse until you detect no ammonia smell. Ensure all traces of the cleaning solution are gone. Any remaining ammonia can irritate skin or dull the diamond over time.
- Dry completely: Pat dry with a lint-free cloth. Air drying is also an option. Your diamond should now exhibit exceptional sparkle.
Another advanced tool is an ultrasonic cleaner. These devices use high-frequency sound waves. These waves create vibrations in a liquid. The vibrations dislodge dirt from hard-to-reach places. Ultrasonic cleaners are very effective for diamonds. They give a professional-level clean at home. However, they are not suitable for all types of jewelry. Do not use an ultrasonic cleaner if your diamond has significant inclusions or fractures. The vibrations could potentially worsen them. Also, avoid using it for jewelry with other gemstones like pearls, opals, or emeralds. These stones are often softer or more porous. The vibrations can cause damage.
If you choose to use an ultrasonic cleaner:
- Follow manufacturer instructions: Each machine is different. Read the manual carefully.
- Use appropriate solution: Some cleaners come with specific solutions. Otherwise, use warm water with a few drops of mild dish soap.
- Limit cleaning time: Most diamond pieces only need a few minutes in the ultrasonic cleaner.
- Check condition: Always inspect your jewelry before and after using an ultrasonic cleaner. Look for any loose stones or changes.
When dealing with tough grime, remember that patience and the right tools are key. These advanced steps complement your regular gentle cleaning routine. They help keep your diamonds stunning.
Different Diamond Cuts and Settings: Special Cleaning Needs
While the basic principles of how to clean diamonds apply to all, different cuts and settings present unique cleaning challenges. The way a diamond is cut affects how light interacts with it. Its setting determines how accessible certain areas are for cleaning. Understanding these nuances helps you clean your specific jewelry more effectively. I have learned to adjust my cleaning routine based on the piece I am working with.
Round Brilliant Cut Diamonds: These are the most popular diamonds. Their numerous facets and precise proportions maximize sparkle. Cleaning them generally follows the standard soak and brush method. The main challenge is the pavilion (the bottom part of the diamond). Dirt can accumulate here. This obscures light entry. When brushing, make sure to gently scrub the entire surface. Pay attention to the underside of the stone.
Princess Cut Diamonds: These square diamonds have sharp corners. Dirt loves to hide in these corners. When cleaning, use the soft brush to carefully get into the points. Ensure you do not snag the brush on any prongs. The flat table of the princess cut can also show smudges easily. Use a lint-free cloth for drying to prevent streaks.
Emerald Cut and Asscher Cut Diamonds: These diamonds feature step cuts. They have long, rectangular facets. Their brilliance comes from flashes of light rather than intense sparkle. Smudges and dirt are very noticeable on their wide, flat surfaces. The key to cleaning these is thoroughness. Ensure every facet is wiped clean. Pay extra attention to the linear grooves where dirt can settle. For specific step cuts like baguette diamonds, which are often used as side stones, their elongated shape means dirt can line up along their edges. A soft brush is essential to get into these linear spaces.
Pave Settings: In a pave setting, tiny diamonds are set closely together. They create a continuous surface of sparkle. Cleaning these settings requires careful brushing. Use a very soft brush to get between the tiny stones. Do not apply too much pressure. You do not want to loosen the small diamonds. Soaking is particularly effective for pave settings. It helps loosen dirt trapped in the small crevices.
Prong Settings vs. Bezel Settings:
- Prong Settings: These settings hold the diamond with small metal claws. They allow a lot of light to enter the diamond. However, dirt can easily collect around the prongs and under the diamond. When cleaning, use your brush to go around each prong and underneath the stone. This ensures maximum light return.
- Bezel Settings: A bezel setting encircles the diamond’s entire perimeter with metal. This offers excellent protection. However, it covers some of the diamond’s surface. This can make it slightly harder for light to enter from the sides. Dirt can also get trapped along the edge where the metal meets the diamond. A good soak and thorough brushing along the bezel’s rim are important.
Tension Settings: In tension settings, the diamond appears to float between two pieces of metal. The metal exerts pressure to hold the stone in place. These settings offer a minimalist look. Cleaning is relatively easy since there are fewer crevices. Focus on the exposed surfaces of the diamond. Ensure no residue remains on the metal that grips the stone.
Always inspect your jewelry after cleaning. Check for any loosened stones or changes in the setting. This ensures your diamond jewelry remains secure and beautiful. Different designs simply mean paying a bit more attention to specific areas during cleaning.
Lab-Created vs. Natural vs. Fake: Cleaning Different Diamond Types
Understanding the type of diamond you own is crucial for proper cleaning. While the term “diamond” often refers to natural diamonds, the market includes lab-created diamonds and various diamond simulants. Each type might react differently to certain cleaning methods or chemicals. Knowing the difference ensures you clean your specific stone safely and effectively. I always make sure I know what kind of stone I am dealing with before I start cleaning.
Natural Diamonds: Natural diamonds form deep within the Earth over billions of years. They are composed of pure carbon, crystallized in an isometric system. They are the hardest known natural substance. This extreme hardness makes them highly resistant to scratches. For natural diamonds, the gentle soak method with mild dish soap and warm water is almost always safe. Ammonia solutions are also generally safe for natural diamonds set in precious metals like gold or platinum. Ultrasonic cleaners can be used for natural diamonds. However, exercise caution if your diamond has significant inclusions or fractures, as vibrations could exacerbate them. My own engagement ring has a natural diamond, and the dish soap method works wonders.
Lab-Created Diamonds (Synthetic Diamonds): Lab-created diamonds, also known as synthetic, cultured, or engineered diamonds, are grown in a laboratory. They possess the exact same chemical, physical, and optical properties as natural diamonds. This means they are pure carbon, have the same hardness (10 on the Mohs scale), and reflect light identically. Because their properties are identical to natural diamonds, you can clean lab-created diamonds using the same methods. The warm water and mild dish soap soak is perfectly safe and effective. Ammonia solutions and ultrasonic cleaners are also generally safe, with the same caveats regarding inclusions or fractures. If you are uncertain about distinguishing between these, you can learn more about how to clean lab-created diamonds in more detail.
Diamond Simulants (Fake Diamonds): Diamond simulants are stones that look like diamonds but are made of different materials. They do not share the same chemical or physical properties as real diamonds. Common simulants include cubic zirconia (CZ), moissanite, and white sapphire. While they mimic a diamond’s sparkle, they are often softer and more porous. They can be more susceptible to damage from harsh chemicals or abrasives. Cleaning methods for simulants must be gentler.
- Cubic Zirconia (CZ): CZ is much softer than a diamond. It can scratch more easily and loses its sparkle over time due to surface wear and dirt buildup. Clean CZ jewelry with very mild soap and warm water. Avoid abrasive cleaners or brushes. Always use a very soft cloth for drying. Over time, CZ can absorb oils and become cloudy. Regular, gentle cleaning is key to maintaining its temporary sparkle. You can find specific guidelines for how to clean fake diamonds to ensure you do not damage them.
- Moissanite: Moissanite is a very popular diamond simulant. It is quite hard (9.25 on the Mohs scale), second only to diamond. Moissanite can withstand most gentle cleaning methods safe for diamonds. Warm water, mild dish soap, and a soft brush are suitable. Ultrasonic cleaners are generally safe for moissanite, but always confirm with the jeweler or manufacturer. Moissanite is known to attract grease, so regular cleaning is beneficial.
- White Sapphire: White sapphire is a natural gemstone. It is softer than diamond (9 on the Mohs scale). Clean white sapphire with warm water and mild soap. Avoid harsh chemicals or ultrasonic cleaners, which could affect its clarity or integrity.
Always err on the side of caution. If you are unsure about the type of stone or its setting, use the gentlest method possible. This is the warm water and mild dish soap soak. When in doubt, consult a professional jeweler. They can identify your stone and recommend the safest cleaning approach. Proper identification protects your precious jewelry.
Preserving Brilliance: Daily Habits and When to Seek Pros
Cleaning your diamonds regularly at home is excellent for maintaining their sparkle. However, daily habits also play a significant role in how quickly your diamonds get dirty. Adopting smart routines can extend the time between deep cleans. It helps your diamonds stay brilliant longer. Even with the best home care, there are times when professional cleaning is necessary. Knowing when to seek expert help protects your valuable investment.
Daily Habits for Diamond Brilliance:
- Remove Jewelry for Chores: Take off your diamond rings when doing housework, gardening, or any activity involving chemicals. Cleaning products, especially bleach, can damage metals and some softer gemstones. They also accelerate dirt buildup.
- Avoid Lotions and Hairspray: Apply lotions, creams, and hairspray before putting on your diamond jewelry. These products leave a film on the diamond’s surface. This film traps dirt and dulls the sparkle quickly. I always put my rings on last.
- Take Off for Showering: While soap might seem harmless, showering with your diamond ring can lead to soap scum buildup. This creates a dull, milky film over time. Remove your jewelry before stepping into the shower.
- Store Properly: When not wearing your diamonds, store them separately from other jewelry. Diamonds are hard and can scratch softer gemstones or metals. A soft pouch or a separate compartment in a jewelry box is ideal.
- Quick Polish: If your diamond looks a little dull between washes, give it a quick wipe with a clean, lint-free cloth. This removes surface oils and dust, restoring immediate shine.
When to Seek Professional Diamond Cleaning:
Even with diligent home care, professional cleaning is important. Jewelers use specialized equipment and solutions to perform a deep clean. They can reach areas impossible to clean at home.
- Annual Cleaning: I recommend taking your diamond jewelry to a professional jeweler once a year. This annual visit ensures a thorough cleaning. Jewelers often use steam cleaners or industrial-grade ultrasonic cleaners. These can remove the most stubborn grime.
- Loose Stones or Settings: A professional jeweler can also inspect your jewelry for wear and tear. They check for loose prongs or damaged settings. Over time, prongs can bend or wear down. This puts your diamond at risk of falling out. A jeweler can tighten prongs and perform necessary repairs. This inspection is just as vital as the cleaning itself.
- Significant Buildup: If your diamond has not been cleaned in a long time, or if it has very intricate details, a professional clean might be the only way to restore its full brilliance. Years of accumulated grime can be incredibly challenging to remove at home.
- Specialty Settings or Gemstones: If your diamond jewelry includes other delicate gemstones (like opals, pearls, or emeralds) or has a very complex, antique setting, professional cleaning is safer. Jewelers understand the specific care requirements for different materials. They avoid damaging sensitive components.
- Before Special Occasions: Before a major event, like a wedding or anniversary, a professional cleaning ensures your diamond looks its absolute best. The sparkle will be undeniable.
Combining smart daily habits with professional annual care ensures your diamonds remain as brilliant as the day you first received them. It is a simple way to protect and enjoy your precious investments for a lifetime.
Common Mistakes to Avoid When Cleaning Diamonds
Cleaning diamonds seems simple. However, some common mistakes can damage your precious jewelry. Knowing what to avoid is as important as knowing what to do. These errors can scratch the diamond, dull its sparkle, or even damage its setting. I have seen many people inadvertently harm their jewelry. I want to help you avoid these pitfalls. Protecting your investment means being smart about your cleaning methods.
Here are the crucial mistakes to steer clear of:
- Using Harsh Chemicals: Never use abrasive cleaners, bleach, chlorine, or household cleaners containing harsh chemicals. While diamonds are extremely hard, these chemicals can damage the metal setting. They can also affect softer gemstones if they are part of the same piece. Bleach, for example, can corrode gold and platinum over time. It makes the metal brittle. Chlorine can pit or discolor settings. Stick to mild dish soap or a dedicated jewelry cleaner.
- Using Abrasive Materials: Avoid scrubbing your diamond with paper towels, tissues, or abrasive cloths. These materials can scratch the metal setting. They may leave microscopic scratches on the diamond’s surface, which can dull its shine over time. Always use a soft, lint-free microfiber cloth or a very soft toothbrush. Steel wool or scouring pads are completely off-limits.
- Using Toothpaste: Some people believe toothpaste works as a cleaner. This is a myth. Toothpaste contains abrasive particles designed to scrub teeth. These particles are too harsh for diamonds and metal settings. They can scratch the surface of your diamond and dull its facets. They can also leave residue.
- Boiling Water or Extreme Temperature Changes: While warm water is fine, do not use boiling water. Rapid temperature changes, from very hot to cold, can stress diamonds, especially those with existing inclusions or fractures. It can also weaken or damage the setting. Sudden temperature shifts can cause the metal to contract or expand, potentially loosening stones.
- Cleaning with Ultrasonic Cleaners for Compromised Diamonds: Ultrasonic cleaners are effective. However, they are not suitable for diamonds with significant inclusions (internal flaws) or fractures. The intense vibrations can worsen these flaws, potentially leading to breakage. If you are unsure about your diamond’s integrity, consult a jeweler before using an ultrasonic cleaner. They are also not safe for pieces with loose prongs or non-diamond gemstones.
- Over-Cleaning: While regular cleaning is good, over-cleaning can sometimes be unnecessary. Excessive scrubbing can potentially wear down settings over a very long time. More importantly, constant exposure to any cleaning agent, even mild ones, if not rinsed thoroughly, can leave residue. Clean your diamond when it visibly needs it, typically every week or two for daily wear.
- Cleaning in the Sink Without a Stopper: This is a very common and heartbreaking mistake. Never clean or rinse your diamond jewelry directly over an open drain. Always use a sink stopper or place a small strainer in the drain. One slip of the hand, and your precious diamond can be lost forever. I always double-check the stopper before I start.
By avoiding these common mistakes, you ensure your diamonds remain safe during the cleaning process. This helps them maintain their magnificent sparkle for years to come. Gentle, consistent care is the best approach.
Frequently Asked Questions About Cleaning Diamonds
Q1: How often should I clean my diamond jewelry?
You should clean diamond jewelry worn daily at least once a week. This prevents excessive buildup of oils, lotions, and dirt. For pieces worn less frequently, clean them before and after wearing. Regular, gentle cleaning maintains their sparkle and reduces the need for deeper cleaning. I find that a quick wash every Sunday keeps my ring bright.
Q2: Can I use rubbing alcohol to clean my diamond?
Rubbing alcohol can be used in a pinch for a quick clean. It acts as a degreaser. However, it can dry out the metal over time. It also might not be ideal for settings with other, softer gemstones. A mixture of warm water and mild dish soap is generally a safer and more effective option for regular cleaning.
Q3: Is it safe to clean a diamond ring with other gemstones?
Cleaning a diamond ring with other gemstones requires caution. Diamonds are tough, but many other gemstones are softer and more porous. Opals, pearls, emeralds, and turquoise, for example, can be damaged by harsh chemicals, high heat, or ultrasonic cleaners. For jewelry with mixed stones, use only warm water and mild dish soap. Avoid ammonia or ultrasonic cleaners unless specifically recommended by a jeweler.
Q4: Will cleaning my diamond make it lose its value?
No, proper cleaning will not make your diamond lose value. In fact, keeping your diamond clean helps preserve its beauty and brilliance, which contributes to its perceived value. Cleaning removes dirt and grime that obscure its sparkle. However, improper cleaning methods, like using abrasive materials or harsh chemicals, can cause damage and reduce its value.
Q5: Can I clean my diamond with toothpaste?
No, you should not clean your diamond with toothpaste. Toothpaste contains abrasive particles that can scratch the metal setting and dull the diamond’s surface over time. These scratches might be microscopic but they accumulate. Always use gentle, non-abrasive cleaners like mild dish soap and a soft brush for optimal results.
Q6: What if my diamond still looks dull after cleaning?
If your diamond still looks dull after cleaning, it might indicate a few things. First, check for soap residue from incomplete rinsing. Second, there might be tough, deeply embedded grime that requires professional attention. Third, your diamond might have internal inclusions that become more visible with age, or the setting could be very old and worn. Consider taking it to a professional jeweler for a thorough cleaning and
- diamond cleaning
- clean engagement ring
- jewelry care
- sparkling diamonds
- DIY cleaning

Todd Martin
Senior Writer
With over 15 years of experience in home renovation and design, I started HEG to share what I’ve learned with homeowners who want to create spaces that are both beautiful and functional. I’ve always believed in a hands-on approach, and over the years, I’ve picked up practical solutions that actually work. Through HEG, I aim to make home improvement more approachable, sharing real tips that help you create a home you truly love.