
· Todd Martin · DIY Cleaning · 18 min read
How To Clean Driftwood Diy
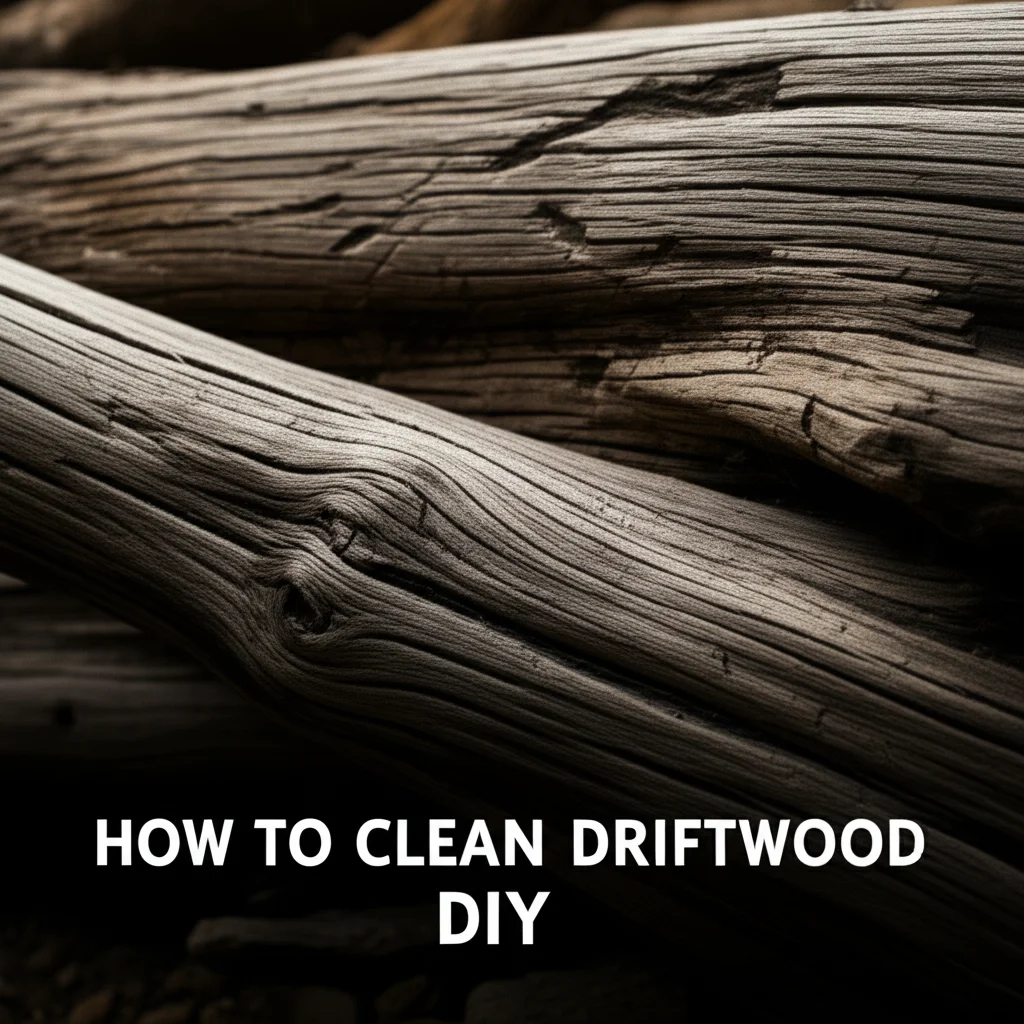
Clean Driftwood DIY: Your Ultimate Guide
Imagine finding a beautiful piece of driftwood. Its unique shape and texture instantly spark ideas for your next home decor project or even a stunning aquarium display. But wait, can you just use it as is? Not so fast. Learning how to clean driftwood DIY is a crucial step before incorporating it into any setting. This process ensures the wood is free from pests, mold, and harmful substances.
Cleaning driftwood properly makes it safe for your home, pets, or aquatic life. This guide will walk you through everything you need to know. We will cover the importance of cleaning, essential supplies, various deep cleaning methods, and crucial drying steps. You will learn to prepare driftwood safely for any project you have in mind.
Takeaway:
- Thoroughly clean driftwood to remove dirt, pests, and potential contaminants.
- Choose a cleaning method based on the driftwood’s intended use (decorative vs. aquarium).
- Complete drying and curing are vital for longevity and safety.
To clean driftwood DIY, you remove all debris, then sanitize it using methods like boiling or bleaching, followed by thorough rinsing to remove chemicals. Finally, dry it completely to prevent mold or prepare it for specific uses like aquariums.
Why Cleaning Driftwood Matters for DIY Projects
Using natural elements in your home brings warmth and unique character. Driftwood stands out as a popular choice for this. However, it is more than just a pretty piece of wood. Driftwood from natural environments like beaches, rivers, or forests often carries unwanted guests. These include sand, dirt, salt, and various organic matter. This matter can include mold spores, fungi, insects, or even bacteria. Cleaning driftwood is not just about making it look good; it is about making it safe.
Ignoring the cleaning process can lead to big problems. For instance, uncleaned driftwood can introduce pests like termites or beetles into your home. It can also cause mold growth, which affects air quality and the wood’s durability. If you plan to use driftwood in an aquarium, the stakes are even higher. Uncleaned wood can leach harmful chemicals, alter water parameters, or introduce pathogens that endanger your fish. Proper preparation ensures your driftwood becomes a safe, beautiful addition. You preserve its natural beauty and ensure its longevity.
Types of Contaminants
- Organic Debris: Leaves, moss, algae, and soil cling to the wood. These items can rot or introduce mold.
- Insects and Pests: Small bugs, insect eggs, or even larvae can hide within crevices. They can infest your home.
- Salt and Minerals: Ocean driftwood contains salt that can crystallize or cause issues in freshwater aquariums. River wood might have various dissolved minerals.
- Bacteria and Fungi: Microorganisms thrive on damp wood. They lead to decay and unpleasant odors.
- Pollutants: Waterways sometimes contain pollutants like oil, chemicals, or fertilizers. These absorb into the wood and can be harmful.
Gathering Your Supplies for Driftwood Cleaning
Before you begin the exciting process of preparing your found treasure, you need to gather the right tools. Having everything ready makes the cleaning process smooth and efficient. The specific supplies you need depend on the size of your driftwood and the cleaning method you choose. Safety gear is always a good idea, regardless of the method. Protecting yourself is important when working with cleaning agents or boiling water.
Consider where you will perform the cleaning. A well-ventilated area is best, especially if you plan to use bleach or bake the wood. A large outdoor space is ideal for initial scrubbing. You will also need sufficient space for drying the wood, which can take several days or even weeks. Setting up a dedicated cleaning station helps keep everything organized.
Essential Supplies
- Stiff Brush or Wire Brush: These tools help remove loose dirt, bark, and stubborn debris. A garden hose with a nozzle is also useful for power rinsing.
- Large Buckets or Tubs: You will need these for soaking the driftwood. Choose containers large enough to fully submerge your piece.
- Gloves: Protect your hands from dirt, splinters, and cleaning solutions.
- Bleach (Household Chlorine Bleach): This is optional, but very effective for sanitizing and whitening decorative driftwood. Do not use for aquarium driftwood.
- Salt (Non-iodized Rock Salt or Aquarium Salt): Useful for saltwater soaks, especially for ocean-found wood.
- Large Pot or Tub (Heat-Resistant): Necessary if you plan to boil the driftwood. Ensure it is big enough for the entire piece or that you can boil sections.
- Oven and Baking Sheets: If you choose the baking method for sterilization and drying. You should clean your stove regularly to keep it in good condition. You can find guides on how to clean your stove if needed.
- Measuring Cups and Spoons: For accurate mixing of cleaning solutions.
- Drying Rack or Clean Tarps: For air drying the driftwood. Good air circulation is essential.
- pH Test Strips (Optional, for Aquarium Use): To check water parameters after soaking aquarium driftwood.
Initial Steps: Pre-Cleaning and Debris Removal
The first step in transforming a raw piece of driftwood into a clean, usable object is a thorough pre-cleaning. This stage focuses on removing all visible surface contaminants. Think of it as preparing your canvas before painting. You want to get rid of anything loose or easily dislodged. This prevents it from contaminating subsequent cleaning stages. This initial cleanup often requires some elbow grease and a good amount of water.
Take your driftwood piece to an outdoor area. A garden hose with a strong nozzle works wonders here. You can blast away dirt, sand, and loose bark. Pay close attention to crevices and hollows. These are common hiding spots for debris and small creatures. This step is about physical removal, not deep sanitization. Do not worry about perfection at this point. The goal is to make the piece manageable for the next cleaning stages.
Step-by-Step Debris Removal
- Brush Off Loose Material: Use a stiff brush or a wire brush to scrub the entire surface. Remove any clinging dirt, sand, or dried algae. Focus on areas where bark is still attached or where roots may be intertwined. Sometimes, old bark is stubborn. You can gently pry it off with a blunt tool if you want a smoother finish.
- Rinse Thoroughly with Water: Use a strong stream of water from a garden hose. Direct the water into all nooks and crannies. This flushes out hidden sand, small pebbles, and any lingering organic matter. Keep rinsing until the water running off the driftwood appears clear. This indicates you have removed most of the superficial grime.
- Inspect for Decay or Pests: Carefully examine the driftwood for any signs of rot, soft spots, or insect activity. Look for tiny holes, sawdust-like trails, or actual insects. If a section is heavily decayed, you might need to remove it. You can cut or break off the damaged parts. This ensures only healthy, solid wood remains.
- Consider a Light Scrub with Soap (Optional, for Decorative Use Only): For decorative driftwood, you can give it a light scrub with a mild dish soap solution. Use a brush and rinse thoroughly afterward. This helps remove any oily residues or stubborn surface dirt. Remember, avoid soap for aquarium driftwood entirely.
Deep Cleaning Methods: Sanitizing Your Driftwood
Once you have removed surface debris, the real work of sanitizing begins. This is where you eliminate bacteria, mold, fungi, and any lingering pests. Choosing the right deep cleaning method depends heavily on the driftwood’s intended purpose. Driftwood for a home decor piece can handle stronger treatments. Driftwood for an aquarium requires a much gentler, chemical-free approach. Each method has its own benefits and drawbacks.
You must be patient during this stage. Proper sanitization takes time. Skipping steps or rushing the process can lead to problems later. For instance, improperly sanitized wood can introduce unwanted elements into your aquarium or develop mold in your living space. Consider the size of your driftwood. Some methods are more practical for larger pieces than others.
Method 1: The Boiling Method (Recommended for Aquariums)
Boiling is a highly effective way to sanitize driftwood. It kills bacteria, fungi, algae, and most insect larvae. Boiling also helps the wood become waterlogged, which is crucial for aquarium use. It makes the wood sink faster. Furthermore, boiling helps to release tannins, which can tint aquarium water brown. This tint is harmless, but some people prefer to reduce it.
Steps for Boiling:
- Submerge in Water: Place the driftwood in a large pot or tub. Fill it with enough water to completely cover the wood. If your piece is too large, you can boil it in sections.
- Boil Thoroughly: Bring the water to a rolling boil. Let the driftwood boil for at least 1-2 hours. For very large or heavily contaminated pieces, boil for 4-6 hours, changing the water every few hours. This allows more tannins to leach out and ensures deeper penetration of heat.
- Cool and Rinse: Carefully remove the driftwood from the hot water. Let it cool down completely. Rinse it thoroughly under cool running water. This removes any loosened debris or excess tannins.
- Repeat (Optional): If the water is still very dark after the first boil, you can repeat the process. This further reduces tannin release.
Method 2: The Bleach Solution Method (For Decorative Use Only)
Bleach is a powerful disinfectant. It kills most bacteria, viruses, fungi, and mold. It also lightens the wood, which some people prefer for decorative pieces. Never use bleach on driftwood intended for aquariums. Residual bleach is highly toxic to fish and aquatic life. Always use this method in a well-ventilated area and wear gloves.
Steps for Bleaching:
- Prepare Solution: Mix a solution of 1 part household chlorine bleach with 9 parts water. For example, use 1 cup bleach for 9 cups water. Adjust the amount based on the size of your driftwood.
- Soak the Driftwood: Submerge the driftwood in the bleach solution. Ensure it is fully covered. You might need to weigh it down.
- Soak Time: Allow the driftwood to soak for several hours, or overnight for heavily stained pieces. Check it periodically. The duration depends on how stained the wood is and how light you want it to become.
- Thorough Rinsing is Critical: After soaking, remove the driftwood. Rinse it extensively under running water. Then, soak it in plain, fresh water for several days, changing the water daily. This leaches out all the bleach. You want to eliminate any lingering bleach smell before using the wood indoors.
Method 3: The Saltwater Soak Method (Natural Option)
This method is particularly suitable for ocean-found driftwood. It helps to extract remaining salt and naturally disinfect the wood. It is a slower process but very gentle. This method can also help waterlog the wood.
Steps for Saltwater Soak:
- Prepare Brine: Dissolve non-iodized salt (like rock salt or aquarium salt) in water. A ratio of 1 cup of salt per gallon of water works well.
- Soak the Wood: Submerge the driftwood in the saltwater solution. Ensure it is fully covered.
- Long Soaking Time: Allow the driftwood to soak for several weeks to several months. Change the saltwater solution every week or two. This long soak helps draw out impurities and old salt. It also allows the wood to fully saturate.
- Rinse and Desalinate: After the saltwater soak, transfer the driftwood to plain fresh water. Soak it for another 1-2 weeks, changing the fresh water daily. This desalts the wood. It removes any remaining salt that could harm plants or animals, especially if you consider using it in an aquarium.
Method 4: The Baking/Oven Method (Sterilization and Drying)
Baking driftwood in an oven is an effective way to kill pests, bacteria, and mold. It also helps dry the wood quickly and thoroughly. This method is often used after initial scrubbing or boiling, especially for smaller pieces. Always monitor the wood closely while baking to prevent charring. You can use your kitchen oven for this. Remember to clean the oven thoroughly after use, especially if there are drips or smells. To prevent messes, place aluminum foil on the bottom of the oven. If any spills do occur, knowing how to clean the bottom of an oven will be helpful.
Steps for Baking:
- Preheat Oven: Preheat your oven to a low temperature, around 200-250°F (93-121°C).
- Prepare Driftwood: Place smaller pieces of driftwood directly on a baking sheet. For larger pieces, you might need to adjust them to fit or bake them in sections. Line the baking sheet with foil or parchment paper to catch any drips or sap.
- Bake Slowly: Bake the driftwood for 1-2 hours for smaller pieces. Larger pieces may need 3-4 hours or longer. The goal is to dry it out completely. Check the wood periodically. Make sure it does not char or smoke. Turn the wood occasionally for even drying. The wood is ready when it feels completely dry and hard. It should not feel cool or damp to the touch.
- Cool Down: Turn off the oven. Allow the driftwood to cool inside the oven for several hours or overnight. This prevents cracking from rapid temperature changes.
Neutralizing and Rinsing Driftwood After Cleaning
After you have applied your chosen deep cleaning method, especially if it involved bleach or strong saltwater, the next critical step is neutralization and thorough rinsing. This stage ensures that no harmful residues remain on or within the wood. Residual chemicals or high salt content can be detrimental to indoor air quality, furniture finishes, or, most critically, aquatic life in an aquarium. Patience here is key. You cannot rush this process.
Imagine cleaning a sponge with soap. You would not use it without rinsing all the soap out. The same principle applies to driftwood. The wood is porous. It absorbs much of what it is exposed to. A good rinse flushes out these absorbed substances. For aquarium driftwood, this step is non-negotiable. Chemical residue can lead to a tank crash and harm your fish. For decorative pieces, incomplete rinsing can lead to a lasting chemical smell or surface residue.
Steps for Neutralizing and Rinsing
- Initial Rinse: Immediately after your deep cleaning process (boiling, bleaching, or saltwater soak), give the driftwood a very thorough rinse under running tap water. Use a strong stream to wash away any loose debris or surface chemicals. Spend a good 10-15 minutes on this initial flush.
- Freshwater Soaking (For Bleached or Saltwater Soaked Wood):
- Bleached Driftwood: After the initial rinse, submerge the driftwood in a large tub or bucket filled with clean, fresh water. Change this water daily for at least 3-7 days. The goal is to leach out all residual bleach. You should not be able to smell any chlorine by the end of this process. The water should remain clear.
- Saltwater Soaked Driftwood: For wood that underwent a saltwater soak, submerge it in fresh water. Change the water daily for 1-2 weeks. This process helps draw out any remaining salt. You want to ensure the wood is fully desalinated, especially for freshwater aquariums.
- Testing pH (For Aquarium Driftwood): If you plan to use the driftwood in an aquarium, testing the water it sits in is a smart final step. After several days of freshwater soaking, place the driftwood in a separate bucket of fresh water for 24 hours. Then, use an aquarium pH test kit to check the water’s pH. It should be stable and close to the neutral range (around 7.0) or your desired tank pH. If the pH is still fluctuating or very low/high, continue soaking and testing. This process also helps you monitor if the wood is still leaching tannins excessively. You might even consider cleaning your aquarium’s water filter to ensure overall water quality.
- Visual and Olfactory Inspection: Before considering the wood fully rinsed, inspect it visually. Look for any cloudy residue or discolored spots. Most importantly, smell it. There should be no chemical odor (like bleach) or strong, unpleasant smells. A natural wood smell is fine, but anything artificial indicates more rinsing is needed.
Drying and Curing Driftwood for Longevity
After thoroughly cleaning and neutralizing your driftwood, the final vital step is drying and, for some applications, curing. Proper drying prevents mold, mildew, and decay. It also ensures the wood remains stable and strong. An improperly dried piece of driftwood can quickly become a source of problems, whether it is for home decor or an aquarium. This stage requires patience, as it can take anywhere from a few days to several weeks, depending on the wood’s size, density, and the environment.
Curing, specifically for aquarium driftwood, involves ensuring the wood is completely waterlogged and stable before introduction to a tank. This prevents the wood from floating and from releasing excessive tannins or other substances into the water. This step is as important as cleaning for aquarium safety. For decorative purposes, the goal is simply to get the wood thoroughly dry and stable.
Methods for Drying Driftwood
- Air Drying (Recommended for most cases):
- Process: Place the clean, rinsed driftwood in a well-ventilated area. An outdoor space with good air circulation is ideal. If drying indoors, ensure it is a dry room with airflow. Elevate the wood off the ground or floor using a drying rack, blocks, or even old cans. This allows air to circulate around all sides of the piece.
- Duration: Air drying can take anywhere from a few days to several weeks or even months. The time depends on the size and thickness of the wood, its initial moisture content, and the humidity of your environment. Periodically turn the driftwood to ensure even drying. The wood is fully dry when it feels light, hard, and no longer cool or damp to the touch. It might make a slightly hollow sound when tapped.
- Benefits: This is the most natural and least energy-intensive method. It reduces the risk of cracking that can occur with rapid drying.
- Oven Drying (For smaller pieces, quicker results):
- Process: As mentioned in the deep cleaning section, baking at a low temperature (200-250°F or 93-121°C) not only sterilizes but also rapidly dries the wood. Place the driftwood on a baking sheet lined with foil.
- Duration: Bake for 1-4 hours, depending on size. Check frequently to prevent burning. Turn the wood every hour.
- Benefits: Much faster than air drying. Ensures thorough drying and sterilization.
- Caution: Always monitor the oven. Do not leave unattended.
Curing Driftwood for Aquariums
Curing is a specific step for driftwood intended for aquatic environments. It involves prolonged soaking to ensure the wood is fully waterlogged and stable. It also helps leach out remaining tannins. Tannins are organic compounds that stain the water brownish-yellow. They are harmless to fish, but some aquarists prefer clear water.
- Submersion Soak: After drying (or boiling, if you prefer to skip a full dry-out before curing), place the driftwood in a large bucket or tub of clean, fresh water. Weigh it down with clean rocks or bricks to keep it fully submerged.
- Regular Water Changes: Change the water in the bucket daily, or every other day, for several weeks. You will notice the water turning brownish. This is the tannins leaching out. Continue changing the water until the water remains mostly clear after 24-48 hours. This indicates most of the readily available tannins have been released.
- Testing for Sinking: The wood is cured when it stays submerged on its own without weights. This means it is fully saturated with water. For large, dense pieces, this can take a very long time, sometimes months. Patience is key.
- pH Monitoring (Optional but Recommended): Throughout the curing process, you can periodically test the pH of the soak water. Very fresh driftwood can sometimes lower the pH of the water. Once the pH stabilizes over several days, it is a good sign the wood is ready for your aquarium.
Specific Considerations: Driftwood for Aquariums vs. Decor
The journey of cleaning driftwood takes a fork in the road depending on its final destination. Driftwood for home decoration has different requirements than driftwood destined for an aquarium. Understanding these distinct needs is paramount. It ensures safety for your household and, more critically, for your aquatic inhabitants. You cannot treat both types the same way. What is perfectly fine for a centerpiece might be lethal for fish.
For decorative driftwood, the primary concerns are aesthetics, stability, and the absence of pests or mold. You might use stronger cleaning agents. You might also consider sealing the wood. For aquarium driftwood, the focus shifts to biological safety. You must avoid chemicals, ensure proper waterlogging, and manage tannin release. This difference dictates your cleaning choices from start to finish.
Driftwood for Aquarium Use
Aquarium driftwood provides essential hiding places for fish and beneficial bacteria. It enhances the natural look of a tank. However, it requires the most careful preparation.
- No Chemicals, Ever: Avoid all soaps, detergents, bleach, and any chemical cleaners. Even small residues can be toxic to fish and invertebrates. Stick to boiling, extended freshwater soaks, and baking.
- Boiling is Best: Boiling is highly recommended for aquarium driftwood. It sterilizes the wood, killing bacteria, fungi, and any lingering pests. It also helps the wood to become waterlogged. This makes it sink faster.
- Tannin Release: Most driftwood, especially newly acquired pieces, will release tannins. These are natural organic compounds that stain the water a tea-like brown or yellow. Tannins are harmless to fish. In fact, some fish species, like tetras, prefer tannin-stained water. If you want crystal clear water, you need to boil and soak the wood for extended periods until the tannin release significantly slows down. Activated carbon in your aquarium filter can also help remove tannins.
- Waterlogging is Crucial: Driftwood must sink on its own before going into an aquarium. If it floats, it has not absorbed enough water. Boiling and extended soaking will help waterlog the wood. This process can take weeks or even months for dense pieces.
- Check pH: Some driftwood can temporarily alter water pH. This is usually due to residual organic acids or minerals. Monitor your tank’s pH after introducing new wood. You can clean other natural elements like stone for your aquarium in a similar fashion, focusing on sterilization without chemicals.
- clean driftwood
- DIY wood cleaning
- prepare driftwood
- sanitize driftwood
- aquarium driftwood
- natural decor
- wood preservation

Todd Martin
Senior Writer
With over 15 years of experience in home renovation and design, I started HEG to share what I’ve learned with homeowners who want to create spaces that are both beautiful and functional. I’ve always believed in a hands-on approach, and over the years, I’ve picked up practical solutions that actually work. Through HEG, I aim to make home improvement more approachable, sharing real tips that help you create a home you truly love.
