· Todd Martin · Automotive Maintenance · 22 min read
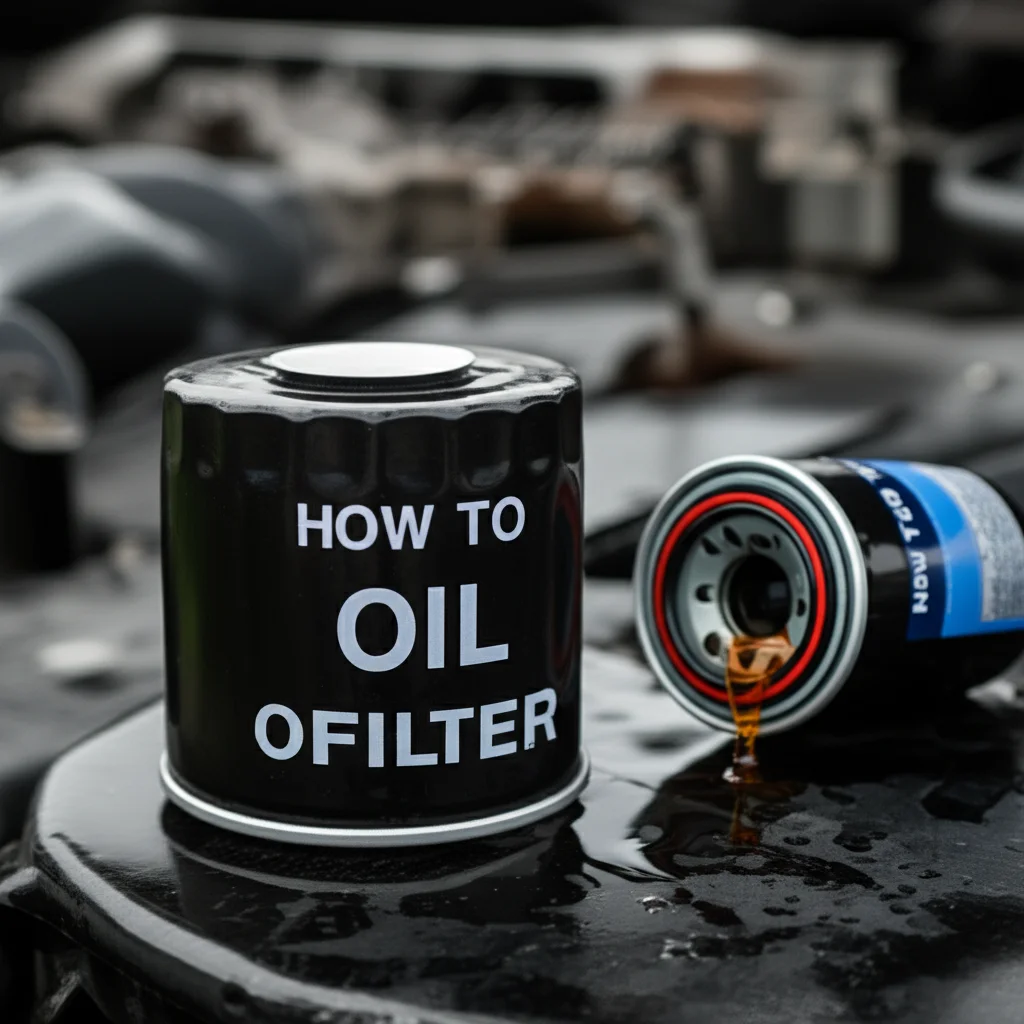
How To Clean Fuel Injector

How to Clean Fuel Injector: Your Complete Guide
Have you noticed your car struggling lately? Perhaps it’s not as quick off the mark, or its fuel economy seems to have dipped. A common culprit for these issues is dirty fuel injectors. I know how frustrating it can be when your vehicle doesn’t perform its best. Taking care of your car’s fuel system is vital for its overall health and efficiency.
In this guide, I will show you how to clean fuel injectors effectively. We will explore why these components get dirty and what signs to watch for. I will walk you through various cleaning methods, from simple additives to more involved procedures. My goal is to help you restore your engine’s power and improve fuel efficiency. Let’s get your car running smoothly again!
Takeaway
Keeping fuel injectors clean is crucial for optimal engine performance. You can clean them using in-tank fuel additives for routine maintenance. For more significant clogs, consider on-car cleaning kits or professional removal and cleaning. Regular maintenance prevents future issues and saves money on repairs.
Main Query Answer
To clean a fuel injector, you can use a high-quality fuel system cleaner added to your gas tank. For more stubborn deposits, professional on-car cleaning kits or removing the injectors for ultrasonic cleaning are effective methods. Regular cleaning maintains fuel efficiency and engine health.
Understanding Fuel Injectors: Why Cleaning Matters
Fuel injectors are small, precise nozzles. They spray atomized fuel into your engine’s combustion chambers. This fine mist mixes with air, allowing for efficient burning. Over time, carbon deposits and varnish build up on these injectors. These deposits block the spray pattern. This blockage leads to poor fuel atomization.
Dirty injectors impact engine performance significantly. Your car might experience a rough idle. You might also feel a loss of power. Fuel efficiency often decreases. Hard starting and engine misfires are other common signs. Cleaning your fuel injectors ensures they deliver the correct amount of fuel. This maintains optimal engine function and prevents costly damage. Regular maintenance keeps your car running like new.
Fuel quality plays a big role in deposit buildup. Low-quality fuel can leave more residue. Short trips also contribute to carbon accumulation. The engine does not get hot enough to burn off deposits. Understanding these factors helps you prevent future issues. A clean fuel system ensures your engine breathes freely. This leads to better power and economy.
Recognizing Signs of Dirty Fuel Injectors
Your car gives you clear signals when its fuel injectors need attention. Paying attention to these signs can save you from bigger problems. I have learned to recognize these warnings quickly. Ignoring them can lead to further engine damage. Timely intervention keeps your vehicle reliable.
Here are the most common indicators:
- Decreased Fuel Economy: If you notice yourself filling up more often, dirty injectors might be the cause. They can spray more fuel than needed, or spray it inefficiently. This wastes gas and costs you money.
- Engine Misfires and Rough Idling: A dirty injector cannot deliver fuel consistently. This causes cylinders to misfire. Your engine might vibrate or run unevenly at idle. It feels like the car is “shaking.”
- Loss of Power and Acceleration: When fuel delivery is compromised, your engine struggles to produce full power. Accelerating feels sluggish. Passing other cars might become difficult.
- Check Engine Light Illumination: Modern cars monitor engine performance closely. A misfire or lean fuel condition caused by dirty injectors can trigger the check engine light. Always get this light checked.
- Hard Starting: Your engine needs a precise fuel-air mix to start quickly. Dirty injectors can prevent this. You might find your car cranks longer before it fires up. This is especially true on cold mornings.
- Increased Emissions: Inefficient fuel burning leads to higher harmful emissions. You might notice a strong fuel smell or dark smoke from the exhaust. This indicates unburnt fuel.
Recognizing these symptoms early helps you decide when to clean your fuel injectors. Addressing them promptly can prevent more serious issues with your fuel system. A well-maintained fuel system contributes to the overall health of your vehicle. It also ensures a smoother driving experience for you.
Choosing Your Cleaning Method: On-Car vs. Off-Car
You have different options when it comes to cleaning fuel injectors. The best method depends on the severity of the clog. It also depends on your comfort level with car maintenance. I consider my mechanical skills and the vehicle’s symptoms before choosing. Both on-car and off-car methods have their benefits.
On-Car Cleaning:
This method cleans injectors while they remain installed in the engine. It is generally easier and less time-consuming. You do not need to disconnect fuel lines or remove parts. This makes it a popular choice for DIY enthusiasts.
- Fuel Additives: This is the simplest approach. You pour a specialized cleaner into your fuel tank. The cleaner mixes with the gasoline. It then flows through the fuel system, dissolving deposits. This method is best for mild clogs and preventative maintenance. It works gradually as you drive. You might not see immediate results. Many drivers use this regularly. It helps keep the entire fuel system clean. This includes components like the fuel pump and fuel lines. You can learn more about keeping your fuel lines clean here: How To Clean Fuel Lines. For a general fuel system refresh, consider how you might also clean your fuel filter without removing it, which often complements injector cleaning: How To Clean Fuel Filter Without Removing It.
- Pressurized Cleaning Kits: These kits use a strong cleaning solution. The solution bypasses your car’s fuel tank and fuel pump. It connects directly to the fuel rail. The engine runs on this concentrated cleaner for a period. This method delivers a more powerful cleaning action. It tackles moderate to severe clogs. You can find kits for DIY use or have a mechanic perform this service. Some products like Seafoam are popular choices for this type of application: How to Clean Fuel Injectors with Seafoam. For comprehensive on-car cleaning, consider exploring methods that clean fuel injectors without removing them: How To Clean Fuel Injectors Without Removing Them.
Off-Car Cleaning (Removal and Professional Service):
This method involves removing the fuel injectors from the engine. They are then cleaned thoroughly using specialized equipment. This is the most effective way to clean heavily clogged injectors. It requires more time and mechanical skill.
- Ultrasonic Cleaning: Removed injectors are placed in an ultrasonic cleaner. This device uses high-frequency sound waves. These waves create cavitation bubbles in a cleaning solution. The bubbles implode, dislodging deposits from the injector’s internal components. This method cleans thoroughly. It restores the original spray pattern.
- Flow Testing and Pattern Analysis: After ultrasonic cleaning, injectors are often flow-tested. This checks if they deliver the correct amount of fuel. The spray pattern is also inspected. Any issues are addressed. This ensures optimal performance.
Choosing between these methods depends on your car’s symptoms and your budget. Mild issues might only need an additive. Severe problems often require removal and professional cleaning. Always prioritize safety and proper procedures. Consulting a trusted mechanic is a wise step if you are unsure.
Step-by-Step Guide: Cleaning Fuel Injectors with Additives
Cleaning your fuel injectors with an additive is the simplest method. It’s often the first step I recommend for maintenance. This approach requires minimal effort and no special tools. It’s perfect for minor clogs or as a preventative measure. Remember to always follow the product instructions for best results.
Here’s how you do it:
- Choose a Quality Fuel Injector Cleaner: Not all additives are created equal. Look for products from reputable brands. They should specifically mention “fuel injector cleaner” or “fuel system cleaner.” These products contain detergents that dissolve carbon deposits. Read reviews and consider what works for your vehicle type.
- Purchase the Right Amount: Most cleaners come in bottles designed for one tank of fuel. Check the label to ensure you buy the correct size. Using too much or too little can impact effectiveness.
- Add the Cleaner to Your Fuel Tank: This is usually done before you fill up your gas tank. Pour the entire contents of the cleaner bottle into the tank. Adding it before fueling helps the cleaner mix thoroughly with the gasoline. This ensures even distribution throughout your fuel system.
- Fill Your Gas Tank: After adding the cleaner, fill your vehicle’s fuel tank completely. This dilutes the cleaner to the recommended concentration. It also ensures the solution circulates through your system as you drive.
- Drive Your Vehicle: The cleaner needs time and fuel flow to work. Drive your car as you normally would. Longer drives, especially at highway speeds, can be more effective. This allows the cleaner to cycle through the injectors repeatedly. You might notice improvements over several hundred miles.
Repeat this process every 3,000 to 5,000 miles or as recommended by the product. This proactive approach keeps your injectors clean. It helps maintain optimal fuel efficiency and engine performance. While additives are great for routine care, they may not fix severe clogs. For persistent issues, consider more intensive cleaning methods.
Advanced On-Car Cleaning: Using Pressurized Kits
When fuel additives aren’t enough, but you want to avoid removing injectors, a pressurized cleaning kit is your next option. This method delivers a concentrated cleaning solution directly to the fuel rail. It bypasses the fuel tank, making it much more potent than a simple additive. I’ve used this method when I need a more aggressive clean. It’s a great intermediate step before full removal.
This process is more involved and requires specific tools:
Gather Your Tools and Materials:
- Fuel injector cleaning kit (contains a pressurized canister of cleaner and hoses).
- Wrenches or sockets to access fuel lines.
- Shop towels or rags.
- Safety glasses and gloves.
- Fire extinguisher (as a precaution when working with fuel).
Prepare Your Vehicle:
- Ensure the engine is cool.
- Locate the fuel pump fuse or relay. Remove it. This prevents the fuel pump from sending fuel to the engine during the cleaning process. Knowing how to clean your fuel pump and its components can be helpful here.
- Crank the engine a few times. This relieves fuel pressure in the lines. Be aware that some fuel might spray out. Use rags to catch any drips.
- Locate the fuel pressure regulator and disconnect its vacuum line, if applicable. Understanding how to clean a fuel pressure regulator is part of comprehensive fuel system care.
Connect the Cleaning Kit:
- Disconnect the fuel supply line from the fuel rail. You might need special tools for this.
- Connect the cleaning kit’s hose to the fuel rail. Use the appropriate adapter. The kit should come with various adapters.
- Ensure all connections are secure and leak-free.
Run the Engine with the Cleaner:
- Open the valve on the cleaning kit’s canister. This allows the cleaning solution to flow into the fuel rail.
- Start the engine. It will run purely on the cleaning solution from the kit.
- Let the engine run until the cleaning solution is nearly depleted. This usually takes 10-20 minutes. The engine might stumble or die as the cleaner runs out.
- Do not let the engine run dry on the cleaner if the manufacturer states otherwise. Some cleaners require partial use.
Disconnect and Reassemble:
- Turn off the engine.
- Close the valve on the cleaning kit.
- Carefully disconnect the cleaning kit hoses.
- Reconnect the vehicle’s fuel supply line to the fuel rail.
- Reinstall the fuel pump fuse or relay.
- Reconnect the fuel pressure regulator vacuum line, if you disconnected it.
Test Drive:
- Start the engine and check for any fuel leaks around the connections.
- Take the car for a test drive. You should notice improved performance, smoother idle, and better acceleration.
This method effectively flushes out heavy deposits. It can restore the spray pattern of mildly to moderately clogged injectors. However, for severely gummed-up lines or internal injector issues, physical removal and cleaning might still be necessary. Learning how to clean gummed up fuel lines is a good complement to this process.
Off-Car Cleaning: Removing and Professional Service
For truly stubborn clogs or when you want the most thorough cleaning, removing the fuel injectors is the best approach. This method allows for precise cleaning and testing. While it is more complex, it guarantees optimal results. I consider this the ultimate solution for heavily fouled injectors. It often pays for itself in restored performance and fuel economy.
Preparing for Removal
Removing fuel injectors requires mechanical skill and proper tools. If you are not comfortable, consider having a professional perform this service.
- Gather Tools: You will need a socket set, wrenches, screwdrivers, pliers, and possibly specialized fuel line disconnect tools.
- Disconnect Battery: Always disconnect the negative terminal of your car’s battery. This prevents accidental shorts and electrical hazards.
- Relieve Fuel Pressure: Before disconnecting any fuel lines, relieve the fuel system pressure. This typically involves removing the fuel pump fuse and cranking the engine a few times.
- Access Injectors: Fuel injectors are usually located on the engine’s intake manifold, mounted in the fuel rail. You might need to remove air intake components, wiring harnesses, or other parts to gain access.
- Disconnect Fuel Rail: Carefully unbolt and remove the fuel rail from the intake manifold. The injectors will likely come out with the rail.
- Remove Injectors: Gently pull the injectors out of the fuel rail. They are often held in place by O-rings. Be careful not to damage the O-rings or the injector tips.
Professional Cleaning and Testing
Once removed, the injectors are ready for professional service. This usually involves specialized equipment:
- Visual Inspection: Each injector is first inspected for external damage or obvious clogs.
- Initial Flow Testing: Injectors are mounted on a test bench. They are subjected to various fuel pressures and pulse widths. This test measures their initial flow rate and spray pattern. This helps identify which injectors are underperforming.
- Ultrasonic Cleaning: Injectors are placed in an ultrasonic cleaning bath. This bath contains a special cleaning solution. High-frequency sound waves create microscopic bubbles. These bubbles implode, dislodging carbon and varnish deposits from all surfaces, including internal passages and the tiny nozzle holes. This process can take several cycles.
- Back-Flushing: Some services include back-flushing. This forces cleaning solution through the injector in the reverse direction of fuel flow. It helps to push out any remaining debris.
- Post-Cleaning Flow Testing: After cleaning, the injectors are tested again. This verifies that their flow rates match factory specifications. It also confirms that their spray patterns are correct and atomized. Leaks are also checked. New O-rings and pintle caps are typically installed.
Reinstallation
Reinstalling the cleaned injectors is the reverse of removal.
- Install New O-Rings: Always use new O-rings for each injector. Lubricate them with a little oil to prevent tearing.
- Insert Injectors: Carefully push the injectors back into the fuel rail and then into the manifold. Ensure they are seated properly.
- Reattach Fuel Rail: Bolt the fuel rail back into place.
- Reconnect Lines and Components: Reconnect all fuel lines, electrical connectors, vacuum lines, and air intake components.
- Reconnect Battery: Reconnect the negative battery terminal.
- Check for Leaks: Turn the key to the “on” position (without starting the engine) to prime the fuel system. Check all connections for leaks. Start the engine and visually inspect for leaks again.
This comprehensive off-car cleaning process completely revitalizes your fuel injectors. It is the most effective way to restore engine performance and fuel efficiency. It addresses even the most severe clogging.
Preventative Measures for Fuel Injector Health
Preventing fuel injector clogs is always better than cleaning them. Adopting good habits can save you time and money. I believe proactive maintenance is key for any vehicle. It keeps your engine running smoothly for years.
Here are essential preventative measures:
- Use High-Quality Fuel: Stick to reputable gas stations and use the recommended octane level for your vehicle. Higher quality fuels often contain detergents that help prevent deposit buildup. They burn cleaner, leaving less residue. This simple step is a powerful defense.
- Regularly Use Fuel System Cleaners: Incorporate a good quality fuel system cleaner into your routine. Add it to your fuel tank every 3,000 to 5,000 miles. This helps to clean minor deposits before they become major problems. It acts as a continuous maintenance boost. Look for products designed to clean injectors, valves, and combustion chambers.
- Change Your Fuel Filter: Your fuel filter catches contaminants before they reach your injectors. A clogged or old fuel filter can restrict fuel flow. It can also allow small particles to bypass it, reaching the injectors. Consult your car’s manual for the recommended replacement interval. This is often every 20,000 to 60,000 miles. A clean fuel filter ensures clean fuel reaches your engine.
- Avoid Running Your Fuel Tank Low: Your fuel pump can pick up sediment from the bottom of a nearly empty tank. This sediment can then travel through the fuel lines and potentially clog injectors. Try to refuel before your tank drops below a quarter full. This keeps the pump submerged and prevents sediment pickup.
- Drive Regularly: Short trips prevent the engine from reaching optimal operating temperature. This can lead to increased carbon buildup. Take your car on longer drives occasionally. This allows the engine to get hot enough to burn off some deposits. Highway driving is particularly good for this.
- Address Engine Issues Promptly: Any underlying engine problem can indirectly affect injector health. For example, excessive oil consumption can lead to more carbon. Get your car serviced if you notice any unusual behavior.
By following these preventative steps, you can significantly extend the life of your fuel injectors. You will also maintain your engine’s peak performance and fuel efficiency. Regular care ensures a reliable and enjoyable driving experience.
Tools and Materials for DIY Fuel Injector Cleaning
Embarking on a fuel injector cleaning project requires specific tools and materials. Having everything ready before you start saves time and frustration. The exact items depend on your chosen cleaning method. I always make a checklist before starting any car project. This ensures I don’t miss anything important.
Here’s a breakdown of what you might need:
For Fuel Additive Cleaning (Easiest Method)
- High-Quality Fuel Injector Cleaner: Choose a reputable brand designed to be poured into the fuel tank. Examples include Techron, Lucas, Gumout, or Seafoam.
- Full Tank of Fuel: The cleaner needs to mix with a full tank of gas for proper dilution and effectiveness.
For Pressurized On-Car Cleaning Kit
- Fuel Injector Cleaning Kit: This kit typically includes a canister of concentrated cleaner, a pressure regulator, and various hoses and adapters.
- Wrench Set or Socket Set: For disconnecting fuel lines and accessing components.
- Fuel Line Disconnect Tool (Optional but Recommended): Some fuel lines require a special tool for safe disconnection.
- Shop Towels or Rags: To catch any fuel spills.
- Safety Glasses and Gloves: Essential for protecting your eyes and hands from fuel and chemicals.
- Fire Extinguisher: A vital safety precaution when working with flammable liquids.
- Flashlight or Work Light: For better visibility in the engine bay.
- Basic Hand Tools: Pliers, screwdrivers, etc., for removing miscellaneous components.
For Off-Car (Removal) Cleaning (DIY Option, though professional is recommended)
- All items from the “Pressurized On-Car Cleaning” list.
- New Fuel Injector O-Rings and Pintle Caps: These should always be replaced during reinstallation.
- Ultrasonic Cleaner: A specialized machine for cleaning small parts. You can buy smaller ones for DIY, but professional ones are much more powerful.
- Specific Ultrasonic Cleaning Solution: Designed for automotive parts or fuel systems.
- Small Brushes or Picks: For manual cleaning of external debris (use carefully to avoid damage).
- Fuel Injector Test Bench (Optional for DIY, Standard for Professional): For flow testing and spray pattern analysis after cleaning. This is usually why professionals are better for off-car cleaning.
General Safety Considerations
No matter which method you choose, safety is paramount. Fuel is highly flammable. Fuel systems operate under pressure.
- Work in a Well-Ventilated Area: Never work in an enclosed space.
- Avoid Open Flames and Sparks: This includes smoking, electric tools that spark, or running engines.
- Wear Personal Protective Equipment (PPE): Safety glasses and chemical-resistant gloves are a must.
- Have a Fire Extinguisher Nearby: A Class B (flammable liquids) extinguisher is recommended.
- Follow Manufacturer Instructions: Always read and follow the instructions for any cleaning product or tool you use.
- Dispose of Waste Properly: Old fuel, cleaning solutions, and contaminated rags must be disposed of according to local regulations.
Having the right tools and knowing how to use them safely makes the cleaning process smoother and more effective. If you are unsure at any point, do not hesitate to seek professional help.
Common Myths About Fuel Injector Cleaning
When it comes to car maintenance, many myths circulate. Fuel injector cleaning is no exception. Some beliefs can lead to ineffective solutions or even damage. I make sure to differentiate fact from fiction. This helps you make informed decisions for your vehicle.
Let’s debunk some common myths:
- Myth 1: Any Fuel Additive Will Clean Injectors Effectively.
- Fact: Not all fuel additives are created equal. Many cheap “fuel system cleaners” are largely ineffective for significant carbon deposits. Look for products specifically formulated with high concentrations of PEA (Polyether Amine) or PIBA (Polyisobutylene Amine) detergents. These are proven to dissolve stubborn deposits. Read product labels carefully.
- Myth 2: You Need to Clean Injectors Every Oil Change.
- Fact: This is an overkill for most vehicles. For routine maintenance, using a quality fuel system cleaner every 3,000 to 5,000 miles is sufficient. Or, follow the product’s recommended interval. Over-cleaning offers no additional benefits and simply wastes money.
- Myth 3: Cleaning Injectors Will Fix All Engine Problems.
- Fact: While dirty injectors cause many common symptoms, they are not a universal cure. A misfire could be due to a bad spark plug, coil pack, or compression issue. Loss of power might stem from a clogged catalytic converter or air filter. Always diagnose the actual problem before applying a solution.
- Myth 4: Pouring Acetone or Other Solvents into the Tank is Safe.
- Fact: Never add unapproved chemicals like acetone, paint thinner, or rubbing alcohol to your fuel tank. These substances can damage fuel system components. This includes fuel lines, O-rings, seals, and the fuel pump itself. Use only products specifically designed for automotive fuel systems. You want to avoid gummed up fuel lines by using incorrect solutions.
- Myth 5: You Can’t Clean Fuel Injectors Without Removing Them.
- Fact: As discussed, fuel additives and pressurized on-car cleaning kits are effective ways to clean injectors without removal. They work well for preventative maintenance and moderate clogs. Removal is necessary for severe clogs or for a professional, precise ultrasonic cleaning. You can learn more about methods to clean fuel injectors without removing them here: How To Clean Fuel Injectors Without Removing Them.
- Myth 6: Injectors Never Need Cleaning on Modern Cars.
- Fact: While modern fuel systems are more refined, carbon deposits still form over time. Even premium fuels leave residues. All fuel systems, regardless of age, benefit from periodic cleaning. This maintains optimal performance and efficiency.
Understanding these facts helps you make informed decisions about your vehicle’s maintenance. Rely on reputable sources and proven methods to keep your fuel system healthy.
When to Seek Professional Fuel Injector Cleaning
While many fuel injector cleaning tasks are DIY-friendly, there are times when professional help is essential. Knowing your limits and recognizing complex issues can save you from costly mistakes. I always advise seeking a professional when faced with certain challenges. Their expertise and specialized equipment often provide the best solution.
Here are scenarios where calling a professional is the smart choice:
- Persistent Symptoms After DIY Attempts: You’ve tried fuel additives or even an on-car cleaning kit, but the engine still misfires, idles rough, or consumes excessive fuel. This indicates a deeper issue or severely clogged injectors that require more intensive cleaning.
- Lack of Proper Tools or Expertise: Removing fuel injectors requires specific tools, knowledge of fuel system safety, and careful handling. If you lack the necessary tools or feel uncomfortable with the procedure, attempting it yourself can lead to damage. Damaging fuel lines or electrical connectors can be expensive to fix.
- Diagnostic Trouble Codes (DTCs) Related to Fuel Delivery: If your check engine light is on and diagnostic scans show codes pointing to specific injector malfunctions (e.g., P0201 - P0206 for injector circuit malfunctions, or codes indicating lean/rich conditions), professional diagnosis is needed. A mechanic can pinpoint the exact problem, which might not just be a clog.
- Vehicle Performance is Critically Impaired: If your car is barely drivable, stalling frequently, or has a severe loss of power, it’s safer to have it towed to a shop. Driving with severely clogged injectors can cause further damage to other engine components, such as catalytic converters.
- Desire for the Most Thorough Cleaning: Off-car ultrasonic cleaning provides the most comprehensive cleaning and testing. Automotive shops and specialized service centers have the proper equipment for this. They can also perform flow testing and match injectors. This ensures they all deliver fuel uniformly.
- No Visible Improvement After Extensive Driving: After using a fuel additive and driving for several hundred miles, you should notice some improvement. If there’s no change at all, the injectors are likely too far gone for simple methods.
- Preventative Maintenance for High-Mileage Vehicles: For older cars with many miles, a professional fuel injector cleaning as part of a major service can restore performance. It acts as a preventative measure against future issues.
A qualified mechanic or fuel system specialist has the training and equipment to diagnose fuel injector problems accurately. They can perform a comprehensive cleaning, replace faulty injectors if needed, and address any related fuel system issues. Investing in professional service can extend your vehicle’s lifespan and save you money on long-term repairs.
FAQ Section
Q1: How often should I clean my fuel injectors?
For preventative maintenance, I recommend using a quality in-tank fuel system cleaner every 3,000 to 5,000 miles. This helps prevent deposits from building up. If you experience symptoms like rough idle or poor fuel economy, you might need to clean them sooner. Severe clogs may require more intensive methods.
Q2: Can dirty fuel injectors damage my engine?
Yes, dirty fuel injectors can harm your engine over time. They can lead to incomplete combustion, causing carbon buildup on valves and pistons. This reduces engine efficiency and can overheat catalytic converters. Persistent misfires can also damage spark plugs and other ignition components.
Q3: Is it better to clean fuel injectors on-car or off-car?
On-car cleaning (with additives or pressurized kits) is good for maintenance and mild to moderate clogs. It’s easier and quicker. Off-car cleaning (removal and professional ultrasonic cleaning) is superior for severe clogs. It provides the most thorough cleaning and allows for precise testing of the injector’s performance.
Q4: How long does it take for fuel injector cleaner to work?
In-tank fuel injector cleaners work gradually as you drive. You might notice improvements after a full tank of treated fuel, typically within 100-300 miles. Pressurized on-car cleaning kits usually show results immediately after the service, which takes about 20-30 minutes of engine run time.
Q5: What are the signs of a bad fuel injector versus a dirty one?
A dirty fuel injector usually causes general performance issues like rough idle, misfires, or reduced fuel economy, which can improve after cleaning. A “bad” or failed injector might show more severe, persistent symptoms, often isolated to one cylinder, even after cleaning. This includes constant mis
- Fuel Injector Cleaning
- Engine Maintenance
- Car Care
- DIY Car Repair
- Fuel System
- Fuel Efficiency

Todd Martin
Senior Writer
With over 15 years of experience in home renovation and design, I started HEG to share what I’ve learned with homeowners who want to create spaces that are both beautiful and functional. I’ve always believed in a hands-on approach, and over the years, I’ve picked up practical solutions that actually work. Through HEG, I aim to make home improvement more approachable, sharing real tips that help you create a home you truly love.