· Todd Martin · Cookware Care · 20 min read
How To Clean Grease Off Pans

How to Clean Grease Off Pans: Your Essential Kitchen Guide
Nothing quite ruins the look of a perfectly cooked meal like a greasy, grimy pan. You know the feeling: you finish dinner, and your once-shiny pan looks dull, sticky, and covered in stubborn grease. Cleaning grease off pans can feel like an endless battle. This sticky residue affects cooking performance and makes your kitchen look untidy. It can even harbor bacteria if not removed properly.
I understand this challenge. That is why I have prepared this guide for you. This article will show you simple, effective ways to clean grease off pans. We will cover methods for fresh grease, baked-on stains, and different pan materials. You will learn about essential tools and cleaning agents. By the end, your pans will sparkle, and your cooking will be more enjoyable. Let’s get your cookware looking new again.
Takeaway
- Act fast: Clean fresh grease quickly for easier removal.
- Choose the right tools: Use sponges, brushes, and scrapers specific to your pan type.
- Natural power: Baking soda, vinegar, and salt are effective degreasers.
- Target stubborn spots: Use heat, soaking, or specialized cleaners for baked-on grime.
- Care for materials: Adjust cleaning methods based on stainless steel, cast iron, or non-stick surfaces.
- Prevent buildup: Wipe pans immediately after use and clean them regularly.
To effectively clean grease off pans, first remove excess oil with a paper towel. Then, soak the pan in hot, soapy water. Use a degreasing dish soap. For stubborn grease, combine baking soda with water to make a paste and scrub thoroughly. Rinse well to reveal a clean, grease-free surface.
Understanding Grease and Pan Types for Better Cleaning
Before you attack that greasy pan, it is good to know what you are up against. Grease is simply fat that has solidified or oxidized. It becomes more difficult to remove the longer it sits and the more it heats up. Different types of pans also react differently to cleaning agents and methods. Knowing your pan material helps you choose the safest and most effective cleaning approach.
Common pan materials include stainless steel, non-stick, cast iron, copper, and aluminum. Each material has unique properties. Stainless steel is durable but can show burnt-on grease easily. Non-stick coatings need gentle care to avoid damage. Cast iron requires seasoning and rust prevention. Copper pans need specific polishes. Aluminum pans can discolor with certain cleaners. Understanding these differences prevents damage to your cookware. This knowledge makes the cleaning process much easier.
Why Grease Sticks
Grease sticks to pans for several reasons. When oil or fat heats up, it can polymerize, forming a sticky, hard-to-remove film. This is especially true for oils cooked at high temperatures. Food particles also get trapped within the grease layer. This creates a challenging mess. Over time, these layers can build up, becoming baked-on grease. This baked-on residue makes your pan look dirty. It also reduces its cooking efficiency. Fresh grease is much simpler to clean than old, hardened grease.
The surface texture of the pan also plays a role. Microscopic pores and scratches on pan surfaces can trap grease. This makes it harder to wipe away. Non-stick surfaces, with their smooth coating, resist grease better initially. However, once the non-stick coating degrades, grease can adhere more easily. Cast iron, with its naturally porous surface, relies on seasoning to prevent food and grease from sticking directly to the metal.
Identifying Your Pan Material
Correctly identifying your pan material is the first step toward effective cleaning. Stainless steel pans are shiny and silver-colored. They are heavy and durable. Non-stick pans often have a dark gray or black coating on the cooking surface. Cast iron pans are heavy, dark, and often have a rough texture. Copper pans have a distinct reddish-brown color, sometimes with a stainless steel lining. Aluminum pans are lightweight and usually dull silver.
- Stainless Steel: Look for a reflective, metallic surface. It is strong and resists corrosion.
- Non-stick: Observe the dark, smooth coating on the inside. This coating prevents food from sticking.
- Cast Iron: Note the heavy weight and dark, often seasoned, surface. It holds heat very well.
- Copper: Admire its distinctive reddish hue. Copper heats up quickly and evenly.
- Aluminum: Feel its lightweight nature and often brushed or anodized finish. It is good for heat conduction.
Different materials require different care. For example, steel wool works on stainless steel but can ruin non-stick coatings. Baking soda is safe for most pans but can strip seasoning from cast iron if used improperly. Understanding your pan type protects your investment and ensures thorough cleaning. For more general advice on cleaning your pots and pans, you can visit our guide on how to clean pots and pans.
Essential Tools and Cleaning Agents for Grease Removal
To effectively clean grease off pans, you need the right tools and cleaning agents. Just like a chef needs the correct knives, a cleaner needs the proper scrubbers and solutions. Using the wrong tool can damage your pans or make the job harder. The right supplies make degreasing your cookware much more efficient. I have found that having these items on hand saves a lot of frustration.
Basic dishwashing soap is often enough for light grease. For tougher messes, you will need something stronger. A good scrubbing brush or sponge is also key. Knowing which cleaning agents work best on different types of grease and pan materials will help you achieve the best results. Let’s look at the must-have items for your cleaning arsenal.
Must-Have Cleaning Tools
Having the right tools is half the battle when cleaning greasy pans. A good quality sponge is essential for everyday cleaning. For more stubborn messes, you might need something with more abrasive power. However, be careful not to scratch delicate surfaces. Always match your tool to your pan’s material.
- Non-scratch sponges: These are perfect for non-stick and delicate surfaces. They effectively lift grease without causing damage. Look for sponges labeled “non-scratch” or “safe for non-stick.”
- Stiff-bristled brushes: A brush with tough bristles can tackle baked-on grease on stainless steel or cast iron. It gives you good leverage and keeps your hands out of the mess.
- Plastic scrapers: These are invaluable for gently removing stuck-on food or hardened grease. They are safer than metal utensils on most pan surfaces.
- Microfiber cloths: Excellent for drying and polishing, leaving your pans streak-free. They are highly absorbent and lint-free.
- Rubber gloves: Protect your hands from hot water and cleaning chemicals. They also improve grip.
For really tough, burnt-on residues, specific tools might be needed. For instance, a dedicated how to clean burnt grease from bottom of frying pans guide might suggest specific scrubbing pads or tools designed for exterior cleaning. Always check your pan manufacturer’s care instructions before using any new tool.
Effective Cleaning Agents
The right cleaning agents break down grease and lift it away. Many common household items work wonders. You do not always need harsh chemicals. Natural alternatives are often just as effective and safer for your home. I often reach for these everyday products first.
- Dish Soap: A good quality dish soap formulated to cut grease is your first line of defense. Apply it directly to the greasy area. Let it sit for a few minutes.
- Baking Soda: This abrasive yet gentle powder is a fantastic degreaser. Mix it with water to form a paste. It also neutralizes odors. This works great on many pan types, including stainless steel. Our guide on how to clean stainless steel pans offers more tips.
- White Vinegar: Vinegar is an acidic cleaner that dissolves grease and mineral deposits. It works well diluted with water or used directly. It is especially useful for removing shine-dulling films.
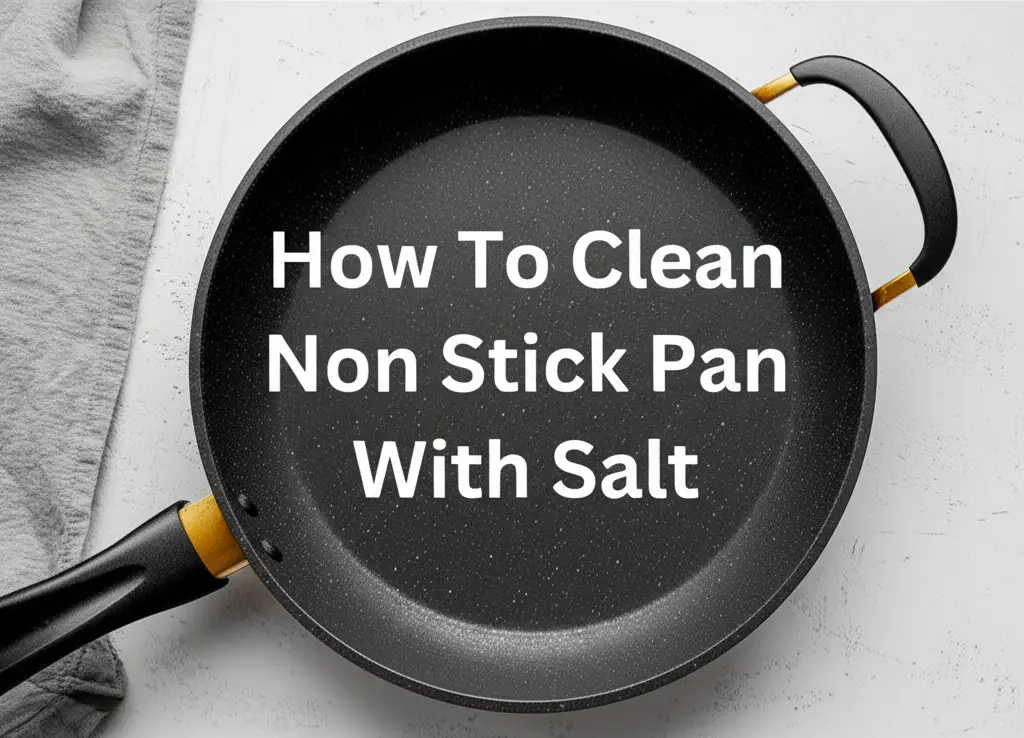
- Salt: Coarse salt acts as a gentle abrasive. It can help scrub away sticky residues when combined with a little oil or lemon juice. This is particularly good for cast iron.
- Commercial Degreasers: For extremely tough, baked-on grease, a specialized kitchen degreaser might be necessary. Follow product instructions carefully. Always test a small, hidden area first.
Remember to rinse your pans thoroughly after using any cleaning agent. This removes all residues. It ensures your pans are food-safe for the next use. For those tough, how to clean baked-on grease from pans situations, combining some of these agents can provide amazing results.
Everyday Methods for Fresh Grease
Catching grease early makes cleaning much simpler. Fresh grease has not had time to solidify or bake onto the pan surface. A quick clean-up after cooking saves you a lot of effort later. My rule is to address the mess as soon as the pan cools enough to handle safely. This approach prevents grease from becoming a long-term problem.
These everyday methods are ideal for your daily cooking messes. They use common kitchen supplies and do not require excessive scrubbing. Get into the habit of performing these steps regularly. This keeps your pans looking good and extends their lifespan.
Hot Water and Dish Soap Soak
This is the simplest and most common method for fresh grease. It works best immediately after cooking. The heat helps break down the grease, and the soap lifts it away. I always start with this method for lightly greased pans.
- Remove excess grease: Carefully pour any remaining liquid grease into a heat-safe container. Do not pour hot grease down your drain. It can solidify and clog pipes. You can also wipe it out with a paper towel.
- Fill and soak: Fill the pan with hot water. Add a generous squirt of grease-cutting dish soap.
- Let it sit: Let the pan soak for 15-30 minutes. For slightly tougher messes, you can let it sit for an hour. The hot water and soap work together to loosen the grease.
- Scrub and rinse: Use a non-scratch sponge or dish brush to easily scrub away the softened grease. Rinse the pan thoroughly under running water. Ensure all soap residue is gone.
- Dry completely: Dry the pan immediately with a clean towel to prevent water spots or rust.
This method is gentle enough for almost all pan types, including non-stick and stainless steel. It is your first and often only step for daily pan cleaning. Many of the techniques discussed in how to clean metal pans also advocate for this approach as a primary cleaning method.
The Baking Soda and Dish Soap Power Duo
For grease that is a little more stubborn than a simple soak can handle, combining baking soda with dish soap creates a powerful cleaning agent. Baking soda adds a gentle abrasive action. Dish soap provides the degreasing power. This duo is my go-to for slightly tougher, but still fresh, grease spots.
- Drain excess grease: Just like before, remove any excess liquid grease from the pan.
- Sprinkle baking soda: Sprinkle a generous amount of baking soda directly onto the greasy areas. Ensure it covers the entire surface.
- Add dish soap: Pour a few drops of dish soap over the baking soda.
- Add a little water (optional): Add just enough warm water to form a thick paste. Do not add too much; you want a scrubbing consistency.
- Scrub gently: Use a non-scratch sponge or brush to scrub the paste into the grease. The baking soda acts as a mild abrasive. It helps lift the grease while the soap breaks it down.
- Let it sit (if needed): For slightly tougher spots, let the paste sit for 10-15 minutes before scrubbing.
- Rinse and dry: Rinse the pan thoroughly with warm water. Make sure all paste and grease are gone. Dry the pan immediately to prevent water spots.
This method is safe for most pan types. However, use caution with non-stick coatings; always use a non-abrasive sponge. This combination effectively cuts through greasy films without harsh chemicals.
Tackling Stubborn Baked-On Grease
Sometimes, grease does not get cleaned right away. It can then bake onto the pan. This creates a dark, hard, crusty layer. Baked-on grease is much harder to remove than fresh grease. It requires more aggressive methods and patience. Do not despair if your pans look like this; there are effective ways to restore them.
These methods involve stronger agents or more intense scrubbing. Always ensure you are using a method safe for your specific pan material. For example, steel wool is great for heavily soiled stainless steel but will destroy non-stick coatings. My approach is to start with the least abrasive method and escalate if needed.
Boiling Water and Degreaser Method
Boiling water helps loosen baked-on grease. Adding a strong degreaser or extra dish soap enhances this effect. This method is good for heavily soiled pans, especially those with an accumulation of sticky, hard-to-reach grease.
- Fill with water and soap: Fill the greasy pan with enough water to cover the baked-on grease. Add a generous amount of strong grease-cutting dish soap or a dedicated kitchen degreaser.
- Boil: Place the pan on the stove and bring the water to a boil. Reduce the heat and let it simmer for 10-20 minutes. The boiling water and soap work to soften the hardened grease.
- Cool and scrape: Carefully remove the pan from the heat. Let the water cool down enough to handle safely. Once cool, use a plastic scraper or a stiff brush to scrape away the softened grease. It should come off much more easily.
- Scrub and rinse: For any remaining residue, use a scrub pad or brush with more soap. Rinse the pan thoroughly with warm water. Ensure all residues are gone.
- Dry: Dry the pan completely to prevent water spots or rust.
This method is effective for stainless steel and enameled pans. Use caution with non-stick pans; only boil if the manufacturer allows, and use gentle tools. This technique is often the first step when dealing with truly stubborn how to clean baked-on grease from pans.
The Baking Soda and Hydrogen Peroxide Paste
This powerful combination creates a strong effervescent action. It helps lift extremely stubborn baked-on grease. This method is particularly effective for stainless steel pans. Hydrogen peroxide should be handled with care.
- Make a paste: In a small bowl, mix baking soda with enough hydrogen peroxide to form a thick, spreadable paste. Aim for a consistency similar to toothpaste.
- Apply generously: Spread the paste generously over the baked-on grease. Cover the entire affected area.
- Let it sit: Allow the paste to sit on the pan for several hours, or even overnight, for very tough stains. The longer it sits, the more time it has to break down the grease.
- Scrub: After soaking, use a stiff brush, non-scratch scrub pad (for stainless steel), or a plastic scraper to scrub away the loosened grease. You might need to apply a bit of force.
- Rinse and dry: Rinse the pan thoroughly under warm water. Ensure all the paste and grease residues are removed. Dry the pan completely to prevent water spots.
Always test this paste on an inconspicuous area first. Ensure it does not discolor or damage your pan’s finish. This method is generally safe for stainless steel but should be avoided on non-stick, cast iron, or aluminum pans. This technique can also be particularly useful for those tough spots on the bottom or outside of your pans. You can find more targeted advice on how to clean the bottom of a pan.
Specialized Cleaning for Different Pan Materials
Each pan material requires a slightly different cleaning approach. What works for stainless steel can ruin a non-stick coating. Treating your pans correctly ensures their longevity and performance. I learned this the hard way with a ruined non-stick pan once. Now, I always consider the material first.
This section covers specific advice for the most common pan types. Understanding these nuances will help you maintain your cookware collection. Always check the manufacturer’s instructions for specific care guidelines for your pans.
Stainless Steel Pans
Stainless steel pans are durable and versatile. They can withstand vigorous scrubbing, but baked-on grease can still be a challenge. They also tend to show water spots or discoloration if not dried properly. For general cleaning, hot water and dish soap are usually enough. For tougher messes, you can be more aggressive.
- For light grease: Use hot water, dish soap, and a regular sponge.
- For stubborn grease:
- Baking Soda Paste: Mix baking soda with a little water to form a paste. Apply it to the greasy area. Let it sit for 15-30 minutes, then scrub with a non-scratch scrub pad or stiff brush.
- Vinegar Soak: Fill the pan with a solution of equal parts white vinegar and water. Bring it to a boil. Simmer for 10-15 minutes. Let it cool, then scrub. This helps dissolve greasy film and hard water spots.
- Commercial Stainless Steel Cleaner: For extremely tough, discolored grease, a specialized stainless steel cleaner can be effective. Follow the product instructions carefully.
- For exterior grease: Often, the outside bottom of stainless steel pans can accumulate burnt-on grease. Apply a baking soda paste mixed with dish soap to the exterior. Let it sit for several hours or overnight. Then scrub vigorously with a stiff brush or even a fine steel wool pad (use with caution, can scratch). Our guide on how to clean the outside bottom of pans gives more in-depth solutions for these areas.
- Polishing: After cleaning, use a microfiber cloth to dry and buff the pan. This restores its shine and prevents water spots.
Stainless steel is robust, but harsh abrasives can still cause micro-scratches over time. Always rinse thoroughly to remove all cleaning residues.
Non-Stick Pans
Non-stick pans are excellent for cooking with less oil. However, their delicate coating requires gentle care. Harsh scrubbing or abrasive cleaners can damage the non-stick surface. Once damaged, the pan loses its non-stick properties. It can then stick and become harder to clean.
- For light grease: Use hot water and mild dish soap immediately after cooking. A soft sponge or cloth is key. Avoid abrasive scrubbers.
- For stubborn but not baked-on grease:
- Baking Soda Paste (Gentle): Mix baking soda with a little water to make a thin paste. Apply it gently with a soft sponge. Do not scrub hard. Let it sit for 10-15 minutes. Gently wipe away.
- Boiling Water: Fill the pan with water and a tablespoon of dish soap. Bring to a gentle boil for 5-10 minutes. Let it cool. The softened grease should wipe away easily with a soft sponge.
- Avoid:
- Metal utensils or steel wool: These will scratch and ruin the non-stick coating.
- Harsh chemical degreasers: They can degrade the coating.
- High heat washing: Avoid putting extremely hot non-stick pans directly into cold water, which can warp them.
- Always use non-abrasive tools. Plastic scrapers are safe for gently removing stuck-on food. Dry thoroughly after washing. If your non-stick pan becomes sticky despite cleaning, it might be time for a replacement.
Cast Iron Pans
Cast iron pans are known for their durability and excellent heat retention. They develop a natural non-stick seasoning over time. Proper cleaning for cast iron focuses on preserving this seasoning. Harsh soaps or abrasives can strip it away, leading to rust.
- For fresh grease:
- Hot Water and Scraper: Immediately after use, while the pan is still warm (not hot), scrape out any food residue with a plastic or wooden scraper. Rinse with hot water.
- Coarse Salt and Oil Scrub: For stuck-on bits, add a tablespoon of coarse salt to the pan. Add a few drops of cooking oil. Use a paper towel or sponge to scrub the pan with this mixture. The salt acts as a gentle abrasive. This lifts food without stripping seasoning. Rinse thoroughly with hot water.
- Avoid:
- Dish Soap (mostly): Modern cast iron can handle a little mild dish soap occasionally. However, consistent use can break down the seasoning. Use it sparingly.
- Steel Wool or Harsh Abrasives: These will definitely remove the seasoning.
- Dishwasher: Never put cast iron in the dishwasher. It will strip the seasoning and cause rust.
- For very stubborn baked-on grease (use as a last resort): If your cast iron has a truly stubborn layer of old, caked-on grease that’s beyond normal seasoning, you might need to strip and re-season it. This involves using strong methods (like oven cleaner or electrolysis) to remove all existing seasoning and rust, then re-applying layers of oil and baking it in the oven. This is a significant undertaking.
- Seasoning: After every wash, dry cast iron pans completely. Place them on low heat on the stove for a few minutes to ensure all moisture evaporates. Then, rub a very thin layer of cooking oil over the entire pan, inside and out. Buff off any excess oil. This maintains the seasoning and prevents rust.
For metal pans in general, proper care extends their life. Check out our comprehensive guide on how to clean metal pans for more universal tips applicable to various metallic cookware.
Preventing Future Grease Buildup
The best way to deal with grease is to prevent it from building up in the first place. A little proactive effort goes a long way. This saves you time and elbow grease in the long run. I have found that adopting these habits keeps my pans cleaner day-to-day. It also significantly reduces the need for deep cleaning.
Prevention is not just about cleaning. It is also about how you cook and store your pans. Simple adjustments to your routine can make a big difference. Let’s look at easy ways to keep your pans sparkling.
Wipe Down Immediately After Use
This is perhaps the most important tip. Once you finish cooking and the pan cools down slightly, wipe out any excess grease. Do this before food particles dry or grease hardens.
- Cool slightly: Allow the pan to cool enough so it is safe to handle but still warm. This helps keep the grease in a more liquid state.
- Scrape/Wipe: Use a spatula or paper towel to scrape or wipe out large food bits and excess oil. Discard grease in a heat-safe container or the trash, not down the drain.
- Quick wash: For most pans, a quick wash with hot water and dish soap at this stage is usually all that is needed. The grease has not had a chance to stick.
- Dry completely: Always dry the pan immediately after washing. Moisture can lead to water spots or rust, especially on cast iron and stainless steel.
This simple step prevents the vast majority of baked-on grease issues. It takes less than a minute. It saves you hours of scrubbing later.
Regular Deep Cleaning Schedule
Even with daily wipe-downs, some grease can accumulate over time. Schedule a deeper clean for your pans every few weeks or months, depending on how often you cook. This ensures that any minor buildup does not become a major problem.
- Monthly Deep Clean: For frequently used pans, consider a monthly deep clean. This involves using more robust methods, like the baking soda paste or boiling water method.
- Check the Exterior: Pay special attention to the outside and bottom of your pans during these deep cleans. Grease often accumulates here unnoticed. For external grease, methods described in how to clean the bottom of a pan or how to clean burnt grease from bottom of frying pans can be highly effective.
- Inspect and Assess: During deep cleaning, inspect your pans for any signs of wear or damage. Address small issues before they become bigger problems. This includes re-seasoning cast iron if needed.
- Store Properly: Ensure pans are completely dry before storing. Stacking wet pans can trap moisture and promote rust or mildew. For cast iron, always store it in a dry place.
A regular cleaning schedule makes maintaining your pans much easier. It turns a daunting task into a simple routine.
Use the Right Amount of Oil
Using too much cooking oil or fat can lead to excess grease splashing and accumulating on the pan’s sides and exterior. While some dishes require more oil, often less is more.
- Measure: Instead of free-pouring, measure your oil. A tablespoon or two is often sufficient for sautéing.
- Preheat: Ensure your pan is properly preheated before adding oil. Adding oil to a cold pan often means it takes longer to heat up. This allows more time for the oil to spread and potentially burn onto the surface.
- Use appropriate oils: Some oils have lower smoke points. They can break down and form sticky residues faster. Choose oils with higher smoke points for high-heat cooking.
- Consider Cooking Methods: Frying inevitably creates more grease than baking or steaming. Adjust your cleaning expectations and efforts based on your cooking style.
By being mindful of how much oil you use, you can significantly reduce the amount of grease buildup. This makes the
- pan cleaning
- grease removal
- kitchen cleaning
- cookware maintenance
- deep cleaning

Todd Martin
Senior Writer
With over 15 years of experience in home renovation and design, I started HEG to share what I’ve learned with homeowners who want to create spaces that are both beautiful and functional. I’ve always believed in a hands-on approach, and over the years, I’ve picked up practical solutions that actually work. Through HEG, I aim to make home improvement more approachable, sharing real tips that help you create a home you truly love.