· Todd Martin · Home Maintenance · 14 min read
How To Clean Hair Clippers

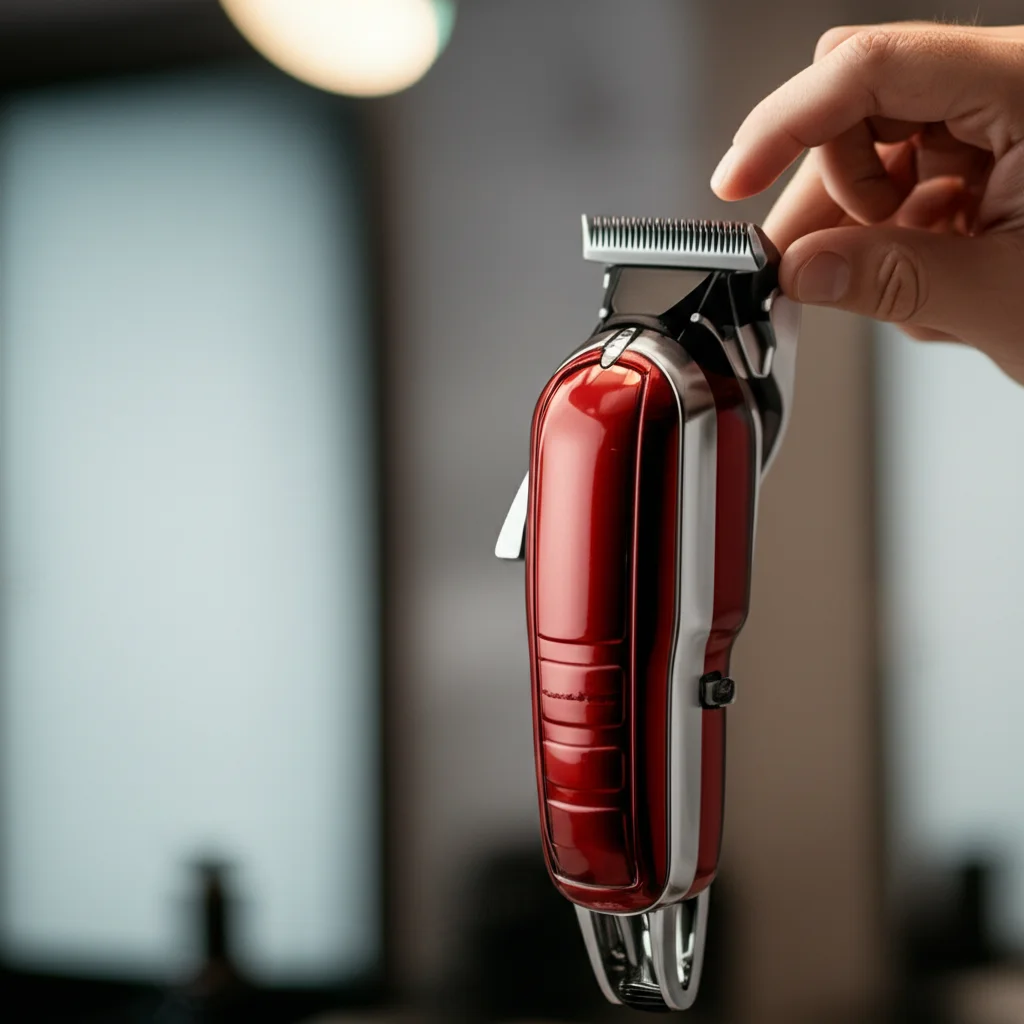
Mastering Clipper Hygiene: How To Clean Hair Clippers for Peak Performance
Keeping your hair clippers clean is important. Dirty clippers can pull hair, cause skin irritation, and stop working well. Many people wonder how to clean hair clippers correctly. You might think a quick brush-off is enough, but proper cleaning goes beyond that. It ensures your clippers last longer and give you a smooth, even cut every time.
In this guide, I will share clear steps to clean your hair clippers. We will cover daily upkeep and thorough deep cleaning methods. I will show you how to remove trapped hair, disinfect blades, and lubricate parts. This article provides all the information you need to maintain your grooming tools. Let us make sure your clippers are always ready for action.
Takeaway
- Clean after each use: Remove hair and brush blades.
- Deep clean monthly: Disassemble and sanitize blades for hygiene.
- Disinfect blades: Use a spray or solution to kill germs.
- Oil regularly: Lubricate blades for smooth operation and tool life.
- Store properly: Keep clippers dry and covered to prevent damage.
To clean hair clippers, first unplug them. Then, use a small brush to remove loose hair from the blades. Detach the blades if possible and wash them with soap and water or a specialized cleaner. Disinfect the blades with rubbing alcohol or a clipper sanitizing spray. Finally, dry the blades completely and apply clipper oil for lubrication.
Why Clean Your Hair Clippers? A Look at the Benefits
You might use your hair clippers often. With each use, hair, skin cells, and oil collect on the blades. This buildup makes clippers work poorly. They can snag hair, causing painful pulls. This also means your haircuts are not as smooth or even.
Beyond performance, hygiene is key. Dirty clippers can spread bacteria and fungi. This can lead to skin irritation or infections on your scalp or face. Think about sharing clippers; proper cleaning protects everyone. A clean clipper feels better and cuts better.
Regular cleaning also extends the life of your clippers. Dirt and hair can wear down the motor and blades. Oiling keeps parts moving smoothly. This prevents rust and reduces friction. My clippers have lasted years because I clean them. I have seen friends replace theirs often due to neglect. Taking time to clean them saves you money later.
A clean clipper also gives you peace of mind. You know it is ready to perform. You can trust it to cut hair cleanly and safely. This simple habit makes a big difference in your grooming routine. It improves results and keeps your tools in top condition.
Essential Tools and Cleaning Supplies for Clippers
Before you start cleaning, gather your supplies. Having everything ready makes the process simple. You likely own most of these items already. I keep a dedicated cleaning kit for my grooming tools. This helps me stay organized.
First, you need a small cleaning brush. Most clippers come with one. If not, a stiff toothbrush works well. This brush helps remove loose hair from the blades. It gets into tight spaces where hair likes to hide.
Next, you need a cleaning solution. You can use mild soap and water for general cleaning. Some people prefer specialized clipper cleaning sprays. These sprays often clean, disinfect, and lubricate all at once. Isopropyl alcohol, or rubbing alcohol, is also a great disinfectant. It quickly kills germs on metal surfaces. You can also use household items like vinegar for cleaning your bathroom.
You will also need clipper oil. This is a light mineral oil specifically for clippers. Do not use cooking oil or heavy motor oil. Clipper oil keeps the blades moving smoothly and prevents rust. A soft cloth or paper towel is useful for wiping down the clippers. Cotton swabs help clean small areas. Remember, cleaning your tools is as important as cleaning your hair combs or plastic hair brushes.
Here is a list of what you will need:
- Small cleaning brush (usually comes with clippers)
- Mild soap or dish detergent
- Warm water
- Rubbing alcohol (isopropyl alcohol) or clipper disinfecting spray
- Clipper oil
- Soft cloth or paper towels
- Cotton swabs
- Small screwdriver (for some deep cleaning)
Gathering these items first makes the cleaning process quick and effective. It helps maintain your clippers properly. Having the right tools ensures a thorough job.
Step-by-Step Guide: Basic Cleaning After Each Use
Cleaning your hair clippers after every use is a simple habit. This daily cleaning prevents hair buildup and keeps your clippers ready. It only takes a few minutes but makes a big difference. I always do this right after I finish a haircut. This prevents hair from sticking and hardening.
First, always unplug your clippers from the power source. Safety comes first. If your clippers are cordless, turn them off. Next, hold the clippers with the blade facing down. Use the small cleaning brush to brush away all loose hair from the blades. Work from the top of the blades down. Make sure to get hair from between the teeth. You can also gently tap the clippers against a hard surface to dislodge trapped hair.
If your clippers have a detachable blade, remove it. This allows you to brush hair from under the blade. Some blades simply snap off, while others may require a small lever. Brush both sides of the blade and the clipper body where the blade attaches. For other grooming tools, removing buildup is similar. For example, you can learn how to clean buildup on a hair brush.
After brushing, wipe the blades and the clipper body with a clean, dry cloth. This removes any fine dust or oil residue. If you see any stubborn spots, a cotton swab can help. Make sure no hair remains on the clipper or its blades. This basic cleaning sets the stage for future performance.
Deep Cleaning Your Hair Clippers: A Monthly Ritual
While daily cleaning removes most hair, a deeper clean is necessary regularly. I do a deep clean on my clippers at least once a month. This process gets rid of old oil, grime, and tiny debris. It ensures your clippers work like new. This is especially important for maintaining the life of your hair cutting tools.
Start by unplugging the clippers and removing the blade set. Most clippers have two screws holding the blades in place. Use a small screwdriver to loosen them. Carefully remove the top blade. Pay attention to how the blades align. This helps you reassemble them correctly. You might also want to consult your clipper’s manual for specific blade removal steps. Some blades just click off, others need screws.
Once the blades are off, brush away all hair from both blades. Clean the clipper body thoroughly, especially the area under where the blades sit. This area often collects a lot of hair and dust. You can use a cotton swab to clean hard-to-reach spots. For deep cleaning, some people use a specialized cleaning solution. You can also mix a small amount of mild soap with warm water.
Dip a soft cloth in the soapy water. Wring out excess water. Wipe down the metal blades carefully. You can also rinse the blades under running water if they are metal and completely detachable. Never let water get into the clipper motor. Always ensure blades are completely dry before reattaching them. Air dry or use a paper towel. For items like hair brushes, baking soda can be used for deep cleaning, but stick to specific methods for clippers.
After cleaning, ensure all parts are dry. Reattach the top blade to the bottom blade. Align them properly. The top blade should sit slightly behind the bottom blade’s cutting edge. This prevents nicks and ensures a smooth cut. Tighten the screws securely but do not over-tighten. This detailed cleaning makes your clippers perform better and last longer.
Disinfecting Hair Clipper Blades for Safety
Disinfecting your hair clipper blades is a critical step. It kills bacteria, viruses, and fungi. This prevents skin infections and keeps your grooming hygienic. I always disinfect my clippers, especially if I use them on more than one person. This is important for all hair removal tools, including facial hair removers.
After you clean the blades, it is time to disinfect them. The most common disinfectant for clippers is rubbing alcohol, also known as isopropyl alcohol (70% or higher). Pour a small amount into a shallow dish. You can also use a spray bottle. Dip the blades into the alcohol, or spray them thoroughly. Ensure the entire blade surface is wet with alcohol.
Allow the alcohol to air dry. Alcohol evaporates quickly, taking germs with it. Do not wipe the alcohol off. This can reintroduce germs. Some brands sell specialized clipper disinfectant sprays. These sprays often have a cooling and lubricating effect too. Read the product instructions if you use a commercial spray.
For very thorough disinfection, barbers often use a barbercide solution. This is a strong disinfectant. If you use your clippers in a professional setting, follow strict sanitation guidelines. For home use, rubbing alcohol is usually enough. Remember to clean and disinfect guides and attachments too. You can wash plastic attachments with soap and water, then spray with alcohol.
Proper disinfection is a non-negotiable step. It ensures safe hair cutting. It protects you and anyone else who uses the clippers. Make this a regular part of your clipper maintenance routine. This simple step can prevent many skin issues.
Oiling and Lubricating Hair Clippers for Smooth Operation
Oiling is key to happy, healthy clippers. It reduces friction between the blades. This prevents them from overheating and extends their lifespan. Proper lubrication also makes the clippers run quieter and smoother. I never skip oiling after cleaning.
After cleaning and disinfecting your clipper blades, they need oil. Use clipper oil. This is a special light oil made for clippers. Do not use motor oil, cooking oil, or any other type of oil. These can be too thick or can gum up the blades. Clipper oil helps the blades glide.
With the clippers running, put 2-3 drops of oil across the top cutting blade. Add one drop on each heel of the blade. This means one drop on the far right and one on the far left. The oil will spread across the blade. Let the clippers run for about 10-15 seconds. This allows the oil to distribute evenly.
Next, turn the clippers off. Wipe off any excess oil from the outside of the blades and the clipper body. Use a clean, soft cloth or paper towel. Excess oil can attract hair and dust. It can also get on your client’s hair or skin.
Oiling frequency depends on use. If you use your clippers often, oil them daily. For occasional home use, oil them after every few uses or after each deep clean. Check your clipper manual for specific oiling recommendations. Consistent oiling is an easy way to keep your clippers in top condition. It prevents wear and ensures consistent performance.
Troubleshooting Common Cleaning Issues and Tips for Longevity
Even with regular cleaning, you might face some issues. Knowing how to handle them keeps your clippers working well. A little care helps them last longer. I have learned a few tricks over the years to keep my clippers performing optimally.
Issue 1: Clippers pulling hair. This often means blades are dull or dirty. First, try deep cleaning and oiling them. If they still pull, the blades might be dull. You may need to sharpen them or replace them. Make sure blades are aligned correctly after cleaning. Improper alignment causes snagging.
Issue 2: Rust on blades. Rust happens when blades get wet and are not dried properly. If you see light rust, you might be able to remove it. A light scrub with steel wool or an abrasive cleaner can help. However, heavy rust means it is time to replace the blades. Always dry blades completely after any wet cleaning. Store your clippers in a dry place. You can apply a thin coat of oil to prevent rust. This is a common issue with many metal tools. Prevention is key.
Issue 3: Clippers making too much noise or running hot. This usually means they need oil. Add a few drops of clipper oil and let them run. If the noise continues, there might be a problem with the motor or a loose part. Sometimes, excessive hair trapped inside the casing can also cause this. Try a deep clean, including removing the blade set to clear any internal hair.
Tips for Longevity:
- Store them properly: Keep your clippers in their original case or a clean, dry drawer. Protect them from dust and moisture.
- Do not drop them: Dropping clippers can misalign blades or damage the motor. Handle them with care.
- Only use specific oil: Always use clipper oil. Other oils can damage the motor or gum up the blades.
- Check the cord: If your clippers are corded, inspect the cord for fraying or damage regularly. A damaged cord is a safety hazard.
- Clean attachments: Remember to clean all guards and attachments too. Wash plastic guards with soap and water. Ensure they are dry before storing. This attention to detail extends the life of your entire grooming kit.
By addressing these common issues and following these tips, your hair clippers will serve you well for a long time. Regular maintenance is an investment in your tools.
FAQ Section
How often should I clean my hair clippers? You should perform a basic clean (brushing off hair and wiping) after every single use. A deep clean, which involves disassembling and thoroughly washing the blades, should happen once a month, or more often if you use your clippers frequently or on multiple people. Oiling should be done after every few uses or after each deep clean.
Can I use water to clean my hair clippers? You can use water to clean the detachable blades of many hair clippers, especially if they are designed to be washable. Always check your clipper’s manual first. Never submerge the clipper body (where the motor is) in water. Ensure blades are completely dry before reattaching them and oiling. This prevents rust and damage.
What kind of oil should I use for clippers? Always use specialized clipper oil. This is a lightweight mineral oil formulated to lubricate clipper blades without causing buildup or damage. Do not use cooking oil, motor oil, or general household oils. These can gum up the blades, attract dirt, or even damage the motor over time, leading to poor performance.
How do I disinfect clipper blades without a special spray? Rubbing alcohol (isopropyl alcohol, 70% or higher) is an effective disinfectant for clipper blades. After cleaning, apply alcohol to the blades by spraying or wiping them down. Allow the alcohol to air dry completely. This process kills bacteria and other pathogens, ensuring your clippers are hygienic for future use.
My clippers are pulling hair even after cleaning and oiling. What next? If your clippers still pull hair, the blades might be dull or misaligned. Check the blade alignment carefully; the top blade should sit slightly behind the bottom blade. If alignment is correct, the blades may need sharpening or replacement. Dull blades are a common cause of pulling, even on clean clippers.
Conclusion
Keeping your hair clippers clean is not just about appearances. It is about performance, hygiene, and the longevity of your valuable grooming tools. I have shown you how simple it is to implement a regular cleaning routine. From a quick brush-off after each haircut to a thorough monthly deep clean, each step plays a vital role.
Remember to always unplug your clippers first. Brush away hair, then clean and disinfect the blades. Finally, apply a few drops of clipper oil. This systematic approach ensures your clippers always provide a smooth, precise cut. You also reduce the risk of skin irritation or infections.
Maintaining your hair clippers is a small investment of time that yields big returns. Your clippers will last longer, perform better, and give you professional-looking results every time. Start taking better care of your clippers today. You will notice the difference with every trim. Make “how to clean hair clippers” a habit for your personal grooming success.
- hair clipper maintenance
- clipper cleaning
- grooming tools
- personal hygiene


