· Todd Martin · Home Appliance Maintenance · 17 min read
How To Clean Homedics Humidifier
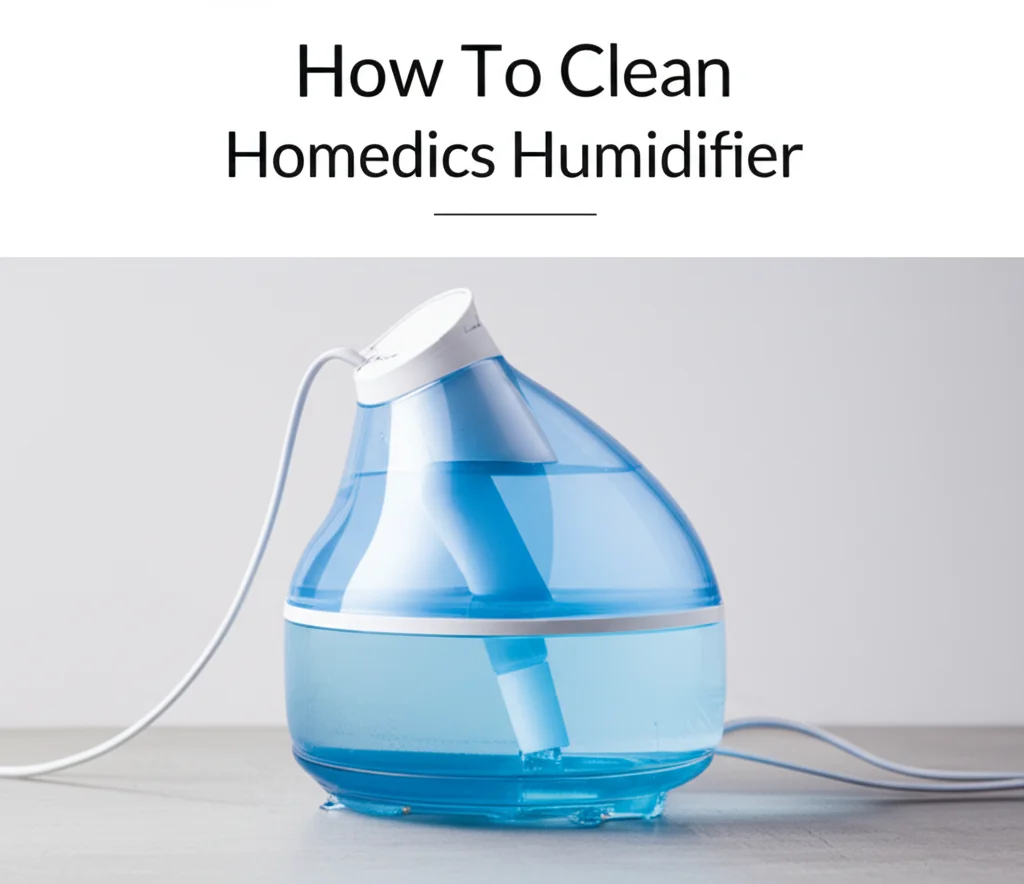
Restore Freshness: How to Clean Your HoMedics Humidifier for Optimal Performance
Do you use a HoMedics humidifier? These devices bring much-needed moisture to your air. They help you breathe easier and improve comfort. But, a humidifier also needs regular cleaning. Unseen dangers can grow inside if you ignore it.
When water sits, mold, bacteria, and mineral deposits build up. Your humidifier then releases these into your air. This can cause health problems instead of solving them. You might notice a strange smell or white dust. These are signs your HoMedics humidifier needs attention.
Learning how to clean Homedics humidifier models ensures healthy air. This guide will walk you through every step. We will cover daily checks, weekly routines, and deep cleaning. You will learn to keep your humidifier fresh and running well. Let’s make sure your air stays clean and pure.
Takeaway
Keeping your HoMedics humidifier clean is vital for health and efficiency.
- Clean the water tank and base daily to stop microbial growth.
- Perform weekly deep cleaning with vinegar to remove mineral buildup.
- Always use distilled or demineralized water to reduce scale.
- Replace filters as the manufacturer suggests.
- Store your humidifier dry when not in use.
To clean a HoMedics humidifier, regularly empty and rinse the tank. Disinfect weekly with a vinegar-water solution, scrubbing away mineral deposits. Rinse all parts thoroughly before refilling with fresh, preferably distilled, water. This routine prevents mold and ensures healthy mist output.
Understanding Your HoMedics Humidifier and Cleaning Needs
Your HoMedics humidifier is an important home appliance. It adds moisture to dry indoor air. This helps with dry skin, stuffy noses, and sore throats. But, this constant use of water creates a unique challenge. Water contains minerals, and moisture promotes growth.
Regular cleaning is not just about keeping your device looking nice. It is about protecting your health. A dirty humidifier can spread mold spores and bacteria into your breathing air. This defeats the purpose of having a humidifier. It can even make existing respiratory issues worse.
HoMedics offers various humidifier types. They include cool mist ultrasonic models and warm mist evaporative units. Each type has slightly different cleaning needs. But, the core principles remain the same. You must remove mineral scale and prevent biological growth.
Mineral scale looks like white, crusty deposits. This comes from hard water. It clogs parts and reduces your humidifier’s efficiency. Mold and bacteria create a musty smell. They grow in stagnant water. Addressing both issues is key to effective HoMedics humidifier cleaning.
This understanding sets the stage for proper maintenance. Knowing why you clean helps you clean better. It makes you proactive about device care. You keep your living space healthy. My own experience taught me that a few minutes of cleaning can save a lot of trouble.
Gathering Your Essential HoMedics Humidifier Cleaning Supplies
Before you start cleaning your HoMedics humidifier, gather your tools. Having everything ready makes the process smoother. You probably have most of these items at home already. Using the right supplies ensures a safe and effective clean.
First, you will need white vinegar. This is your best friend for descaling. Vinegar is a natural acid. It breaks down mineral deposits without harsh chemicals. You should always have a bottle of distilled white vinegar handy for home cleaning.
Next, prepare some soft brushes or sponges. A small bottle brush works well for narrow areas. A soft cloth or sponge is good for larger surfaces. Avoid abrasive scrubbers. They can scratch your humidifier’s plastic parts. This damage can create more places for germs to hide.
You also need clean water. Distilled water is best for humidifier use. But tap water is fine for rinsing. A basin or sink is helpful for soaking parts. Always have a clean towel ready to dry everything. Drying parts thoroughly prevents immediate mold regrowth.
For tough mold issues, a very diluted bleach solution might be necessary. Use this with caution. Mix one teaspoon of bleach per gallon of water. Only use it when vinegar does not work. Always rinse parts very well after using bleach. I prefer using natural solutions first.
- White Vinegar: Essential for dissolving mineral buildup.
- Soft Brushes or Sponges: For gentle scrubbing of surfaces.
- Small Bottle Brush: Reaches inside narrow openings.
- Clean Cloth/Towel: For drying all components completely.
- Measuring Spoons/Cups: For accurate solution mixing.
- Optional (for severe mold): Bleach (very diluted solution).
Always refer to your HoMedics humidifier manual. Some models may have specific cleaning instructions. They might also list specific cleaning agents to avoid. Following these steps prepares you for effective HoMedics humidifier maintenance.
Daily and Weekly Cleaning Routines for Your HoMedics Humidifier
Maintaining your HoMedics humidifier does not need to be a big chore. Simple daily and weekly routines prevent major buildup. This keeps your air clean and extends your unit’s life. Consistency is key for effective HoMedics humidifier cleaning.
Every day, start with a quick refresh. First, unplug the humidifier. Safety comes first when dealing with electronics and water. Empty any leftover water from the tank and base. Do not let water sit in the unit for extended periods. Stagnant water encourages bacterial growth.
Rinse the water tank and base thoroughly with fresh tap water. You can use a soft cloth to wipe down the inside surfaces. Make sure to remove any visible slime or film. This daily rinse prevents mold and bacteria from taking hold. It also reduces mineral scale formation.
Once a week, perform a more detailed clean. Again, unplug the unit and empty all water. Disassemble the removable parts. This usually includes the water tank, base, and any trays. Check your specific HoMedics model for disassembly instructions.
Prepare a cleaning solution using white vinegar. Mix one part white vinegar with one part water. Pour this mixture into the water tank. Also, pour some into the base. Allow the solution to soak for at least 30 minutes, or up to an hour. This soaking breaks down mineral deposits and kills germs.
- Daily Routine:
- Unplug the humidifier.
- Empty old water from the tank and base.
- Rinse the tank and base with fresh water.
- Wipe down internal surfaces with a soft cloth.
- Refill with fresh, clean water.
- Weekly Routine:
- Unplug and empty all water.
- Disassemble removable parts.
- Mix equal parts white vinegar and water.
- Pour solution into the tank and base.
- Soak for 30 minutes to an hour.
- Use a small brush to scrub stubborn spots.
- Rinse all parts thoroughly with clean water.
- Dry completely before reassembling or storing.
After soaking, use a soft brush or sponge to scrub any remaining residue. Pay close attention to the nebulizer or transducer on ultrasonic models. This part often accumulates mineral buildup. Thorough rinsing is critical. Make sure no vinegar smell remains before refilling. Consistent care helps prevent bigger cleaning challenges. Just like cleaning a cool mist humidifier, regular upkeep prevents issues.
Deep Cleaning Your HoMedics Humidifier: Tackling Stubborn Buildup
Sometimes, daily and weekly cleaning are not enough. Stubborn mineral buildup or mold might persist. This happens, especially if you use hard water. A deep cleaning process is then necessary. This ensures your HoMedics humidifier works at its best.
For extensive mineral deposits, white vinegar is your primary tool. After soaking as in the weekly clean, look closely at the base. The heating element or ultrasonic disc (transducer) often gets the most buildup. These white, crusty layers can reduce mist output.
Pour pure white vinegar directly onto these heavily affected areas. Let it sit for several minutes. Use a small, soft brush or an old toothbrush to gently scrub the deposits away. The vinegar helps loosen the scale. You might need to repeat this process for very thick layers.
If you spot visible mold, a slightly stronger approach might be needed. Mold can appear as black or pink spots. While vinegar effectively kills many types of mold, some stubborn varieties might require more. For these, a very diluted bleach solution can be used with extreme caution.
Mix one teaspoon of household bleach with one gallon of water. Dip a cloth or brush into this solution. Carefully wipe down moldy areas. Do not pour this solution directly into the unit. Let it sit for about 10 minutes. Rinse all parts extensively with plain water afterwards. You must rinse until no bleach smell remains. Bleach residues can be harmful when airborne.
- Steps for Deep Cleaning:
- Unplug and Disassemble: Always begin by unplugging. Take apart all removable sections.
- Vinegar Soak: Fill the water tank and base with undiluted white vinegar. Let it sit for at least an hour, or even overnight for severe buildup.
- Scrub Hard Water Scale: Use a soft brush (like an old toothbrush) to scrub mineral deposits. Focus on the ultrasonic disc or heating element.
- Mold Treatment (if needed): If mold persists, use a solution of 1 teaspoon bleach per gallon of water. Apply with a cloth to moldy areas. Let sit for 10 minutes.
- Rinse Thoroughly: This is the most crucial step. Rinse all parts several times with fresh, clean water. Ensure no vinegar or bleach odor remains.
- Air Dry: Allow all components to air dry completely before reassembling.
Remember to be gentle during scrubbing. Plastic parts can scratch easily. Scratches create new surfaces for grime to cling to. Using a similar approach as you would to clean a plastic shower ensures the material is protected. Always prioritize safety. Wear gloves if using bleach. Ensure good ventilation. This deep cleaning helps maintain optimal HoMedics humidifier performance. It keeps your air fresh and healthy.
Maintaining Your HoMedics Humidifier’s Filter and Accessories
Many HoMedics humidifiers use filters, wicks, or demineralization cartridges. These accessories play a big role in air quality. They also prevent mineral dust. Proper maintenance of these parts is essential for your humidifier’s efficiency. Ignoring them can lead to poor performance.
Filters, typically found in evaporative humidifiers, absorb water. They release it as mist. Over time, these wicks collect minerals and can grow mold. They become stiff and discolored. This reduces their ability to absorb water. Your humidifier will produce less mist.
Always check your HoMedics humidifier’s manual for filter replacement schedules. This varies by model and water hardness. Typically, filters need changing every 2-3 months. Some filters can be rinsed, but most are disposable. Rinsing might extend life slightly, but does not remove all mineral buildup.
Demineralization cartridges are common in ultrasonic HoMedics models. These cartridges reduce the white dust often seen with ultrasonic humidifiers. This dust is actually mineral residue. The cartridge “filters” these minerals out of the water.
These cartridges also have a lifespan. They become less effective over time. Replace them according to your manual’s recommendations. Usually, this is every 30-40 tank fillings or every few months. A good way to know if it is time is if you start seeing more white dust.
- Filter Care (Wicks):
- Inspect weekly for discoloration or stiffness.
- Replace according to your HoMedics manual (typically 2-3 months).
- Do not try to deep clean heavily mineralized wicks; replacement is best.
- Demineralization Cartridge Care:
- Monitor for increased white dust output.
- Replace as per manual (e.g., every 30-40 tank fillings).
- These are not designed for cleaning; they are disposable.
- Other Accessories:
- Some models have essential oil trays. Clean these with a damp cloth after each use. This prevents oil residue buildup.
- Always ensure all accessories are correctly seated before use.
When you replace a filter or cartridge, note the date. This helps you remember the next replacement. Using distilled or demineralized water also prolongs filter life. It greatly reduces mineral accumulation. Proper filter maintenance keeps your HoMedics humidifier running cleanly. It also helps with a consistent mist output. This helps you maintain the healthy air you expect. It’s similar to how you would replace a water filter in a drinking water system.
Preventing Mold and Mineral Accumulation in Your HoMedics Humidifier
Preventive measures are always better than extensive cleaning. By taking a few steps, you can significantly reduce mold and mineral buildup. This means less frequent deep cleaning for your HoMedics humidifier. A little effort goes a long way in keeping your unit pristine.
The type of water you use makes a huge difference. Tap water contains minerals like calcium and magnesium. These minerals form the white dust and hard scale you see. Using distilled water or demineralized water virtually eliminates this problem. It is a simple switch with big benefits for your humidifier’s longevity and cleanliness. I always recommend distilled water.
Emptying the water tank daily is another critical step. Do not leave stagnant water in the humidifier for long periods. If you use the humidifier intermittently, empty it after each use. Then, let it air dry. This prevents bacteria and mold from growing in still water. They need moisture to thrive.
Consider where you place your humidifier. Place it on a hard, flat surface. Avoid placing it on carpet or near walls. Proper air circulation around the unit helps. It also prevents moisture from building up in surrounding areas. This reduces the risk of mold forming outside the unit too.
You can also use humidifier cleaning balls or cartridges. Some HoMedics models are compatible with these. These products often contain bacteriostats. These are agents that inhibit bacterial and mold growth in the water. They are a good supplement to regular cleaning, not a replacement. Always check if these are safe for your specific HoMedics model.
- Use Distilled Water: This is the most effective way to prevent mineral buildup and white dust.
- Daily Empty and Rinse: Never leave water sitting in the tank or base for more than 24 hours.
- Air Dry Between Uses: Allow all parts to dry completely when not in use.
- Proper Placement: Ensure good air circulation around the humidifier.
- Consider Additives (with caution): Use humidifier bacteriostat products only if approved for your model.
Even with these preventative steps, some regular cleaning is still necessary. But, these methods greatly reduce the frequency and intensity of that cleaning. They ensure your HoMedics humidifier consistently delivers clean, healthy mist. Just like you would prevent mold in your bathroom with vinegar, consistent practices keep your humidifier healthy.
Troubleshooting Common HoMedics Humidifier Cleaning Challenges
Even with regular care, you might encounter specific cleaning challenges. Addressing these issues promptly helps maintain your HoMedics humidifier. Understanding these problems lets you tackle them effectively. Let’s look at some common cleaning-related hurdles.
One frequent issue is persistent white dust. This is mineral residue. Even if you deep clean, it can reappear quickly. This signals very hard tap water. The best solution here is to switch to distilled or demineralized water. No amount of cleaning will stop white dust if the source water is full of minerals. If you clean a Dyson humidifier, you might find similar challenges with hard water.
A musty or sour smell is another common complaint. This indicates mold or bacterial growth. If daily rinsing and weekly vinegar soaks do not fix it, you need a very thorough deep clean. Disassemble every possible part. Look for slime or discolored spots in hidden crevices. Use a small bottle brush for tight spaces. A cautious, diluted bleach treatment (as described earlier) might be necessary for pervasive mold. Remember to rinse meticulously after bleach use.
The humidifier producing little to no mist is often due to mineral buildup. The ultrasonic disc or heating element can get coated. This prevents it from vibrating or heating water correctly. A strong vinegar soak and gentle scrubbing often resolves this. Ensure the disc is completely clear of any white film. Sometimes, the issue is not cleaning but a clogged air intake. Check the back or bottom for dust accumulation and wipe it clean.
- Persistent White Dust:
- Cause: Hard water minerals.
- Solution: Switch to distilled or demineralized water immediately.
- Action: Replace demineralization cartridge if present and old.
- Musty/Sour Smell:
- Cause: Mold or bacteria.
- Solution: Perform an intensive deep clean with vinegar.
- Action: If severe, use diluted bleach rinse, followed by extensive clear water rinsing.
- Low/No Mist Output:
- Cause: Mineral buildup on ultrasonic disc/heating element, or clogged air intake.
- Solution: Deep clean the transducer/heating element with vinegar.
- Action: Clear any dust from air vents.
- Leaking:
- Cause: Improper assembly after cleaning, cracked tank, or damaged seals.
- Solution: Reassemble carefully. Check for cracks. Inspect seals.
- Action: Contact HoMedics support if parts are damaged.
Sometimes, despite cleaning, a part might be worn out. For instance, rubber seals can degrade. This causes leaks. In such cases, contacting HoMedics customer support is the next step. They can advise on replacement parts. Solving these common issues ensures your HoMedics humidifier operates at peak performance. It maintains clean air for your home.
The Importance of Regular Humidifier Cleaning for Your Health
We often think of humidifiers as simple machines. We might not realize their direct link to our health. A humidifier that looks clean can still harbor unseen threats. Regular cleaning of your HoMedics humidifier is not just a chore. It is a vital health practice.
When a humidifier is dirty, it becomes a breeding ground. Mold spores, bacteria, and even viruses can multiply in standing water. These tiny particles then become airborne. Your humidifier, designed to improve air, starts spreading contaminants. You and your family breathe these in. This can lead to various health problems.
Common issues include respiratory infections. People might experience symptoms like coughing, wheezing, and chest congestion. Allergies can worsen. Asthma attacks may become more frequent or severe. Infants and individuals with weakened immune systems are especially vulnerable. I have seen friends suffer from unexplained coughs, only to discover their humidifier was the culprit.
Mineral dust, or “white dust,” is another concern. This happens with hard water. These fine particles can settle on furniture. More importantly, they enter your lungs. While usually not severely harmful, over time, large amounts can irritate airways. They can also exacerbate existing lung conditions.
A clean humidifier delivers pure, beneficial mist. It helps relieve dry skin and chapped lips. It can soothe a dry throat and nasal passages. It makes breathing easier during cold and flu season. This is the healthy outcome you want from your HoMedics humidifier.
- Prevents Respiratory Issues: Stops the spread of airborne mold and bacteria.
- Reduces Allergies and Asthma Triggers: Minimizes irritants in the air.
- Eliminates White Dust Risks: Protects lungs from inhaled mineral particles.
- Ensures Clean Mist Output: Delivers only beneficial moisture to your air.
- Promotes Overall Well-being: Contributes to a healthier indoor environment.
Think of your humidifier as a lung for your home. You would not want to breathe dirty air. So, do not let your humidifier distribute it. Make cleaning a routine. It is a simple yet powerful way to protect your family’s health. Prioritizing this helps you maintain fresh indoor air.
Maximizing Your HoMedics Humidifier’s Lifespan Through Smart Habits
You have learned how to clean HoMedics humidifier models. Now, let’s look at habits that extend its life. Cleaning is part of it. But other smart practices keep your investment working for years. These tips save you money and ensure consistent performance.
First, always use the right water type. I cannot stress this enough: distilled water is best. It prevents mineral buildup. This is the primary cause of humidifier damage. It keeps the motor, ultrasonic disc, and filters clear. This extends their operational life significantly.
Store your humidifier properly when not in use. This means completely dry. If you put it away wet, mold and mildew will grow. They can damage components and leave lasting odors. Disassemble, clean, and dry all parts. Store it in a cool, dry place. This prepares it for next season’s use.
Follow the manufacturer’s guidelines for filter and cartridge replacement. These parts are designed to wear out. An old, clogged filter stresses the motor. An expired demineralization cartridge lets minerals through. Replacing them on time prevents overworking the unit. It also ensures efficient mist production.
Avoid harsh chemicals for cleaning. Stick to white vinegar and diluted bleach only when necessary. Abrasive cleaners or scrubbers can scratch surfaces. These scratches then trap dirt and mold. This makes future cleaning harder. Gentle care preserves the unit’s materials.
- Utilize Distilled Water: Prevents scale buildup and component wear.
- Proper Storage: Clean and dry unit completely before storing for long periods.
- Timely Replacements: Change filters and demineralization cartridges as recommended.
- Gentle Cleaning Agents: Use only recommended solutions like vinegar. Avoid abrasive tools.
- Read the Manual: Your specific HoMedics model may have unique care instructions.
Do not overfill the water tank. Filling past the “max” line can lead to leaks. Leaks can damage internal electronics or your furniture. Follow the fill line exactly. These simple habits create a foundation for long-term humidifier health. They ensure you get the most out of your HoMedics humidifier for a very long time.
FAQ Section
How often should I clean my HoMedics humidifier?
You should rinse your HoMedics humidifier’s water tank and base daily. Perform a more thorough cleaning with white vinegar once a week. If you use hard water or notice white dust or mold, increase the cleaning frequency. Consistent, light cleaning prevents major issues from developing.
- Homedics Humidifier
- Humidifier Cleaning
- Appliance Maintenance
- Indoor Air Quality
- Mold Prevention

Todd Martin
Senior Writer
With over 15 years of experience in home renovation and design, I started HEG to share what I’ve learned with homeowners who want to create spaces that are both beautiful and functional. I’ve always believed in a hands-on approach, and over the years, I’ve picked up practical solutions that actually work. Through HEG, I aim to make home improvement more approachable, sharing real tips that help you create a home you truly love.