· Todd Martin · Home Cleaning · 18 min read
How To Clean Keurig With Vinegar
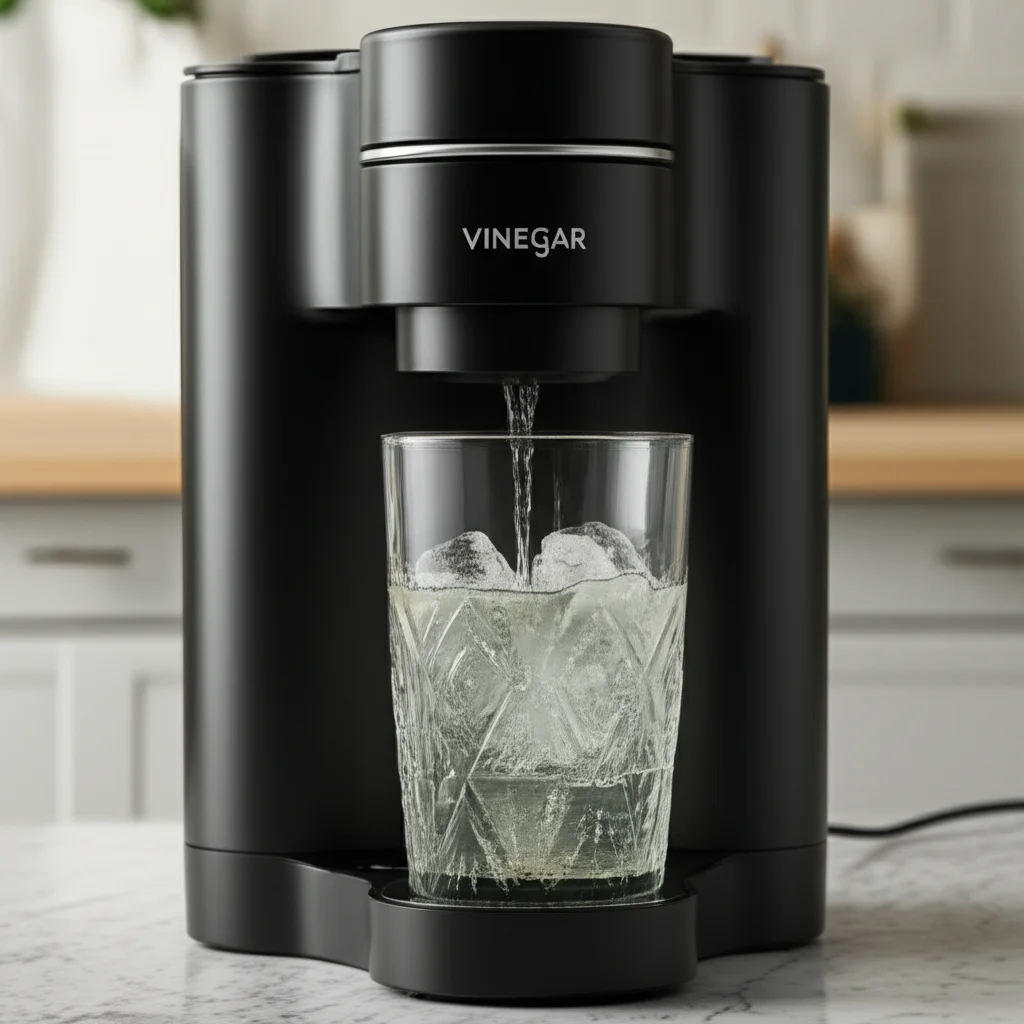
Revitalize Your Brew: How To Clean Keurig With Vinegar
Imagine sipping your morning coffee, and it tastes… off. A stale, bitter note often signals it is time to clean your Keurig machine. Mineral deposits, primarily from hard water, build up inside the brewer over time. This buildup, known as limescale, restricts water flow and lowers brewing temperature.
Regular cleaning prevents these issues. Cleaning your Keurig with vinegar is a simple, effective, and natural method. It helps remove limescale and keeps your coffee tasting fresh. I will guide you through each step to ensure your Keurig performs its best. We will cover why vinegar works, what you need, and how to perform a thorough cleaning.
Takeaway
- Regularly cleaning your Keurig with vinegar removes mineral buildup.
- Vinegar is a natural and effective descaling agent for coffee makers.
- Follow specific steps to ensure a complete cleaning and rinse cycle.
Concise Answer
To clean your Keurig with vinegar, fill the reservoir with a 1:1 mixture of white vinegar and water. Run several brew cycles with this solution, followed by multiple water-only rinse cycles until the vinegar smell disappears. This process effectively removes mineral buildup and refreshes your machine.
The Importance of Regular Keurig Cleaning
Your Keurig works hard to deliver fresh coffee every day. Over time, it collects mineral deposits from tap water. These deposits are primarily calcium and magnesium. They form limescale inside the machine’s internal components. This limescale affects your coffee’s quality and your machine’s performance.
Limescale buildup can restrict water flow. This makes your Keurig brew slower. It can also reduce the water temperature. This means your coffee will not be as hot or as flavorful. An unclean Keurig can also harbor mold and bacteria. These can grow in damp environments, affecting hygiene. Regular cleaning keeps your machine running smoothly and ensures each cup of coffee tastes great. It also extends the lifespan of your appliance.
Think about it: every cup of coffee passes through these internal parts. If they are dirty, your coffee absorbs those impurities. Cleaning is not just about machine function; it is about taste and health. I make sure to clean my Keurig often. This helps prevent unpleasant surprises in my morning routine. Keeping your Keurig clean means enjoying delicious coffee, cup after cup.
Why Vinegar is Your Best Keurig Cleaning Solution
Vinegar is a powerhouse for cleaning, especially for appliances. Its acidic nature makes it perfect for breaking down mineral deposits. White vinegar is a natural product. It is non-toxic and food-safe. This makes it an ideal choice for cleaning something you use to make drinks.
Unlike harsh chemical descalers, vinegar leaves no harmful residues. It effectively dissolves limescale without damaging your Keurig’s internal parts. Many people use vinegar for various household cleaning tasks. You might use it to clean your dishwasher with vinegar or even to clean your washing machine with vinegar. This shows its versatility and safety. Its affordability also makes it a practical choice. You likely already have it in your pantry.
I prefer natural cleaning solutions when possible. Vinegar provides a deep clean. It removes stubborn buildup and sterilizes at the same time. This ensures your Keurig is clean and free of germs. Trusting vinegar for this task gives me peace of mind. It means my coffee maker is ready for the next brew.
Preparing Your Keurig for a Vinegar Cleanse
Before you start cleaning your Keurig with vinegar, a few preparatory steps are essential. These steps ensure a smooth and effective cleaning process. Taking time to prepare saves effort later. It also helps achieve the best cleaning results.
First, power off your Keurig machine. Unplug it from the wall outlet. Safety is important when cleaning appliances. This prevents accidental activation during the process. Next, remove the water reservoir, the K-Cup holder, and the drip tray. These parts need a separate hand wash.
Wash these removable parts with warm, soapy water. Use a soft cloth or sponge. Scrub away any coffee grounds, residue, or spills. Pay attention to crevices. Rinse them thoroughly under running water. Ensure all soap residue is gone. Let them air dry completely or dry them with a clean towel. This initial cleaning removes loose debris. It allows the vinegar solution to target internal mineral buildup.
- Empty and Unplug: Make sure the machine is completely off and unplugged.
- Remove Parts: Detach the water reservoir, K-Cup holder, and drip tray.
- Wash Separately: Clean these parts by hand with soap and water.
- Rinse and Dry: Rinse thoroughly and allow parts to dry completely before reassembly.
By following these steps, you prepare your Keurig properly. This sets the stage for a successful vinegar cleaning. It ensures maximum efficiency when running the descaling solution.
Step-by-Step Guide: Cleaning Your Keurig with Vinegar
Cleaning your Keurig with vinegar involves a few simple, sequential steps. Following these instructions ensures a thorough descaling and rinsing process. This will leave your machine clean and ready for fresh coffee. I have used this method many times. It always works well for me.
Creating the Vinegar Solution
First, mix equal parts white vinegar and fresh water. For most Keurig models, this means about 16 ounces (2 cups) of vinegar and 16 ounces of water. Pour this mixture into the empty water reservoir. Make sure the reservoir is properly seated back in the machine. Do not use apple cider vinegar or any other type of vinegar. White vinegar is best for cleaning. It has the right acidity and will not stain your machine.
Running the Vinegar Brew Cycles
Place a large ceramic mug or bowl on the drip tray. It needs to hold at least 10 ounces of liquid. This prevents spills. Lift and close the K-Cup holder without inserting a K-Cup. This tells the machine to perform a hot water cycle. Select the largest cup size setting on your Keurig. Press the brew button to start a cycle.
Repeat this process until the water reservoir is empty. You will notice the solution coming out. It might be cloudy at first. This is normal. It shows the vinegar is working to dissolve the mineral deposits. Ensure you empty the collection mug after each cycle. This prevents overflow. The strong vinegar smell indicates the solution is doing its job.
Performing Multiple Rinse Cycles
Once the vinegar solution is gone, refill the reservoir with fresh, plain water. Place your large mug back on the drip tray. Run several water-only brew cycles. Do this until the entire reservoir of fresh water is used up. Empty the mug after each cycle. Refill the reservoir with plain water and repeat this process two or three more times.
This rinsing phase is crucial. It flushes out any remaining vinegar and dissolved mineral particles. You want to eliminate all traces of vinegar smell and taste. If you still detect vinegar, continue running plain water cycles. A clean Keurig should only smell like clean water. Just as you might clean an ice maker with vinegar and then thoroughly rinse it, the same meticulous rinsing applies here.
Cleaning the Exit Needle
The exit needle, located inside the K-Cup holder, can get clogged. This happens from coffee grounds and oils. Unplug your Keurig again. Carefully remove the K-Cup holder. Look for the needle. Use a straightened paper clip to gently clear any clogs in the needle’s opening. Be gentle to avoid damage. This step ensures proper water flow through your coffee pod. Rinse the K-Cup holder before placing it back.
Troubleshooting Common Keurig Cleaning Issues
Sometimes, cleaning your Keurig with vinegar might present small challenges. Knowing how to address these common issues helps ensure a successful cleaning. I have encountered these myself and found solutions.
Dealing with a Lingering Vinegar Smell
After multiple rinse cycles, you might still detect a faint vinegar smell or taste. This is common. It means some vinegar residue remains. Do not worry. The solution is simple. Refill the water reservoir with fresh water. Add a tablespoon of baking soda to the water. Baking soda helps neutralize odors.
Run two to three more plain water brew cycles. The baking soda water will flush out the remaining vinegar. Then, run two to three more cycles with only plain water. You can also leave the reservoir lid open overnight. This allows air to circulate and dissipate any remaining odor. This method is effective for many household cleaning tasks. For example, when you clean with vinegar and baking soda, you often use them together for enhanced cleaning and odor removal.
Addressing a Clogged Keurig
A heavily scaled Keurig might struggle to brew or dispense water slowly. This indicates a severe clog. If the vinegar solution does not flow, the machine might be too clogged. Try a stronger vinegar solution first. Use a 2:1 vinegar to water ratio. Place a paper clip in the exit needle. Sometimes, the needle above the K-cup is clogged.
If water still does not flow, it might be an internal blockage. In severe cases, the pump might struggle. For very stubborn clogs, you might need a commercial descaling solution. These are often stronger than vinegar. Always follow the manufacturer’s instructions for any commercial product. Sometimes a second vinegar cycle is needed. Do not give up after one try. Persistence often pays off with stubborn buildup.
Handling Leaks or Dripping
If your Keurig leaks during or after cleaning, check the water reservoir. Ensure it is seated correctly. The rubber gasket at the bottom of the reservoir must form a tight seal. Remove the reservoir and reposition it firmly. Inspect the gasket for any damage or debris. Clean the area if needed.
Check the K-Cup holder and the drip tray as well. Ensure they are correctly installed. Loose or improperly seated parts can cause drips. If the leak persists, it might indicate a worn internal seal. In such cases, professional service might be needed. However, most leaks are due to improper assembly after cleaning.
Maintaining Your Keurig for Optimal Performance
Keeping your Keurig in top condition requires more than just occasional deep cleaning. Regular maintenance ensures fresh-tasting coffee every day. It also helps extend the life of your appliance. I follow a few simple routines to keep my machine running smoothly.
Daily Quick Cleaning Tips
- Empty and Rinse Drip Tray: After each use, empty and rinse the drip tray. This prevents water from sitting and becoming stagnant. It also stops mold growth.
- Wipe Down Exterior: Use a damp cloth to wipe the outside of your Keurig daily. This removes coffee splatters and dust. It keeps your machine looking good.
- Rinse Water Reservoir: Each day, empty any old water from the reservoir. Rinse it with fresh water. Refill it with filtered water. Stale water can affect coffee taste. Filtered water reduces mineral buildup.
Weekly Maintenance Habits
Once a week, perform a more thorough clean of the removable parts.
- Wash Removable Parts: Remove the water reservoir, K-Cup holder, and drip tray. Wash them in warm, soapy water. Use a soft brush for the K-Cup holder to remove coffee grounds. Rinse them well and let them air dry completely before reassembling. This prevents residue buildup.
- Clean the Exit Needle: Use a straightened paper clip to clear the exit needle. This is crucial for preventing clogs. It ensures a consistent brew. You can also use this time to clear the entrance needle. This is the needle that pierces the top of the K-cup.
Recommended Descaling Frequency
The frequency of descaling depends on your water hardness. If you have hard water, you will need to descale more often.
- Soft Water Areas: Descale every 3-6 months.
- Hard Water Areas: Descale every 1-3 months.
- Indicator Lights: Many Keurig models have a “Descale” indicator light. When this light turns on, it is time to clean. Do not ignore it.
Regular cleaning and maintenance reduce the need for emergency troubleshooting. It ensures your Keurig delivers delicious coffee consistently. Think of it like maintaining your car. Small, regular efforts prevent big problems later. This proactive approach saves you time and ensures you always have a perfect cup ready.
Advanced Keurig Cleaning Techniques and Considerations
While vinegar is highly effective, some situations might call for additional considerations or techniques. Understanding these can help you tackle unique cleaning challenges. I have learned a few extra tricks over time.
Addressing Mold Growth
If you notice black spots or a musty smell, your Keurig might have mold. Mold thrives in dark, damp environments. It can grow in the water reservoir or internal tubing. Vinegar is an excellent mold killer due to its acidity.
To tackle mold, use full-strength white vinegar in the reservoir. Run several brew cycles with just vinegar, ensuring it flows through the system. Let the machine sit for 30 minutes with the vinegar solution inside. Then, run multiple rinse cycles with plain water. You might also need to scrub the reservoir manually with a brush and vinegar solution. For severe mold issues, consider using a mix of vinegar and baking soda to clean the reservoir. This helps remove mold and odors. Mold in appliances like a Keurig is similar to mold in other water-contact areas, such as cleaning mold from a shower head with vinegar.
Using Filtered Water to Reduce Buildup
The quality of water you use directly impacts mineral buildup. Tap water often contains minerals like calcium and magnesium. These cause limescale. Using filtered water significantly reduces the accumulation of these deposits.
A water filter pitcher or a filtered water dispenser can supply better water. While filtered water does not eliminate the need for descaling, it can extend the time between cleanings. It also improves the taste of your coffee. I always use filtered water in my Keurig. This helps keep my machine cleaner for longer.
Professional Descaling Solutions vs. Vinegar
Keurig sells its own descaling solution. Other brands offer commercial descalers too. These solutions are typically phosphoric acid-based. They are designed specifically for coffee makers. They can be more aggressive than vinegar. They work faster on heavy mineral buildup.
However, commercial solutions cost more than vinegar. They also require careful handling and thorough rinsing. If you prefer a natural, cost-effective method, vinegar is your best bet. For extremely neglected machines with very heavy scale, a commercial solution might be necessary as a one-time treatment. Always follow the product instructions carefully. For regular maintenance, vinegar is usually sufficient and safer for the environment.
The Importance of Air Drying Components
After cleaning removable parts, ensure they air dry completely before reassembling. Water left on surfaces can encourage mold or mildew growth. This is especially true for the water reservoir. Letting it air dry for several hours, or even overnight, is a good practice. This step ensures a truly clean machine.
The Environmental and Cost Benefits of Vinegar Cleaning
Choosing vinegar to clean your Keurig offers more than just effectiveness. It brings significant environmental and cost benefits. This makes it a responsible choice for your home and your wallet. I appreciate these aspects of natural cleaning.
Eco-Friendly Cleaning
Vinegar is a natural product. It comes from fermented grains. It is biodegradable. This means it breaks down safely in the environment. Unlike harsh chemical cleaners, vinegar does not introduce synthetic compounds into our water systems. When you pour it down the drain, it does not harm aquatic life or contaminate water sources.
Many commercial descalers contain strong acids and chemicals. These can be corrosive and require special disposal. Using vinegar reduces your chemical footprint. It supports a greener lifestyle. It is a simple way to contribute to environmental protection. I feel good knowing my cleaning choices are eco-conscious.
Cost-Effective Solution
White vinegar is incredibly affordable. You can buy a large bottle for just a few dollars. This bottle will last for many Keurig cleanings. Compare this to specialized commercial descaling solutions. These can be quite expensive. They often come in small bottles designed for one or two uses.
Over time, the savings add up significantly. Cleaning your Keurig regularly with vinegar prevents costly repairs too. Mineral buildup can damage internal components. This could lead to a broken machine. A new Keurig costs far more than a bottle of vinegar. Regular, inexpensive maintenance with vinegar extends your machine’s life. This saves you from premature replacement costs.
Health and Safety Advantages
Vinegar is non-toxic. This makes it safe to use around food and drinks. You do not need gloves or special ventilation when cleaning with it. Accidental skin contact is not harmful. Unlike strong acids, vinegar does not pose a chemical burn risk.
After cleaning, any residual vinegar taste or smell is harmless. It simply indicates more rinsing is needed. There are no lingering harmful fumes. This provides peace of mind. You know your coffee maker is free from dangerous chemicals. This is a major advantage, especially in kitchens where food preparation occurs. Your family’s health is protected.
Keurig Cleaning Myths Debunked
Many myths circulate about cleaning coffee makers. It is important to separate fact from fiction. Relying on accurate information ensures you clean your Keurig effectively and safely. Let’s look at some common misconceptions.
Myth 1: You Should Use Dish Soap for Descaling
Some people think dish soap works for descaling. This is false. Dish soap is for cleaning grease and food residue. It does not dissolve mineral deposits like limescale. Dish soap can also leave a residue inside your Keurig’s internal parts. This residue can affect the taste of your coffee. It is also difficult to rinse out completely. For descaling, you need an acidic solution like vinegar. Dish soap is good for the removable parts, not the internal system.
Myth 2: Lemon Juice is Just as Good as Vinegar for Descaling
Lemon juice contains citric acid, which is acidic. It can help with light descaling. However, white vinegar is stronger and more effective for heavy mineral buildup. Vinegar has a consistent acidity level. Lemon juice can vary in strength. It also contains sugars and pulp. These can leave sticky residues or clog your machine.
Lemon juice also has a distinct flavor that might linger. While you can use lemon juice for some light cleaning tasks, white vinegar is superior for Keurig descaling. It provides a more thorough and consistent clean. I stick to white vinegar for its proven effectiveness and lack of residue.
Myth 3: You Only Need to Clean Your Keurig When the “Descale” Light Appears
The “Descale” light is a helpful reminder. However, it indicates significant mineral buildup has already occurred. Waiting for the light means your machine has been brewing with limescale for some time. This affects coffee quality and machine performance.
Regular cleaning, even before the light appears, is better. As mentioned earlier, descaling every 1-3 months, depending on water hardness, is ideal. This proactive approach prevents heavy buildup. It keeps your Keurig working at its best. Do not wait for a warning sign. Regular maintenance saves problems.
Myth 4: You Can Use Any Vinegar for Cleaning
While most vinegar types are acidic, white vinegar is the best choice for cleaning appliances. Apple cider vinegar, red wine vinegar, or balsamic vinegar are not suitable. They contain sugars, colors, and other compounds. These can leave residues, stains, or a distinct smell in your machine.
White vinegar is clear, pure, and has the right acidity for descaling. It rinses away cleanly without leaving unwanted traces. Always use distilled white vinegar for cleaning your Keurig. This ensures the safest and most effective results.
FAQ Section
How often should I clean my Keurig with vinegar?
Clean your Keurig with vinegar every 1 to 3 months if you have hard water. If your water is soft, every 3 to 6 months is enough. Many Keurig models have a “Descale” light that indicates when cleaning is needed. Regular cleaning maintains coffee taste and extends machine life.
Can I use apple cider vinegar instead of white vinegar?
No, you should not use apple cider vinegar to clean your Keurig. Apple cider vinegar contains sugars and other compounds. These can leave a residue inside your machine. It can also impart a strong, lingering smell. Always use distilled white vinegar for effective and safe descaling.
What if my Keurig still smells like vinegar after cleaning?
If your Keurig still smells like vinegar, run more plain water rinse cycles. Fill the reservoir with fresh water and brew cycles until the smell disappears. You can also add a tablespoon of baking soda to one rinse cycle to help neutralize the odor.
Can vinegar damage my Keurig machine?
No, white vinegar is safe for cleaning Keurig machines. Its mild acidity effectively dissolves mineral buildup without harming internal components. Keurig recommends using vinegar for descaling in many of their user manuals. Always use diluted vinegar (1:1 with water) for general descaling.
How do I know if my Keurig needs cleaning?
Signs your Keurig needs cleaning include slower brewing, coffee that is not hot enough, an altered taste, or a visible “Descale” light. You might also see white flakes in your coffee, which are mineral deposits. Regular cleaning prevents these issues.
Can I use commercial descaling solutions with my Keurig?
Yes, you can use commercial descaling solutions. Keurig offers its own brand. These solutions are often stronger and work faster for heavy buildup. However, vinegar is a natural, cost-effective, and safe alternative for regular maintenance. Always follow the product’s specific instructions for use and rinsing.
Conclusion
Cleaning your Keurig with vinegar is a vital step in maintaining your machine. It ensures delicious coffee every time. We have explored why mineral buildup is a problem. We also learned how vinegar acts as a powerful, natural descaling agent. Taking care of your coffee maker means enjoying better coffee.
Following the step-by-step guide helps you thoroughly clean your Keurig. From preparing the machine to running the descaling and rinse cycles, each step is simple. Regular maintenance prevents clogs and keeps your brew tasting fresh. Remember to perform daily and weekly cleaning tasks. Also, descale your Keurig regularly, based on your water hardness. This proactive approach extends your appliance’s life. It guarantees consistent, high-quality coffee.
I hope this guide gives you confidence to clean your Keurig with vinegar. It is a small effort that yields big rewards for your morning cup. Make this simple cleaning process a regular part of your home routine. Enjoy a perfectly brewed cup every day!
- Keurig cleaning
- vinegar cleaning
- descaling coffee maker
- natural cleaning
- coffee machine maintenance

Todd Martin
Senior Writer
With over 15 years of experience in home renovation and design, I started HEG to share what I’ve learned with homeowners who want to create spaces that are both beautiful and functional. I’ve always believed in a hands-on approach, and over the years, I’ve picked up practical solutions that actually work. Through HEG, I aim to make home improvement more approachable, sharing real tips that help you create a home you truly love.