· Todd Martin · Personal Care · 23 min read
How To Clean Nail Filer
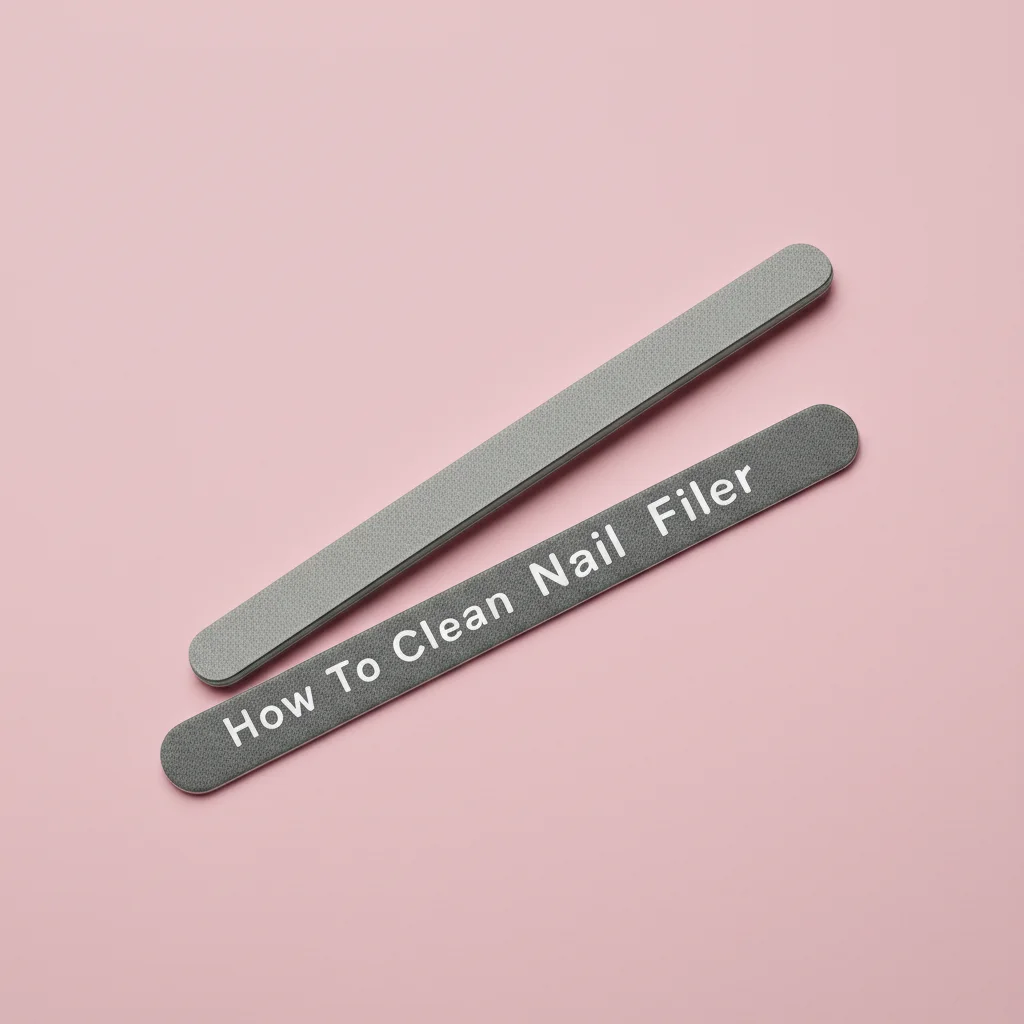
Clean Your Nail Filer: A Complete Guide
Have you ever looked at your nail filer and wondered if it is truly clean? Your nail filer is a key tool in your personal care routine. It shapes and smooths your nails, helping them look their best. Over time, skin cells, nail dust, and product residue build up on its surface. This makes the filer less effective. It can also harbor germs. Learning how to clean nail filer effectively ensures hygiene and extends the life of your tool.
A dirty nail filer not only works poorly but can also spread bacteria or fungi. This puts your nail health at risk. Regular cleaning keeps your manicure tools in top condition. It also protects you from infections. This comprehensive guide will walk you through the process. We cover different types of nail filers and their specific cleaning needs. Get ready to give your nail tools the proper care they deserve.
Takeaway: Keep Your Filer Pristine
- Clean regularly: Remove nail dust and skin cells after each use.
- Know your type: Cleaning methods vary for emery, metal, and glass files.
- Disinfect often: Use alcohol or soap for deeper sanitization.
- Dry completely: Prevent rust and mold by drying tools thoroughly.
- Store properly: Keep files in a clean, dry place to maintain hygiene.
To clean a nail filer, first tap off loose debris. For most files, scrub gently with a soft brush, warm water, and mild soap. Rinse well and then disinfect with rubbing alcohol or a specialized sanitizing solution. Allow the filer to air dry completely before storing it.
Why Clean Your Nail Filer? Essential Hygiene & Performance
You might wonder why it is so important to clean your nail filer. Many people overlook this simple step. However, a clean nail filer offers significant benefits. It directly impacts your nail health and the effectiveness of your manicure. Dirty tools can cause big problems.
Firstly, hygiene is a primary concern. Your nail filer comes into direct contact with your nails and skin. Each time you use it, dead skin cells, nail dust, and natural oils transfer to its surface. These organic materials create a perfect breeding ground for bacteria, fungi, and other microorganisms. Using a dirty filer can transfer these germs back to your nails. This might lead to infections, such as nail fungus or paronychia. Maintaining cleanliness protects your health.
Secondly, a clean nail filer performs much better. When dust and debris clog the abrasive surface, the file becomes less effective. It struggles to smooth and shape nails properly. You might find yourself filing harder or longer to achieve the desired result. This extra friction can damage your nails. Regularly cleaning the file clears away the build-up. This restores its original abrasive quality. Your filing becomes more efficient and gentle.
Finally, cleaning extends the life of your nail filer. Accumulations of dirt and moisture can degrade the material over time. For metal files, this means rust. For emery boards, it means a loss of grit. Glass files might become cloudy. Proper cleaning and drying prevent this wear and tear. You save money by not having to replace your tools as often. Investing a few minutes in cleaning pays off in longevity and performance.
Types of Nail Filers and Their Cleaning Needs
Nail filers come in many forms, each with unique materials and cleaning requirements. Understanding your specific type of nail filer is crucial. This helps you choose the right cleaning method. Using the wrong approach can damage your tool or make it less effective. Let’s look at the most common types.
Emery Boards and Disposable Files: These are often made from cardboard with a grit applied to the surface. They are inexpensive and widely available. Due to their porous nature, they are not ideal for deep cleaning. Water can damage the cardboard core and loosen the abrasive grit. Most professionals consider these single-use items. For personal use, you might get a few uses. But their design limits thorough cleaning.
Metal Nail Files: These files are usually made from stainless steel. They are very durable and long-lasting. Metal files have a textured surface, often cross-hatched or ridged, to provide the grit. Their non-porous nature makes them easy to clean and sanitize. They can withstand water, soap, and even stronger disinfectants. This makes them a hygienic choice for repeated use.
Glass and Crystal Nail Files: These files are gaining popularity for their smooth filing action and durability. They are made from tempered glass or finely etched crystal. Their non-porous surface prevents bacterial growth. They are also very gentle on nails. Glass and crystal files are among the easiest types to clean and sanitize. They tolerate water, soap, and alcohol well without degrading the filing surface. For more details on maintaining these specific tools, explore how to clean glass nail file.
Ceramic Nail Files: Similar to glass files, ceramic files are very hard and durable. They offer a fine grit and are good for natural nails. Their non-porous surface also makes them easy to clean. They can be washed and disinfected without harm.
Knowing the material of your nail filer guides your cleaning choices. Always avoid soaking materials that absorb water. Embrace thorough cleaning for non-porous tools. This ensures your nail care routine remains safe and effective.
Basic Steps to Clean Any Nail Filer Effectively
Regardless of your nail filer type, a few fundamental steps apply to all. These basic cleaning practices form the foundation of good nail tool hygiene. Following them regularly will keep your files in good condition. You will prevent most build-up with these steps.
Step 1: Remove Loose Debris. The first action is always to remove any visible dust or debris. After each use, gently tap your nail filer against a hard surface. This helps dislodge loose nail dust and skin particles. You can also use a small, stiff brush for this purpose. A soft toothbrush or a specialized nail brush works well. Brush along the grit in one direction. This lifts away the stuck particles. This step is crucial for preventing deeper grime.
Step 2: Wash with Soap and Water (for suitable types). For non-porous files like metal, glass, or ceramic, a simple wash is effective. Hold your file under warm running water. Apply a small amount of mild liquid soap directly to the file. Use a brush to gently scrub the entire abrasive surface. Ensure you get into all the grooves and textures. This helps break down oils and trapped debris. Rinse the file thoroughly under clean water. Make sure all soap residue is gone.
Step 3: Disinfect (Highly Recommended). Washing removes visible dirt. Disinfecting kills germs. This step is vital for hygiene. You can use rubbing alcohol (isopropyl alcohol) for most file types. Dip a cotton ball or a clean cloth in alcohol. Wipe down the entire surface of your nail filer. Alternatively, you can spray the file with an alcohol solution. Let the alcohol sit for a few minutes. Alcohol evaporates quickly, which is a bonus. For professional settings, stronger disinfectants approved for beauty tools might be used. Always read the disinfectant’s label for proper use.
Step 4: Dry Completely. This step is often overlooked but is very important. After washing and disinfecting, ensure your nail filer is completely dry. Moisture can lead to rust on metal files. It can also encourage mold growth in damp environments. Air dry your file by laying it on a clean towel. You can also hang it in a well-ventilated area. Avoid putting it away damp. A completely dry file is a clean file.
These basic steps provide a solid cleaning routine. Adapt them slightly based on your specific filer type. Regular application of these steps will keep your nail tools hygienic and effective.
Cleaning Emery Boards & Disposable Nail Files Safely
Emery boards and other disposable nail files require a different approach. Their construction makes them unsuitable for wet cleaning methods. These types are typically made from cardboard or foam. They have abrasive grit glued onto their surface. Water and strong cleaning solutions can ruin them quickly. The key is to manage their use and consider them semi-disposable.
Limited Cleaning for Personal Use: For your personal emery board, you can do some light cleaning. After each use, gently tap the file. This dislodges any loose nail dust. You can use a soft, dry brush, like a toothbrush, to sweep away remaining particles. Brush lightly in the direction of the grit. Avoid scrubbing too hard, as this can remove the abrasive material.
Using a Dry Cloth or Cotton Swab: For more stubborn, but still dry, debris, use a dry cloth. A cotton swab can reach smaller areas. Wipe the surface to pick up any remaining dust. This method is gentle. It will not damage the file’s integrity. Remember, these tools are not designed for deep sanitation.
Alcohol Wipes for Light Disinfection (Use Caution): If you wish to disinfect your personal emery board, use caution. Lightly dampen a cotton ball or a clean cloth with rubbing alcohol (70% isopropyl alcohol). Gently wipe the surface of the file. Do not soak the file. Alcohol evaporates quickly. This minimizes moisture exposure. This method provides a superficial disinfection. It will not reach deep into the porous material. Air dry completely before storing.
When to Discard Emery Boards: Given their limitations, knowing when to discard an emery board is vital. You should discard them when:
- The grit wears down and no longer files effectively.
- The board shows signs of bending, fraying, or softening.
- You notice any visible stains, discoloration, or embedded debris that cannot be dry-brushed off.
- You have used them on nails with an active infection. In professional settings, emery boards are strictly single-use to prevent cross-contamination.
Treating emery boards as semi-disposable items ensures better hygiene. Replace them frequently for the best results and safest nail care.
Deep Cleaning Metal Nail Files for Longevity
Metal nail files are robust and durable. This makes them excellent candidates for deep cleaning. Proper cleaning ensures they remain sharp and hygienic for many years. Unlike emery boards, metal files can handle water and strong disinfectants. This makes them a more sustainable choice in the long run.
Initial Debris Removal: Start by removing all visible debris. Tap the metal nail file firmly against a hard surface. This dislodges larger pieces of nail dust. Use a stiff-bristled brush, like a dedicated nail brush or an old toothbrush. Brush along the file’s textured surface. This clears out fine particles trapped in the grooves. Ensure you remove as much dry matter as possible before moving to wet cleaning.
Washing with Hot Soapy Water: Fill a small basin with hot water. Add a few drops of mild dish soap. Submerge your metal nail file completely in the soapy water. Let it soak for 5-10 minutes. Soaking helps loosen stubborn grime and oils. After soaking, use the stiff brush again. Vigorously scrub the entire surface of the file. Pay extra attention to the textured areas. The hot water and soap will break down the residue.
Rinsing Thoroughly: Rinse the metal file under warm, running water. Ensure all soap suds and loosened debris are washed away. Check closely for any remaining residue. If you see any, repeat the scrubbing and rinsing process. A clean rinse is crucial before disinfection.
Disinfection for Metal Tools: For superior hygiene, disinfection is key.
- Rubbing Alcohol: After rinsing, wipe the entire metal file with a cotton ball or cloth soaked in 70% isopropyl alcohol. Let it air dry. Alcohol is a good disinfectant.
- Boiling Water (Sterilization): For a deeper level of sterilization, you can boil metal files. Place the clean, rinsed file in a pot of boiling water for 10 minutes. Use tongs to carefully remove it. This method kills most bacteria and viruses. Be careful as the file will be very hot.
- Autoclave/Barbacide (Professional Use): Professionals often use an autoclave for sterilization. This machine uses steam under pressure. Alternatively, they might use Barbacide, a blue liquid disinfectant. Barbacide is effective for immersing tools. Always follow the manufacturer’s instructions for any professional-grade disinfectant.
Complete Drying: After washing and disinfecting, dry the metal file completely. Use a clean, dry towel to pat it down. Then, let it air dry completely. Air drying prevents water spots and rust. Do not store a damp metal file. Proper drying extends the file’s life. This detailed cleaning ensures your metal nail file stays pristine and safe to use. You can also apply similar principles when cleaning other metal tools, such as how you might approach cleaning a toilet brush.
Gentle Care: Cleaning Glass and Crystal Nail Filers
Glass and crystal nail filers are known for their gentle filing action. They are also incredibly easy to clean. Their non-porous surface means they do not harbor bacteria like other materials. This makes them a highly hygienic choice. Proper cleaning ensures their longevity and maintains their effectiveness.
Immediate Debris Removal: Just like other files, start by removing loose nail dust. Gently tap the glass or crystal file against a hard surface. You can also use a soft dry cloth. Wipe the surface to remove any visible particles. This prevents large build-up.
Washing with Soap and Water: Glass and crystal files are fully submersible. Hold the file under warm running water. Apply a small amount of mild liquid soap. Use your fingers or a soft brush to gently scrub the entire surface. The abrasive surface on these files is etched into the glass itself. This means you do not have to worry about scrubbing off a coating. Wash away all nail dust and oils. Rinse the file thoroughly under clean water. Ensure no soap residue remains.
Disinfection with Alcohol: After washing, disinfection is simple and effective. Wipe the entire glass or crystal file with a cotton pad or cloth soaked in 70% isopropyl alcohol. Alcohol quickly evaporates. It kills any remaining germs. You can also spray the file directly with an alcohol solution. Allow the alcohol to air dry. The non-porous nature of glass means alcohol penetrates effectively.
Boiling or UV Sanitization (Optional but Effective): For an extra layer of sterilization, glass and crystal files can withstand boiling. Place the clean file in boiling water for a few minutes. Carefully remove it with tongs. Allow it to cool completely before handling. Some users also employ UV sanitizers. These devices use ultraviolet light to kill bacteria. This is a common method in professional settings. For more specific advice on maintaining this material, consider reviewing information on how to clean glass nail file.
Thorough Drying: Drying is critical. After washing and disinfecting, use a clean, lint-free cloth to dry the file. Then, let it air dry completely. Glass files can get water spots if not dried properly. Ensure it is bone dry before storing. Proper drying prevents any potential for microbial growth. It also maintains the file’s pristine appearance. These simple steps keep your glass and crystal files in perfect condition.
Sanitizing Your Nail Filer: Advanced Methods
Beyond basic washing, sanitization is crucial for personal and professional hygiene. This step goes further. It reduces or eliminates microorganisms on your nail filer. Regular sanitization prevents the spread of bacteria, fungi, and viruses. This protects both you and anyone else using your tools.
Rubbing Alcohol (Isopropyl Alcohol): This is one of the most common and effective sanitizers for nail tools. Use 70% or 90% isopropyl alcohol.
- Method 1 (Wipe Down): After cleaning the file of visible debris, dampen a clean cotton ball or cloth with alcohol. Vigorously wipe down the entire surface of the nail filer. Ensure all parts come into contact with the alcohol.
- Method 2 (Immersion): For metal or glass files, you can immerse the tool directly in a small dish of rubbing alcohol for at least 5-10 minutes. This provides a deeper sanitize.
- Drying: Alcohol evaporates quickly. Allow the file to air dry completely. No rinsing is needed after alcohol application.
Disinfectant Sprays: Several commercial disinfectant sprays are available. They are specifically designed for beauty tools.
- Selection: Choose a spray labeled as “hospital-grade” or “broad-spectrum disinfectant.” Ensure it is safe for the material of your nail filer.
- Application: After cleaning, spray the file thoroughly. Make sure the entire surface is wet with the disinfectant.
- Contact Time: Always follow the product’s instructions for “contact time.” This is the period the disinfectant needs to sit wet on the surface to kill germs. It can vary from 30 seconds to 10 minutes.
- Rinsing and Drying: Some disinfectants require rinsing after contact time. Others do not. Read the label carefully. Then, dry the file completely.
Boiling Water: Boiling is a simple and effective sterilization method for heat-resistant files. This includes metal, glass, and ceramic types.
- Process: Place your cleaned nail filer into a pot of boiling water. Let it boil for at least 10 minutes. This high heat kills most bacteria and viruses.
- Caution: Use tongs to remove the hot file. Let it cool completely on a clean surface. Ensure it is dry before storing. This method is not suitable for plastic or emery board files.
UV Sanitizers: These devices use ultraviolet (UV-C) light to destroy microorganisms.
- Ease of Use: Simply place your cleaned nail filer inside the UV sanitizer chamber. Close the lid and activate it.
- Effectiveness: UV light is effective against many germs. However, it only sanitizes surfaces directly exposed to the light. Any shadows or blocked areas will not be cleaned.
- Professional Use: Many salons use UV sanitizers. They are also available for home use.
Regularly sanitizing your nail filer is a key step in preventing infections. It also ensures your manicure tools are always clean and ready for use. Maintaining clean nail tools is just as important as keeping other personal items clean, much like the care you’d give to your nail brushes or acrylic nail brushes.
Proper Drying and Storage for Your Nail Filer
Cleaning your nail filer is only half the battle. Proper drying and storage are equally important. These steps prevent rust, mold, and recontamination. They also protect the integrity of your nail tool. A well-cared-for filer lasts longer and performs better.
The Importance of Thorough Drying: Any moisture left on your nail filer can cause problems. For metal files, it leads to rust. Rust damages the file and makes it unsafe to use. For porous materials like emery boards (if you attempt light cleaning), moisture encourages mold and mildew growth. Even non-porous glass files can develop water spots or become breeding grounds for bacteria in damp conditions. Always ensure your filer is completely dry before putting it away.
Drying Methods:
- Pat Dry with a Clean Cloth: After washing and rinsing, gently pat your nail filer dry with a clean, lint-free towel. This removes most of the surface water.
- Air Dry Completely: Lay the file flat on a clean, dry surface, or hang it up. Choose a well-ventilated area. Avoid direct sunlight, which can warp some materials. Allow enough time for all moisture to evaporate. This typically takes a few hours. For metal files, this step is critical to prevent corrosion.
- Consider a Hair Dryer (Low Heat): For a quicker dry, you can use a hair dryer on a cool or low-heat setting. Keep the dryer at a distance. Move it continuously to prevent overheating any specific spot. This is especially useful for metal or glass files.
Optimal Storage Solutions: Once your nail filer is thoroughly dry, proper storage keeps it clean and protected.
- Individual Sleeves or Cases: Many nail filers come with a protective sleeve or case. Use it! This prevents dust, lint, and other airborne particles from settling on the clean surface. It also protects the file from damage.
- Dedicated Tool Organizers: Store your nail filer in a clean, dry drawer or a dedicated beauty tool organizer. Keep it separate from other dirty items. This prevents cross-contamination.
- Avoid Humid Environments: Do not store nail filers in humid places. This includes damp bathrooms or direct sunlight. Humidity encourages microbial growth and material degradation. A dry cupboard or a vanity drawer is ideal.
- Vertical Storage (if possible): For some larger files, storing them vertically can aid air circulation. This helps keep them dry.
Following these drying and storage practices safeguards your nail filer. It keeps it ready for hygienic and effective use. Think of it as a small investment in your nail health and tool longevity.
When to Replace Your Nail Filer: Knowing the Signs
Even with the best cleaning and care, nail filers do not last forever. Knowing when to replace your nail filer is important. Using a worn-out file can harm your nails. It also makes your manicure less effective. Pay attention to these clear signs that it is time for a new one.
Sign 1: Worn-Out Grit. This is the most obvious sign. The abrasive surface of your nail filer will eventually wear down.
- For Emery Boards: The gritty paper will feel smooth or become less coarse. It will take more effort to file your nails. You might see white spots where the grit has disappeared.
- For Metal Files: The etched pattern will become smooth. The file will slide over your nail without making much progress.
- For Glass/Crystal Files: While very durable, even these can lose their effectiveness over a very long time. The etched surface might become less sharp, making filing less efficient.
Sign 2: Visible Accumulation That Won’t Clean Off. Despite regular cleaning, some files might accumulate stubborn grime. This could be discoloration from polishes, oils, or deep-set skin particles. If a thorough cleaning does not restore the file’s appearance or performance, it is time to replace it. Any persistent stains or embedded debris can harbor bacteria.
Sign 3: Physical Damage.
- For Emery Boards: Bending, peeling of the abrasive layer, or significant fraying around the edges means it is compromised. A damaged emery board can scratch your nails or skin.
- For Metal Files: Rust spots, bent tips, or jagged edges are clear signs of damage. Rust indicates metal degradation and unhygienic conditions. Bent or jagged edges can cause injury or uneven filing.
- For Glass/Crystal Files: Chips, cracks, or a broken file means it is no longer safe to use. Small chips can create sharp points that scratch your nails or skin.
Sign 4: Odor. If your nail filer develops an unpleasant odor, even after cleaning, it is a strong indicator of microbial growth. This could be mold or bacteria. Do not risk using such a file. Dispose of it immediately.
Sign 5: Professional vs. Personal Use:
- Professional Settings: In salons, strict hygiene protocols mean frequent replacement. Emery boards are often single-use. Reusable files are sterilized after each client. They are replaced regularly based on wear and salon policy.
- Personal Use: For personal use, files can last longer with proper care. However, replace them if you’ve used them on nails with an active infection (like fungus). This prevents reinfection.
Replacing your nail filer ensures your nail care remains effective and hygienic. Do not cling to old, worn-out tools. A fresh file makes a world of difference.
Common Mistakes to Avoid While Cleaning Nail Filers
Cleaning your nail filer seems straightforward. However, some common mistakes can damage your tools or compromise hygiene. Avoiding these pitfalls ensures your nail filers stay in top condition and last longer. Knowing what not to do is just as important as knowing what to do.
Mistake 1: Soaking Emery Boards or Porous Files. This is perhaps the biggest mistake for these types of files. Emery boards and foam files are made from cardboard or similar porous materials. Soaking them in water or any liquid will cause the core to swell, disintegrate, or lose its adhesive. The grit will peel off. This renders the file useless. For these types, stick to dry brushing or very light alcohol wiping.
Mistake 2: Using Harsh Abrasives or Chemicals. While metal and glass files are durable, using overly harsh abrasives can scratch them. Steel wool, for example, can damage the delicate grit of a glass file. Strong, undiluted chemicals not designed for beauty tools can corrode metal or leave harmful residues. Always use mild soap and approved disinfectants like rubbing alcohol. Follow product instructions carefully.
Mistake 3: Incomplete Drying. Putting away a damp nail filer is a recipe for disaster.
- For Metal Files: Residual moisture leads to rust, which degrades the file and can transfer onto your nails.
- For Any File: Damp conditions promote the growth of mold, mildew, and bacteria. Even non-porous surfaces can harbor germs if left wet in a closed environment. Always ensure your file is bone-dry before storing it. Air drying completely is vital.
Mistake 4: Overlooking Disinfection. Washing removes dirt. Disinfection kills germs. Some people only rinse their files, thinking it is enough. This is not true. Invisible bacteria and fungi can remain after washing. Rubbing alcohol or a suitable disinfectant is essential for truly hygienic tools. This step is critical for preventing infections.
Mistake 5: Storing Dirty or Damp Files with Clean Ones. If you store a dirty or damp file with other clean, dry tools, you risk cross-contamination. Germs from the uncleaned file can transfer to your freshly cleaned ones. Always ensure all your nail tools are clean and completely dry before storing them together. Use separate storage for used and clean tools if you cannot clean them immediately.
Mistake 6: Ignoring Manufacturer’s Instructions. Some specialized nail files may have unique cleaning instructions. Always check the packaging or the manufacturer’s website. They provide specific guidance to prolong the life of their product. What works for a standard metal file might not work for a diamond-dust file.
Avoiding these common mistakes will ensure your nail filers remain effective, hygienic, and long-lasting. Proper care protects both your tools and your nail health.
FAQ Section
Q1: How often should I clean my nail filer?
For personal use, clean your nail filer after every 2-3 uses, or at least once a week. If you notice visible nail dust or residue, clean it immediately. For professional use, files must be sanitized or sterilized after each client to prevent cross-contamination. Regular cleaning ensures hygiene and better performance.
Q2: Can I use bleach to clean my nail filer?
It is generally not recommended to use bleach on nail filers. Bleach can be too harsh for most materials, potentially corroding metal files or damaging the grit on others. It can also be irritating to your skin. Rubbing alcohol (70% isopropyl alcohol) or specific beauty tool disinfectants are safer and more effective alternatives.
Q3: How do I remove stubborn nail polish residue from my filer?
For stubborn nail polish residue on metal or glass files, you can use a small amount of non-acetone nail polish remover on a cotton swab. Gently rub the affected area. Rinse the file thoroughly with warm, soapy water afterwards. Then, disinfect and dry completely. Avoid this method for emery boards.
Q4: Is it safe to share my nail filer if I clean it well?
Sharing nail filers, even if cleaned, carries a risk of infection. It is best practice to have a personal nail filer. While thorough cleaning and disinfection reduce the risk, some microorganisms can still survive. For optimal hygiene, avoid sharing personal grooming tools.
Q5: Can I clean my nail filer in a dishwasher?
No, it is not recommended to clean nail filers in a dishwasher. The high heat and harsh detergents in dishwashers can damage many types of nail files, especially those with glued grit or plastic components. Metal files might rust. Stick to hand-washing and specific disinfection methods.
Q6: What’s the best way to clean a new nail filer before first use?
It is a good habit to clean a new nail filer before its first
- nail filer cleaning
- nail hygiene
- manicure tools
- clean emery board
- clean glass file
- nail care
- beauty tool maintenance
- sanitizing nail tools

Todd Martin
Senior Writer
With over 15 years of experience in home renovation and design, I started HEG to share what I’ve learned with homeowners who want to create spaces that are both beautiful and functional. I’ve always believed in a hands-on approach, and over the years, I’ve picked up practical solutions that actually work. Through HEG, I aim to make home improvement more approachable, sharing real tips that help you create a home you truly love.