· Todd Martin · Home Maintenance · 20 min read
How To Clean Oven Coils
Cleaning Oven Coils: Your Complete Guide
Is your oven not heating evenly, or do you smell strange odors when you bake? The problem might be dirty oven coils. I understand the importance of a clean oven for proper cooking. Cleaning these essential components ensures your oven works efficiently and safely. This guide helps you understand why cleaning oven coils matters. It explains how to identify different coil types. You will learn the best methods for both electric and gas ovens. I will also share tips for tackling tough messes. Finally, I will offer advice to maintain your oven coils. This article provides all the knowledge you need for a spotless oven.
Takeaway:
- Always prioritize safety by unplugging electric ovens or shutting off gas before cleaning.
- Distinguish between electric heating elements and gas oven igniters; cleaning methods differ.
- Use gentle methods for electric coils; avoid water submersion or abrasive cleaners.
- Address gas burner clogs carefully with a brush or wire.
- Regular maintenance prevents buildup and ensures optimal oven performance.
Cleaning oven coils involves different methods based on oven type. For electric ovens, gently wipe heating elements with a damp cloth after unplugging. For gas ovens, address burner clogs using a brush or compressed air. Always ensure the oven is cool and power is disconnected for safety.
Understanding Your Oven’s Heating Components
My oven is a workhorse in my kitchen. It handles everything from weeknight dinners to holiday feasts. Over time, spills and splatters accumulate on the heating components. This buildup affects how my oven performs. It can also create smoke or odors. Different ovens use different types of heating components. Electric ovens use exposed or concealed heating elements. Gas ovens rely on igniters and burner ports. Knowing which type you have is the first step in effective cleaning. Proper care ensures my oven lasts longer. It also guarantees food cooks properly.
Electric Oven Heating Elements
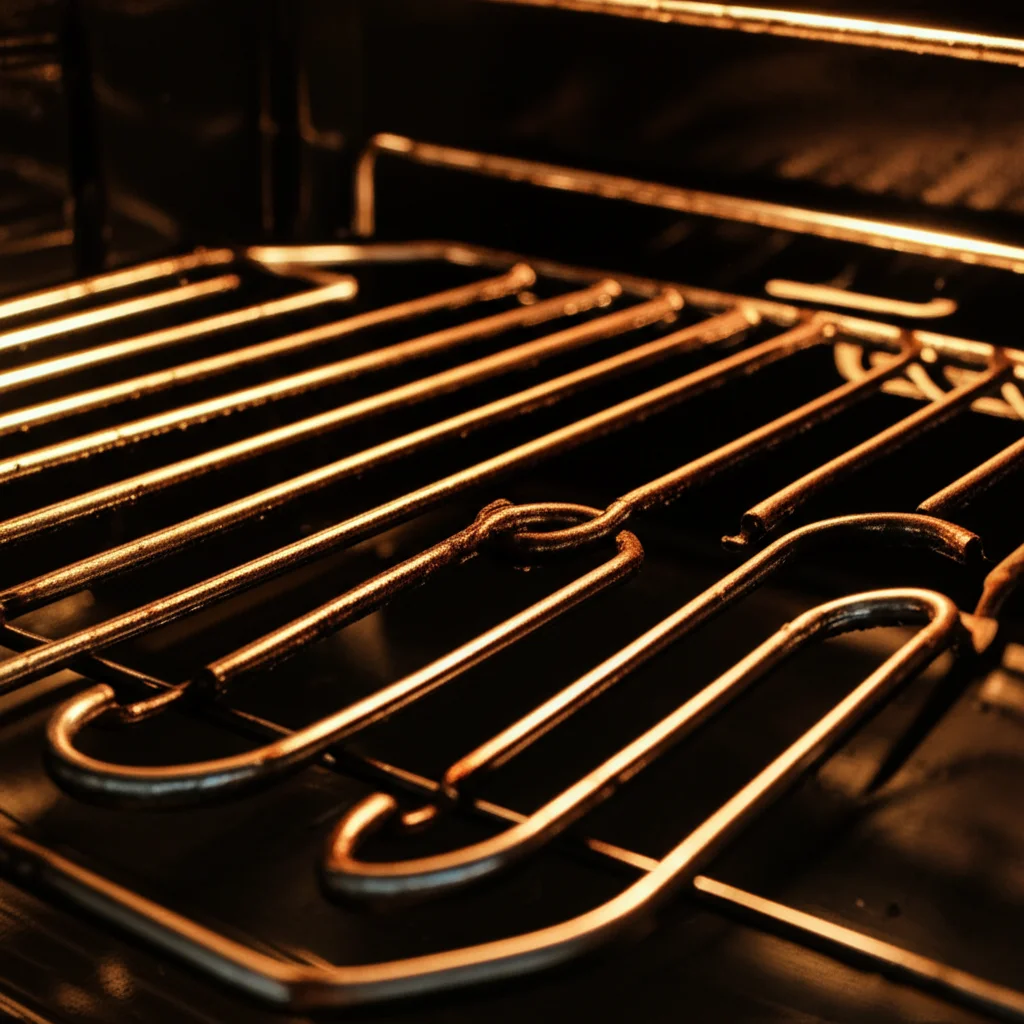
Electric ovens typically have two main heating elements. The bake element is usually at the bottom. The broil element is at the top. These elements glow red when heating. Food particles and grease can fall onto them. They can bake onto the surface over time. This creates a hard, carbonized layer. It causes uneven heating. It also produces smoke. Sometimes it creates unpleasant smells during cooking. I make sure to check these elements regularly. I clean them before buildup becomes too severe.
Gas Oven Igniters and Burners
Gas ovens work differently. They use gas burners to create heat. An igniter lights the gas. The flame heats the oven cavity. The burners are usually located at the bottom of the oven. They have small ports where the gas exits. These ports can become clogged with grease or food debris. A clogged port causes uneven flames. It might even prevent the burner from lighting. This impacts cooking results. It can also pose a safety risk. It is important to keep these ports clear. I check them each time I clean my oven.
Essential Safety Precautions and Tools
Before I start any cleaning task, safety is my top priority. Cleaning oven coils involves electrical components or gas lines. I must take necessary precautions. This protects me and my appliance. Gather all the tools I need beforehand. This makes the cleaning process smooth and efficient. Being prepared saves time and prevents issues. I never rush when dealing with electrical appliances or gas.
Prioritizing Safety First
First, always ensure the oven is completely cool. Never attempt to clean hot elements or surfaces. Second, disconnect the oven from its power source. For an electric oven, unplug it from the wall outlet. If the oven is hardwired, turn off the circuit breaker that controls the oven. For a gas oven, turn off the gas supply valve to the oven. This valve is usually behind the oven or nearby. Following these steps prevents electric shock or gas leaks. It ensures a safe cleaning environment. I also wear rubber gloves to protect my hands.
Necessary Cleaning Tools and Supplies
I gather specific tools for cleaning oven coils. The right tools make the job easier and safer.
- Soft cloth or microfiber towels: These are for wiping surfaces.
- Mild dish soap: Good for general degreasing.
- Baking soda: A natural abrasive and odor absorber.
- White vinegar: Excellent for cutting grease and deodorizing.
- Spray bottle: For applying cleaning solutions.
- Nylon brush or old toothbrush: For scrubbing stubborn spots.
- Small vacuum with a hose attachment: To remove loose debris.
- Fine wire or paperclip: For clearing gas burner ports.
- Flashlight: To see into dark corners and under elements.
- Protective gloves: To protect my hands from cleaners and grime.
I ensure these items are ready before I begin. This helps me clean effectively. It keeps me from stopping midway.
How to Clean Electric Oven Heating Elements
Cleaning electric oven heating elements requires a gentle approach. These elements are fragile. Harsh scrubbing or submerging them in water can cause damage. My goal is to remove baked-on grime without compromising the element’s integrity. I usually do this every few months or as needed. This keeps my oven performing its best. It also helps avoid smoke during cooking.
Step-by-Step Cleaning Process
- Ensure Safety: Unplug the oven. Make sure it is completely cool. This step is critical for safety.
- Remove Loose Debris: Use a dry soft brush or a small vacuum cleaner with a hose attachment. Gently brush away any loose food particles. Do this from around and under the elements. Do not force anything.
- Prepare Cleaning Solution: Mix a paste of baking soda and water. Use about half a cup of baking soda. Add water slowly until it forms a thick paste. This paste is a gentle abrasive. It helps lift grime.
- Apply Paste to Affected Areas: Carefully apply the baking soda paste to any baked-on food or grease on the elements. Avoid getting the paste on the electrical connections. Let the paste sit for 15-30 minutes. For very stubborn spots, I let it sit longer, sometimes an hour.
- Gently Scrub: Use a damp soft cloth or a non-abrasive sponge. Gently wipe the elements. For stubborn spots, use a nylon brush or an old toothbrush. Scrub very lightly. Do not press hard. Remember, these elements are delicate. They can bend or break.
- Wipe Clean: Dampen a clean microfiber cloth with plain water. Wipe away all the baking soda paste and loosened grime. Rinse the cloth frequently. Ensure no residue remains. If the elements are removable, wipe under them too. This helps clean the bottom of the oven.
- Dry Thoroughly: Allow the elements to air dry completely. This might take a few hours. I usually leave the oven door ajar. Make sure no moisture remains before plugging the oven back in. Moisture can cause a short circuit.
- Address Adjacent Areas: While the elements are drying, I often clean other parts. This includes wiping down the inside walls and cleaning the oven racks. This comprehensive approach ensures a fully clean oven.
I avoid using harsh chemical oven cleaners on heating elements. These chemicals can damage the element’s coating or material. They can also leave harmful residues. Baking soda and a gentle touch are usually enough. This method is safe and effective for keeping my electric oven coils clean.
Cleaning Gas Oven Igniters and Burners
Gas ovens operate differently than electric ones. So, cleaning their heating components, the igniters and burners, requires a specific approach. My main concern here is ensuring gas flows freely and ignites properly. Blocked ports can lead to uneven flames or even prevent the oven from lighting. I approach this task with care and precision, as gas lines are involved. This ensures my gas oven works safely and efficiently.
Step-by-Step Cleaning Process for Gas Oven Components
- Ensure Safety: The first and most crucial step is to turn off the gas supply to the oven. The shut-off valve is usually located behind the oven or in a nearby cabinet. I also ensure the oven is completely cool. This prevents any risk of gas leaks or burns.
- Identify Burners and Igniters: Open the oven door. Look for the main burner tube at the bottom. Sometimes, it’s concealed under a metal plate. The igniter is a small, glowing rod or sparker near the burner. Some ovens have a broiler burner at the top.
- Remove Oven Racks and Bottom Plate (If Applicable): Pull out the oven racks. If your oven has a removable bottom plate covering the burner, lift it out carefully. This provides better access to the burner tube.
- Clean Loose Debris: Use a small brush or a vacuum cleaner with a hose attachment. Remove any loose food crumbs, dust, or light debris around the burner and igniter. This prevents pushing debris further into the ports.
- Clear Burner Ports: This is a vital step for gas ovens. The burner tube has small holes or slots along its length. These are the gas ports. Over time, grease or food particles can clog them.
- Use a fine wire: I use a straightened paperclip, a sewing needle, or a thin wire. Gently push it into each port to clear any obstructions. Do not use a toothpick, as it can break off inside.
- Avoid enlarging ports: Do not poke or enlarge the holes. Just clear them.
- Brush the burner: Use a stiff nylon brush or an old toothbrush. Lightly scrub the exterior of the burner tube. This removes surface grime.
- Clean the Igniter: The igniter is delicate. I do not scrub it. If it looks dusty, I gently wipe it with a dry, soft cloth. I avoid applying any liquid to the igniter itself. A dirty igniter may prevent the gas from lighting.
- Wipe Down Surfaces: Mix mild dish soap with warm water in a spray bottle. Spray it onto a clean cloth. Wipe down the burner tube and surrounding surfaces. This helps to clean grease from the oven. For tougher grease, a paste of baking soda and water can be used. Apply the paste, let it sit, then wipe clean.
- Dry Thoroughly: Ensure all components are completely dry before reassembling. Use a dry cloth to wipe surfaces. Let the oven air dry with the door open for an hour or two.
- Reassemble and Test: Replace the bottom plate and oven racks. Turn the gas supply back on. Carefully light a burner to ensure it ignites properly. The flame should be even and blue. If the flame is orange or uneven, some ports might still be clogged. Repeat the clearing process if necessary.
Cleaning gas oven components requires attention to detail. It ensures safety and optimal performance. Regular checks prevent major issues. I find this helps maintain the efficiency of my oven.
Tackling Tough Spills and Burnt-On Grime
Sometimes, cleaning oven coils is not just about routine maintenance. Accidents happen. A bubbling casserole might spill over. A dish might boil dry, leaving burnt-on residue. These tough messes require more intensive cleaning methods. They can be challenging, but with the right approach, even the most stubborn grime can be removed. My goal is to restore the oven’s cleanliness without damaging its components. These methods also apply to cleaning other parts of the oven, such as the oven heating element.
Strategies for Stubborn Oven Coil Messes
Before I start, I reiterate safety. Always ensure the oven is cool and unplugged or the gas is off. This is non-negotiable.
For Burnt-On Food (Electric Coils):
- Baking Soda Paste Power: For deeply carbonized food on electric heating elements, I make a thick paste. I mix baking soda with a little water. It should be the consistency of peanut butter.
- Apply and Wait: I generously apply this paste directly onto the burnt spots on the coils. I let it sit for several hours, or even overnight. The longer it sits, the more it breaks down the grime.
- Gentle Scraping/Scrubbing: After the waiting period, I use a plastic scraper or an old credit card to gently scrape off the softened residue. Then, I use a damp nylon brush or a non-abrasive sponge to scrub lightly. I avoid metal scourers as they can damage the element.
- Repeat if Necessary: For extremely tough spots, I might need to repeat the application and waiting process. Patience is key here.
- Wipe Clean: Finally, I wipe the elements clean with a damp cloth, ensuring all paste and loosened grime are removed. I let them air dry completely.
For Grease Spills (Both Electric and Gas):
- Degreasing Action with Dish Soap and Vinegar: For greasy buildup around the coils or burners, a mix of dish soap and white vinegar works wonders. I mix equal parts warm water and white vinegar in a spray bottle. I add a few drops of dish soap.
- Apply and Let Sit: I spray this solution generously onto the greasy areas. I let it sit for about 15-20 minutes. The vinegar cuts through the grease. The soap helps lift it.
- Scrub and Wipe: I use a scrub brush or a cleaning sponge to scrub the greased areas. For gas burners, I pay attention to the areas around the ports. Then, I wipe everything clean with a damp cloth. This method is effective for general grease from the oven.
- Baking Soda Boost: If grease is particularly thick, I sprinkle baking soda directly onto the greased area after spraying the vinegar solution. The baking soda will fizz, creating a powerful cleaning action. I let it sit for 10-15 minutes, then scrub and wipe.
For Melted Plastic or Burnt Sugar:
- These types of spills can be very challenging. For melted plastic, it’s best to let it cool and harden. Then, you can try to chip it off carefully. For burnt sugar, allowing it to cool and then applying a hot, damp cloth can sometimes help soften it for removal. However, for serious issues like burnt plastic from the oven or melted plastic from the oven, it can be difficult to remove without professional help or using specialized techniques if the plastic has fused with the element.
- Extreme Caution: For these materials, I am extremely careful. I avoid scraping vigorously on heating elements. The element itself is delicate. If a significant amount of material is fused, professional assessment might be needed.
Patience and using the right, gentle tools are essential when tackling tough messes on oven coils. I always take my time. This ensures I clean effectively without causing damage.
Preventing Buildup and Maintaining Oven Performance
Cleaning oven coils is important. However, preventing heavy buildup is even better. Regular maintenance routines extend the life of my oven. They ensure it performs optimally every time I use it. A proactive approach saves me time and effort in the long run. It also helps prevent common issues like smoke or uneven cooking. I incorporate a few simple habits into my kitchen routine.
Simple Steps for Ongoing Oven Coil Care
- Wipe Up Spills Immediately: This is my number one rule. If a dish boils over or food splatters, I address it once the oven is cool. Fresh spills are much easier to clean than baked-on ones. A quick wipe with a damp cloth can prevent stubborn stains. I often keep a dedicated baking soda solution or white vinegar spray handy for these quick cleanups.
- Use Oven-Safe Cookware: I ensure all my bakeware is oven-safe. This reduces the risk of melting plastics or materials that can cause difficult spills.
- Use Foil or Baking Sheets on Lower Racks: When baking casseroles or anything prone to bubbling over, I place a foil-lined baking sheet on the rack below. This catches drips and prevents them from reaching the oven coils or the bottom of the oven. It saves a lot of cleaning effort.
- Regular Light Cleaning: I make it a habit to do a light clean of my oven interior and coils every 1-2 months. This involves:
- Removing racks.
- Vacuuming loose crumbs.
- Wiping down the elements with a damp cloth.
- Checking gas burner ports for blockages. This prevents significant accumulation. It means I avoid needing deep cleaning sessions as often.
- Avoid Overfilling Dishes: I try not to fill baking dishes too close to the brim. This minimizes the chance of liquids boiling over and onto the heating elements or oven floor.
- Proper Ventilation: While cooking, especially with greasy foods, proper kitchen ventilation helps. My range hood pulls grease particles and steam away from the oven interior. This can reduce how much grime settles on surfaces.
- Inspect During Other Cleanings: When I’m cleaning other parts of the oven, like the inside oven glass or the oven racks, I take a quick look at the coils. This allows me to catch any potential issues early.
- Professional Servicing: For persistent issues or if I notice unusual smells (like gas, or burning odors that aren’t food-related), I contact a professional. Sometimes, deeper issues with igniters or elements require expert attention. This ensures my oven’s continued safety and longevity.
By following these simple maintenance tips, I keep my oven coils clean and my appliance working efficiently. It is a small effort that yields big benefits in terms of cooking quality and appliance lifespan.
Common Oven Coil Problems and Troubleshooting
Even with regular cleaning, oven coils can sometimes present problems. Understanding these issues helps me determine if it’s a simple fix or if professional help is needed. My goal is to keep my oven running smoothly and safely. Identifying the root cause of a problem saves me time and worry.
Diagnosing and Addressing Oven Coil Issues
Uneven Heating:
- Possible Cause (Electric): Burnt-on grime on the element can create cold spots. The element might also be partially failing.
- Solution: Clean the element thoroughly as described in the “How to Clean Electric Oven Heating Elements” section. If cleaning doesn’t help, the element may need replacement.
- Possible Cause (Gas): Clogged burner ports cause gas to flow unevenly, leading to an uneven flame.
- Solution: Clear the burner ports with a fine wire. Ensure all ports are free of debris. An uneven or yellow flame usually indicates incomplete combustion. This often means blocked ports.
Oven Not Heating:
- Possible Cause (Electric): The element itself might be burned out. Sometimes, you can see a visible break or blister on the element.
- Solution: Check the element for physical damage. If it’s broken, it needs replacement. This is usually a simple part swap.
- Possible Cause (Gas): A faulty igniter. The igniter might glow but not get hot enough to ignite the gas. Or it might not glow at all. Gas flow issues can also be a cause.
- Solution: Ensure the gas supply is on. Listen for the “click” of the igniter. If it clicks but gas doesn’t light, the igniter might be weak. If it doesn’t glow or spark, it’s likely faulty. Professional repair is often required for igniter replacement.
Smoke or Burning Smell:
- Possible Cause: This is most often caused by baked-on food or grease on the coils or oven interior. This includes oil out of the oven that has carbonized.
- Solution: Thoroughly clean the oven coils, racks, and interior. If the smoke persists after a thorough cleaning, there might be a residue from previous spills that needs another cleaning cycle. Sometimes, a new oven will smoke a bit during its first uses as manufacturing oils burn off.
- Safety Note: If the smoke is excessive, blue, or smells like burning plastic or chemicals, turn off the oven immediately. Unplug it or turn off the gas. Investigate the source.
Self-Clean Cycle Issues:
- Possible Cause: Many modern ovens have a self-clean function. While convenient, it doesn’t always clean the heating elements directly. It also creates intense heat. Sometimes, too much baked-on food can cause excessive smoke during self-clean.
- Solution: I always try to wipe down heavy spills before using the self-clean cycle. This reduces smoke. After a self-clean cycle, there’s often ash to wipe away. Sometimes, elements might look discolored. I then manually wipe the elements down. This ensures I get all the residue. If you just used the self-clean function, you might need to know how to clean the oven after self-clean.
Noisy Operation:
- Possible Cause: For gas ovens, a sputtering or roaring noise might indicate an issue with gas pressure or a dirty burner. For electric ovens, humming is normal, but loud buzzing or clicking might point to an electrical fault.
- Solution: Check gas burner ports for cleanliness. If the noise persists or is alarming, it’s best to consult a qualified appliance technician. Electrical issues can be dangerous.
Remember, if you are ever unsure or uncomfortable with an oven issue, especially those involving gas or electrical components, contact a professional appliance repair service. Safety should always be your highest priority.
FAQs About Cleaning Oven Coils
Here are answers to common questions about keeping your oven coils clean and functional.
How often should I clean oven coils?
I recommend cleaning oven coils every 3-6 months. This depends on how often you use your oven and how prone you are to spills. Lightly wipe them down as needed for minor spills. Regular, quick cleanings prevent major buildup. This helps maintain oven performance and prevents smoke during cooking.
Can I use a regular oven cleaner on heating elements?
No, I strongly advise against using harsh chemical oven cleaners directly on heating elements or gas igniters. These cleaners can damage the element’s protective coating or material. They can leave residues that burn and produce fumes. Stick to gentle methods like baking soda paste or mild dish soap solutions.
What if my electric heating element is visibly broken or bent?
If an electric heating element is visibly broken, bent, or has a significant blister, it needs replacement. A damaged element can be a fire hazard or cause uneven heating. Do not attempt to bend it back or repair it yourself. Contact an appliance technician or purchase a replacement part specific to your oven model.
Is it normal for gas flames to be yellow or orange?
No, a healthy gas flame should be blue. Yellow or orange flames often indicate incomplete combustion. This usually happens due to clogged burner ports. It can also signal an imbalance in the gas-air mixture. Clearing the burner ports should fix this. If it persists, it is important to contact a professional. Incomplete combustion can produce carbon monoxide.
Can a dirty oven coil affect cooking time or food quality?
Absolutely! Dirty oven coils or clogged gas burners can lead to uneven heating. This means your food might cook faster in some spots and slower in others. It results in unevenly baked goods or undercooked meals. Burnt-on residue also produces smoke and unpleasant odors, affecting food taste and kitchen air quality.
What should I do if a coil won’t heat up at all?
First, ensure the oven is properly plugged in or the circuit breaker is on. If it’s an electric oven coil, visually check for any breaks or disconnections. If the coil shows no signs of life, it is likely burned out. It will need replacement. For gas ovens, if the igniter doesn’t glow or spark, it’s likely faulty and needs professional replacement.
Conclusion
Keeping your oven coils clean is a simple yet vital task. It maintains your appliance’s safety and efficiency. I’ve learned that regular cleaning prevents smoke and odors. It ensures your meals cook evenly. Whether you have an electric oven with heating elements or a gas oven with igniters and burners, the methods are straightforward.
Always remember to prioritize safety. Disconnect power or gas before you begin. Use gentle, non-abrasive cleaners like baking soda and vinegar. These solutions are effective without causing damage. By following the detailed steps in this guide, you can confidently clean oven coils yourself. You will extend your oven’s lifespan. You will also improve its performance. Make this simple maintenance a regular part of your home routine. Enjoy a cleaner kitchen and perfectly cooked food every time.
- oven cleaning
- electric oven
- gas oven
- oven maintenance
- kitchen cleaning
- heating elements
- oven safety

Todd Martin
Senior Writer
With over 15 years of experience in home renovation and design, I started HEG to share what I’ve learned with homeowners who want to create spaces that are both beautiful and functional. I’ve always believed in a hands-on approach, and over the years, I’ve picked up practical solutions that actually work. Through HEG, I aim to make home improvement more approachable, sharing real tips that help you create a home you truly love.