· Todd Martin · Health & Wellness · 15 min read
How To Clean Pierced Ears

How To Clean Pierced Ears: Essential Aftercare Guide for Health
Getting new ear piercings is exciting. You pick out the perfect spot and the perfect jewelry. The journey does not end with the piercing itself. Proper aftercare is critical for healthy, beautiful piercings. Understanding how to clean pierced ears correctly prevents complications. It ensures your new adornments heal well. This comprehensive guide will walk you through everything you need to know. We cover the importance of hygiene, proper cleaning techniques, common pitfalls to avoid, and recognizing signs of trouble. Follow these steps to enjoy your piercings for years to come.
Takeaway:
- Clean new piercings daily: Use a sterile saline solution.
- Avoid harsh chemicals: Do not use alcohol or hydrogen peroxide.
- Handle with clean hands: Always wash your hands before touching your piercings.
- Do not twist jewelry: This irritates the healing tissue.
- Be patient: Healing takes time; follow all aftercare instructions.
- Monitor for infection: Look for redness, swelling, pus, or pain.
Cleaning pierced ears involves gentle application of sterile saline solution. Do this 1-2 times daily. Always wash your hands thoroughly before touching the piercing. Avoid twisting or rotating the jewelry during the healing period. This process prevents infection and promotes healthy tissue regeneration around the piercing site.
Why Proper Piercing Aftercare Is Crucial for Healing
When you get your ears pierced, a small wound is created. This open wound is vulnerable to bacteria and other irritants. Proper cleaning helps the body heal this wound effectively. It minimizes the risk of infection, swelling, and pain. Neglecting aftercare can lead to serious complications. These can include prolonged healing times or permanent damage.
Your body treats the piercing as a foreign object. It works to heal around it. A clean environment allows this natural process to occur without interference. Think of it like maintaining a clean home. A clean home environment helps prevent the spread of germs. Similarly, a clean piercing site supports faster recovery. Many people get infections because they skip cleaning or use wrong products. We will discuss specific cleaning agents and methods. Understanding why each step matters helps you commit to the routine. The goal is to keep the area free from dirt and bacteria.
Good aftercare protects your investment. It ensures your new jewelry looks good on healthy, uninfected ears. It also reduces discomfort during the healing phase. Imagine cleaning your bathroom regularly; it prevents mold and grime buildup. Keeping your bathroom clean is a similar concept to keeping your piercings clean. Both actions prevent problems. Cleanliness protects your health and well-being.
Essential Supplies for Cleaning Your Pierced Ears
Before you begin cleaning, gather the right materials. Using incorrect products can harm your healing piercing. The most recommended and safest option is a sterile saline solution. You can buy this at pharmacies. It is specifically formulated for wound care. These solutions usually come in a spray bottle. This makes application easy and hygienic.
Do not use homemade salt solutions unless instructed by a professional. The concentration can be off. This might irritate the piercing. You will also need clean non-woven gauze pads or cotton swabs. These help apply the solution gently. Avoid cotton balls, as fibers can get caught in the jewelry. Always ensure your hands are clean. Wash them thoroughly with antibacterial soap and warm water before you touch your ears.
Some piercers might suggest specific aftercare products. Follow their advice. They often have specialized knowledge about their tools and techniques. Avoid strong antiseptics like rubbing alcohol or hydrogen peroxide. These can dry out the skin and damage new cells. This delays healing. It is like using harsh chemicals on delicate surfaces; it causes more harm than good. A gentle approach is always best for fresh piercings.
Step-by-Step Guide: How to Clean New Ear Piercings
Cleaning your new ear piercing is simple. Follow these steps carefully to ensure proper healing. Consistency is key during the first few weeks or months. You should clean new piercings 1-2 times a day. Your piercer will tell you how often.
Washing Your Hands
Always start by washing your hands. Use antibacterial soap and warm water. Lather for at least 20 seconds. Rinse thoroughly. This removes bacteria that could transfer to your piercing. Clean hands are the first line of defense against infection. It is as basic as cleaning your hands before handling food.
Preparing the Area
Gently remove any crusting around the piercing. You can do this by soaking a non-woven gauze pad in saline solution. Hold it against the piercing for a few minutes. This softens the crusts. Do not pick or force them off. This can tear the healing tissue.
Applying the Saline Solution
Spray sterile saline solution directly onto the front and back of the piercing. Alternatively, soak a fresh cotton swab or gauze pad with saline. Gently dab it around the piercing. Make sure the solution reaches the piercing channel. Do not rotate the jewelry. Moving the jewelry can pull bacteria into the new wound. It can also cause irritation. Let the solution air dry. This helps avoid further irritation from rubbing.
Drying the Piercing
Pat the area dry gently with a clean paper towel. Do not use cloth towels. Cloth towels can harbor bacteria. They can also snag the jewelry. A paper towel is disposable and clean. Ensure the area is completely dry. Moisture can create a breeding ground for bacteria. Just like you would dry a bathroom floor to prevent mold, dry your piercing thoroughly.
Repeat this process twice a day for new piercings. Continue until your piercer advises it is safe to stop. The healing time varies depending on the piercing location. Ear lobes heal faster than cartilage.
Common Mistakes to Avoid During Piercing Aftercare
Many people make mistakes during the healing process. These errors can prolong healing or lead to infection. Being aware of these pitfalls helps you avoid them. Your piercing will thank you.
Using Harsh Cleaning Agents
Do not use rubbing alcohol, hydrogen peroxide, or antibacterial soaps with strong chemicals. These products are too harsh for a healing wound. They dry out the skin. They can kill healthy cells crucial for healing. Stick to sterile saline solution. It is gentle and effective. Imagine cleaning delicate surfaces; you would not use a strong bleach. Similarly, use gentle products for your skin.
Over-Cleaning Your Piercing
Cleaning more than twice a day is not better. It can irritate the piercing. Over-cleaning strips away natural oils. It can cause dryness and prolong healing. Follow the recommended frequency from your piercer. Consistency is more important than frequency.
Touching or Twisting Jewelry
It is tempting to touch your new piercing. Resist the urge. Unwashed hands carry germs. Every time you touch it, you introduce bacteria. Twisting the jewelry is also harmful. It pulls bacteria into the piercing channel. It also irritates the delicate healing tissue. This can lead to bumps or scarring.
Removing Jewelry Too Early
Do not remove your jewelry before the recommended healing time. The piercing channel can close quickly. Removing it too early also disrupts the healing process. This can lead to pain and infection. Be patient. Let your body heal fully.
Ignoring Signs of Infection
Do not dismiss unusual redness, swelling, excessive pain, or pus. These are signs of infection. Ignoring them can lead to serious issues. We will discuss infection signs in a later section. Seek professional help if you suspect an infection. Taking care of your body is essential. Just as you would address a toilet problem immediately, address any piercing issues.
Understanding Different Piercing Types and Their Cleaning Needs
Not all ear piercings are the same. Different locations on the ear have different healing times and specific care considerations. Knowing your piercing type helps you give it the best care. This ensures a smoother healing journey.
Ear Lobe Piercings
Lobe piercings are the most common. They typically heal the fastest. The tissue is soft and has good blood flow. Healing usually takes 6-8 weeks. Cleaning remains the same: use sterile saline solution 1-2 times daily. Avoid heavy earrings during the healing period. They can pull on the piercing. This causes irritation. Once healed, you can wear various types of jewelry.
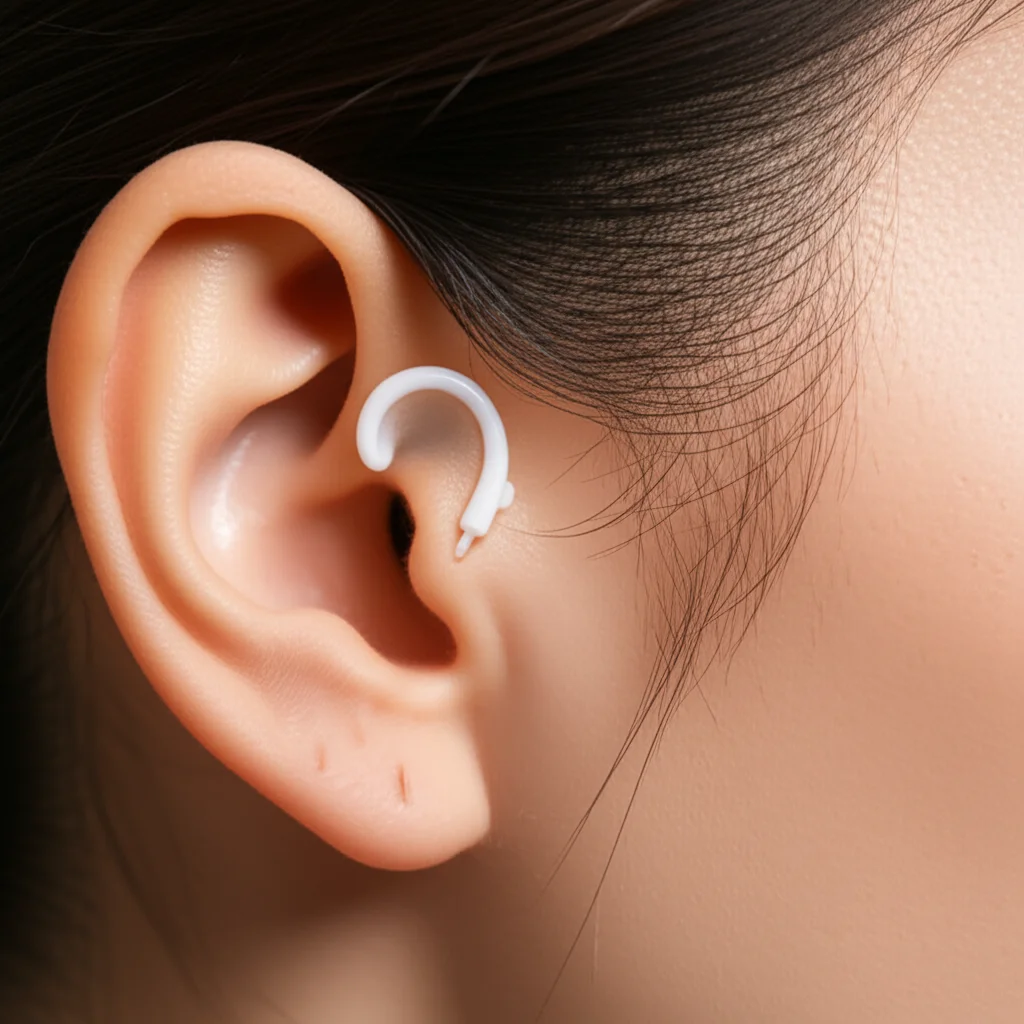
Cartilage Piercings (Helix, Tragus, Rook, Daith, Conch)
Cartilage piercings are different. Cartilage tissue has less blood flow than the lobe. This means longer healing times. Healing can take 6 months to a year, or even longer. These piercings are also more prone to irritation bumps. They require diligent care. The cleaning method is similar: sterile saline solution applied gently. However, be extra careful not to bump or snag cartilage piercings. Sleep on your back or use a donut pillow to avoid pressure. Any trauma can set back healing significantly.
Industrial Piercings
An industrial piercing involves two separate cartilage piercings connected by a single bar. This makes it complex. Both holes must heal perfectly for the bar to sit correctly. Healing time is long, often 9 months to over a year. Cleaning needs to cover both entry and exit points. Ensure no hair or clothing snags the bar. Its unique structure requires more careful attention.
Specific Cleaning Considerations
- Sea Salt Soaks (LITHA Method): Many piercers now recommend “Leave It The Hell Alone” (LITHA). This means minimal interference. Use sterile saline solution without over-cleaning. Soaking can be beneficial for stubborn crusts.
- Jewelry Material: Wear high-quality, body-safe jewelry during healing. Surgical stainless steel, titanium, niobium, or 14k/18k gold are good choices. Poor quality metals can cause irritation or allergic reactions. This makes cleaning and healing harder. Keeping your jewelry clean is important, similar to how you would care for cookware that touches food.
Always consult your professional piercer for specific advice. They know your unique piercing. They can provide tailored instructions. Their expertise is invaluable during the healing process.
Handling Complications: What to Do If Your Piercing Looks Infected
Even with the best care, complications can arise. It is important to know the signs of an infection. Early detection can prevent serious problems. Do not panic if you notice something is wrong. Take action.
Signs of Infection
- Excessive Redness: Beyond normal initial redness, persistent deep red color around the piercing.
- Swelling: Significant and continuous swelling that does not go down.
- Pain and Tenderness: Increased pain, throbbing, or extreme tenderness to the touch.
- Warmth: The area around the piercing feels unusually warm.
- Pus: Discharge that is thick, yellow, green, or foul-smelling. This is a strong indicator of infection. Clear or whitish fluid is usually lymph, which is normal for healing.
- Fever or Chills: Systemic symptoms mean the infection might be spreading.
- Red Streaks: Red lines extending from the piercing site. This suggests a spreading infection.
What to Do If You Suspect Infection
- Do Not Remove the Jewelry: Removing the jewelry can trap the infection inside the piercing channel. This can lead to an abscess. Leave the jewelry in. This allows for drainage.
- Continue Cleaning: Keep cleaning the piercing gently with sterile saline solution. Do not use anything else.
- Consult Your Piercer: Your professional piercer is often the first point of contact. They can assess the situation. They can offer advice or recommend a doctor. They often have experience with various piercing complications.
- See a Doctor: If symptoms worsen or you develop systemic signs (fever, chills), see a doctor immediately. A doctor can diagnose the infection. They can prescribe antibiotics if needed. Timely medical attention is critical.
Bumps are also common. These are often irritation bumps, not infections. They can be caused by trauma, poor jewelry, or over-cleaning. Your piercer can advise on how to treat these. Maintaining cleanliness in your personal space, like your apartment, also contributes to overall health. A clean environment reduces exposure to pathogens.
Long-Term Care for Healed Piercings and Jewelry
Once your piercing is fully healed, daily cleaning is no longer strictly necessary. However, maintaining good hygiene remains important. Healed piercings can still accumulate dirt, oils, and dead skin cells. These can cause odors or minor irritation. Long-term care ensures your piercings stay fresh and comfortable.
Regular Cleaning of Healed Piercings
Even healed piercings benefit from occasional cleaning. A gentle wash in the shower with a mild, fragrance-free soap is usually sufficient. Rinse thoroughly. This keeps the piercing site free of buildup. Some people find that their piercings get a bit “stinky” if not cleaned regularly. This is often due to the accumulation of sebum and dead skin cells. Simple cleaning removes this.
Jewelry Cleaning and Maintenance
Your jewelry also needs cleaning. Remove your earrings regularly. Clean them with mild soap and water. You can also use a jewelry cleaner if appropriate for the material. Rinse well and dry completely before reinserting. Different metals require different care. For example, silver can tarnish. Gold can dull. Regular cleaning keeps your jewelry sparkling. Think of cleaning your jewelry like cleaning a sponge. Both need regular cleaning to be effective and hygienic.
Material Matters
Pay attention to your jewelry material. High-quality materials like surgical stainless steel, titanium, and gold are less likely to cause irritation. If you have sensitive skin, avoid nickel. Even after healing, some materials can cause contact dermatitis. This can make the piercing site itchy or red. Switch to hypoallergenic materials if you experience this.
Changing Jewelry
You can change jewelry once the piercing is fully healed. Be gentle when changing. Always wash your hands first. Make sure the new jewelry is clean. Some people find changing jewelry easier after a warm shower. The skin is more pliable. If you struggle, visit your piercer. They can help you change it safely. This prevents trauma to the healed piercing channel.
Maintaining cleanliness around your piercing, much like dealing with mold, helps prevent issues. For instance, knowing how to clean mold with vinegar can prevent health issues in your home. Similarly, proper piercing care prevents skin issues.
Preventing Future Piercing Problems
Preventing problems is always better than treating them. A few simple habits can keep your piercings healthy. These tips go beyond daily cleaning. They involve general awareness and good practices.
Choose a Reputable Piercer
This is the first and most important step. A good piercer uses sterile equipment. They follow strict hygiene protocols. They provide clear aftercare instructions. They will use high-quality, body-safe jewelry. A reputable piercer greatly reduces your risk of complications. Do your research. Read reviews. Look for certifications.
Maintain Overall Hygiene
Good personal hygiene benefits your piercings. Shower regularly. Change your pillowcases often. Dirt, sweat, and oils from hair and skin can transfer to your piercings. This increases the risk of irritation or infection. Keep your hair clean, especially if it touches your ear. Overall cleanliness supports healthy skin.
Be Mindful of Your Surroundings
Be careful with clothes, hair, and headphones. These can snag or rub against new piercings. This causes irritation and trauma. Be particularly careful when dressing or undressing. Avoid sleeping on new piercings. Pressure can lead to bumps or crooked healing. For ear piercings, use a travel pillow to avoid direct pressure.
Protect from Chemicals
Avoid getting harsh chemicals near your piercings. This includes hairspray, perfumes, and strong cleaning products. These can irritate the piercing. They might also react with your jewelry. Apply these products carefully. Cover your ears if needed.
Diet and Lifestyle
A healthy diet and lifestyle support overall healing. Eat nutritious food. Stay hydrated. Get enough sleep. Avoid smoking and excessive alcohol. These can impair your body’s healing abilities. A strong immune system helps your body recover from the piercing process. Just like you would clean your car carburetor for optimal performance, a healthy body performs better.
By integrating these practices into your routine, you create an environment conducive to healing. You minimize the chances of future issues. A little effort goes a long way in keeping your piercings looking great and feeling comfortable.
FAQ Section
How often should I clean new ear piercings?
You should clean new ear piercings one to two times daily. Follow your piercer’s specific instructions. Over-cleaning can irritate the piercing. Under-cleaning can lead to infection. Consistency is more important than frequency for proper healing.
What solution should I use for cleaning pierced ears?
Always use a sterile saline solution. These are available in spray bottles at pharmacies. They are specifically formulated for wound care. Avoid homemade salt solutions, as the concentration can be incorrect. This might irritate or harm the healing tissue.
Can I use rubbing alcohol or hydrogen peroxide to clean my piercing?
No, you should not use rubbing alcohol or hydrogen peroxide. These chemicals are too harsh for new piercings. They can dry out the skin, damage new cells, and delay the healing process. Stick to gentle, sterile saline solution for the best results.
What are the signs of an infected ear piercing?
Signs of an infected ear piercing include persistent redness, excessive swelling, throbbing pain, warmth around the site, and thick yellow or green pus. You might also experience fever or red streaks. Seek professional advice if you notice these symptoms.
When can I change my earrings after getting a new piercing?
The timing depends on the piercing type. Ear lobe piercings usually heal in 6-8 weeks. Cartilage piercings take 6 months to a year, or even longer. Do not change jewelry before the recommended healing time. Your piercer will give you a specific timeline.
Do I need to clean old, healed piercings?
While not as critical as new piercings, it is good practice to clean healed piercings occasionally. Dirt, oils, and dead skin cells can accumulate. A gentle wash with mild soap in the shower can keep them fresh. Regularly clean your jewelry too.
Conclusion
Cleaning pierced ears correctly is a fundamental step in piercing aftercare. It ensures a smooth healing process and prevents complications. We have discussed the importance of using sterile saline solution and maintaining consistent hygiene. Remember to always wash your hands before touching your piercing. Avoid harsh chemicals, excessive cleaning, and twisting your jewelry.
Understanding the unique needs of different piercing types helps you provide tailored care. Being aware of infection signs and knowing when to seek professional help is also crucial. By following these comprehensive guidelines, you equip yourself with the knowledge to care for your piercings effectively. Embrace these simple habits to keep your pierced ears healthy and beautiful for years to come. Your diligence now ensures lasting comfort and style.
- ear piercing care
- piercing aftercare
- healing piercings
- ear hygiene
- pierced ear cleaning
- prevent infection
- saline solution

Todd Martin
Senior Writer
With over 15 years of experience in home renovation and design, I started HEG to share what I’ve learned with homeowners who want to create spaces that are both beautiful and functional. I’ve always believed in a hands-on approach, and over the years, I’ve picked up practical solutions that actually work. Through HEG, I aim to make home improvement more approachable, sharing real tips that help you create a home you truly love.