
· Todd Martin · Home Cleaning · 18 min read
How To Clean Quartz Rocks
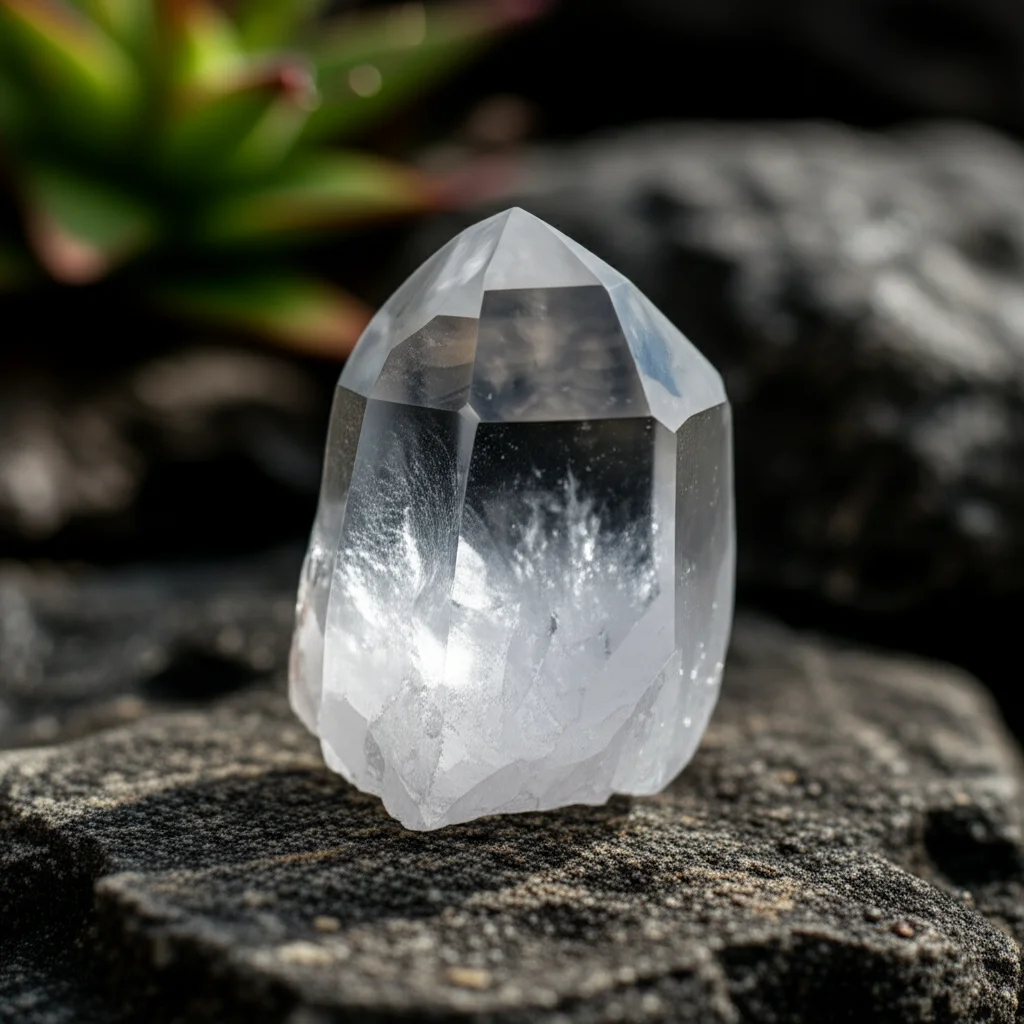
How To Clean Quartz Rocks: Restore Their Natural Shine
Have you ever found a beautiful quartz rock, only to see it covered in dirt and grime? It can be disappointing when a stunning piece of nature looks dull. Cleaning these natural treasures brings out their true beauty. I understand the desire to see those sparkling facets and clear crystals.
Cleaning quartz rocks is simpler than you might think. It involves gentle methods and common household items. This guide will walk you through everything. You will learn the best ways to clean quartz rocks, from basic dusting to removing tough stains. Get ready to transform your dusty finds into dazzling displays.
Takeaway
- Assess the Rock: Identify the type of dirt and the quartz rock’s condition.
- Use Gentle Methods First: Start with plain water and a soft brush.
- Target Stubborn Stains: Apply appropriate cleaners for rust or organic matter.
- Rinse Thoroughly: Remove all cleaning agents from the quartz.
- Dry Completely: Prevent water spots and future issues.
To clean quartz rocks effectively, use warm water, a mild soap, and a soft brush. For stubborn dirt, soaking or gentle scrubbing with a non-abrasive tool is best. Always rinse thoroughly and air dry to reveal their natural luster.
Understanding Your Quartz Rocks
Before you start cleaning, it helps to understand what quartz is. Quartz is one of the most common minerals on Earth. It appears in many forms and colors. Some quartz rocks are clear crystals, while others are milky or colored like rose quartz.
Knowing the type of quartz you have helps you choose the right cleaning method. Most quartz is quite durable. It rates a 7 on the Mohs scale of mineral hardness. This means it can withstand a good scrub. However, always be gentle, especially with delicate crystal formations. You want to enhance its beauty, not damage it.
Why Cleaning Quartz Rocks Matters
Cleaning your quartz rocks does more than just make them look good. It reveals hidden features and colors. Dirt and mineral deposits often hide the true character of a rock. A clean quartz rock can show off its unique patterns. It allows light to pass through, making it sparkle.
Proper cleaning also preserves the rock. Removing corrosive elements or organic growth helps maintain its integrity over time. It is a way to honor the natural beauty of these geological wonders. This care extends the life and appeal of your collection. It is a simple step with a big impact.
Essential Tools and Supplies for Cleaning Quartz
To clean quartz rocks effectively, gather the right tools. You do not need anything fancy. Basic supplies often work best. Using the correct tools prevents scratches or damage to your valuable rocks. I always start by laying out everything I need.
Here are the items you will want to have on hand:
- Warm Water: The primary cleaning agent for most dirt.
- Mild Dish Soap: A few drops can break down grease and grime.
- Soft Brushes: Old toothbrushes, nail brushes, or soft-bristled scrub brushes are perfect.
- Non-Abrasive Cloths: Microfiber cloths or soft towels for drying.
- Plastic Container or Bucket: For soaking rocks.
- Gloves: To protect your hands, especially when using stronger cleaners.
- Safety Glasses: If there’s a risk of splashing chemicals.
- Toothpicks or Dental Picks: For reaching into tiny crevices.
- Distilled Water (Optional): For final rinsing to prevent mineral spots.
Avoid harsh chemicals or abrasive scrubbers. These can dull the surface of your quartz or cause damage. Always test any new cleaning agent on a small, inconspicuous area first. This step ensures it will not harm your beautiful rock.
Basic Cleaning Methods for Quartz Rocks
Most quartz rocks only need a simple, gentle wash. This method removes loose dirt, dust, and light grime. It is the first step I take with any new find. This approach is safe for almost all types of quartz.
Here is how to perform a basic clean:
- Rinse Under Running Water: Hold the quartz rock under cool or lukewarm running water. Use your fingers to rub away any loose dirt. This step removes surface debris without much effort.
- Prepare a Soapy Bath: Fill a plastic container with warm water. Add a few drops of mild dish soap. Stir the water gently to create some suds. Avoid using too much soap, as it can leave a residue.
- Soak the Rock: Place the quartz rock into the soapy water. Let it soak for 15-30 minutes. Soaking helps to loosen stubborn dirt and grime. For delicate crystals, a shorter soak is better.
- Gentle Scrubbing: Remove the rock from the soapy water. Use a soft-bristled brush, like an old toothbrush, to gently scrub its surface. Pay attention to crevices and cracks where dirt collects. For landscape rocks or those in your yard, you might use a slightly stiffer brush, but always start gentle. If you are cleaning large landscape rocks, remember that the methods for how to clean landscape rocks can be adapted.
- Rinse Thoroughly: Rinse the quartz rock under running water again. Make sure to wash away all soap residue. Soap left on the rock can dry and leave a film. This step is crucial for a clear finish.
- Air Dry: Place the clean quartz rock on a soft towel. Allow it to air dry completely. You can also pat it gently with a microfiber cloth. Avoid direct sunlight or excessive heat, which can sometimes cause thermal shock in very rare cases or just dry water spots.
This basic method is often enough to bring out the natural beauty of many quartz rocks. It is safe, effective, and uses minimal supplies. For general outdoor rocks, similar gentle methods apply, as discussed in how to clean rocks in yard.
Deep Cleaning Techniques for Stubborn Dirt and Deposits
Sometimes, basic cleaning is not enough. Quartz rocks found outdoors can have stubborn layers of dirt, clay, or mineral deposits. These require more intensive cleaning methods. I have encountered many rocks that needed a little extra help to shine.
Here are some deeper cleaning techniques:
Extended Soaking for Heavy Clay/Dirt:
- If your quartz rock is heavily caked with clay or mud, a longer soak is effective.
- Place the rock in a bucket of plain water. Let it soak for several hours or even overnight.
- Change the water periodically if it becomes very cloudy.
- After soaking, much of the dirt should easily brush away. This method helps to saturate and loosen deeply embedded particles.
Using a Pressure Washer (with Caution):
- For very large, durable quartz rocks found outdoors, a low-pressure power washer can be used.
- Stand a good distance away from the rock (at least 2-3 feet).
- Use a wide-angle nozzle setting, not a concentrated stream.
- Direct the spray at an angle to dislodge dirt, not directly at any fragile parts.
- This is not suitable for small, delicate, or crystalline quartz specimens. It is primarily for robust, larger pieces where surface integrity is less of a concern.
Ultrasonic Cleaner (for Smaller, Durable Pieces):
- If you collect many smaller quartz crystals or smooth rocks, an ultrasonic cleaner can be a good investment.
- Fill the cleaner with water and a tiny amount of mild soap.
- Place the quartz rocks inside and run the cycle.
- The vibrations help to dislodge dirt from tiny crevices.
- This method is excellent for intricate specimens but avoid it for very fragile or fractured quartz.
Always remember to rinse thoroughly after any deep cleaning. No matter how much dirt you tackle, a good rinse ensures no cleaning agents remain. This prepares your quartz for the final drying stage. This comprehensive approach helps rejuvenate even the most neglected quartz finds.
Removing Specific Stains from Quartz Rocks
Quartz rocks can pick up various stains, depending on where they were found. Rust, algae, and other organic matter are common culprits. Each type of stain needs a specific approach. It is important to identify the stain before choosing a cleaner.
Here are ways to tackle common stains:
1. Removing Iron Stains (Rust)
Iron staining is very common on quartz, especially if it was found near iron-rich soil or other rusty minerals. These stains appear as orange, brown, or reddish marks.
Oxalic Acid (Rust Remover): For significant rust stains, oxalic acid is often recommended by geologists. You can find it in some rust removal products.
- Preparation: Mix oxalic acid crystals with warm water to create a strong solution. Always wear gloves and eye protection. Work in a well-ventilated area.
- Application: Submerge the quartz rock in the solution. The soaking time depends on the severity of the stain, from a few hours to several days. Check on the rock periodically.
- Safety: Oxalic acid is corrosive. Handle it with extreme care. Never use it on polished surfaces or if you are unsure of the quartz’s stability.
- Rinsing: After the stain is gone, remove the rock and rinse it extensively under running water. Brush any remaining residue. You might need to rinse for several minutes.
Iron Out or Similar Products: These are commercial rust removers designed for laundry or surfaces. They contain oxalic acid or other iron-reducing agents.
- Directions: Follow the product instructions carefully. They usually involve dissolving the powder in water and soaking the rock.
- Considerations: Be cautious with polished quartz or those with a delicate surface, similar to how one would approach how to clean quartz countertop stains. These products are potent.
2. Eliminating Organic Stains (Algae, Moss, Lichen)
Rocks exposed to moisture and light can develop green algae or black lichen. These organic growths stick tightly to the surface.
Bleach Solution (Diluted): For tough organic stains, a diluted bleach solution can be effective.
- Mixture: Combine one part household bleach with ten parts water.
- Soaking: Submerge the quartz rock in this solution for a few hours.
- Scrubbing: Use a stiff brush to scrub off the softened organic matter.
- Rinsing: Rinse the rock thoroughly under running water to remove all bleach residue. Bleach can be harsh, so use it sparingly and with caution.
Hydrogen Peroxide: A milder alternative to bleach for organic stains.
- Application: Soak the rock in a 3% hydrogen peroxide solution. This is the common strength found in drugstores.
- Time: Let it soak for several hours or overnight.
- Effectiveness: It works by oxidizing the organic matter. It is safer for your hands and the environment than bleach.
- Rinsing: Rinse well after soaking and scrubbing.
3. Removing Calcite or Other Mineral Deposits
Sometimes, quartz rocks are covered by a layer of calcite, limestone, or other easily dissolved minerals. These can make the quartz appear dull or cloudy.
Vinegar (Acetic Acid): Vinegar is a mild acid that can dissolve calcium-based deposits.
- Soaking: Place the quartz rock in undiluted white vinegar.
- Duration: Let it soak for a few hours or overnight. You might see bubbling as the acid reacts with the mineral.
- Scrubbing: After soaking, gently scrub the rock with a brush. The deposits should now be softer.
- Rinsing: Rinse the rock completely to remove all vinegar.
Muriatic Acid (Last Resort): For very stubborn mineral deposits, some collectors use dilute muriatic acid.
- Extreme Caution: This is a very strong and dangerous acid. Only use it as a last resort and with extreme personal protective equipment (gloves, eye protection, respirator) in a well-ventilated outdoor area.
- Dilution: Always add acid to water, never water to acid, to prevent dangerous reactions. Start with a very dilute solution (e.g., 1 part acid to 10-20 parts water).
- Application: Briefly dip the rock or carefully apply with a brush. Do not soak for long periods.
- Immediate Rinse: Rinse the rock immediately and thoroughly with water.
- Neutralization: You can follow with a baking soda bath to neutralize any remaining acid.
- Warning: Muriatic acid can etch or damage some minerals and can be hazardous to health. It is generally not recommended for home users unless experienced.
When using any strong chemical, ensure proper ventilation. Always follow product instructions and safety warnings. Test a small area first to ensure no damage occurs. Your goal is to clean the rock, not to harm it. These specific methods target the most common types of stubborn stains, helping your quartz truly shine. For more general quartz cleaning tips, you can also look at advice for how to clean quartz crystals.
Special Care for Different Quartz Forms
Quartz comes in many forms, from raw specimens to polished pieces. Each type might require slightly different cleaning considerations. Understanding these nuances helps preserve the unique characteristics of your quartz. I treat each piece as an individual.
Raw and Unpolished Quartz Rocks
Raw quartz rocks are typically rugged. They often have natural fissures, rough surfaces, and unrefined edges. These pieces are more forgiving with scrubbing. However, their texture also traps dirt easily.
Cleaning Raw Quartz:
- Focus on getting into crevices. Use a soft toothbrush or a dental pick to carefully dislodge dirt from deep cracks.
- You can use a slightly stiffer brush than for polished quartz, but avoid metal brushes that could leave marks.
- Extended soaking in water or mild soapy water is very effective for loosening embedded dirt.
- For outdoor findings, a gentle hose spray can help initially remove loose dirt before deeper cleaning.
Considerations: Raw quartz may have inclusions or tiny fractures not visible when dirty. Be mindful of these. Very sudden temperature changes might stress a fractured rock.
Polished Quartz Rocks and Tumblestone
Polished quartz rocks, like those used in jewelry, decor, or as tumblestone, have a smooth, shiny surface. They are beautiful but can show scratches more easily. Countertops made of engineered quartz, like those described in how to clean quartz countertop, also fall into this category of polished surfaces.
Cleaning Polished Quartz:
- Use only very soft cloths and sponges. Abrasive materials will scratch the polished surface.
- Stick to mild soap and warm water. Avoid any harsh chemical cleaners or acids that could dull the shine.
- Wipe gently in one direction to avoid swirling marks.
- Immediately dry with a clean, soft microfiber cloth to prevent water spots.
Considerations: Polished quartz is less porous but can still get greasy fingerprints or light smudges. Regular wiping keeps it gleaming. Do not use anything gritty.
Geodes and Crystal Clusters
Geodes and crystal clusters are often delicate. They have many exposed crystal points that can chip or break. The internal structure can be very intricate.
Cleaning Geodes/Clusters:
- Gentle Rinsing: Hold under a very gentle stream of lukewarm water. Avoid strong water pressure.
- Soft Brush/Air Compressor: Use a very soft brush (like an artist’s paintbrush) to dust away loose dirt. For hard-to-reach areas, a can of compressed air (used for electronics) can gently blow out dust.
- No Soaking (Generally): Avoid prolonged soaking, especially for geodes with delicate inner formations or if the outer shell is fragile. Water might get trapped inside.
- Limited Chemicals: Stick to plain water or a very dilute mild soap solution. Strong chemicals could react with matrix minerals or damage delicate crystals.
Considerations: The goal is to remove surface dust and dirt without damaging the fragile crystal points. Handle these with extreme care. The cleaning methods for quartz sinks, while for a different application, also emphasize gentle care for quartz surfaces, as detailed in how to clean quartz sink.
By tailoring your cleaning method to the specific form of quartz, you ensure its safety and highlight its natural beauty. Each piece gets the specialized care it deserves.
Drying and Finishing Your Cleaned Quartz
Drying your quartz rocks properly is just as important as cleaning them. Improper drying can leave unsightly water spots or even affect the rock’s long-term appearance. I always make sure my cleaned rocks are completely dry before putting them away or displaying them.
Here is how to dry and finish your quartz:
Initial Pat Dry: After rinsing, gently pat the quartz rock with a clean, soft, non-abrasive towel or microfiber cloth. This removes most of the surface water. Do not rub vigorously, as this can cause microscopic scratches on polished surfaces.
Air Drying: The best method for complete drying is air drying.
- Place the quartz rocks on a clean, dry towel.
- Ensure good air circulation around the rocks. You can use a fan to speed up the process.
- Allow ample time for drying. Depending on the rock’s size and complexity (crevices, druzy surfaces), this could take several hours or even a full day.
- For crystal clusters or geodes, position them so water can drain out of any hollows. You might need to rotate them periodically.
Using Distilled Water for Final Rinse (Optional but Recommended): If you live in an area with hard water, tap water can leave mineral deposits as it dries. These appear as white spots.
- After your final tap water rinse, give the quartz a quick rinse with distilled water.
- This removes any tap water residue. Distilled water evaporates cleanly.
- This step is especially beneficial for polished quartz or clear crystals where spots would be very noticeable.
No Heat Drying: Avoid using heat sources like ovens, microwaves, or direct sunlight to dry your quartz. Rapid heating or cooling can cause thermal shock, potentially cracking or damaging the rock, especially if it has existing fractures or inclusions. Gentle air drying is always safest.
Polishing (for Polished Quartz): For polished quartz rocks or tumblestone, once completely dry, you can use a clean, dry microfiber cloth to buff the surface. This enhances its shine and removes any lingering smudges. Do not use furniture polish or oily substances unless specifically designed for mineral polishing, as they can leave a greasy residue.
Once your quartz rocks are perfectly dry, they are ready for display. Their true color and sparkle will be evident, showcasing their natural beauty.
Preventative Care and Long-Term Maintenance
Cleaning your quartz rocks is great, but preventing them from getting too dirty in the first place saves you effort. Regular maintenance helps keep your collection looking its best. Think of it as proactive care for your natural treasures.
Here are some tips for preventative care and long-term maintenance:
Regular Dusting: The simplest form of maintenance is regular dusting.
- Use a soft brush (like a makeup brush or a soft-bristled paintbrush) or a microfiber cloth.
- Gently brush or wipe away dust and light grime from your quartz rocks.
- This prevents dust from building up and potentially embedding into the rock’s surface.
- For delicate clusters, a can of compressed air can effectively blow off dust without touching the crystals.
Display Environment: The location where you display your quartz rocks matters.
- Avoid Direct Sunlight: Prolonged exposure to strong direct sunlight can, over time, cause some colored quartz varieties (like amethyst, a form of quartz) to fade. While clear or milky quartz is less affected, it is still a good practice to avoid harsh sunlight.
- Minimize Dust Accumulation: Displaying rocks in enclosed display cases or on shelves with glass doors can significantly reduce dust buildup.
- Stable Temperatures: Avoid areas with drastic temperature fluctuations, which can potentially stress some minerals.
Handle with Care:
- When handling quartz rocks, especially large or heavy ones, avoid dropping them. Even durable quartz can chip or break from impact.
- Lift rocks from their base, not by delicate crystal points.
- Wear gloves if your hands are oily or dirty, as oils can transfer to the rock and attract dust.
Routine Checks: Periodically inspect your quartz rocks for any signs of new stains, dirt accumulation, or damage. Catching issues early makes them easier to address. If you notice persistent dust, it might be time for a quick rinse.
Storage for Un-displayed Rocks: If you store some quartz rocks, ensure they are clean and dry before storage. Wrap individual pieces in soft cloth or tissue paper. Store them in boxes where they won’t rub against each other. This prevents scratches and chips.
By incorporating these preventative measures, you will find yourself needing to deep clean your quartz rocks less often. It is about creating a consistent routine that keeps their natural beauty preserved for years to come. Your quartz collection will thank you with its enduring sparkle and clarity.
Frequently Asked Questions About Cleaning Quartz Rocks
Q1: Can I use vinegar to clean all types of quartz?
Vinegar is safe for most quartz rocks. It is effective for removing hard water spots or calcium deposits. However, avoid using it on very delicate, porous, or polished quartz surfaces for extended periods. Always rinse thoroughly afterward to prevent any etching over time.
Q2: Is it safe to use bleach on quartz rocks?
A diluted bleach solution can remove organic stains like algae or moss. Use it with caution. Rinse the quartz rock very thoroughly with plain water afterward. Never mix bleach with other cleaners, especially ammonia-based ones, as it creates dangerous fumes.
Q3: How do I clean quartz rocks that are part of jewelry?
For quartz jewelry, use only mild soap and lukewarm water with a soft brush. Avoid harsh chemicals or ultrasonic cleaners, as they can damage the metal settings or other gemstones. Dry gently with a soft cloth. Do not soak pieces with glued settings.
Q4: Can I put quartz rocks in the dishwasher?
No, never put quartz rocks in a dishwasher. The high heat, harsh detergents, and strong water jets can damage, chip, or crack the rocks. The agitation can also cause them to knock against each other, leading to breakage.
Q5: What if my quartz rock has rust stains that won’t come off?
For stubborn rust stains, specific rust removers containing oxalic acid are often necessary. Follow product instructions carefully and wear protective gear. If you are hesitant to use chemicals, consult a professional mineral cleaner or rock shop.
Q6: How often should I clean my quartz rocks?
The frequency depends on how dirty they get. Displayed rocks might just need weekly or monthly dusting. Rocks handled frequently or used outdoors will need more regular washing. Clean them whenever you notice significant dirt or a loss of shine.
Conclusion
Cleaning quartz rocks is a rewarding process that reveals their natural splendor. From a simple wash with mild soap to tackling stubborn stains, you now have the knowledge to restore your finds. Remember, gentleness and thorough rinsing are key to success.
By following these steps, you can safely and effectively clean quartz rocks, bringing out their inherent beauty. Regular dusting and proper display will keep them looking their best. Enjoy your sparkling collection, knowing you have given these geological wonders the care they deserve.
- quartz cleaning
- rock care
- mineral maintenance

Todd Martin
Senior Writer
With over 15 years of experience in home renovation and design, I started HEG to share what I’ve learned with homeowners who want to create spaces that are both beautiful and functional. I’ve always believed in a hands-on approach, and over the years, I’ve picked up practical solutions that actually work. Through HEG, I aim to make home improvement more approachable, sharing real tips that help you create a home you truly love.


