
· Todd Martin · Home Maintenance · 20 min read
How To Clean Remote Control
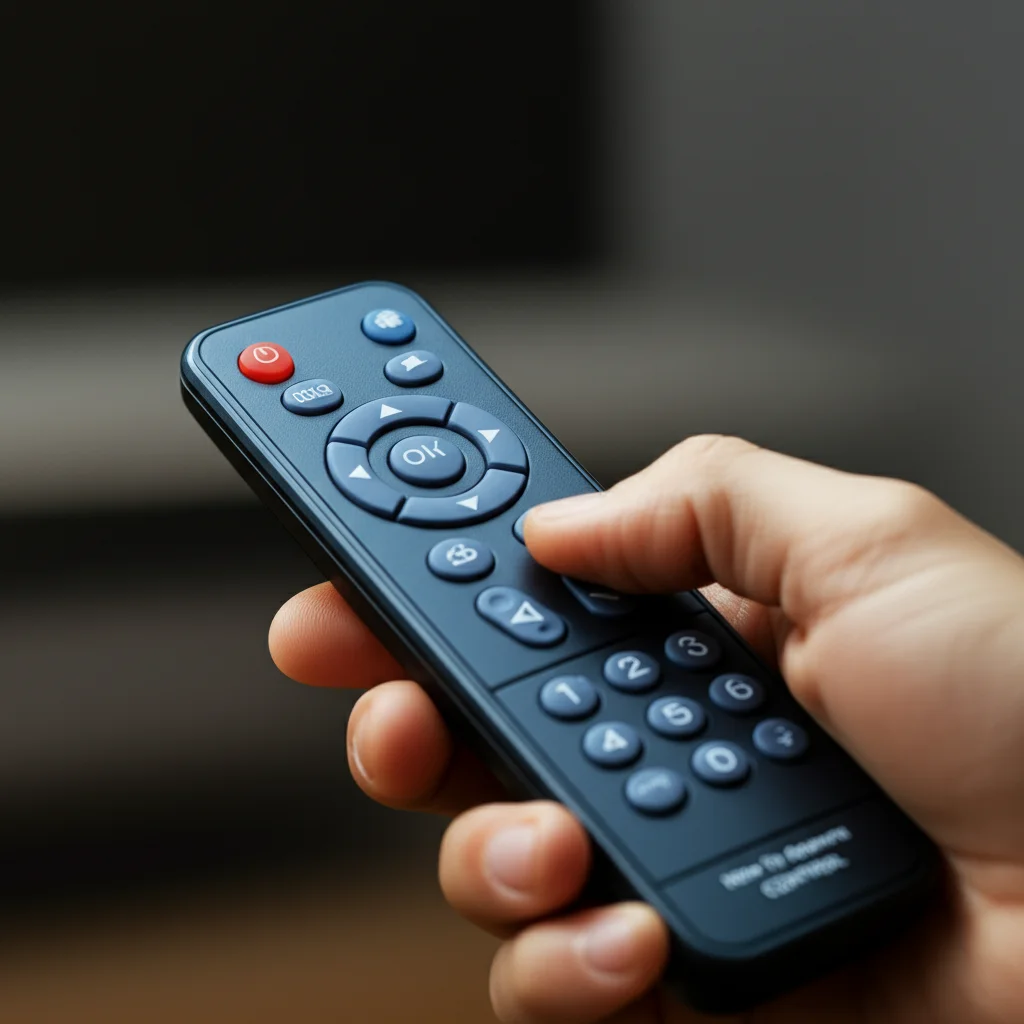
Keep Your Remote Spotless: How To Clean Remote Control Effectively
Think about it: Your remote control is one of the most touched items in your home. You pick it up after eating, during a cough, or right after touching other surfaces. This constant interaction makes it a hotspot for germs, dust, and sticky residue. Learning how to clean remote control properly is not just about aesthetics; it is about hygiene and ensuring your device lasts longer.
A dirty remote can harbor bacteria and viruses, potentially spreading illness among family members. Furthermore, accumulated grime can cause buttons to stick or even stop working entirely. Regular cleaning protects your health and extends the life of your valuable electronics. In this comprehensive guide, I will show you simple, effective methods to clean your remote, from quick wipe-downs to tackling stubborn issues like sticky buttons and battery acid leaks. You will discover the right tools and techniques to keep all your remotes in pristine condition, ensuring they function flawlessly and remain a clean part of your home environment.
Takeaway
- Regularly clean your remote control to prevent germ buildup and device malfunction.
- Use isopropyl alcohol and cotton swabs for effective surface and button cleaning.
- Address sticky buttons and battery acid leaks promptly to avoid permanent damage.
- Consider protective covers and hand hygiene to maintain cleanliness.
Concise Answer
To effectively clean a remote control, first remove batteries. Wipe the exterior with a microfiber cloth lightly dampened with isopropyl alcohol. Use cotton swabs dipped in alcohol for crevices and around buttons. For sticky buttons, gently work alcohol into the gaps. For battery acid, neutralize with a cotton swab dipped in vinegar, then clean thoroughly. Ensure the remote is completely dry before reinserting batteries.
Why Your Remote Needs Regular Cleaning
We often overlook the humble remote control in our cleaning routines. Yet, it serves as a central hub for countless interactions throughout the day. From changing channels to adjusting volume, our hands are constantly in contact with this device. This continuous handling makes it a prime location for accumulating dirt, oils, and microorganisms.
Ignoring your remote control during regular cleaning can have significant consequences. It becomes a silent carrier of germs, affecting family health. Moreover, the buildup of grime can directly impair its function, leading to frustrating experiences. Understanding why this small device requires attention is the first step toward a healthier and more functional home.
The Hidden Germ Hotbed
Your remote control is a germ super-spreader. Studies show remotes often harbor more bacteria than toilet seats. Think about how many different hands touch it daily. Each touch leaves behind skin cells, oils, and microscopic organisms.
These germs can include common cold viruses, flu viruses, and even more concerning bacteria like E. coli or MRSA, especially if someone is ill. Regular remote cleaning significantly reduces this microbial load. It creates a healthier environment for everyone in your household. Disinfecting your remote becomes a vital step in maintaining good home hygiene.
Preventing Malfunctions
Beyond germs, physical dirt poses a threat to your remote’s performance. Dust, crumbs, and sticky residues from food or drinks can seep into the tiny gaps around buttons. This accumulation obstructs the button mechanisms. It causes them to become unresponsive or “sticky.”
When buttons stick, you might press harder, potentially damaging the internal components. Over time, this constant struggle can lead to permanent button failure. A clean remote ensures smooth operation, preventing these frustrating malfunctions. Regular upkeep helps maintain optimal functionality and responsiveness for years to come.
Essential Tools and Supplies for Remote Cleaning
Cleaning your remote control effectively does not require a vast array of specialized equipment. Most of the necessary items are likely already in your home. Having the right tools on hand ensures you can tackle both superficial grime and more challenging sticky situations. Preparing your supplies before you begin makes the cleaning process smooth and efficient.
Remember to gather everything you need in one place. This prevents interruptions once you start cleaning. A small investment in these basic supplies goes a long way in maintaining your remote’s cleanliness and functionality. Let’s look at what you will need for a thorough clean.
General Cleaning Supplies
For a basic wipe-down and surface cleaning, you will need a few common household items. These supplies are gentle yet effective at removing everyday dirt and fingerprints. Always start with these before moving to more intensive methods if needed.
Here is a list of general supplies:
- Microfiber Cloth: Soft and non-abrasive, perfect for wiping surfaces without scratching. It traps dust and dirt effectively.
- Isopropyl Alcohol (70% or 90%): This is your primary cleaning agent. It evaporates quickly, sanitizes surfaces, and cuts through grease and grime. Do not use rubbing alcohol with added dyes or moisturizers.
- Cotton Swabs: Excellent for reaching into small crevices and around buttons. They allow for precise application of cleaning solutions.
- Toothpicks or Non-Metallic Probe: Useful for dislodging stubborn debris from button gaps. Ensure it is not sharp to avoid damage.
- Compressed Air Duster: Helps blow out loose dust and crumbs from cracks. Aim short bursts to prevent moisture buildup.
Specialized Tools for Deeper Cleaning
Sometimes, general cleaning is not enough, especially for sticky buttons or internal grime. For these situations, a few additional tools can make a significant difference. These items allow for a more thorough, targeted cleaning without damaging your remote.
Consider these specialized tools for deeper cleaning:
- Small Screwdriver Set (Phillips/Flathead): If you need to open the remote for internal cleaning or to address severe battery acid leaks. Match the screw head size exactly to prevent stripping.
- Distilled White Vinegar: Necessary for neutralizing battery acid corrosion. It is mildly acidic and reacts with alkaline battery residue.
- Small Soft Brush (e.g., old toothbrush): Can be useful for scrubbing away dried grime in textured areas or inside the remote if opened. Ensure bristles are soft.
Step-by-Step Guide: Basic External Remote Control Cleaning
Cleaning the exterior of your remote control is a simple process. Regular external cleaning prevents dirt and grime from building up and causing issues. This basic routine helps maintain hygiene and keeps your remote looking good. It is a quick task that yields significant benefits for both cleanliness and functionality.
Always prioritize safety during any cleaning process. Make sure the remote is powered down and batteries are removed before you start. This prevents accidental button presses and protects against potential electrical issues. Let’s walk through the steps for a thorough external clean.
Preparing Your Remote for Cleaning
Before you begin any cleaning, proper preparation is key. This ensures your safety and prevents potential damage to the remote. It is a vital first step that should never be skipped.
- Remove Batteries: The very first step is to open the battery compartment and take out all batteries. This eliminates power and prevents accidental button presses or short circuits during cleaning.
- Unplug Any Connected Cables (if applicable): While most remotes are wireless, some smart remotes might have charging cables. Disconnect these before cleaning.
- Shake Out Loose Debris: Turn the remote upside down and gently tap it against your palm. This helps dislodge any loose crumbs, dust, or hair stuck in the buttons or crevices. You can also use a compressed air duster for a more effective removal of debris from cracks.
Surface and Button Cleaning
Now that your remote is prepared, it’s time to tackle the visible dirt and grime. This process focuses on the remote’s surface and the areas immediately around the buttons.
- Dampen a Microfiber Cloth: Lightly moisten a clean microfiber cloth with isopropyl alcohol. The cloth should be damp, not soaking wet. Excess liquid can seep into the remote and cause damage.
- Wipe Down the Entire Remote: Carefully wipe the entire surface of the remote, paying attention to the areas where hands frequently touch. The alcohol will help dissolve grease, oils, and kill germs.
- Clean Around Buttons with Cotton Swabs: Dip a cotton swab in isopropyl alcohol. Gently clean around each button and in the crevices between them. The swab’s small size allows it to reach these tight spots. You might be surprised by how much dirt comes off.
- Address Sticky Spots: For persistent sticky spots, apply a bit more alcohol to a cotton swab and gently rub the area. The alcohol will help break down the residue.
- Use a Toothpick for Stubborn Grime: If there’s dried gunk stuck in the button gaps, carefully use a toothpick or a non-metallic probe to dislodge it. Be very gentle to avoid scratching the remote or damaging the buttons.
- Wipe Again with a Dry Microfiber Cloth: After cleaning, use a dry part of your microfiber cloth to wipe away any residual moisture and polish the surface. Ensure the remote is completely dry before proceeding.
This basic cleaning method is excellent for general maintenance and keeping your remote hygienic. For specific remote types, like your how to clean TV remote or even your sleek how to clean Apple TV remote, these steps form the foundation of a good cleaning routine.
Tackling Stubborn Issues: Sticky Buttons and Grime
Sometimes, a simple wipe-down isn’t enough. Remote controls can develop sticky buttons or accumulate stubborn grime that simple surface cleaning cannot remove. This often happens from spilled drinks, food residue, or prolonged use without cleaning. When buttons become unresponsive or feel gummy, it is time for a more targeted approach.
Addressing these specific issues requires patience and careful execution. The goal is to clean the affected areas thoroughly without damaging the remote’s internal mechanisms. We will focus on methods that get into the deeper crevices where dirt loves to hide.
Dealing with Sticky Residue
Sticky buttons are a common and frustrating problem. This usually indicates that liquid or food residue has seeped under the button and dried. The sugar or oils in the residue bond the button to the remote’s casing.
- Isolate the Sticky Buttons: Identify which buttons are sticking or feel sluggish. This helps you focus your efforts.
- Apply Alcohol to a Cotton Swab: Dampen a cotton swab generously with 70% or 90% isopropyl alcohol.
- Work Alcohol Around the Button Edges: Press the sticky button down. Then, using the alcohol-dampened cotton swab, carefully work the swab around all edges of the depressed button. The alcohol needs to get into the tiny gap to dissolve the sticky substance.
- Press and Release Repeatedly: While working the alcohol, repeatedly press and release the sticky button. This helps the alcohol penetrate deeper and break down the residue. Continue this process, using fresh swabs if needed, until the button moves freely.
- Clean Excess Residue: Once the button moves smoothly, wipe away any excess alcohol or dissolved residue from the remote’s surface with a clean, dry microfiber cloth.
This method typically resolves most sticky button issues without needing to open the remote.
Cleaning Button Crevices
Even if buttons aren’t sticky, the tiny spaces around and between them can accumulate a surprising amount of dirt, dust, and lint. This grime can make the remote look dirty and affect tactile feedback.
- Use a Toothpick or Non-Metallic Tool: For hardened dirt or compacted lint in the crevices, use a wooden toothpick or a non-metallic spudger. Gently scrape or pick the debris out of the gaps. Be very careful not to press too hard or slip, which could damage the remote’s surface or buttons.
- Follow with an Alcohol-Dampened Cotton Swab: After dislodging the larger pieces of grime, use a cotton swab lightly dampened with isopropyl alcohol to clean the now-exposed surfaces within the crevices. The alcohol will remove remaining film and sanitize the area.
- Wipe Down with a Dry Cloth: Finish by wiping the cleaned areas with a dry microfiber cloth to remove any moisture. Ensure all alcohol has evaporated before using the remote.
For stubborn stains on the remote’s plastic casing, you can often address them using the principles from how to clean stains on plastic. Applying isopropyl alcohol or a mild cleaning solution to a microfiber cloth and gently rubbing can lift most blemishes.
Addressing Battery Acid Leaks: A Critical Step
Battery acid leaks are a common and serious problem for remote controls. These leaks occur when old or depleted batteries corrode and release corrosive chemicals. This residue can quickly damage the remote’s internal components, leading to malfunction or complete failure. It is crucial to address battery acid leaks immediately and safely.
Battery acid, specifically potassium hydroxide for alkaline batteries, is corrosive and can cause skin irritation. Always prioritize your safety when dealing with a leak. Proper handling and cleaning are essential to protect both yourself and your remote control from further damage.
Safety First
Before you touch a remote with a battery leak, prioritize your safety. Battery acid is corrosive. Direct contact can irritate your skin.
- Wear Protective Gloves: Always put on disposable gloves, such as latex or nitrile, before handling the remote. This protects your skin from the corrosive acid.
- Work in a Ventilated Area: Battery acid can produce fumes. Work in a well-ventilated space to avoid inhaling any unpleasant or harmful odors.
- Do Not Touch Your Eyes or Mouth: Avoid touching your face while handling the leaked battery. If contact occurs, rinse immediately with plenty of water.
Neutralizing the Acid
Battery acid is alkaline. To neutralize it, you need a mild acid. Distilled white vinegar is perfect for this. It is effective and readily available.
- Remove Leaking Batteries: Carefully remove all batteries from the compartment. Dispose of them safely according to local regulations for hazardous waste. Do not throw them in regular trash.
- Prepare Vinegar-Dampened Swab: Dip a cotton swab or a clean, small brush (like an old toothbrush) into distilled white vinegar. Do not soak it; it should be damp, not dripping.
- Apply to Corroded Areas: Gently dab the vinegar-dampened swab onto the corroded areas within the battery compartment. The vinegar will react with the acid, neutralizing it. You might see some bubbling or fizzing, which indicates the neutralization process.
- Allow to Sit Briefly: Let the vinegar sit on the corrosion for a minute or two to ensure proper neutralization.
Cleaning the Battery Compartment
After neutralizing the acid, you need to clean out all residue. This step is vital to prevent future corrosion and ensure good electrical contact.
- Scrub with a Dry Brush: Use a dry, small brush (like an old toothbrush) to gently scrub away any loosened, neutralized corrosion. Be thorough but careful not to damage the contact points.
- Wipe with Isopropyl Alcohol: Dampen a fresh cotton swab with isopropyl alcohol. Wipe down the entire battery compartment, including the metal contact points. The alcohol will clean any remaining residue and help evaporate moisture.
- Check Metal Contacts: Ensure the metal battery contacts are clean and shiny. If they are severely corroded or damaged, the remote might not work, and the contacts may need professional repair or replacement. For a detailed guide, refer to our article on how to clean battery acid off remote.
- Allow to Dry Completely: Leave the battery compartment open and allow it to air dry completely for at least an hour, or until there is no sign of moisture. Never insert new batteries into a damp compartment.
- Insert New Batteries: Once fully dry, insert fresh, new batteries. Test the remote to ensure it functions correctly.
Cleaning Specific Remote Types: Beyond the TV Remote
While the basic cleaning principles apply broadly, different remote types have unique designs and materials. These variations might require slight adjustments to your cleaning approach. Understanding these nuances ensures you clean each remote effectively without causing damage. It also helps to address specific vulnerabilities each type might have.
From the complex buttons of a universal remote to the sleek surfaces of smart home controllers, each demands thoughtful care. Recognizing these differences allows for targeted cleaning, ensuring longevity and optimal performance across all your devices.
Universal Remotes
Universal remotes often feature many small, closely spaced buttons. This design creates numerous tiny crevices where dust and grime can easily accumulate. Their multifunctionality also means they are frequently handled.
- Focus on Button Gaps: Use cotton swabs dipped in isopropyl alcohol to meticulously clean around each button. The alcohol helps dissolve oils and grime trapped in these tight spaces. A toothpick or a non-metallic probe can gently dislodge stubborn debris before wiping.
- Textured Surfaces: Some universal remotes have textured grips or rubberized coatings. These areas can trap dirt. Use a slightly damp microfiber cloth with alcohol and gently rub these surfaces. For deeper textures, a soft brush might be helpful.
- Display Screens: If your universal remote has a small LCD screen, wipe it with a clean, dry microfiber cloth. For smudges, a very lightly dampened cloth with alcohol can be used, ensuring no liquid seeps into the screen’s edges.
Gaming Console Controllers
Gaming controllers endure intense handling, sweat, food residue, and vigorous button mashing. They are often a haven for grime, especially around joysticks and triggers.
- Joystick Bases: These areas are notorious for collecting grime. Use a cotton swab dampened with isopropyl alcohol to clean around the base of the joysticks. Rotate the joystick while cleaning to reach all angles.
- Trigger and Bumper Gaps: Like regular buttons, triggers and bumpers have crevices. Use cotton swabs and toothpicks to clean these areas thoroughly.
- Textured Grips: Many controllers have textured or rubberized grips for comfort. These are prime spots for sweat and dirt. Wipe them down with an alcohol-dampened microfiber cloth. For heavy buildup, a soft brush can help.
- Analog Stick Caps: If the rubber caps on your analog sticks are removable, take them off and clean them separately with soap and water (rinse thoroughly and dry completely). Clean the plastic underneath with alcohol.
Smart Home Remotes
Smart home remotes, like those for streaming devices (e.g., Apple TV) or smart lights, often feature minimalist designs with fewer physical buttons or touchpads. Their sleek surfaces can show fingerprints and smudges easily.
- Sleek Surfaces: Many smart remotes have smooth, glossy plastic or even metal surfaces. Use a clean, soft microfiber cloth to wipe away fingerprints and smudges. For stubborn marks, lightly dampen the cloth with isopropyl alcohol.
- Touchpads/Touch Surfaces: If your remote has a touchpad, treat it gently. Wipe it with a microfiber cloth. Avoid excessive liquid or harsh scrubbing. Alcohol can be used sparingly for disinfection.
- Minimalist Buttons: Even with fewer buttons, clean around them with a cotton swab and alcohol, just like traditional remotes.
- For specific guidance on very precise devices, you might find valuable tips in articles such as how to clean Apple TV remote, which often share design principles with other smart remotes.
Maintaining Your Remote’s Cleanliness and Longevity
Cleaning your remote control is not a one-time event; it is an ongoing process. Regular maintenance prevents the buildup of dirt, germs, and sticky residues, ensuring your remote remains hygienic and fully functional for years. Incorporating simple habits into your daily routine can significantly extend your remote’s life and cleanliness.
Think of it as preventive care. A little effort consistently applied can save you the hassle of deep cleaning or, worse, replacing a malfunctioning remote. These practices protect your investment and contribute to a healthier home environment.
Regular Wiping Habits
The easiest and most effective way to maintain a clean remote is through frequent, light wiping. This prevents grime from becoming entrenched. Consistency is more important than intensity.
- Weekly Wipe-Down: Make it a habit to wipe down your remote control at least once a week. Use a microfiber cloth lightly dampened with 70% isopropyl alcohol. This quick wipe removes fresh fingerprints, dust, and helps reduce germ accumulation.
- Immediate Spill Cleanup: If food or drinks spill on the remote, clean it immediately. The faster you act, the less likely the substance is to dry and become sticky or seep into the remote.
- Hand Hygiene: Encourage everyone in the household to wash their hands before using the remote, especially after eating. Clean hands mean less transfer of oils and food particles to the remote. This simple step dramatically reduces the rate at which your remote gets dirty.
- Designated Remote Spot: Keeping the remote in a designated, clean spot (like a remote caddy or a clean table surface) rather than on the floor or cluttered surfaces can reduce its exposure to dirt.
Protective Covers
Remote control covers offer an excellent barrier against dirt, spills, and general wear and tear. They are a practical investment for maintaining cleanliness and extending the remote’s life.
- Silicone Sleeves: These are flexible, washable covers that fit snugly over your remote. They prevent dust and liquids from reaching the buttons and body. When the cover gets dirty, simply remove it and wash it with soap and water, or wipe it down with a disinfectant.
- Plastic Wrap (Temporary): For a very temporary or emergency solution, you can carefully wrap your remote in clear plastic wrap. This is not ideal for long-term use but can offer protection during specific messy activities (e.g., eating a meal on the couch).
- Benefits of Covers:
- Spill Protection: Prevents liquids from seeping into the remote, which is often a cause of damage.
- Dirt Barrier: Keeps dust, crumbs, and grime from accumulating in button crevices.
- Germ Reduction: The cover can be easily cleaned and disinfected, acting as the primary point of contact for germs.
- Wear and Tear: Protects the remote’s original casing and button labels from fading or wearing off.
By combining regular wiping with the use of protective covers, you create a robust defense against dirt and damage. This ensures your remote remains a clean, functional, and long-lasting part of your home electronics.
FAQ Section
How often should I clean my remote control?
You should aim to clean your remote control at least once a week for general hygiene. If multiple people use the remote, or if someone in the household is ill, consider cleaning it daily with an alcohol wipe. For sticky buttons or spills, clean immediately to prevent permanent damage. Regular, quick wipe-downs are more effective than infrequent, deep cleans.
Can I use water to clean my remote?
No, generally you should not use water to clean your remote control. Water can seep into the remote’s internal electronics and cause short circuits or corrosion, leading to permanent damage. Always use isopropyl alcohol, which evaporates quickly and leaves no residue. Ensure your cloth or swab is only damp, not dripping wet.
What if my remote stops working after cleaning?
If your remote stops working after cleaning, first ensure it is completely dry. Check the battery compartment for any lingering moisture. Reinsert the batteries firmly. If it still does not work, remove the batteries and let it air dry for 24-48 hours. If the problem persists, water or alcohol might have seeped inside, potentially damaging the circuits.
How do I clean inside my remote?
Cleaning inside a remote is generally not recommended for average users due to the risk of damage. It requires opening the casing with small screwdrivers. If you attempt this, carefully disconnect the circuit board and clean it with cotton swabs lightly dampened with isopropyl alcohol. Only do this if you are comfortable with electronics and as a last resort for severe internal grime or corrosion.
Are remote control covers helpful?
Yes, remote control covers are very helpful. They provide an excellent protective barrier against dust, dirt, spills, and daily wear and tear. Silicone covers are washable and can be easily removed and cleaned, making it simple to maintain hygiene. They significantly extend the life and cleanliness of your remote control by preventing direct contact with contaminants.
Conclusion
Taking the time to clean your remote control might seem like a small task, but its impact is significant. We have explored why this often-overlooked device is a hotspot for germs and grime, threatening both your health and the remote’s functionality. From preventing sticky buttons to tackling corrosive battery acid, knowing how to clean remote control properly is an essential skill for any homeowner.
By following the simple steps outlined, you can ensure your remote remains a clean, responsive, and long-lasting tool. Remember to use the right tools, prioritize safety, and apply the appropriate techniques for different types of dirt and remote designs. Consistent maintenance, even quick weekly wipe-downs and the use of protective covers, will make a world of difference. Do not let your remote become a forgotten haven for germs and malfunction. Start your remote cleaning routine today, and enjoy a cleaner, healthier, and more functional home environment. Your remote—and your family—will thank you!
- remote control cleaning
- sticky remote buttons
- battery acid remote
- disinfecting remote
- TV remote cleaning
- universal remote cleaning
- electronic hygiene

Todd Martin
Senior Writer
With over 15 years of experience in home renovation and design, I started HEG to share what I’ve learned with homeowners who want to create spaces that are both beautiful and functional. I’ve always believed in a hands-on approach, and over the years, I’ve picked up practical solutions that actually work. Through HEG, I aim to make home improvement more approachable, sharing real tips that help you create a home you truly love.


