· Todd Martin · RV Maintenance · 19 min read
How To Clean Rv Roof
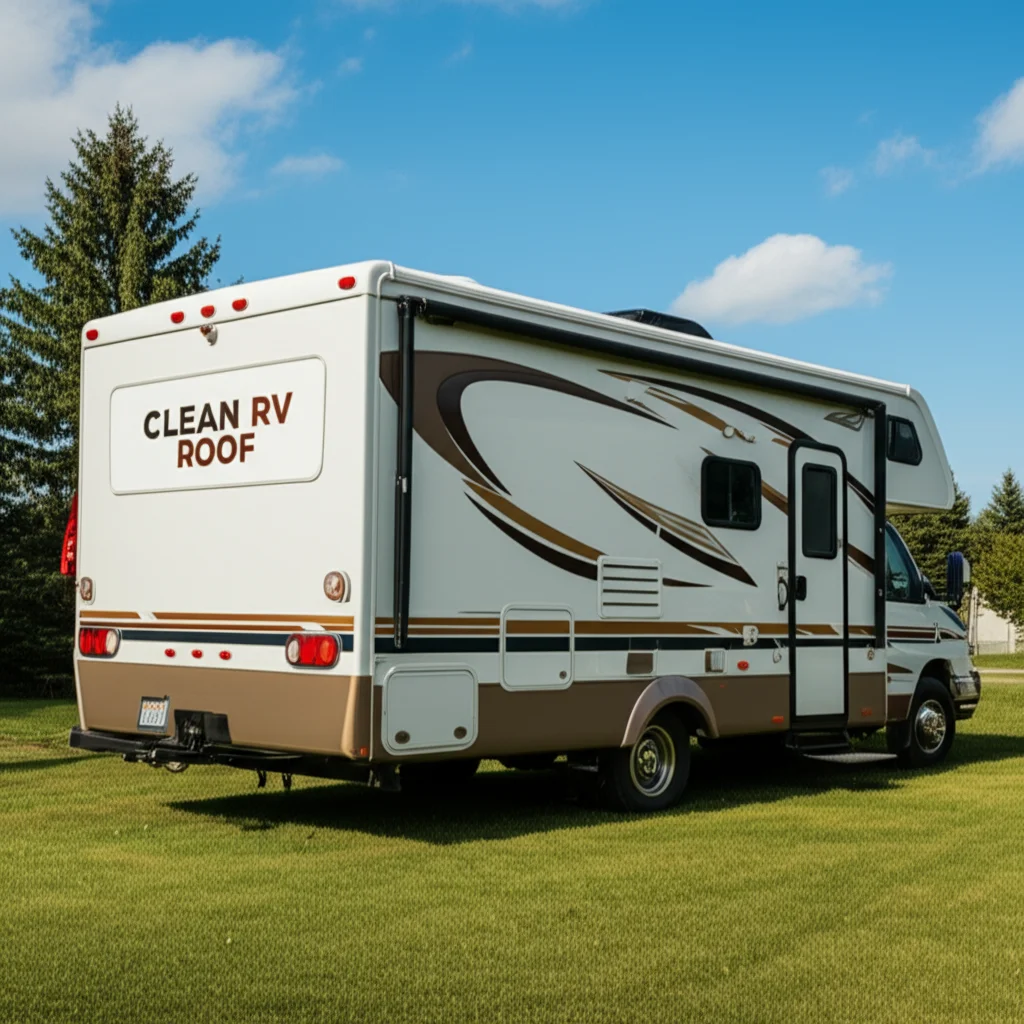
Keep Your RV Sparkling: A Guide to Cleaning RV Roofs
Imagine hitting the open road, sun shining, and your RV gleaming. What about the part you rarely see, but plays a huge role in your RV’s health? It is your RV roof. Keeping it clean protects your investment. A clean RV roof means a longer life for your recreational vehicle. I will share with you the simple steps to achieve this.
This guide helps you understand why roof cleaning is important. We will explore different roof types and the right tools. You will learn a step-by-step process. We will also discuss how to handle stubborn grime and keep your roof protected. My goal is to make cleaning your RV roof an easy task.
Takeaway:
- Regularly clean your RV roof to prevent damage and extend its lifespan.
- Identify your RV roof material to choose the correct cleaning products.
- Always prioritize safety with proper gear and secure ladders.
- Address stubborn stains like mold and black streaks with specific treatments.
- Apply protectants after cleaning to shield against UV and oxidation.
Cleaning your RV roof helps preserve its structural integrity and appearance. You remove damaging dirt, mold, and oxidation. Use appropriate cleaners and soft brushes based on your roof type. Always rinse thoroughly. This prevents leaks and costly repairs, ensuring your RV lasts longer.
Why Cleaning Your RV Roof Matters Annually
Your RV roof takes a beating from the elements. Sun, rain, dirt, and tree sap all land there. These elements break down your roof material over time. Regular cleaning prevents damage. It helps you catch small issues before they become big problems. I make sure my RV roof gets attention every year.
Dirt and grime trap moisture. This leads to mold and mildew growth. Mold eats away at sealants and roof coatings. UV rays cause oxidation, which makes your roof chalky. This chalky residue runs down the sides, leaving ugly black streaks. Cleaning removes these harmful elements. It keeps your RV looking good and structurally sound.
Impact of Neglect
Ignoring your RV roof leads to serious issues. Oxidation weakens the roof material. It makes it prone to cracking. Mold can cause leaks. Water intrusion is expensive to fix. It damages the interior of your RV. Regular cleaning avoids these costly repairs. It saves you money in the long run.
Your RV’s resale value also benefits from a well-maintained roof. A clean roof shows proper care. Buyers prefer RVs with good maintenance history. A neglected roof suggests overall poor care. This can reduce what you can sell your RV for. I always advise owners to keep their roof spotless.
How Often to Clean Your RV Roof
Most experts recommend cleaning your RV roof at least once a year. This is a minimum. If you camp often under trees, or in humid climates, more frequent cleaning is wise. I usually clean my roof every spring. This removes winter build-up. I also give it a quick rinse after every long trip.
Consider cleaning after heavy storms or pollen season. These events can deposit a lot of debris. Inspect your roof regularly between washes. Look for any signs of mold or damage. Prompt action keeps your roof in top shape. It ensures your RV remains a comfortable home on wheels.
Understanding Your RV Roof Type: Materials and Care
Knowing your RV roof material is key. Different materials need different cleaning products. Using the wrong cleaner can damage your roof. It can void your warranty. I always check my RV manual first. Most RV roofs are EPDM, TPO, or fiberglass.
Each material has unique properties. They react differently to chemicals. Some cleaners are too harsh for certain roofs. Others might not be strong enough. Take time to identify your roof type. This step protects your investment. It ensures effective cleaning. You can learn more about general roof maintenance by reading guides on cleaning different roof surfaces.
EPDM (Rubber) Roofs
EPDM (Ethylene Propylene Diene Monomer) roofs are common. They are flexible and durable. EPDM roofs are usually black or white. They are prone to chalking or oxidation. This happens when UV rays break down the surface. You will see white streaks on your RV’s sides.
When cleaning EPDM, use only approved RV rubber roof cleaners. Avoid citrus-based cleaners or petroleum distillates. These can dry out or damage the rubber. Use a soft-bristle brush. Rinse thoroughly to remove all cleaner. Regular cleaning helps prevent chalking. It keeps the roof pliable.
TPO (Thermoplastic Polyolefin) Roofs
TPO roofs are also very popular. They are more resistant to chalking than EPDM. TPO is a single-ply membrane. It is often white or light-colored. TPO is quite durable. It handles punctures well. TPO roofs generally resist mold better than EPDM.
You can use general RV wash products on TPO roofs. Avoid abrasive cleaners. Do not use cleaners with harsh solvents. A soft brush or mop works best. Rinse well to prevent water spots. TPO roofs are easier to maintain. They still need regular cleaning.
Fiberglass/Aluminum Roofs
Some RVs have fiberglass or aluminum roofs. These are very durable. They are less common than rubber membranes. Fiberglass roofs are smooth. Aluminum roofs are usually ribbed. These roofs often look like a car’s painted surface.
You can use a mild automotive soap or general RV wash on these roofs. Avoid abrasive pads. They can scratch the surface. A soft brush or sponge works well. Rinse completely to avoid streaks. Waxing fiberglass roofs helps protect them. It adds shine. These roofs are quite resilient.
What Not to Use on Your RV Roof
Always avoid harsh chemicals. Bleach can damage rubber roofs. It makes them brittle. Pressure washers are risky. They can force water under seams. They can also strip away protective layers. Use a garden hose instead. This prevents damage.
Do not use cleaners with petroleum, citrus, or harsh abrasives. These can degrade the roof material. Read product labels carefully. Choose cleaners specifically for RV roofs. This prevents accidental damage. It keeps your roof warranty valid.
Essential Tools and Supplies for Cleaning Your RV Roof
Gathering your tools before you start saves time. It makes the cleaning process smoother. You need the right equipment for safety and effectiveness. I always lay everything out. This ensures I have what I need. It also prevents multiple trips up and down the ladder.
Having the correct supplies protects your RV. It also protects you. Cheap tools can break. Improper cleaning agents cause damage. Invest in good quality items. This makes the job easier and safer. It also yields better results.
Safety Gear
Safety is most important when working on an RV roof. The surface can be slippery when wet. A sturdy ladder is a must.
- Sturdy Ladder: Use an extension ladder that extends above the roofline. Ensure it is stable. My ladder has rubber feet to prevent slipping.
- Non-Slip Shoes: Wear shoes with good grip. This prevents falls. I use old sneakers with deep treads.
- Gloves: Protect your hands from cleaners. Chemical-resistant gloves are best.
- Eye Protection: Goggles shield your eyes from splashes. This is very important.
- Safety Harness (Optional): For very high RVs or if you feel unsteady, a harness provides extra security.
Cleaning Solutions
Choosing the right cleaner matters for your specific RV roof material.
- RV-Specific Roof Cleaner: Many brands offer cleaners designed for EPDM, TPO, or fiberglass. These are generally safe. I often use a cleaner approved by my RV manufacturer.
- Mild Dish Soap: For light cleaning, a few squirts of gentle dish soap in a bucket of water can work. Always check with your roof material manufacturer first.
- Vinegar Solution: For light mold or mildew, a diluted white vinegar solution can be effective. Mix one part vinegar with two parts water. This is a natural option. You can learn more about how to remove mold with vinegar.
- Black Streak Remover: Specific products target those tough black streaks. They are usually sprayed on and wiped off.
- Oxidation Remover/Restorer: For chalky EPDM roofs, special products can help restore the finish.
Brushes, Sponges, and Buckets
These tools help apply cleaners and scrub surfaces.
- Long-Handled Soft-Bristle Brush: Essential for scrubbing large areas. Choose one designed for RVs or car washing. A soft brush prevents scratches.
- Soft Sponges or Mops: Good for applying cleaner and gentle scrubbing. I keep a few large sponges handy.
- Multiple Buckets: Use one for clean rinse water and another for your cleaning solution. This prevents re-contaminating your roof.
- Garden Hose with Spray Nozzle: For rinsing. A strong, wide spray works best. Avoid pressure washers as they can damage seals.
Other Useful Items
- Microfiber Towels: For drying or polishing after cleaning.
- Squeegee: Can help remove excess water quickly.
- Sealant: Inspect your roof seals after cleaning. Have appropriate sealant on hand for touch-ups.
- UV Protectant: Apply after cleaning to shield your roof from sun damage. This extends its life.
Having all these items ready makes the task simple. You can move efficiently. This ensures a thorough and safe clean. My aim is always to finish the job well the first time.
Step-by-Step Guide: How to Clean RV Roof Effectively
Cleaning an RV roof is a process. Following steps ensures a thorough and safe clean. It also prevents missed spots. I break down the task into manageable parts. This makes it less daunting. You will see good results from following these steps.
This method works for most RV roof types. Always adapt for your specific material. Refer back to the section on roof types. Safety is my first rule. Make sure your ladder is stable. Wear non-slip shoes.
1. Preparation and Parking
Park your RV on a flat, level surface. This helps water drain properly. Avoid parking under trees if possible. Tree sap and leaves make more mess. Ensure you have clear space around your RV. This allows you to move freely. I always check weather forecasts. Choose a cloudy day if possible. Direct sun can dry cleaners too fast.
Lay out all your tools and supplies. Place them within easy reach. This saves you trips up and down the ladder. Cover any sensitive areas on the RV sides, like decals, if using strong cleaners. This prevents accidental damage.
2. Initial Rinse
Start by rinsing the entire roof with a garden hose. This removes loose dirt, leaves, and debris. Use a wide spray nozzle. Work from front to back. This washes heavy grime away. Rinse thoroughly to loosen stuck-on dirt. A good rinse reduces scrubbing effort later. It also prevents scratching your roof.
Pay attention to gutters and roof vents. Clear any accumulated debris. This initial step is crucial. It prepares the surface for cleaning solutions. It also helps identify heavily soiled areas. You can also get inspiration for moss removal techniques if you have any.
3. Apply Cleaning Solution
Mix your chosen RV roof cleaner according to product directions. Do not guess with concentrations. Apply the cleaner to a small section of the roof at a time. Work in sections of about 5x5 feet. This keeps the cleaner from drying too fast. Apply with a soft-bristle brush or sponge.
Spread the cleaner evenly. Make sure the entire section is covered. Allow the cleaner to sit for the recommended time. Do not let it dry on the roof. This can leave marks. Follow the label instructions precisely. This ensures the cleaner works effectively.
4. Scrubbing Techniques
Use your long-handled, soft-bristle brush to scrub the section. Apply gentle, even pressure. Work in small, overlapping strokes. Do not scrub too hard. This can damage the roof material or remove sealants. Focus on areas with visible dirt or stains. Mold and mildew may need more attention.
Rinse your brush frequently. This removes dirt from the bristles. It prevents spreading grime. If you encounter stubborn spots, reapply cleaner. Let it sit a bit longer. Then scrub gently again. The goal is to lift dirt, not to scrape it off.
5. Rinse Thoroughly
Rinsing is as important as scrubbing. Rinse the section you just cleaned immediately. Do not let the cleaner dry on the roof. Rinse from the highest point down. Direct the dirty water away from the clean areas. Ensure all soap residue is gone. Soap left behind can attract more dirt. It can also cause streaking.
Rinse the RV’s sides as you go. This washes off any dirty runoff. It prevents streaks on your paint or decals. Rinse the entire RV thoroughly once you finish the roof. This ensures a spotless finish. You want a clean RV, not just a clean roof.
6. Inspect and Dry
After rinsing the whole roof, inspect it. Look for any missed spots or remaining stains. Address them now. Check all seams and sealants. Ensure they are intact. Look for cracks or peeling. This is a good time to touch up any sealant issues.
Allow the roof to air dry completely. Or, you can use a squeegee to remove excess water. Microfiber towels can help too. A dry roof is less likely to re-attract dirt. It is also ready for protective treatments. A clean, dry roof looks great and performs well.
Tackling Stubborn Stains: Mold, Mildew, and Black Streaks
Regular cleaning helps, but sometimes you face tough stains. RV roofs can develop mold, mildew, and black streaks. These need special attention. They not only look bad but can also harm your roof material. I have dealt with these many times. I use specific methods for each.
These stains are often a sign of neglect. They can also appear quickly in humid climates. Early treatment prevents deeper penetration. It keeps your RV roof looking new. Knowing how to attack them saves frustration.
Specific Treatments for Mold and Mildew
Mold and mildew thrive in damp, shady conditions. They look like black or green spots. They can be slick and dangerous.
- For light mold: A solution of one part white vinegar to two parts water works well. Spray it on the moldy area. Let it sit for 10-15 minutes. Scrub gently with a soft brush. Rinse thoroughly. Vinegar is a natural fungicide. You can learn more about how to remove mold with vinegar.
- For tougher mold: Use an RV-specific mold cleaner. Follow product instructions carefully. Some cleaners contain mild bleach, but only use if approved for your roof type. Test on a small, hidden area first.
- Preventative measures: Keep your RV roof clear of debris. Park in sunny spots if possible. Ensure good airflow. This helps prevent moisture build-up. Consider applying a mold inhibitor after cleaning. Different surfaces like walls also get mold. Read about how to deal with mold on surfaces.
Removing Black Streaks
Black streaks are common on RVs. They form when dirt, grime, and oxidation run off the roof. They run down the sides of your RV. They are tough to remove with regular soap.
- Dedicated Black Streak Removers: Many products are designed specifically for black streaks. These are effective. Spray the product directly onto the streaks. Let it sit for a short time. Wipe with a microfiber cloth.
- Application: Apply to a small section at a time. Work quickly. Do not let the product dry. Rinse immediately after wiping.
- Preventative: Regular roof cleaning is the best prevention. Apply a good RV wax or sealant to your RV’s sides. This makes streaks easier to wash off. I keep my RV waxed for this reason.
Oxidation Removal
Oxidation appears as a chalky, powdery residue. It is very common on EPDM rubber roofs. It is caused by UV exposure. This chalk can be very difficult to clean. It also stains your RV’s sides.
- Specialized Cleaners: Some cleaners are designed to remove oxidation and restore rubber roofs. They contain mild chemicals. Apply with a soft brush or pad. Scrub gently.
- Restorers: After cleaning, consider using an RV roof restorer. These products help bring back the original luster. They also add a protective layer.
- Prevention: Applying a UV protectant is key. This shields your roof from sun damage. It slows down the oxidation process. Regular application extends your roof’s life. It keeps it looking new.
Tackling these stubborn stains takes patience. With the right products and techniques, you can restore your RV roof. A clean roof enhances your RV’s appearance. It also protects its structural integrity. Always test new products in an inconspicuous area. This avoids unwanted damage.
Protecting Your RV Roof After Cleaning: Sealing and UV Protection
Cleaning your RV roof is only half the battle. Protecting it afterwards is crucial. This step extends the life of your roof. It prevents future damage. It also makes future cleanings easier. I never skip this step. It is an investment in your RV’s longevity.
Protection shields against harsh elements. UV rays, rain, and debris can all harm your roof. A protective layer acts as a barrier. It keeps your roof materials in good condition. This prevents costly repairs.
Why Protect Your RV Roof?
Think of your RV roof as your vehicle’s skin. It needs protection from the sun’s harsh rays. UV light breaks down roof materials. It causes fading, cracking, and chalking. Rain and moisture promote mold and mildew growth. A protective coating creates a barrier. It seals small pores. This stops water from seeping in.
Protection also repels dirt. It makes the surface slicker. Dirt and grime stick less easily. This means your roof stays cleaner for longer. It also makes subsequent cleanings much simpler. A protected roof is a happy roof.
Types of Sealants
Sealants are vital for preventing leaks. They seal around vents, skylights, and edges. Always inspect your sealants after cleaning. Look for cracks, peeling, or missing sealant.
- Self-Leveling Sealant: This type is for horizontal surfaces. It flows to fill gaps. It creates a smooth, watertight seal. Use it around vents and skylights.
- Non-Sag Sealant: This is for vertical seams and edges. It stays where you put it. It does not run. Use it along the side edges of your roof.
- Material-Specific Sealants: Some sealants are designed for specific roof materials. Always match the sealant to your roof type. EPDM roofs need EPDM-compatible sealants. TPO roofs need TPO-compatible sealants. Using the wrong type can cause damage.
UV Protectants
UV protectants are a must, especially for rubber roofs. They shield against sun damage. They help prevent oxidation and chalking.
- Liquid UV Protectants: These are typically sprayed or wiped onto the clean, dry roof. They form a clear, protective layer. Reapply as directed, usually every few months.
- Wax/Sealants for Fiberglass/Aluminum: For fiberglass or aluminum roofs, a good automotive wax or marine sealant works well. It provides a glossy finish. It also offers UV protection. Apply it just like you would on your car.
- Benefits: UV protectants keep your roof looking newer. They maintain its flexibility. This prevents it from becoming brittle. They also help repel dirt and water. This reduces future cleaning efforts.
Regular Inspection of Sealant
Make roof sealant inspection a regular part of your RV maintenance. Check sealants before and after every major trip. Also check after cleaning. Look closely at all seams and around all roof fixtures. These areas are prone to cracks.
Touch up any compromised areas promptly. Do not delay. Small cracks can lead to big leaks. Water damage is very expensive to fix. A small tube of sealant is a cheap insurance policy. Maintaining your sealant prevents water intrusion. It preserves your RV’s interior. A well-sealed roof provides peace of mind.
Safety First: Important Precautions When Cleaning Your RV Roof
Cleaning your RV roof can be risky. Falls from ladders are serious. The roof surface can be slippery. Ignoring safety rules leads to accidents. I always prioritize safety. This keeps me and my RV safe. Make sure you plan for safety before you start.
Proper precautions protect you. They also protect your RV. Rushing or cutting corners is never worth the risk. A few simple steps make the job much safer. Your health is more important than a perfectly clean roof.
Ladder Safety
Most accidents happen on ladders. Use a sturdy, stable ladder.
- Proper Placement: Place the ladder on a firm, level surface. Ensure all four feet are stable. Do not place it on uneven ground.
- Extension Above Roofline: The ladder should extend at least three feet above the RV roof. This provides a handhold when climbing on and off.
- Angle: Set the ladder at a 75-degree angle. The base should be one foot out for every four feet of height. This is the safest angle.
- Three Points of Contact: Always maintain three points of contact with the ladder. This means two hands and one foot, or two feet and one hand. Move slowly and deliberately.
- No Overreaching: Do not lean too far to the side. Move the ladder instead. Overreaching can cause the ladder to tip.
- Secure the Ladder: If possible, tie off the top of the ladder to the RV. This adds stability. You can use ropes or bungee cords.
Slippery Surfaces
RV roofs get very slippery when wet with water and soap.
- Non-Slip Shoes: Wear shoes with good traction. Rubber soles are best. I use old tennis shoes with good grip.
- Work in Sections: Clean and rinse one small section at a time. Do not let the whole roof get wet and soapy at once. This reduces the area that is slippery.
- Awareness: Always be aware of your footing. Watch for soap or water puddles. Move slowly and carefully.
- Avoid Walking on Wet Areas: If possible, stay on dry parts of the roof. Walk only on areas you have rinsed clean.
- No Rushing: Take your time. Rushing increases the risk of slipping.
Weather Conditions
Check the weather forecast before you start.
- Avoid Wind: Do not clean your RV roof on a windy day. Wind can make the ladder unstable. It can also cause you to lose balance.
- Avoid Rain: Rain makes the roof extremely slick. It also dilutes your cleaners.
- Avoid Direct Sun: Very hot, sunny days can cause cleaners to dry too quickly. This leaves streaks. A cloudy, mild day is ideal.
- Temperature: Avoid freezing temperatures. Water can turn to ice. This creates a very dangerous surface.
Working with a Partner
If possible, have someone help you.
- Ladder Spotter: Your partner can hold the base of the ladder. This adds stability.
- Tool Handler: They can hand you tools and supplies. This saves you from climbing up and down frequently.
- Emergency Help: In case of an accident, a partner can call for help. They can also provide immediate assistance.
- Communication: Talk to your partner. Let them know your movements. This prevents miscommunication.
By following these safety tips, you can clean your RV roof with confidence. Prioritize safety above all else. A clean RV is great, but a safe you is better.
Frequently Asked Questions
Cleaning an RV roof brings up many common questions. Here, I address some of the most frequent ones. My goal is to provide clear, helpful answers. These insights help you maintain your RV roof better. They clear up any confusion you might have.
Can I use a pressure washer to clean my RV roof?
I do not recommend using a pressure washer on an RV roof. High pressure can damage the roof material. It can force water under sealants and seams. This leads to leaks. Use a standard garden hose with a spray nozzle instead. A garden hose provides enough pressure to
- RV roof care
- RV cleaning tips
- motorhome maintenance
- EPDM roof cleaning

Todd Martin
Senior Writer
With over 15 years of experience in home renovation and design, I started HEG to share what I’ve learned with homeowners who want to create spaces that are both beautiful and functional. I’ve always believed in a hands-on approach, and over the years, I’ve picked up practical solutions that actually work. Through HEG, I aim to make home improvement more approachable, sharing real tips that help you create a home you truly love.