· Todd Martin · Appliance Maintenance · 20 min read
How To Clean Speed Queen Washer
Keep Your Speed Queen Washer Spotless
Your Speed Queen washer is a workhorse. It handles countless loads of laundry. Over time, residue can build up inside the machine. This buildup affects performance and can cause odors. Learning how to clean Speed Queen washer properly ensures it stays in top condition. Regular cleaning keeps your clothes fresh. It also extends the life of your valuable appliance. I will show you simple methods to maintain your washer. We will cover everything from the tub to the smallest nooks.
Takeaway
Keeping your Speed Queen washer clean is easy. You need to follow these steps:
- Perform monthly deep cleaning cycles.
- Wipe down the drum and agitator regularly.
- Clean detergent and softener dispensers.
- Check and clear the lint filter.
- Address odors and potential mold promptly.
To clean a Speed Queen washer, run a hot water cycle with a cleaning agent like white vinegar or a specialized washer cleaner. Additionally, manually wipe down the tub, agitator, and dispenser areas, ensuring all residue is removed. Consistent monthly cleaning maintains peak performance and prevents odors.
Why Speed Queen Washers Need Regular Cleaning
You might wonder why a robust Speed Queen washer needs cleaning. These machines are built to last. They handle heavy use with ease. However, they are not immune to dirt and detergent buildup. Soap scum, mineral deposits from hard water, and lint collect inside the drum. These residues create a film. This film can trap bacteria and mold. A dirty washer leads to unpleasant odors. It also leaves your clothes less clean. Sometimes, it even stains them.
Regular cleaning prevents these issues. It ensures your Speed Queen continues to perform optimally. A clean washer uses less energy. It also works more efficiently. Ignoring cleaning shortens the lifespan of the machine. It can lead to expensive repairs. Taking a little time each month makes a big difference. You protect your investment. You also ensure your family has truly clean laundry. I have seen the difference it makes firsthand.
Essential Supplies for Speed Queen Washer Cleaning
Before you begin cleaning your Speed Queen washer, gather your supplies. Having everything ready makes the process smooth. You likely already own most of these items. No special tools are necessary. We focus on simple, effective solutions. These items are safe for your machine and your home.
Here is a list of what you will need:
- White Vinegar: This is a natural cleaner and deodorizer. It breaks down mineral deposits. It also kills mold and mildew. Many prefer it over harsh chemicals. You can learn more about how to clean a washer with vinegar.
- Baking Soda: This acts as a gentle abrasive. It helps remove stubborn stains. It also absorbs odors. Combining it with vinegar creates a powerful cleaning action.
- Bleach (Optional): Use bleach for severe mold or mildew issues. It is a strong disinfectant. However, use it carefully. Never mix bleach and vinegar. This creates dangerous fumes.
- Microfiber Cloths: These are great for wiping surfaces. They pick up dirt and absorb moisture. Keep a few clean ones handy.
- Small Brush or Old Toothbrush: This helps scrub tight spots. It is perfect for dispenser drawers or crevices.
- Spray Bottle: Useful for mixing cleaning solutions. It allows for even application.
- Warm Water: For rinsing and wiping.
Some people prefer commercial washer cleaning tablets. Products like Affresh work well. However, you can achieve excellent results without them. Many find the vinegar and baking soda method sufficient. This is also a more natural option. If you prefer not to use commercial tablets, you can explore how to clean a washer without Affresh. I find these simple household items do the job perfectly.
Deep Cleaning the Washer Tub and Agitator
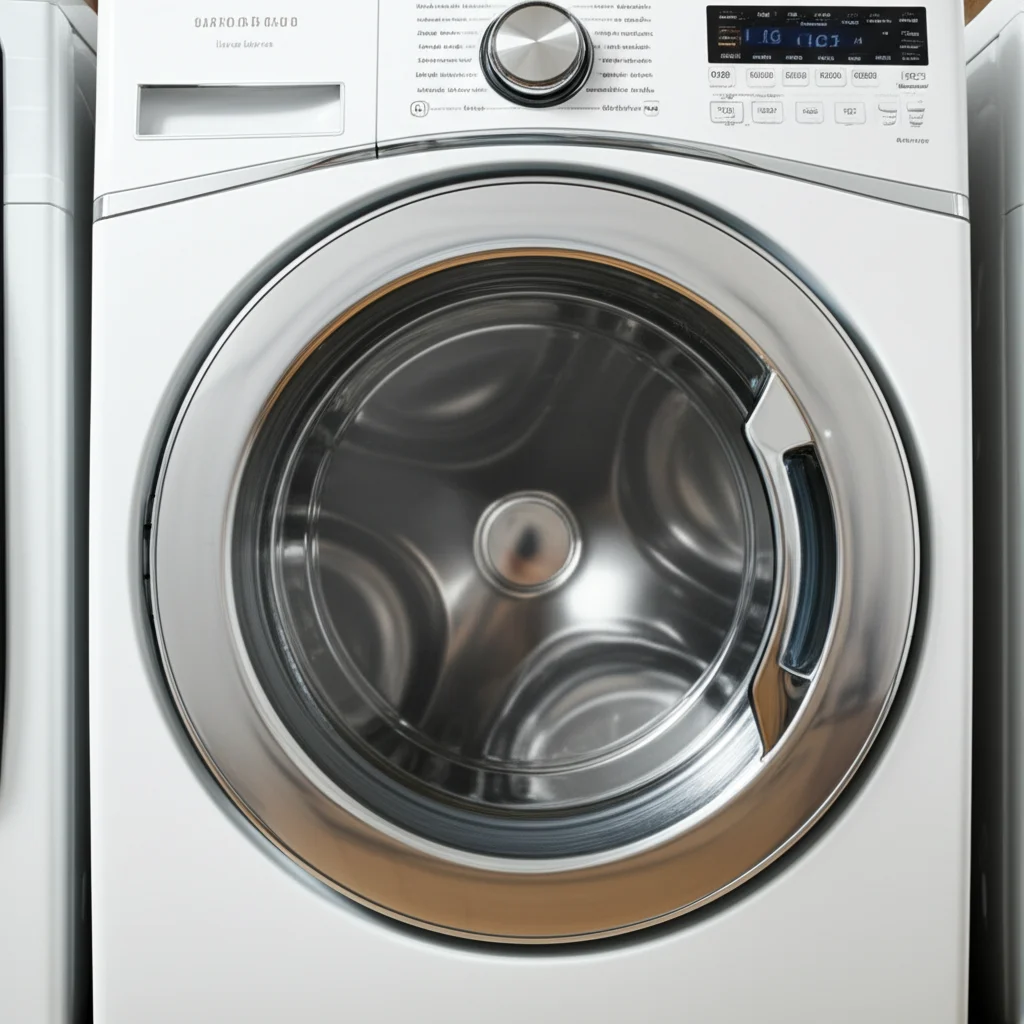
The tub and agitator are the heart of your Speed Queen washer. They come into direct contact with your laundry. This is where most of the residue builds up. A thorough cleaning of these parts is essential. It removes soap scum, dirt, and mineral deposits. This process helps your washer rinse clothes better. It also prevents odors from developing. I often start here because it makes the biggest difference.
Here is how to deep clean your washer tub and agitator:
Using White Vinegar for a Natural Clean
- Empty the Washer: Ensure no clothes are inside the machine. A completely empty tub is important.
- Add Vinegar: Pour two cups of white vinegar directly into the washer tub. Do not put it in the dispenser.
- Run a Hot Cycle: Select the hottest water setting available on your Speed Queen. Choose the largest load size. Allow the machine to fill with water and agitate for a few minutes. This mixes the vinegar with water.
- Pause and Soak: Once the water and vinegar are mixed, pause the cycle. Let the mixture soak in the tub for at least an hour. You can even let it sit for several hours. This allows the vinegar to break down buildup.
- Complete the Cycle: Restart the wash cycle. Let it run to completion. The hot water and vinegar solution will flush out residue.
- Wipe Down: After the cycle finishes, open the lid. Use a clean microfiber cloth dipped in vinegar solution. Wipe down the entire inside of the tub. Pay attention to the agitator and the top rim. Scrub any visible grime. The agitator often collects residue at its base.
Using Bleach for Tougher Issues (Use with Caution)
If you have persistent mold or severe odors, bleach can be effective. Remember, never mix bleach with vinegar.
- Empty the Washer: As before, make sure the washer is empty.
- Add Bleach: Pour one cup of liquid chlorine bleach into the dispenser or directly into the tub.
- Run a Hot Cycle: Select the hottest water setting. Choose the largest load size. Allow the cycle to run completely. The bleach will sanitize the tub. It will also kill mold and mildew.
- Run a Rinse Cycle: After the bleach cycle, run an additional rinse cycle. This ensures all bleach residue is removed. You do not want bleach to come into contact with your clothes later.
- Wipe Down: Wipe the tub and agitator with a damp cloth. Make sure no bleach residue remains on surfaces.
I find that the vinegar method is usually enough for regular maintenance. For similar principles, you can look at how to clean an LG top load washer, as many top-load washer cleaning techniques are universal.
Cleaning the Dispenser Drawers and Compartments
Your Speed Queen washer has compartments for detergent, fabric softener, and sometimes bleach. These areas often accumulate a gooey residue. This residue consists of undissolved detergent, softener, and lint. If left uncleaned, it can clog the dispensers. This prevents your products from dispensing correctly. It can also cause mold to grow. I always pay close attention to these spots.
Here is how to clean the dispenser drawers and compartments:
- Remove the Drawers: If your Speed Queen has removable dispenser drawers, pull them out completely. Some older top-load models might have a simple pour-in system. If your compartments are not removable, you will clean them in place.
- Soak (Removable Drawers): Place the removed drawers in a sink or basin. Fill it with warm water. Add a squirt of dish soap or a cup of white vinegar. Let them soak for about 30 minutes. This softens the accumulated gunk.
- Scrub the Drawers: Use a small brush or an old toothbrush. Scrub all surfaces of the dispenser drawers. Pay attention to the corners and crevices. Remove all visible residue. Rinse them thoroughly under running water.
- Clean the Compartment Housing: Look inside the washer where the dispenser drawers sit. You will likely see buildup here too. Dip a microfiber cloth or an old toothbrush in warm, soapy water or vinegar solution. Scrub the inside of the compartments. Get into any spray nozzles or tubes.
- Wipe and Dry: Wipe down all cleaned parts with a clean, damp cloth. Then dry them completely before reinserting the drawers. This prevents new mold from forming quickly.
- For Non-Removable Dispensers: If your Speed Queen has fixed compartments, use your brush and cloth. Dip them in warm, soapy water or vinegar. Scrub the inside of each compartment. Rinse by pouring a small amount of clean water through them. Then wipe dry.
Regular cleaning of these dispensers ensures your laundry additives reach your clothes. This makes your washes more effective. It also prevents clogs and overflows. For models with specific dispenser designs, such as those with smart dispense features, the principles remain similar. You can find more detail on systems like those in how to clean a GE Smart Dispense washer.
Maintaining the Lint Filter/Trap
Many Speed Queen top-load washers have a lint filter or trap. This component catches lint, pet hair, and small debris from your laundry water. It prevents these particles from recirculating onto your clothes. It also stops them from clogging your washer’s drain pump. A clogged lint filter drastically reduces your washer’s efficiency. It can also cause drainage issues. This is a crucial part to clean regularly.
Here is how to find and clean your Speed Queen lint filter:
- Locate the Filter: The location of the lint filter varies by Speed Queen model.
- Agitator-mounted Filter: Some older or classic Speed Queen models have a self-cleaning lint filter built into the top of the agitator. This type is usually a removable cup or screen. You lift the agitator cap to access it.
- Top Rim Filter: Other models might have a lint trap located around the top rim of the washer tub. It might be a removable screen or a series of small holes.
- Drain Pump Filter: Some newer or commercial-style Speed Queens might have a filter at the drain pump. This is less common for consumer top-loaders but important for some front-load models or heavy-duty commercial units. You usually access this from a small panel near the bottom front of the machine. Check your user manual for exact location.
- Remove the Filter: Once you locate the filter, carefully remove it. It might twist or pull out. Be gentle.
- Clear Debris: You will likely find a significant amount of lint, hair, and maybe even small forgotten items like coins. Remove all visible debris. You can use your fingers or a paper towel.
- Rinse and Clean: Rinse the filter under running water. Use a small brush or an old toothbrush to scrub away any stuck-on residue. You can use a little dish soap if necessary. Make sure all perforations or mesh are clear.
- Inspect the Housing: Look into the area where the filter sits. Wipe away any accumulated grime or lint from this area too.
- Reinstall the Filter: Once the filter is clean and dry, carefully reinsert it into its proper place. Ensure it is securely seated.
I recommend checking and cleaning the lint filter at least once a month. If you wash a lot of pet bedding or lint-heavy items, clean it more often. A clean lint filter means cleaner clothes. It also prevents potential drainage problems. This simple step contributes significantly to your Speed Queen’s longevity. Some washing machines, like certain Whirlpool Cabrio models, have similar filter systems that require regular attention. Knowing how to clean a Whirlpool Cabrio washer filter can provide additional context if your Speed Queen shares a similar design.
Cleaning the Washer Exterior and Control Panel
While the interior of your Speed Queen washer handles the dirty work, the exterior and control panel also need attention. Splashes, detergent drips, and dust can accumulate on these surfaces. A clean exterior not only looks better but also prevents grime from getting back into the clean laundry. This step is quick and simple but completes the overall cleaning process.
Here is how to clean the exterior and control panel:
- Unplug the Washer (Safety First): Before cleaning the control panel, always unplug the appliance. This prevents accidental activation or electrical hazards. Safety comes first in any cleaning task.
- Wipe Down the Exterior:
- Use a soft microfiber cloth.
- Dampen the cloth with warm water.
- Add a small amount of mild dish soap to the cloth, if needed.
- Wipe down all exterior surfaces of your Speed Queen washer. This includes the top, sides, and front panel.
- For stainless steel finishes, wipe in the direction of the grain. This prevents streaks.
- Remove any spills, drips, or dust.
- Clean the Control Panel:
- Use a separate, clean microfiber cloth.
- Lightly dampen the cloth with water. You can also use a gentle, all-purpose cleaner that is safe for electronics. Avoid spraying liquids directly onto the panel. Spray the cloth instead.
- Gently wipe the control panel buttons and display.
- Be careful not to get water into any cracks or openings.
- For sticky buttons, a cotton swab lightly dampened with rubbing alcohol can help.
- Clean the Lid/Door:
- Wipe the inside and outside of the washer lid.
- Pay attention to the hinge area. Dirt and lint can collect here.
- For front-load Speed Queens (if applicable), thoroughly clean the rubber gasket around the door. This area is prone to mold and mildew. Wipe it dry after every wash cycle to prevent buildup.
- Dry Thoroughly: After wiping, use a dry microfiber cloth to dry all surfaces. This prevents water spots and streaks. It also ensures no moisture remains on the control panel.
A sparkling clean exterior gives your laundry room a fresher look. It also makes your Speed Queen washer feel new again. I find this final touch very satisfying after a deep internal clean.
Tackling Odors and Mold in Your Washer
A musty smell in your Speed Queen washer is a common problem. This odor usually comes from mold and mildew buildup. It thrives in damp, dark environments. If you notice a persistent smell, or visible black spots, it is time for targeted action. Addressing odors and mold ensures your clothes come out smelling fresh, not stale.
Here is how to tackle odors and mold:
- Identify the Source:
- Tub and Agitator: Often, the main tub is the source. Residue inside the drum traps moisture and organic matter, leading to mold.
- Dispenser Drawers: These are prime spots for mold due to constant dampness and soap residue.
- Lid/Gasket (if applicable): If you have a front-load Speed Queen or a top-loader with a seal, check the rubber gasket around the lid. Mold loves to grow here.
- Initial Treatment with Vinegar or Bleach:
- As discussed in the deep cleaning section, running a hot cycle with two cups of white vinegar or one cup of bleach can often eliminate odors. Remember, do not mix them.
- For strong odors, consider pausing the cycle. Let the water and cleaning solution soak for several hours.
- Targeted Mold Removal:
- For Tub/Agitator Mold: If you see visible mold spots on the agitator or inside the tub, spray them directly with undiluted white vinegar. Let it sit for 15-30 minutes. Then scrub with a brush or cloth. Run a hot cycle afterwards.
- For Dispenser Mold: Remove the dispensers. Soak them in a solution of warm water and vinegar. Use a small brush to scrub away mold.
- For Gasket Mold (Front-Load): Mix equal parts water and bleach in a spray bottle. Spray the moldy gasket. Let it sit for 10-15 minutes. Wear gloves. Wipe thoroughly with a damp cloth. Make sure all bleach is removed. If you prefer a non-bleach method, you can use a solution of vinegar and baking soda paste. Many people use vinegar to clean mold from various surfaces, as explored in how to clean mold with vinegar.
- Baking Soda Odor Absorption:
- After a vinegar or bleach wash, or as a standalone odor treatment, sprinkle half a cup of baking soda directly into the empty washer tub.
- Run a short hot water cycle. Baking soda helps absorb any lingering odors. It also scours the tub gently.
- Preventive Measures:
- Always leave the washer lid open for an hour or two after each use. This allows the interior to air dry.
- Wipe down the tub and gasket (if applicable) after each wash, especially if you live in a humid area.
- Do not leave wet clothes in the washer for extended periods.
By combining deep cleaning with specific mold and odor treatments, you can keep your Speed Queen smelling fresh. This prevents unpleasant smells from transferring to your clean laundry.
Routine Maintenance Tips for Your Speed Queen Washer
Cleaning your Speed Queen washer is not just a one-time event. Regular, simple maintenance steps extend its life. They also ensure it always performs at its best. Think of it as preventative care. Incorporating these habits into your routine saves time and effort in the long run. I follow these steps myself to keep my machine running smoothly.
Here are essential routine maintenance tips:
- Leave the Lid Open After Each Use:
- After every wash cycle, leave the washer lid open.
- Do this for at least an hour, or even until the next laundry day.
- This allows air to circulate inside the tub. It dries out moisture. This simple act prevents mold and mildew growth. It also stops musty odors from forming.
- Wipe Down the Tub and Agitator:
- Quickly wipe down the inside of the tub and agitator after your final load of the day.
- Use a clean, dry cloth.
- This removes any lingering moisture or lint. It also prevents residue buildup from hardening.
- Use the Correct Detergent Amount:
- Using too much detergent is a common mistake.
- Excess detergent creates more suds. These suds can leave residue inside the washer.
- They can also clog pipes.
- Follow the detergent manufacturer’s recommendations. Speed Queen machines are often efficient with less soap.
- Consider using HE (High-Efficiency) detergent even if your Speed Queen is not an HE model. These detergents produce fewer suds.
- Clean Dispenser Drawers Regularly:
- Aim to clean the detergent and fabric softener dispensers weekly or bi-weekly.
- A quick rinse or wipe prevents stubborn buildup.
- This ensures products dispense properly into each wash.
- Check and Clean Lint Filter Monthly:
- Make it a habit to check the lint filter every month.
- Clean out any accumulated lint, hair, or debris.
- A clean filter improves draining and prevents lint from redepositing on clothes.
- Run a Self-Clean or Hot Cycle Monthly:
- Many Speed Queen models do not have a dedicated “self-clean” cycle like some other brands.
- You can simulate a self-clean. Run an empty hot water wash cycle once a month.
- Add two cups of white vinegar or a commercial washer cleaner to this cycle. This flushes out hidden residue. It also sanitizes the tub.
- Inspect Hoses and Connections:
- Periodically check the water inlet hoses for cracks or leaks.
- Ensure the drain hose is not kinked.
- Tighten connections if necessary. These checks prevent water damage.
- Avoid Overloading:
- Overloading your Speed Queen can stress the motor and internal components.
- It also prevents proper cleaning and rinsing of clothes.
- Refer to your machine’s manual for recommended load sizes.
By implementing these simple routine maintenance steps, you will keep your Speed Queen washer working flawlessly. It will clean your clothes effectively for many years. It is an investment in your home and laundry routine.
Troubleshooting Common Cleaning Issues
Even with regular cleaning, you might encounter specific issues with your Speed Queen washer. Some problems can be stubborn. Addressing these challenges directly helps restore your machine’s performance. I have faced these myself and found practical solutions.
Here are common cleaning issues and their troubleshooting steps:
- Persistent Musty Odor:
- Problem: The washer still smells even after a cleaning cycle.
- Solution:
- Deep Bleach Clean: If you only used vinegar, try a hot wash cycle with 1 cup of liquid chlorine bleach (ensure no vinegar residue remains). Let it run completely, then run an extra rinse cycle.
- Check Hidden Areas: Look under the agitator, around the tub’s rim, and inside the dispenser housing. Mold can hide in small crevices. Use a brush and a stronger cleaning solution (like a bleach solution or a mold remover if safe for appliances).
- Air Dry Thoroughly: Ensure you leave the lid open for several hours after every wash. Air circulation is key to preventing reoccurring odors.
- Drain Pump Filter (if applicable): Some Speed Queens might have an accessible drain pump filter at the base. Consult your manual to check it. A clogged filter can harbor stagnant water and smell bad. Cleaning it, similar to how to clean a Whirlpool Cabrio washer filter, can resolve hidden odors.
- Clothes Still Smell or Have Residue:
- Problem: Your laundry doesn’t smell fresh, or you see white residue on clothes.
- Solution:
- Too Much Detergent: You might be using too much detergent. Reduce the amount. Excess detergent leaves residue.
- Hard Water Buildup: If you have hard water, mineral deposits can cause residue. Add a water softener to your wash, or use more vinegar in your cleaning cycles.
- Rinse Cycle Issues: Ensure your washer’s rinse cycle is functioning correctly. Check the drain hose for kinks.
- Washer Overload: Do not overload the washer. Clothes need space to move and rinse properly.
- Visible Mold Spots Reappearing:
- Problem: Mold spots keep coming back after cleaning.
- Solution:
- Increase Cleaning Frequency: Clean your washer more often, perhaps bi-weekly instead of monthly.
- Targeted Treatment: For persistent spots, apply a paste of baking soda and a small amount of water or hydrogen peroxide. Let it sit for 30 minutes, then scrub and rinse.
- Ventilation: Ensure your laundry area is well-ventilated. High humidity encourages mold growth. Consider a dehumidifier.
- Wipe Dry Daily: Make it a habit to wipe down the inside of the tub, agitator, and lid (especially gaskets if present) after your last load each day.
- Slow Drainage:
- Problem: Water drains slowly from the tub.
- Solution:
- Lint Filter: The most common cause is a clogged lint filter or drain pump filter. Clean this thoroughly.
- Drain Hose: Check the drain hose at the back of the washer. Ensure it is not kinked, blocked, or inserted too far into the drain standpipe.
- Plumbing Issue: If the problem persists, the issue might be with your home’s plumbing. Consult a plumber.
By systematically addressing these common issues, you can keep your Speed Queen washer in prime working condition. A little detective work often solves the problem.
Frequently Asked Questions About Cleaning Speed Queen Washers
Cleaning appliances often brings up specific questions. Here are answers to common queries about cleaning your Speed Queen washer. These cover practical aspects and help ensure you keep your machine in top shape.
How often should I clean my Speed Queen washer?
You should deep clean your Speed Queen washer once a month. This includes running a cleaning cycle with vinegar or bleach. You should also perform routine maintenance, like wiping down the tub and checking dispensers, after every few uses or weekly. Regular, light cleaning prevents major buildup.
Can I use bleach and vinegar together to clean my washer?
No, never mix bleach and vinegar. This combination creates highly toxic chlorine gas. Always use them separately. If you use bleach, ensure the washer is completely rinsed before using vinegar, and vice versa. It is safer to choose one method for a cleaning cycle.
What causes a Speed Queen washer to smell bad?
A bad smell usually comes from mold, mildew, and bacteria growth inside the washer. This happens due to trapped moisture, soap scum, and residue from laundry. Overuse of detergent and leaving the lid closed after a wash can worsen the problem. Regular cleaning prevents these odors.
Do Speed Queen washers have a self-clean cycle?
Most consumer Speed Queen top-load washers do not have a dedicated “self-clean” cycle button. Instead, you simulate one. You run an empty hot water cycle with a cleaning agent like white vinegar or a commercial washer cleaner. Check your specific model’s manual for recommended cleaning procedures.
Can I clean the outside of my Speed Queen washer with abrasive cleaners?
No, avoid abrasive cleaners, scouring pads, or harsh chemicals on the exterior. These can scratch the finish or damage the control panel. Use a soft microfiber cloth with mild soap and water. Always unplug the machine before cleaning the control panel.
What if my Speed Queen washer still has residue after cleaning?
If residue persists, you might have hard water. Mineral deposits cause this buildup. Try increasing the amount of white vinegar in your cleaning cycles to three or four cups. Consider using a water softening additive with your regular laundry detergent. Ensure you are not overloading the machine, as this can prevent proper rinsing.
Conclusion
Keeping your Speed Queen washer clean is a simple yet vital task. It maintains its legendary performance. Regular cleaning prevents issues like odors, residue buildup, and reduced efficiency. We have covered a comprehensive approach. This includes deep cleaning the tub and agitator. We also discussed maintaining dispensers, lint filters, and the exterior. Remember, consistency is key. A monthly deep clean combined with routine wiping and proper ventilation keeps your Speed Queen operating flawlessly.
Embrace these practices. Your durable Speed Queen will continue to deliver spotless laundry for years. Take action today. Give your Speed Queen the care it deserves.
- Speed Queen
- washer cleaning
- laundry machine care
- appliance maintenance
- top-load washer cleaning

Todd Martin
Senior Writer
With over 15 years of experience in home renovation and design, I started HEG to share what I’ve learned with homeowners who want to create spaces that are both beautiful and functional. I’ve always believed in a hands-on approach, and over the years, I’ve picked up practical solutions that actually work. Through HEG, I aim to make home improvement more approachable, sharing real tips that help you create a home you truly love.