· Todd Martin · Home Maintenance · 21 min read
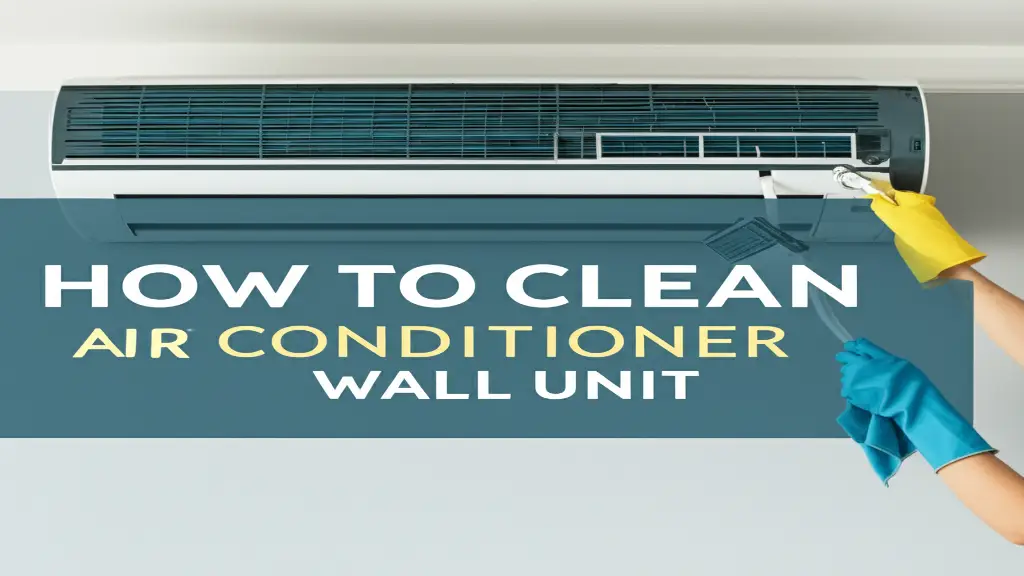
How To Clean Split Ac Unit
How To Clean Your Split AC Unit for Peak Performance
Revitalize Your Air: How to Clean Your Split AC Unit Effectively
Imagine stepping into your home after a long day, greeted by a blast of cool, fresh air. That feeling is priceless, right? Your split AC unit works hard to give you this comfort. But over time, it collects dust, grime, and even mold. This buildup affects its performance, wastes energy, and can even impact your indoor air quality. I know, because I’ve experienced the noticeable difference a clean unit makes. Learning how to clean a split AC unit is a vital skill for any homeowner. It ensures your system runs efficiently, keeps your home comfortable, and helps you save money on energy bills. In this article, I will guide you through a comprehensive, step-by-step process. We will cover everything from essential safety precautions to deep cleaning the indoor and outdoor components. Get ready to breathe easier and enjoy optimal cooling.
Takeaway
Regularly cleaning your split AC unit is simple, cost-effective, and crucial for optimal performance.
- Always disconnect power before you begin any cleaning.
- Focus on cleaning filters, coils, and drain lines for both indoor and outdoor units.
- Use appropriate cleaning solutions and tools to avoid damage.
- Schedule professional maintenance annually for comprehensive checks and deep cleaning.
Clear Answer
To clean a split AC unit, first turn off its power. Then, clean the indoor unit’s air filters, coils, and blower fan using a soft brush, vacuum, and specialized coil cleaner. Finally, clear the outdoor unit’s condenser coils and remove any debris around it.
Preparation Is Key: Safety First Before You Clean Your Split AC Unit
Before you start any cleaning, remember that safety comes first. Working with electrical appliances requires caution. You must completely disconnect the power to your split AC unit before touching any part of it. This prevents electrical shocks and protects you from moving parts. Do not skip this critical step. I always head to my circuit breaker box and flip the switch labeled for the AC unit. Sometimes, I even unplug it from the wall if there’s an accessible plug.
Gathering the right tools before you begin saves time and makes the job much easier. You do not need highly specialized equipment for a basic clean. Most items are likely already in your home. This preparation phase ensures you have everything at hand, preventing interruptions. A well-prepared workspace also promotes efficiency.
Here is a list of essential tools and supplies:
- Safety Glasses and Gloves: Protect your eyes from debris and your hands from cleaning solutions.
- Dust Mask: Essential for preventing inhalation of dust, mold spores, and cleaning solution fumes.
- Soft Cloths or Microfiber Towels: For wiping surfaces and absorbing moisture.
- Vacuum Cleaner with Brush Attachment: For removing loose dust from filters and coils.
- Soft Bristle Brush: For gently scrubbing coils and fan blades.
- Coil Cleaning Spray (No-Rinse, Evaporator Coil Cleaner): Specifically designed for AC coils, safe for the unit.
- Mild Detergent or Dish Soap: For general cleaning of washable parts.
- Spray Bottle: For mixing water and mild detergent.
- Bucket: To catch water or for mixing cleaning solutions.
- Garden Hose with Spray Nozzle: For rinsing the outdoor unit.
- Fin Comb (Optional but Recommended): To straighten bent fins on coils.
- Waterproof Tarp or Plastic Bag: To protect your walls and floor during indoor unit cleaning.
Ensure you have good ventilation in the room where the indoor unit is located. Open windows if possible. This helps disperse any odors from cleaning solutions. Taking these preliminary steps ensures a safe and effective cleaning process for your split AC unit.
Cleaning the Indoor Unit: Filters and Front Panel
The indoor unit of your split AC system is where the air you breathe is conditioned. It is often called the evaporator unit. Keeping this part clean is crucial for air quality and cooling efficiency. The first and easiest components to clean are the air filters and the front panel. These parts bear the brunt of airborne dust and particles. I always start here because it makes an immediate difference.
Begin by carefully opening the front panel of the indoor unit. Most split AC units have clips or latches that allow the panel to swing upwards or outwards. Be gentle; forcing it can break the plastic. Once the panel is open, you will see the air filters. They are usually mesh screens that slide out easily. Take a moment to observe how they are inserted. This helps when you put them back.
Now, it is time to clean the filters. If your filters are washable, take them outside. Use a vacuum cleaner with a brush attachment to remove the bulk of the dust. For a deeper clean, wash them under running water. You can use a mild detergent or dish soap to cut through stubborn grime. Gently scrub them with a soft brush if needed. Make sure to rinse them thoroughly until the water runs clear. If your filters are disposable, replace them with new ones. Always allow washable filters to air dry completely before reinstalling them. Wet filters can promote mold growth and hinder airflow.
While the filters are drying, clean the front panel and the exterior casing of the indoor unit. Use a soft, damp cloth with a small amount of mild soap. Wipe down all visible surfaces to remove dust and dirt. Avoid harsh chemicals or abrasive cleaners, as these can damage the plastic or finish. Make sure to get into any crevices where dust might accumulate. Once the panel is clean and dry, gently close it. This routine filter and panel cleaning should be done every 2-4 weeks, especially during peak usage seasons. Regular attention to these parts will noticeably improve your AC’s performance and the air quality in your home. You can find more specific guidance on filter cleaning for mini-split units here: How To Clean Mini Split Filters. For a comprehensive look at cleaning the entire indoor unit, refer to: How To Clean AC Unit Inside.
Deep Cleaning the Indoor Unit: Coils, Blower Fan, and Drain Line
Once the filters are clean, it’s time to tackle the more intricate parts inside your split AC unit: the evaporator coils, the blower fan, and the drain line. These components are critical for your AC’s cooling process and often accumulate a significant amount of dirt and mold. A thorough cleaning of these parts improves efficiency, reduces energy consumption, and ensures healthier air. I find that this step makes the biggest difference in how my unit performs.
Cleaning the Evaporator Coils
The evaporator coils are the “cold” part of your AC system. They absorb heat from the air. Over time, a layer of dust, lint, and even mold can build up on these fins. This buildup acts as an insulator, reducing the coil’s ability to transfer heat. This makes your AC work harder and use more energy.
- Access the Coils: With the front panel open and filters removed, you will see the metal fins of the evaporator coil.
- Protect Your Surroundings: Place a waterproof tarp or plastic bag beneath the indoor unit. This catches any dripping water or cleaning solution.
- Vacuum Loose Debris: Use a vacuum cleaner with a soft brush attachment to gently remove any loose dust from the coil fins. Work carefully to avoid bending the delicate fins.
- Apply Coil Cleaner: Spray a no-rinse evaporator coil cleaner generously over the entire coil surface. These cleaners are designed to break down grime and mold. They drip into the drain pan and exit through the drain line. Follow the product instructions regarding application and dwell time. Many are “no-rinse,” meaning they do not require flushing with water.
- Straighten Fins (Optional): If you notice any bent fins, carefully use a fin comb to straighten them. Straight fins allow for better airflow across the coil.
Cleaning the Blower Fan (Blower Wheel)
The blower fan, or blower wheel, is a cylindrical component located behind the evaporator coils. It pulls air from your room over the cold coils and pushes cool air back out. This fan can get incredibly dirty with caked-on dust and mold, especially if the filters are not changed regularly. A dirty blower wheel drastically reduces airflow and can even cause your unit to vibrate.
- Access the Blower Fan: This step can be challenging. Some units allow you to partially access the blower wheel by carefully moving a few components. Others require more disassembly. If you are not comfortable, consider professional help.
- Manual Cleaning: Using a soft brush (like a toothbrush or a specialized coil brush) and a vacuum cleaner, carefully dislodge and remove the accumulated dirt from the fan blades. Rotate the fan manually to clean all sides.
- Damp Cloth Wipe: For stubborn grime, lightly dampen a cloth with a mild detergent solution or a diluted coil cleaner. Carefully wipe down each blade, ensuring no excess liquid drips into electrical components.
- Dry Thoroughly: Allow the blower wheel to air dry completely before reassembling or turning on the unit. You can gain insights into cleaning the blower wheel without removal here: How To Clean Mini Split Blower Wheel Without Removing.
Clearing the Drain Line
The drain line carries condensation from the evaporator coil’s drip pan out of your home. If it gets clogged with algae, mold, or debris, water will back up and can overflow, leading to leaks, water damage, and unpleasant odors.
- Locate the Drain Line: The drain line is usually a small PVC pipe that exits the indoor unit, often leading to an outdoor drain or a nearby sink.
- Check for Clogs: Look for visible blockages at the end of the pipe. You might see slimy buildup.
- Flush the Line: For minor clogs, you can try flushing the line. Pour a cup of distilled white vinegar into the drain pan (if accessible) or directly into the drain line opening inside the unit. The vinegar will help break down mold and algae. Let it sit for 30 minutes, then flush with a cup of clean water. For more persistent clogs, you might need to use a wet/dry vacuum to suction out the blockage from the outdoor end of the drain line, or even a specialized drain line cleaning kit.
- Preventive Measures: Regular flushing with vinegar every few months can prevent future clogs. More detailed instructions on cleaning your split AC drain pipe can be found here: How To Clean Split AC Drain Pipe. If you encounter stubborn clogs, consider options like: How To Clean AC Drain Line With Bleach.
This deep cleaning of the indoor unit’s coils, blower fan, and drain line should be performed at least once a year, or more frequently if you live in a dusty area or have pets. It is a vital step in maintaining your split AC’s health and performance.
Maintaining the Outdoor Unit: The Condenser Coil and Fan
Your split AC system is not just about the indoor unit; the outdoor unit, also known as the condenser unit, plays an equally vital role. It is responsible for releasing the heat absorbed from your home into the outside air. Because it sits outdoors, it is exposed to harsh elements like dust, leaves, pollen, dirt, and even animal droppings. A dirty outdoor unit can significantly reduce your AC’s efficiency and even lead to system breakdowns. I always make sure to give this unit attention too.
Cleaning the Condenser Coil
The condenser coil is a large component wrapped around the outdoor unit. It looks like a radiator. Its fins are crucial for heat dissipation. When these fins get clogged with debris, heat cannot escape efficiently. This forces your compressor to work harder, consuming more electricity and shortening the unit’s lifespan.
- Safety First: Just like with the indoor unit, always ensure the power to the entire AC system is disconnected at the circuit breaker before you begin.
- Clear Debris: Start by removing any large debris around and on top of the unit. This includes leaves, twigs, grass clippings, and dirt. You can use your hands or a soft broom.
- Vacuum the Fins: Use a vacuum cleaner with a brush attachment to gently remove loose dust and dirt from the condenser fins. Work from top to bottom.
- Rinse with Water: Using a garden hose with a spray nozzle, gently spray the condenser fins from the inside out if possible. This pushes the dirt outwards, away from the coil. If you cannot spray from the inside, spray from the outside, angling the spray to penetrate the fins. Avoid using high-pressure washers, as they can bend the delicate fins. A gentle, steady stream is sufficient. For more details on this, you can check: How To Clean Outside AC Unit With Water Hose.
- Apply Coil Cleaner (Optional): For stubborn grime, you can use a dedicated outdoor condenser coil cleaner. Follow the product’s instructions for application and rinsing. These cleaners help break down grease and caked-on dirt.
- Straighten Fins: Just like with the evaporator coil, use a fin comb to carefully straighten any bent condenser fins. This improves airflow and heat transfer.
Cleaning the Outdoor Fan
The fan inside the outdoor unit pulls air through the condenser coils to dissipate heat. If the fan blades become dirty or obstructed, the fan cannot move air efficiently.
- Remove the Top Grille: Most outdoor units have a protective grille on top. Unscrew and carefully lift this grille to access the fan blades. Be mindful of any wires connected to the grille or fan motor.
- Wipe Fan Blades: Use a damp cloth to wipe down the fan blades. Remove any dirt, grime, or stuck-on debris. You can use a mild detergent solution if needed.
- Inspect for Damage: While the grille is off, inspect the fan blades for any cracks or damage. Also, check the fan motor for any signs of wear.
- Clear Obstructions: Ensure there are no loose items or obstructions inside the unit that could interfere with the fan’s operation.
- Reassemble: Once clean and dry, carefully reattach the top grille.
General Outdoor Unit Maintenance
Beyond cleaning the coil and fan, perform these additional checks:
- Clear the Area: Maintain a clear perimeter of at least 2 feet around the entire outdoor unit. Remove any plants, shrubs, weeds, or structures that might block airflow. Proper airflow is vital for the unit’s efficiency.
- Level the Unit: Ensure the unit is sitting on a level pad. If it has shifted, it can put undue stress on internal components.
- Check Electrical Connections: While the power is off, briefly inspect visible electrical connections for corrosion or damage. If you see anything concerning, contact a professional.
Cleaning the outdoor unit should be done at least once a year, preferably before the cooling season begins. It significantly extends the lifespan of your unit and keeps your energy bills in check. You can find more general tips for cleaning your outdoor AC unit here: How To Clean Outside AC Unit.
Troubleshooting Common Split AC Cleaning Issues
Even with regular cleaning, you might encounter specific issues that need addressing. These often point to areas that require a bit more attention during your cleaning routine or indicate the presence of persistent problems like mold. Addressing these issues promptly can prevent more serious problems and keep your AC running smoothly. I have dealt with these concerns myself, so I understand the frustration.
Mold Growth and Musty Odors
One of the most common complaints with AC units, especially split systems, is the presence of musty odors. This almost always indicates mold or mildew growth. Warm, damp environments like the evaporator coil, drip pan, and drain line are ideal breeding grounds for these fungi.
- Identify the Source: The smell is usually strongest when the AC first turns on. It often comes from the indoor unit. Check the evaporator coils, drip pan, and the blower wheel. You might see black or green fuzzy spots.
- Deep Clean: A standard cleaning might not be enough. You need an anti-fungal coil cleaner or a solution of diluted bleach (1 part bleach to 16 parts water) for non-porous surfaces like the drain pan. For coils, use a mold-specific coil cleaner. Always wear a mask and gloves when dealing with mold.
- Ensure Proper Drainage: A clogged drain line causes water to sit in the drip pan, leading to mold. Make sure the drain line is completely clear.
- Prevention: After cleaning, consider using an AC coil disinfectant or a mold inhibitor spray on the coils. Running the fan-only mode for 10-15 minutes after turning off the cooling can help dry out the coil and reduce moisture. For more information on dealing with mold, check out: How To Clean Mold From AC Unit.
Reduced Airflow
If your split AC unit is blowing air but not with the usual force, it is a sign of restricted airflow. This issue can stem from several common culprits.
- Dirty Air Filter: This is the simplest and most common cause. A clogged filter blocks air from entering the system. Clean or replace it immediately.
- Blocked Evaporator Coils: A thick layer of dust and grime on the evaporator coils acts as a barrier, preventing air from passing through freely. A thorough coil cleaning is necessary.
- Dirty Blower Wheel: If the blower wheel (the fan that pushes air) is heavily caked with dirt, its ability to move air is significantly reduced. This often requires careful manual cleaning, as described in the deep cleaning section.
- Obstructed Return Air Vent: Ensure that furniture, curtains, or other items are not blocking the return air vent, which is usually located on the indoor unit or a nearby wall.
Water Leaks from the Indoor Unit
Discovering water dripping from your indoor split AC unit is a concerning problem. This usually points to a blockage in the drainage system.
- Clogged Drain Line: This is the most frequent cause. If the drain line is clogged, the condensate water backs up in the drain pan and eventually overflows. You need to clear the drain line, as detailed in the deep cleaning section.
- Cracked Drain Pan: Less common, but possible. Inspect the drain pan for any cracks or damage that would allow water to escape. If it is cracked, it may need replacement.
- Incorrect Installation/Pitch: If the indoor unit or drain line was not installed with the correct downward slope, water will not drain properly. This might require professional adjustment.
- Frozen Evaporator Coil: If the coil freezes, ice can block the drain path or cause excess water when it melts. A frozen coil usually indicates poor airflow (dirty filter/coil) or low refrigerant. Address the underlying airflow issues first. If the coil is still freezing, it is time to call a technician.
Addressing these common issues during your regular cleaning helps maintain your split AC unit’s health and prevents minor annoyances from escalating into costly repairs.
Frequency and Professional Help: When to Clean Your Split AC and When to Call an Expert
Understanding when and how often to clean your split AC unit is as important as knowing the cleaning steps themselves. Regular maintenance can extend the lifespan of your unit, maintain efficiency, and ensure consistent comfort. However, there are also times when professional help is not just recommended, but necessary. I have learned to recognize these signals over time.
How Often Should You Clean Your Split AC Unit?
The frequency of cleaning depends on several factors:
- Air Filters: These are the most accessible parts and collect the most dust. I recommend cleaning or replacing them every 2-4 weeks, especially during peak cooling season. If you have pets, allergies, or live in a dusty area, weekly checks might be beneficial.
- Indoor Unit (Coils, Blower Fan, Drain Line): A thorough deep clean of the evaporator coils, blower fan, and drain line should be performed at least once every 6-12 months. This is often best done before the cooling season begins or at the end of it.
- Outdoor Unit (Condenser Coils, Fan): The outdoor unit should be cleaned at least once a year, typically in spring, before you start relying on your AC heavily. If you live in an area with a lot of foliage, pollen, or airborne debris, you might consider cleaning it twice a year.
- Drain Line Flushing: Even if not clogged, I suggest flushing the drain line with vinegar every 2-3 months to prevent algae and mold buildup.
Consistency is key. Small, regular cleaning efforts prevent major buildup and more complicated problems down the line.
Signs You Might Need Professional AC Help
While DIY cleaning is effective for routine maintenance, there are times when you should call in an HVAC professional. Recognizing these signs can save you from costly repairs or safety hazards.
- Unusual Noises: Any new, loud, or strange noises (grinding, squealing, banging) coming from your unit indicate an internal mechanical problem that requires expert diagnosis.
- AC Not Cooling Properly: If your unit is running but not producing cold air, or the cooling is inconsistent, it could be a sign of low refrigerant levels, a faulty compressor, or other serious issues that you cannot fix with cleaning.
- Persistent Leaks: While a clogged drain line causes most leaks, if you have cleaned the drain line and the unit still leaks, there might be an issue with the drain pan itself, a cracked coil, or improper installation.
- Electrical Problems: If your AC trips circuit breakers frequently, has frayed wires, or emits a burning smell, turn it off immediately and call a professional. Electrical issues are serious safety hazards.
- Foul Odors Persist: If musty, moldy, or even burning odors persist after you have thoroughly cleaned the unit, it indicates a deeper problem with mold growth, electrical issues, or internal component breakdown.
- High Energy Bills: A sudden spike in your energy bills without a corresponding increase in usage could mean your AC is losing efficiency, possibly due to unseen issues or wear and tear.
- Complex Disassembly Required: Some deep cleaning tasks, especially accessing certain parts of the blower wheel or diagnosing internal issues, require significant disassembly. If you are not comfortable or do not have the right tools, it is best to leave it to the experts.
- Annual Professional Tune-up: Even if you perform regular DIY cleaning, I strongly recommend scheduling a professional AC tune-up annually. Technicians can perform refrigerant checks, inspect electrical components, lubricate moving parts, and identify potential issues before they become major problems. This preventive maintenance can save you money in the long run.
By following a consistent cleaning schedule and knowing when to seek professional assistance, you ensure your split AC unit remains a reliable source of comfort for years to come.
FAQ Section
Q1: Can I use water to clean the indoor unit’s coils?
A1: You should use a no-rinse evaporator coil cleaner for indoor coils. While some professionals use low-pressure water with specific tools, it is generally not recommended for DIY. Water can damage sensitive electrical components if not applied carefully, and it may not fully remove stubborn grime. Always use products designed for indoor AC coils.
Q2: How often should I replace my split AC air filters?
A2: For optimal performance and air quality, clean reusable filters every 2-4 weeks during peak use and replace disposable filters every 1-3 months. Factors like pets, allergies, and local dust levels might require more frequent filter changes. Regular filter maintenance is crucial for efficiency.
Q3: What happens if I do not clean my split AC unit?
A3: Neglecting to clean your split AC unit leads to several issues. You will experience reduced cooling efficiency, higher energy bills, poor indoor air quality due to dust and mold, and unpleasant odors. Over time, this neglect can also shorten the lifespan of your unit and lead to costly repairs.
Q4: Is it safe to clean my AC unit by myself?
A4: Yes, it is safe to perform basic cleaning tasks on your AC unit yourself, provided you follow safety guidelines. Always disconnect power to the unit first. Wear protective gear like gloves and a mask. If any task feels too complex or involves significant disassembly, it is best to call a professional HVAC technician.
Q5: Can a dirty AC unit cause health problems?
A5: Yes, a dirty AC unit can contribute to health problems. Accumulated dust, mold, and mildew can release spores and allergens into your indoor air. This can trigger respiratory issues, allergies, and asthma symptoms. Regular cleaning improves air quality and creates a healthier living environment.
Q6: Can I use household cleaners like bleach or soap on AC coils?
A6: You should avoid using harsh household cleaners like undiluted bleach or abrasive soaps directly on AC coils. These can corrode the delicate fins and potentially damage components. Always use specialized, no-rinse coil cleaners designed for AC units. For drain lines, diluted bleach can be used cautiously to kill mold.
Conclusion
Maintaining your split AC unit is a straightforward process that offers significant rewards. By regularly cleaning the indoor and outdoor components, you ensure your system runs efficiently, saves energy, and provides cleaner, healthier air for your home. We covered everything from basic filter cleaning to deep-cleaning coils, blower fans, and drain lines, emphasizing safety every step of the way. I have personally seen how a little effort in AC maintenance prevents big headaches and expenses.
- split AC cleaning
- mini split maintenance
- AC unit cleaning guide

Todd Martin
Senior Writer
With over 15 years of experience in home renovation and design, I started HEG to share what I’ve learned with homeowners who want to create spaces that are both beautiful and functional. I’ve always believed in a hands-on approach, and over the years, I’ve picked up practical solutions that actually work. Through HEG, I aim to make home improvement more approachable, sharing real tips that help you create a home you truly love.