· Todd Martin · Home Cleaning · 21 min read
How To Clean Stained Plastic Containers
Revive Your Kitchen: How to Clean Stained Plastic Containers
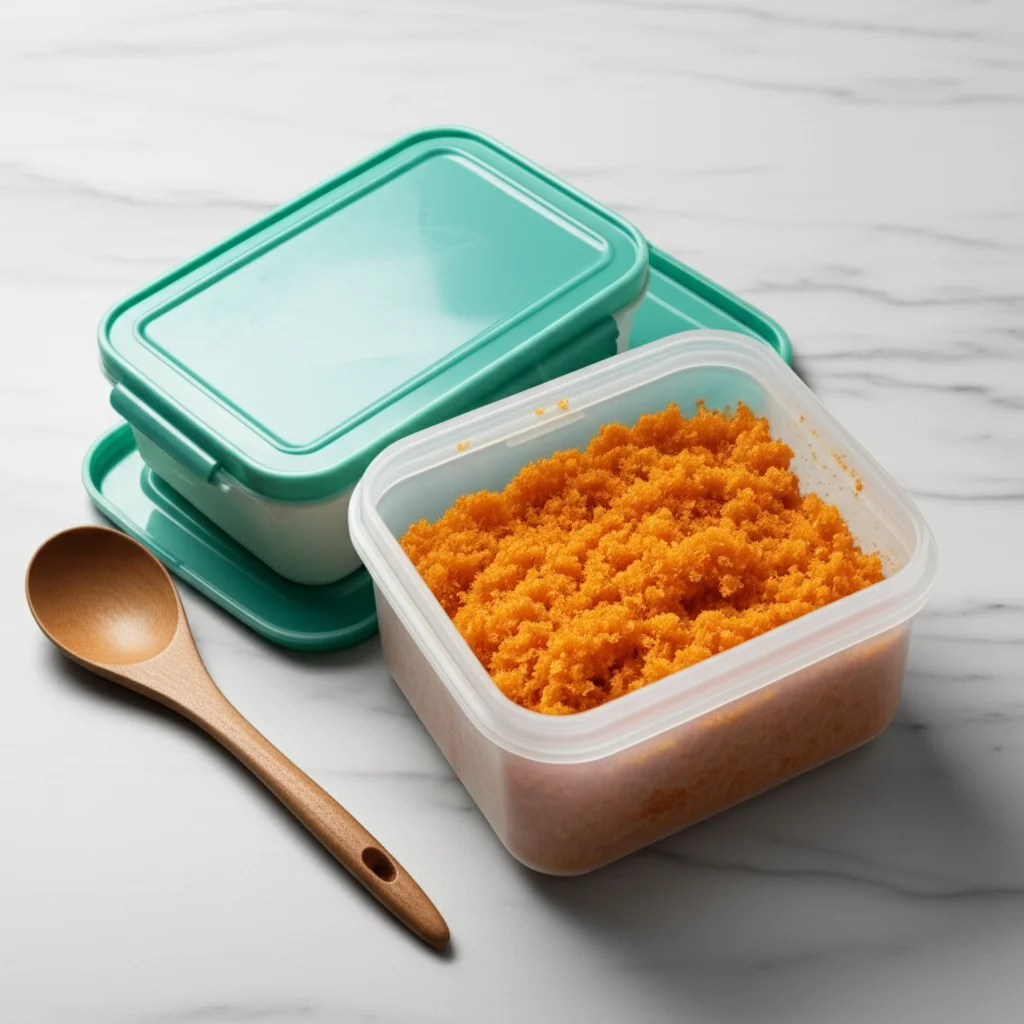
Have you ever opened your cupboard to find your once-clear plastic containers marred by stubborn orange or red stains? It is a common problem for many home cooks. These discolorations make containers look old and unclean, even after washing. Learning how to clean stained plastic containers can rescue your storage solutions.
This guide explores effective methods to remove those unsightly marks. We will cover gentle everyday solutions and powerful remedies for tough stains. You will discover practical tips to restore your plasticware. My goal is to help you keep your kitchen looking its best.
Takeaway
- Use dish soap and warm water for fresh stains.
- Apply natural methods like lemon and sun for tough discoloration.
- Baking soda paste provides gentle abrasion for set-in marks.
- White vinegar is effective for cutting through lingering stains.
- Bleach offers a strong solution for extreme cases, but use with caution.
- Prevent future stains by rinsing containers quickly after use.
How do you get food stains out of plastic containers?
You can get food stains out of plastic containers by using a combination of methods. Start with dish soap and warm water for fresh stains. For tougher marks, try natural solutions like lemon juice and sunlight. Baking soda paste or white vinegar soaks effectively lift stubborn discoloration. Bleach can remove very deep stains, but use it as a last resort.
Understanding Plastic Stains: Why They Happen
Plastic containers are kitchen staples for meal prep and leftovers. However, they often develop unsightly stains over time. These stains commonly appear as orange, red, or yellowish tints. This happens because plastic is porous. It has tiny openings on its surface.
When hot or oily foods touch plastic, the food pigments seep into these pores. Foods like tomato sauce, curry, or red pasta sauce are common culprits. The dyes from these foods absorb into the plastic. Over time, these pigments become trapped, creating permanent-looking stains. This process is called migration or leaching. The longer a pigmented food stays in contact with the plastic, the deeper the stain sets. Heat can also worsen the problem by expanding the plastic’s pores.
Different types of plastic also affect staining. Softer plastics tend to stain more easily than harder, more rigid ones. Understanding this helps us choose the right cleaning method. It also reminds us that prevention is a key part of keeping containers clean. We can find effective solutions by knowing why stains occur.
The Role of Pigments and Oils
Food pigments are often oil-soluble. This means they dissolve well in fats and oils. Many common staining foods contain both strong pigments and oils. Think of tomato sauces, which are rich in lycopene (a red pigment) and often cooked with oil. When these components come into contact with plastic, the oil helps carry the pigment deeper into the material. The pigment then binds to the plastic molecules.
This binding makes simple washing with water ineffective. The stain becomes embedded, not just sitting on the surface. That is why plain dish soap and water often fail to remove old stains. We need methods that can break down these bonds or lift the pigment out. The goal is to separate the pigment from the plastic.
Types of Plastic and Their Susceptibility
Not all plastic containers are created equal when it comes to staining. Some plastics are more prone to absorbing colors. Polypropylene (PP), often used for microwave-safe containers, tends to stain more readily. It has a slightly softer, more porous surface. Polycarbonate, which is often clear and rigid, can also stain, though sometimes less severely.
Glass containers are stain-proof because they are non-porous. This is why some people prefer them for highly pigmented foods. Knowing the type of plastic helps in choosing a cleaning approach. It also informs how we handle and store different foods. For instance, you might use an older, already stained container for tomato sauce.
Gentle First Steps: Dish Soap and Warm Water Method
Sometimes, the simplest methods are the best. For fresh or light stains, a good old-fashioned scrub with dish soap and warm water can do wonders. This method is the first line of defense against discoloration. It is also the safest for all types of plastic containers. This approach works best immediately after food contact.
Do not let food sit in the container for too long. The sooner you clean it, the better your chances of preventing a stain from setting. I always try to rinse my containers as soon as I finish my meal. This quick action can save a lot of scrubbing later on. It keeps your containers looking new for longer.
The Basics of Hand Washing
To clean your stained plastic containers, gather your supplies. You will need standard dish soap, warm water, and a non-abrasive sponge or cloth. Avoid using steel wool or harsh scrubbers. These can scratch the plastic surface. Scratches create more tiny pores, making the container even more susceptible to future staining.
Start by rinsing the container with warm water. This removes any loose food particles. Next, add a few drops of dish soap to the container. Fill it about halfway with warm water. Swish the soapy water around vigorously.
- Step 1: Rinse the container under warm water to remove loose food.
- Step 2: Add a generous squirt of liquid dish soap to the container.
- Step 3: Fill the container half-full with warm water.
- Step 4: Place the lid on the container.
- Step 5: Shake the container vigorously for 30-60 seconds. This creates a soapy foam that works on the stains.
- Step 6: Empty the soapy water and scrub any remaining residue with a soft sponge.
- Step 7: Rinse thoroughly with clean water.
For a more in-depth look at general plastic cleaning, you might find this guide helpful: How to Clean Plastic Containers.
Dishwasher Considerations
Many plastic containers are labeled “dishwasher safe.” While convenient, dishwashers might not always remove tough stains. The high heat can sometimes bake stains deeper into the plastic. This is especially true if the stains are already set. Dishwashers use hot water and strong detergents. These can sometimes worsen the issue.
I personally prefer hand washing for any containers that have held highly pigmented foods. This gives me more control over the scrubbing process. If you do use a dishwasher, place plastic containers on the top rack. This helps protect them from excessive heat. Always pre-rinse containers well before putting them in the dishwasher.
Harnessing Natural Power: Lemon and Sunshine for Stains
Sometimes, dish soap is not enough for stubborn stains. This is where natural remedies come into play. Lemon juice combined with sunlight is an incredibly effective, chemical-free method. It uses the bleaching power of citric acid and UV rays. This combination works wonders on plastic, especially for red or orange food stains.
Lemon juice acts as a natural bleaching agent. It breaks down the pigments embedded in the plastic. Sunlight, particularly UV light, further enhances this process. It helps to lighten and fade the stains. This method is gentle on your containers and safe for food contact surfaces. I have seen remarkable results using this simple trick.
Lemon Juice Application
You will need fresh lemons or bottled lemon juice for this method. Squeeze enough lemon juice to cover the stained areas inside your plastic container. If the stain is widespread, you might need to coat the entire inside surface. For very light stains, just rubbing a lemon wedge directly on the stain can work.
Make sure the lemon juice makes good contact with all the discolored spots. You can also mix a little salt with the lemon juice to create a mild abrasive paste. This paste can help scrub away some of the surface discoloration. Apply the paste and let it sit for a few minutes before the next step. This prepares the stain for the sun.
Sun Bleaching Technique
After applying the lemon juice, place the plastic container outside in direct sunlight. Leave it exposed for several hours, or even a full day. The UV rays from the sun will react with the citric acid in the lemon juice. This reaction helps to break down the stains. It effectively bleaches the plastic back to its original color.
- Step 1: Squeeze fresh lemon juice directly onto the stained areas inside the container.
- Step 2: Ensure the entire stained surface is coated with lemon juice.
- Step 3: Place the container outside in direct sunlight. Position it so the sun hits the stained parts.
- Step 4: Let it sit for at least 4-6 hours, or ideally a full day. You may turn it to ensure even sun exposure.
- Step 5: After sun exposure, wash the container thoroughly with dish soap and warm water.
- Step 6: Inspect the container; repeat the process if stains persist.
This method works particularly well for cleaning clear plastic containers. The transparent material allows UV light to penetrate effectively.
Baking Soda Boost: The Abrasive Yet Gentle Approach
When stains persist after gentle washing or lemon and sun, baking soda is your next best friend. Baking soda, also known as sodium bicarbonate, is a versatile household cleaner. It is a mild abrasive that can scrub away stubborn stains without scratching plastic. Its alkaline nature also helps to neutralize acids found in food stains.
I find baking soda incredibly effective for those orange-y sauce stains. It works by gently lifting the embedded pigments from the porous surface of the plastic. It is a natural, non-toxic option. This makes it safe for food containers. You can use it as a paste or a soak for maximum effect.
Creating a Baking Soda Paste
To make a cleaning paste, mix baking soda with a small amount of water. You want a thick consistency, similar to toothpaste. This paste allows for targeted application on the stained areas. Do not make it too watery, or it will just run off.
Apply the paste directly to the stains inside the plastic container. Use a spoon or your fingers to spread it evenly. Ensure all discolored spots are covered. For very deep stains, you can also add a few drops of dish soap to the paste. This boosts its cleaning power.
Scrubbing and Soaking Method
Once the paste is applied, let it sit for a while. For light stains, 15-30 minutes might be enough. For more stubborn discoloration, let it sit for several hours or even overnight. This gives the baking soda time to work on breaking down the stain molecules.
After the sitting period, use a soft sponge or cloth to scrub the paste into the stain. Rub in circular motions, applying gentle pressure. The mild abrasive nature of the baking soda will help lift the stain. Then, rinse the container thoroughly with warm water. For heavily stained plastic, consider a baking soda soak.
- For a soak: Fill the container with warm water. Add several tablespoons of baking soda. Stir to dissolve. Let the container soak overnight.
- For scrubbing:
- Step 1: Mix baking soda with a small amount of water to form a thick paste.
- Step 2: Apply the paste directly to the stained areas inside the plastic container.
- Step 3: Let the paste sit for at least 30 minutes, or several hours for tough stains.
- Step 4: Use a soft sponge or brush to gently scrub the stained areas with the paste.
- Step 5: Rinse the container thoroughly with warm water.
- Step 6: Repeat if necessary.
This method is also very effective for general stains on plastic surfaces, not just containers.
Vinegar’s Vigor: Cutting Through Stubborn Discoloration
White vinegar is another powerhouse in natural cleaning. Its acidic properties make it excellent for dissolving many types of stains. For plastic containers, vinegar can cut through grease and oils. It also helps to break down pigments. This makes it an effective follow-up or alternative to baking soda.
I often use vinegar for lingering food odors as well as stains. It is a great deodorizer. White vinegar is safe, affordable, and readily available. It is a staple in my cleaning kit for many tasks. Its gentle yet effective action makes it suitable for regular use.
Vinegar Soak Technique
To use white vinegar for stained plastic containers, you can create a soaking solution. Fill the stained container with undiluted white vinegar. Ensure the vinegar covers all the discolored areas. For very deep or widespread stains, you might want to fully submerge the container in a larger basin filled with vinegar.
Let the container soak for several hours or overnight. The longer it soaks, the more time the vinegar has to work on the stains. You might even see the water change color as the stains leach out. This soaking method is particularly effective for large or irregularly shaped containers where scrubbing is difficult.
Combining with Baking Soda (Volcano Method)
For really tough stains, combining vinegar with baking soda can create a powerful reaction. This is often called the “volcano method” due to the fizzing. The acid from the vinegar reacts with the alkali of the baking soda. This creates carbon dioxide gas. The bubbling action helps to lift and dislodge stains.
- Step 1: Sprinkle a generous layer of baking soda onto the bottom of the stained container.
- Step 2: Pour white vinegar over the baking soda. It will immediately begin to fizz and bubble.
- Step 3: Let the mixture sit and fizz for several minutes.
- Step 4: Once the fizzing subsides, use a soft sponge to scrub the stained areas.
- Step 5: Rinse the container thoroughly with warm water.
- Step 6: For deeply stained Tupperware or similar containers, you might need to repeat or combine with sun bleaching.
Always remember to rinse thoroughly after using vinegar. This removes any lingering scent.
Bleach Basics: When to Use (and When Not To)
Bleach is a powerful cleaning agent. It is highly effective at removing stubborn stains and sanitizing surfaces. When natural methods fail to remove deep, set-in stains from plastic containers, bleach can be a last resort. However, it requires careful handling. Bleach is a strong chemical.
It is important to understand when and how to use bleach safely. I only resort to bleach for my plastic containers if a stain is truly impossible to remove otherwise. It is not something I recommend for regular cleaning. Bleach can potentially weaken plastic over time. It can also leave a lingering chemical smell if not rinsed properly.
Dilution and Application
Never use undiluted bleach on your plastic containers. Always dilute it with water. A common ratio is one tablespoon of bleach per cup of water. This creates a strong enough solution to tackle stains without being overly harsh. Mix the solution in a well-ventilated area.
Wear gloves to protect your skin. Pour the diluted bleach solution into the stained plastic container. Make sure the solution covers all the stained areas. If the container is heavily stained, you can submerge it in a larger basin of diluted bleach.
Soaking and Rinsing Precautions
Let the stained container soak in the diluted bleach solution for 30 minutes to an hour. Do not exceed two hours, as prolonged exposure can damage the plastic. Check the stain periodically. Once the stain has faded or disappeared, immediately remove the container from the bleach solution.
The most critical step after bleaching is thorough rinsing. Rinse the container multiple times with hot water. You want to ensure no bleach residue remains. A good practice is to then wash the container with dish soap and water. This helps remove any chemical smell. Allow the container to air dry completely.
- Step 1: Work in a well-ventilated area. Wear protective gloves.
- Step 2: Mix 1 tablespoon of bleach with 1 cup of warm water in a separate bowl.
- Step 3: Pour the diluted bleach solution into the stained container, ensuring stains are covered.
- Step 4: Let the container soak for 30 minutes to 1 hour. Do not exceed 2 hours.
- Step 5: Pour out the bleach solution.
- Step 6: Rinse the container thoroughly under hot running water multiple times.
- Step 7: Wash the container with dish soap and water.
- Step 8: Air dry completely before use.
Remember, bleach is a powerful oxidizer. Use it with caution. For general cleaning of plastic items, there are many safer alternatives. For example, methods for cleaning plastic shower surfaces rarely require bleach.
Advanced Tactics: Dealing with Deeply Ingrained Stains
Some stains are just incredibly stubborn. They laugh in the face of lemon, baking soda, and even light bleach. These deeply ingrained stains often happen when highly pigmented, oily foods sit in plastic for a very long time. Or, they might be from repeated exposure to the same type of food. For these persistent marks, we need to bring out a few more tricks.
These advanced methods combine the strengths of various cleaning agents. They might involve longer soaking times or a more aggressive approach. Remember, always test any new method on an inconspicuous area first. This ensures it does not damage your specific type of plastic container.
Using Hydrogen Peroxide
Hydrogen peroxide is a milder alternative to bleach but still effective. It is an oxygen-based bleaching agent. It works by breaking down organic matter. This makes it good for lifting food stains. It is also safer for the environment than chlorine bleach.
To use hydrogen peroxide, pour a 3% hydrogen peroxide solution into the stained container. Ensure the stains are fully submerged. Let it soak for several hours or overnight. For tougher stains, you can also add a small amount of baking soda to create a fizzing action. Rinse thoroughly with water and then wash with dish soap.
The “Newspaper Ball” Method (for oily stains)
This trick is particularly good for oily, greasy stains that also carry color. It uses the absorbent nature of newspaper. The paper helps to absorb the oil that carries the pigment. This makes it easier to clean away the actual stain.
- Step 1: Crumple up a piece of newspaper into a loose ball.
- Step 2: Place the newspaper ball inside the stained plastic container.
- Step 3: Add a few drops of dish soap directly onto the newspaper.
- Step 4: Add a small amount of warm water, just enough to moisten the newspaper.
- Step 5: Close the lid tightly.
- Step 6: Shake the container vigorously for 1-2 minutes. The newspaper acts as an abrasive, scrubbing the stains and absorbing the oil.
- Step 7: Empty the container, discard the newspaper, and wash normally with dish soap and water.
This method is surprisingly effective. It works because the newspaper fibers are rough enough to scrub. They are also absorbent enough to soak up stubborn grease. This principle is similar to how we might clean cutting board plastic using abrasive elements.
Specialized Plastic Cleaners
For some very specific or unusual stains, you might consider commercially available plastic cleaners. These are often formulated with specific chemicals to break down tough residues. Look for products designed for plastic, rather than general-purpose cleaners. Always read the instructions carefully.
Test the cleaner on a small, hidden spot first. This checks for any discoloration or damage to the plastic. Some specialized cleaners might contain stronger solvents. These could potentially harm certain types of plastic. Use them only when other methods have failed.
Preventing Future Stains: Best Practices for Container Care
The best way to deal with stained plastic containers is to prevent them from happening in the first place. A little proactive care goes a long way. Implementing simple habits can significantly extend the life and appearance of your plasticware. It saves you time and effort in the long run.
I have found that consistent prevention is far easier than trying to remove deeply set stains. It keeps my containers looking pristine. You can keep your plastic food containers looking clear and clean for years to come with just a few mindful steps.
Immediate Rinsing and Washing
This is perhaps the most crucial prevention tip. As soon as you finish using a plastic container, rinse it out. Do not let food residue, especially highly pigmented sauces, sit in it. A quick rinse under cold water can remove most of the offending food particles.
Even better, wash the container immediately with dish soap and warm water. This prevents the pigments from absorbing into the plastic’s pores. If you cannot wash it right away, at least give it a thorough rinse. This will buy you some time.
Using Barriers for Staining Foods
When storing highly pigmented foods like tomato sauce, curry, or chili, consider adding a barrier. Lining the container with a layer of plastic wrap or aluminum foil before adding food can prevent direct contact. The food will touch the barrier instead of the plastic. This completely avoids stain transfer.
Alternatively, consider using non-plastic containers for such foods. Glass containers are completely non-porous. They will never stain. I often reserve my glass containers for my red sauces. This protects my clear plastic ones.
The Oil Barrier Trick
This is a clever trick I learned years ago. Before putting staining food into a plastic container, coat the inside lightly with cooking oil. Use a neutral oil like vegetable or canola oil. Just a thin film is enough.
The oil acts as a barrier between the food pigments and the plastic surface. It fills the tiny pores in the plastic. This prevents the food’s dyes from entering. When you wash the container, the oil (along with the stain) washes away easily. It is a simple step that can make a big difference. This also helps with general cleaning of plastic containers for everyday use.
Proper Drying and Storage
After washing, ensure your plastic containers are completely dry before storing them. Storing damp containers can lead to mildew growth and unpleasant odors. While not a stain in the typical sense, mold can certainly discolor plastic. For more on this, you can check out guides like how to clean mold off plastic.
Store containers with their lids off, or at least slightly ajar, to allow for air circulation. This prevents moisture buildup and keeps them fresh. Proper drying also helps ensure no water spots are left behind, which can sometimes look like faint stains on clear plastic.
FAQ Section
Can I use a dishwasher to clean stained plastic containers?
While many plastic containers are dishwasher safe, dishwashers might not always remove tough stains effectively. The high heat can sometimes bake stains deeper into the plastic. For best results, pre-rinse heavily stained containers. Hand washing with specific stain removal methods usually works better for stubborn discoloration.
Are these methods safe for all types of plastic?
Most methods mentioned, like dish soap, lemon, baking soda, and vinegar, are safe for common food-grade plastics. Always exercise caution with bleach. Test any new method on an inconspicuous area first. Some harsh chemicals might damage certain types of plastic or reduce their lifespan.
How can I prevent stains from setting in the first place?
The best prevention is immediate rinsing and washing of containers after use. For highly pigmented foods, coat the inside of the container with a thin layer of cooking oil before adding food. Alternatively, use plastic wrap as a barrier. Consider using glass containers for very staining foods like tomato sauce.
Does boiling water help remove stains from plastic?
Boiling water can sometimes help soften plastic and potentially loosen surface stains. However, extreme heat can also cause plastic to warp or degrade. It might even set some stains deeper. It is generally not recommended as a primary stain removal method. Stick to the suggested cleaning agents for safer results.
What about oily residues, not just color stains?
Oily residues can be challenging. Baking soda paste is excellent for cutting through grease. The “newspaper ball” method is also highly effective for absorbing oils while providing a gentle scrub. Dish soap is designed to break down fats, so a good soapy scrub is always a great start for oily messes.
Is it safe to use bleach on food containers?
Using bleach on food containers requires extreme caution. Always dilute bleach heavily and rinse the container multiple times afterward. Follow up with a thorough wash with dish soap. Bleach is effective for tough stains and sanitization, but it can leave residues. Use it as a last resort, not for routine cleaning.
Conclusion
Cleaning stained plastic containers might seem like a never-ending battle. However, with the right techniques, you can restore your plasticware to its former glory. We have explored a range of effective methods, from simple dish soap and water to natural solutions like lemon and sun, and powerful agents like baking soda, vinegar, and, when necessary, bleach. Each method offers a unique approach to tackling different types of stains.
My goal was to provide you with a comprehensive toolkit. You can now confidently tackle any stain your plastic containers might throw at you. Remember, prevention is key to keeping your plastic containers looking their best. A quick rinse, an oil barrier, or choosing the right container for certain foods can save you a lot of effort later. By regularly applying these tips, you will maintain a clean and organized kitchen.
Do not let stained plastic containers clutter your kitchen or dampen your spirits. Take action today and revive your plasticware. Your pristine food storage solutions await.
- plastic container cleaning
- stain removal
- food stains
- kitchen organization
- home remedies
- plastic maintenance

Todd Martin
Senior Writer
With over 15 years of experience in home renovation and design, I started HEG to share what I’ve learned with homeowners who want to create spaces that are both beautiful and functional. I’ve always believed in a hands-on approach, and over the years, I’ve picked up practical solutions that actually work. Through HEG, I aim to make home improvement more approachable, sharing real tips that help you create a home you truly love.