· Todd Martin · Home Cleaning · 22 min read
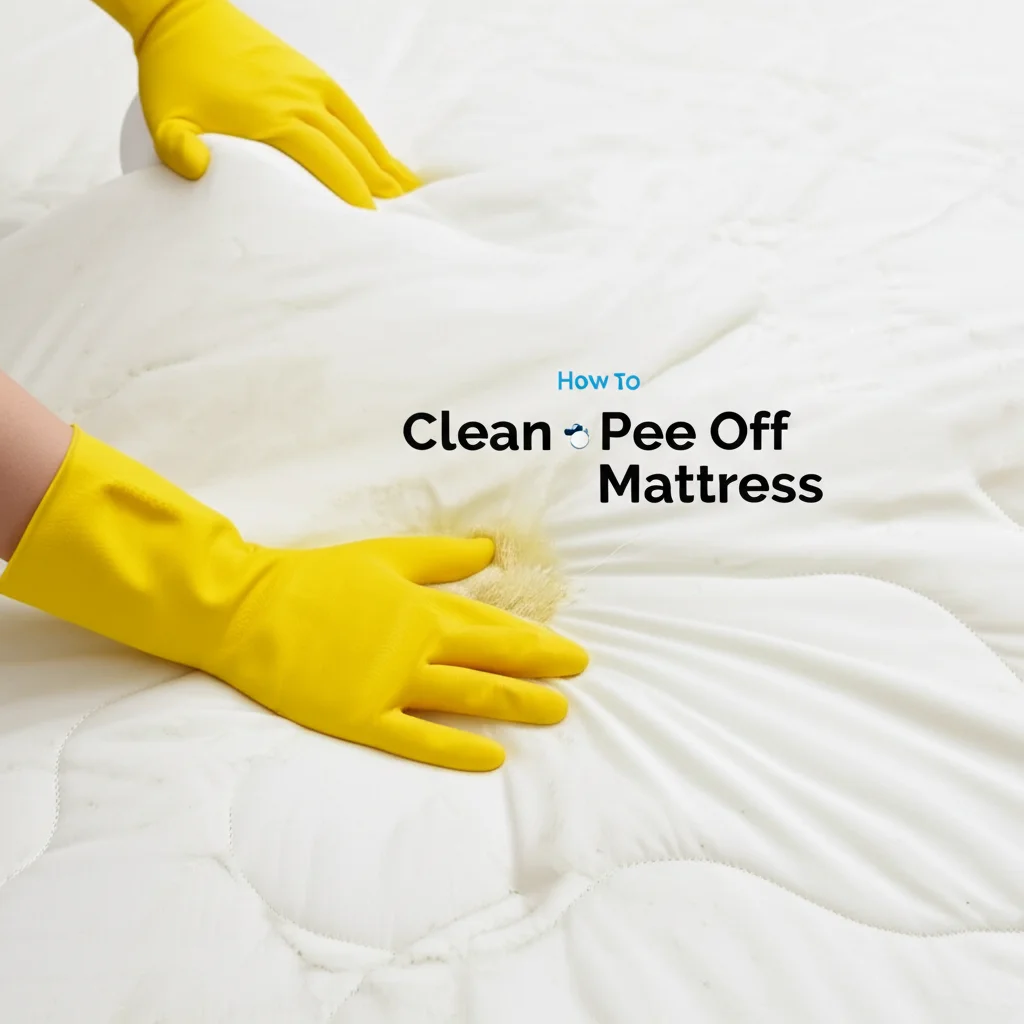
How To Clean Urine From A Mattress

How To Clean Urine From A Mattress: A Complete Guide
Waking up to a wet mattress is never fun. Whether it is from a child’s accident, a pet mistake, or a sick adult, urine on your mattress presents a unique cleaning challenge. The smell can linger, and the stain can set if not handled quickly. Knowing how to clean urine from a mattress properly protects your investment and ensures a hygienic sleep environment.
You need effective methods to tackle both the stain and the smell. This guide will walk you through a clear, step-by-step process. We will cover immediate actions, gather essential cleaning supplies, and explain different cleaning approaches. You will also learn how to dry your mattress thoroughly and prevent future accidents. My goal is to help you restore your mattress to its fresh state.
Takeaway
- Act quickly to blot fresh urine and prevent it from soaking deeper into the mattress.
- Use a combination of absorbent materials, cleaning solutions, and odor neutralizers.
- Ensure the mattress dries completely to prevent mold or mildew growth.
Clear Answer
To clean urine from a mattress, blot the area immediately to absorb as much liquid as possible. Apply a cleaning solution of white vinegar, baking soda, or an enzyme cleaner, allowing it to work on the stain and odor. After treatment, vacuum up residue and air dry the mattress completely to ensure no moisture remains.
Act Fast: Immediate Steps to Clean Fresh Urine
A urine accident on your mattress needs immediate attention. The faster you act, the better your chances are of preventing the stain from setting and the odor from permeating. Ignoring it makes the problem much harder to fix later. My first step is always to gather what I need and start blotting.
Do not scrub the urine. Scrubbing pushes the liquid deeper into the mattress fibers. Instead, you want to absorb it. This initial action is crucial for a successful cleaning outcome. It also makes subsequent steps easier.
Blotting the Urine
Grab a thick towel or a stack of paper towels right away. Press down firmly on the wet spot. Apply pressure to draw the urine out of the mattress. You will see the towel absorb the liquid.
Continue this process with fresh sections of the towel or new paper towels until no more liquid transfers. You are essentially “blotting dry” the area. This step removes the bulk of the urine. It reduces the amount of moisture that needs to evaporate later. This also minimizes the area the stain might spread to.
Stripping the Bed
Remove all bedding, including sheets, blankets, mattress pads, and protectors. Wash these items immediately in hot water with a cup of white vinegar. The hot water and vinegar help sanitize them and remove any urine smell. A pre-soak with an enzyme-based laundry detergent can also be very effective for these items.
Delaying this step allows the urine to sit on the fabric, making stains and odors harder to remove. You want a completely clear mattress surface to work on. This ensures no other fabric hinders your cleaning efforts.
Protecting the Floor
Urine can seep through the mattress and onto the box spring or even the floor. Place a thick layer of old towels or a plastic sheet underneath the affected area of the mattress. This protects your floor or box spring from further damage. It also makes cleanup easier if any liquids drip through during the cleaning process. This small step prevents a small accident from becoming a bigger chore.
Gather Your Tools: Essential Supplies for Urine Removal
Before you begin the actual cleaning process, gather all the necessary supplies. Having everything within reach saves time and ensures a smooth operation. You do not want to stop mid-clean to find a missing item. The right tools make a big difference in effectively cleaning urine from a mattress.
Using household items is often enough for most urine stains. These items are typically safe for mattress fabrics. They also offer a natural way to tackle odors. Sometimes, you might need a specialized product.
Basic Household Cleaning Agents
You probably have most of these items already in your pantry or laundry room. These are simple yet powerful cleaners. They work well for fresh and even older urine stains.
- White Vinegar: This acidic liquid neutralizes ammonia in urine. It acts as a natural disinfectant and deodorizer. I always keep a large bottle on hand for cleaning.
- Baking Soda: A fantastic odor absorber. It helps draw out moisture and smells from the mattress. It is gentle on fabrics but tough on odors.
- Hydrogen Peroxide (3% solution): This is a mild bleach that helps break down urine components. It is great for removing yellow stains. Test it in an inconspicuous spot first to ensure it does not bleach your mattress fabric.
- Dish Soap: A few drops of mild dish soap can help lift the urine stain. It acts as a surfactant, breaking down the oils in the urine.
- Clean Cloths or Paper Towels: You need plenty of these for blotting and applying solutions. I prefer white cloths to avoid color transfer.
- Spray Bottle: Essential for evenly applying liquid solutions to the affected area.
Enzyme Cleaners: The Professional Touch
For stubborn stains, strong odors, or old accidents, an enzyme cleaner is a game-changer. These cleaners contain special enzymes that break down the uric acid crystals found in urine. Regular cleaners often cannot do this. Uric acid crystals are what cause that lingering urine smell.
Enzyme cleaners are especially effective for pet urine, which often has a more potent odor. They are safe for most mattress types. Always follow the product instructions carefully. They often need time to work their magic. Using a product like this is often how professionals approach tough problems. If you have tried other methods to clean stains from a mattress with baking soda and it is not working, an enzyme cleaner might be the next step.
Other Useful Items
A few other tools can assist you in your mattress cleaning quest. These are not always essential but can make the job easier or more effective.
- Rubber Gloves: Protect your hands from cleaning solutions.
- Stiff Brush (optional): A soft-bristled brush can help work solutions into deeper stains, but use it gently.
- Vacuum Cleaner (with upholstery attachment): Crucial for removing dry baking soda and other residues.
- Fan or Hair Dryer: Speeds up the drying process, preventing mold and mildew. Proper drying is key to finishing the job.
With these supplies ready, you are prepared to effectively clean and deodorize your mattress. The next step is applying these solutions.
Step-by-Step Guide: How to Clean Urine Stains
Cleaning urine from a mattress is a methodical process. Following these steps ensures you treat the stain and the odor effectively. My approach combines absorbent materials with cleaning solutions for the best results. Remember, patience is key.
This guide provides a universal method that works for most mattress types. However, some materials like memory foam require specific care, which we will discuss later. For general stains on a mattress, this is a solid approach.
Preparing the Area
First, make sure you have already blotted up as much fresh urine as possible and stripped the bed. You should have old towels or plastic sheeting protecting the floor underneath the mattress. Good ventilation is also important. Open windows or turn on a fan to air out the room.
Method 1: Vinegar and Baking Soda Approach
This is my go-to natural method. It is highly effective for both fresh and moderately old urine stains and odors. It combines the neutralizing power of vinegar with the absorbing power of baking soda.
- Spray with Vinegar Solution: Mix equal parts white vinegar and water in a spray bottle. Lightly mist the urine-affected area. Do not oversaturate the mattress. The vinegar helps break down the uric acid and neutralizes the odor. For tough stains, you can use undiluted vinegar.
- Blot Again: After letting the vinegar sit for 5-10 minutes, blot the area with clean towels. This removes excess vinegar and brings more urine out.
- Sprinkle Baking Soda: Generously sprinkle baking soda over the entire treated area. Ensure the stain is completely covered with a thick layer. The baking soda will absorb the remaining moisture and odor. Let it sit for at least 8-10 hours, or overnight. The longer it sits, the more effective it will be. I often let it sit for 24 hours if the odor is strong.
- Vacuum the Baking Soda: Once the baking soda is completely dry, vacuum it up thoroughly using your vacuum’s upholstery attachment. You might need to go over the area several times to remove all the powder. This step physically removes the odor-absorbing baking soda and any residue. For more tips on this, refer to how to clean stains off mattress with baking soda.
Method 2: Hydrogen Peroxide and Dish Soap Spot Treatment
This method is excellent for tackling yellow stains that might remain after the vinegar and baking soda treatment, or as a primary method for older, set-in stains. Hydrogen peroxide is a mild bleaching agent.
- Prepare Solution: In a spray bottle, mix 8 ounces of 3% hydrogen peroxide with 3 tablespoons of baking soda and 2-3 drops of liquid dish soap. Gently swirl to combine; do not shake vigorously, as hydrogen peroxide can foam.
- Apply to Stain: Lightly spray the solution directly onto the urine stain. Cover the entire affected area.
- Allow to Sit: Let the solution sit on the stain for 5-10 minutes. The hydrogen peroxide will begin to break down the chromogens that cause the yellow color.
- Blot and Air Dry: Blot the area with a clean, dry cloth until almost dry. Do not rinse the mattress. Allow the mattress to air dry completely. The hydrogen peroxide solution will evaporate, leaving behind clean fabric. For stubborn yellow stains, you might repeat this process. You can find more detailed guidance on how to clean yellow stains from mattress.
Method 3: Enzyme Cleaner Application
For very strong odors or old, persistent urine stains, an enzymatic cleaner is often the most effective solution. These cleaners break down the uric acid crystals that cause the lingering odor.
- Pre-Test: Always pre-test the enzyme cleaner on an inconspicuous part of your mattress. This ensures it does not cause discoloration.
- Saturate the Area: Apply the enzyme cleaner according to the product instructions. You typically need to saturate the affected area to allow the enzymes to reach all the urine crystals.
- Allow Dwell Time: Let the cleaner sit for the recommended time, usually 10-15 minutes or longer. Some products recommend keeping the area moist for several hours. This allows the enzymes to work fully.
- Blot Excess: After the dwell time, blot up any excess liquid with a clean cloth. Do not rinse the mattress.
- Air Dry: Allow the mattress to air dry completely. The enzymes will continue to work as long as they are moist.
Each of these methods offers a powerful way to clean urine stains. Choose the one that best suits the severity of your stain and your available supplies. For general stain cleaning, these methods are similar to how you might clean stains from a mattress.
Tackling Stubborn Odors: Removing Urine Smell
Urine stains are one problem, but the lingering odor is another. Even if the visual stain is gone, a strong urine smell can persist. This is usually due to uric acid crystals that remain embedded in the mattress fibers. These crystals release a gas as they break down, creating the unpleasant smell. My focus here is on odor elimination, not just surface cleaning.
Effective odor removal requires specific agents that break down these crystals or absorb the smell. Simple scrubbing with water often makes the smell worse. It spreads the crystals around. For tough odors, you need specific strategies.
The Power of Baking Soda
Baking soda is a remarkable natural deodorizer. It works by absorbing odors rather than just masking them. It is non-toxic and safe for most mattress materials. I use it generously for any lingering smells.
- Generous Application: After cleaning the visible stain, sprinkle a very generous amount of dry baking soda over the entire affected area. Make sure it is a thick, even layer. You want to cover the stain and a little beyond.
- Extended Dwell Time: Let the baking soda sit for at least 24 hours. For really stubborn odors, leave it for 48 hours or even longer. The longer it sits, the more odor it absorbs. During this time, the baking soda draws moisture and odor molecules out of the mattress.
- Vacuum Thoroughly: Once the baking soda is completely dry, vacuum it up with a strong vacuum cleaner and an upholstery attachment. Go over the area several times to ensure all the powder is removed. You will notice a significant reduction in the odor. This step is crucial for removing the odor-laden baking soda.
Enzyme Cleaners for Deep Odor Elimination
As mentioned before, enzyme cleaners are superstars for odors. They contain living enzymes that “eat” or break down organic matter, including the uric acid crystals in urine. This means they do not just cover the smell; they eliminate its source. They are very effective for persistent smells, especially cat pee out of mattress.
- Saturate the Source: Identify the exact areas where the odor is strongest. Apply the enzyme cleaner directly to these spots. You need to use enough cleaner so that it penetrates as deeply as the urine did. This ensures the enzymes reach all the odor-causing crystals.
- Follow Product Directions: Each enzyme cleaner has specific instructions for dwell time. Some require keeping the area moist for several hours, others for just 15-30 minutes. Use a damp towel or plastic wrap to cover the area if needed, to prevent the cleaner from drying too quickly.
- Allow to Air Dry: After the recommended time, blot up any excess liquid. Then, allow the mattress to air dry completely. The enzymes continue to work as long as the area is moist. This process can take a day or two.
Air Circulation and Sunlight
Fresh air and sunlight are natural deodorizers. After cleaning and treating with baking soda or an enzyme cleaner, move your mattress to a well-ventilated area. If possible, take it outside on a sunny day.
- Indoor Ventilation: Open windows, use fans, or a dehumidifier to circulate air around the mattress. This helps dissipate any remaining odors and speeds up drying.
- Sunlight Exposure: UV rays from the sun are natural disinfectants. They can help kill bacteria and break down residual odor molecules. Let the mattress sit in direct sunlight for several hours on both sides if possible. This is a simple, free way to help your mattress smell fresh again.
By combining these methods, you can effectively tackle even the most stubborn urine odors. It requires patience and proper application, but the result is a fresh-smelling mattress.
Specific Scenarios: Pet Urine, Human Urine, and Mattress Types
Cleaning urine from a mattress can vary slightly depending on the source of the urine and the type of mattress. Understanding these nuances helps you choose the most effective approach. My experience shows that what works for one situation might need slight adjustments for another.
Addressing these specific scenarios ensures a thorough clean. It also prevents damage to certain mattress materials. Every mattress type has its own characteristics.
Pet Urine vs. Human Urine
While the general cleaning principles remain similar, pet urine, especially cat urine, often presents a greater challenge. This is due to its higher concentration of uric acid and ammonia, which leads to a stronger, more persistent odor.
- Cat Urine: Cat urine is notorious for its pungent smell. The high concentration of uric acid crystals means that standard cleaners often do not break down the odor source. For cat urine, an enzyme cleaner is almost always the most effective solution. These cleaners specifically target and break down the uric acid. You can find detailed steps on how to clean cat pee out of mattress. Ensure you saturate the area enough to reach all the uric acid crystals.
- Dog Urine: Dog urine can also be strong, but generally less potent than cat urine. Enzyme cleaners are still highly recommended for dog urine. Baking soda and vinegar methods can work for smaller, fresh accidents.
- Human Urine: Human urine, while still smelly, is typically easier to clean and deodorize. The vinegar and baking soda method is often sufficient for human urine. For older or larger human urine accidents, an enzyme cleaner can provide extra assurance.
For both pet and human urine, acting quickly remains the golden rule. The longer the urine sits, the deeper it penetrates and the more difficult the odor is to remove.
Cleaning Different Mattress Types
The construction of your mattress can influence the cleaning method you use. Some materials are more sensitive to moisture than others. You must choose your cleaners carefully.
- Memory Foam Mattresses: These mattresses are dense and absorb liquids readily. Over-saturating a memory foam mattress with liquid can damage its structure. It can also lead to mold or mildew inside the foam, which is very difficult to remove.
- Method: Blot quickly and thoroughly. Use cleaning solutions sparingly. Apply them as a light mist rather than drenching. For how to clean memory foam mattress, focus on surface cleaning and quick drying. Avoid strong chemical cleaners that might degrade the foam. Enzyme cleaners designed for sensitive materials are a good choice.
- Pillow Top Mattresses: Pillow top mattresses have an extra layer of padding. This padding can trap moisture and odors.
- Method: Treat the stain on the pillow top layer first. Blot extensively. Use cleaning solutions that do not require deep saturation. The challenge is ensuring the padding underneath dries completely. Good airflow is critical. For more on this, see how to clean pillow top mattress.
- Innerspring Mattresses: These are the most common type and generally more forgiving when it comes to moisture.
- Method: You can be a bit more liberal with cleaning solutions. However, still avoid drenching the mattress to prevent mold inside the springs. The vinegar and baking soda method works very well.
- Hybrid Mattresses: These combine springs with foam layers.
- Method: Treat them similarly to memory foam mattresses regarding liquid application. Focus on cleaning the top layers while being careful not to over-saturate the foam components.
Always test any cleaning solution on an inconspicuous spot first, regardless of the mattress type. This ensures it does not cause discoloration or damage. Understanding your mattress material helps you tailor your cleaning approach for optimal results.
Drying and Disinfecting: Final Steps for a Clean Mattress
Cleaning the stain and neutralizing the odor are only part of the process. Properly drying and disinfecting your mattress is crucial. Failing to dry the mattress completely can lead to serious problems like mold growth. Mold can cause health issues and permanently damage your mattress. Disinfection ensures you kill any remaining bacteria from the urine.
My final steps always focus on ensuring the mattress is dry and sanitary. This prevents future problems. It also makes sure the mattress is safe for sleeping again.
Ensuring Complete Dryness
This is arguably the most critical step after cleaning. Even a slightly damp mattress can become a breeding ground for mold and mildew. These can produce foul odors and negatively affect air quality.
- Air Circulation: After cleaning, set up fans directly pointing at the treated area. A floor fan or box fan works well. Open windows to maximize airflow in the room. Good air circulation helps evaporate moisture quickly.
- Sunlight (if possible): If you can, move the mattress outside on a sunny, low-humidity day. Direct sunlight is a natural dryer and disinfectant. Position the mattress so both sides get ample sun exposure. Flip it periodically to ensure even drying.
- Dehumidifier: In humid climates or if you cannot move the mattress outside, a dehumidifier in the room can greatly speed up the drying process. It pulls moisture from the air, which helps dry the mattress faster.
- Patience: Do not rush this step. It can take anywhere from several hours to a few days for a mattress to completely dry, depending on the severity of the saturation, humidity, and airflow. Press your hand firmly on the treated area. If it feels cool to the touch, it is still damp. You need it to feel completely dry and at room temperature.
Disinfecting the Mattress
While cleaning solutions like vinegar and enzyme cleaners have some disinfecting properties, a dedicated step ensures maximum hygiene. Urine contains bacteria that you want to eliminate.
- Alcohol Spray (Rubbing Alcohol): Once the mattress is almost dry, lightly mist the cleaned area with rubbing alcohol (70% isopropyl alcohol). Alcohol is a powerful disinfectant. It also evaporates very quickly, minimizing added moisture. It kills bacteria and helps with any lingering odors. Allow it to air dry completely.
- Disinfectant Spray (Mattress Safe): You can also use a commercial fabric disinfectant spray. Choose one specifically labeled safe for fabrics or mattresses. Ensure it is non-toxic and leaves no residue. Spray lightly over the affected area and allow to air dry. Always check the label for specific instructions and warnings.
Final Check
Before putting your bedding back on, perform a final inspection.
- Smell Check: Lean in and sniff the treated area. Are there any lingering urine odors? If so, you may need to reapply baking soda or an enzyme cleaner and repeat the drying process.
- Visual Check: Is the stain completely gone? If not, you might need another spot treatment. For more on general stain removal, see how to clean stains from a mattress.
- Dryness Check: Feel the area again. Is it absolutely dry to the touch? Press down hard. Any coolness or dampness means more drying time is needed.
Only when the mattress is completely dry, odorless, and stain-free should you replace your mattress protector and bedding. This thorough approach ensures your mattress is clean, sanitized, and ready for use. This detailed process is also very similar to how one might clean urine from a couch, given the similar fabric nature.
Prevention is Key: Protecting Your Mattress from Future Accidents
Cleaning urine from a mattress is a chore nobody enjoys. The best solution is to prevent accidents from happening in the first place. Taking proactive steps can save you time, effort, and your mattress. My focus here is on smart preventative measures.
These strategies protect your mattress from various spills, not just urine. They are simple additions to your bedding routine. Investing a little now saves a lot of hassle later.
Invest in a Quality Mattress Protector
This is the single most important step you can take. A good mattress protector acts as a barrier between your mattress and any liquids. It is much easier to wash a protector than to clean an entire mattress.
- Waterproof and Breathable: Look for a protector that is explicitly labeled waterproof. Many options are also breathable, which prevents the mattress from feeling hot. A quality protector prevents urine from soaking into the mattress.
- Full Encasement: For maximum protection, consider a full encasement mattress protector that zips around the entire mattress. This protects all sides, including the bottom. It also offers protection against dust mites and allergens.
- Regular Washing: Even if there are no accidents, wash your mattress protector regularly according to its care instructions. This maintains its effectiveness and keeps it clean. Cleaning a mattress protector is a simple task that extends its life.
Establish Bedtime Routines (for Children and Pets)
For children or pets prone to accidents, routines can make a big difference. Consistency helps train bladders and reduce incidents.
- Toilet/Potty Breaks: Ensure children and pets use the bathroom right before bed. Make it the last thing they do before settling down for the night.
- Limit Liquids: Reduce liquid intake for children and pets in the hour or two leading up to bedtime. This lessens the chances of a full bladder during sleep.
- Regular Potty Schedule (Pets): For puppies or older pets, stick to a consistent potty schedule throughout the day and evening. This helps regulate their bladder.
Consider Training Pads or Doggie Diapers
Sometimes, accidents are unavoidable, especially during potty training or for older pets. These tools offer an extra layer of protection.
- Disposable or Reusable Pads: Place absorbent training pads under the fitted sheet where accidents are most likely to occur. These can absorb liquid before it reaches the mattress protector. They are easy to dispose of or wash.
- Pet Diapers/Wraps: For pets, doggie diapers or belly bands can be effective, especially for unsupervised night times. They contain any accidents, protecting your furniture and mattress.
Address Underlying Issues
If accidents are a frequent occurrence, especially with older adults or children, it might be worth investigating if there is an underlying medical issue.
- Consult a Doctor/Vet: Persistent bedwetting in children or sudden incontinence in adults or pets warrants a visit to a healthcare professional. They can rule out medical conditions that contribute to the accidents. Addressing the root cause is the most effective long-term prevention strategy.
By implementing these preventive measures, you can significantly reduce the likelihood of urine accidents on your mattress. This proactive approach saves you from the hassle of cleaning and helps maintain a healthy sleep environment.
Frequently Asked Questions
How do you get old urine stains out of a mattress?
Getting old urine stains out of a mattress requires persistent effort. First, re-wet the stain slightly with plain water. Then, apply a paste of baking soda and a small amount of water or a hydrogen peroxide/dish soap solution. Let it sit for several hours or overnight. For very old, set-in stains, an enzyme cleaner is often the most effective solution. Ensure the mattress dries completely after treatment.
Does vinegar or baking soda work better for urine?
Both vinegar and baking soda are excellent for cleaning urine, but they serve different purposes. Vinegar neutralizes the ammonia in urine and acts as a disinfectant. Baking soda excels at absorbing odors and drawing out moisture. For best results, use them together: spray with a vinegar solution, blot, then generously apply baking soda and let it sit before vacuuming. This combination tackles both the stain and the odor effectively.
Can I use bleach on a urine stain on a mattress?
No, you should not use bleach on a urine stain on a mattress. Bleach can damage mattress fabric, cause discoloration, and potentially degrade the foam or other materials inside. It also does not effectively remove the uric acid crystals responsible for the lingering urine odor. Stick to safer alternatives like white vinegar, hydrogen peroxide (3%), or enzyme-based cleaners
- mattress cleaning
- urine stain removal
- odor elimination

Todd Martin
Senior Writer
With over 15 years of experience in home renovation and design, I started HEG to share what I’ve learned with homeowners who want to create spaces that are both beautiful and functional. I’ve always believed in a hands-on approach, and over the years, I’ve picked up practical solutions that actually work. Through HEG, I aim to make home improvement more approachable, sharing real tips that help you create a home you truly love.