· Todd Martin · Home Appliances Maintenance · 21 min read
How To Clean Washer Machine Front Loader

Clean Your Front Loader Washer: A Complete Guide
Maintaining a clean washing machine is crucial for fresh laundry. Many people wonder how to clean washer machine front loader appliances properly. Front-loading washing machines are popular, but they can develop odors and mold if not cared for correctly. This guide will walk you through a comprehensive cleaning process. We will cover the drum, gasket, dispenser, and filter. You will learn practical steps to keep your front loader fresh and efficient.
Front loader washing machines are excellent for saving water and energy. However, their design can trap moisture. This trapped moisture often leads to mold, mildew, and unpleasant smells. Over time, detergent residue and fabric softener can also build up inside the machine. These buildups hinder performance and transfer grime to your clothes. Regular cleaning solves these problems. It ensures your machine lasts longer and your laundry smells truly clean. I will share my best tips and methods to keep your front loader in top condition.
Takeaway
To ensure your front loader washing machine remains fresh and performs optimally, focus on these key areas:
- Drum Cleaning: Run a hot cycle with a powerful cleaning agent.
- Gasket Care: Thoroughly wipe down and dry the rubber seal after each use.
- Dispenser Maintenance: Regularly clean the detergent and fabric softener trays.
- Drain Filter Check: Periodically clear the drain pump filter of debris.
- Preventative Habits: Leave the door ajar and wipe surfaces after every wash.
A clean front loader means fresh laundry and a longer-lasting appliance.
Clear Answer to the Main Query
To effectively clean your front loader washing machine, run a hot cycle with bleach, vinegar, or a commercial cleaner. Focus on scrubbing the rubber gasket, cleaning the detergent dispenser, and clearing the drain pump filter. These steps eliminate mold, mildew, and odors.
Understanding Why Your Front Loader Needs Regular Cleaning
Front-loading washing machines are a modern marvel for laundry. They offer efficiency and gentle fabric care. Yet, their unique design means they need specific cleaning attention. Unlike top loaders, front loaders use less water. This can leave more residue inside the drum. The horizontal drum also means gravity works differently. Water can pool in certain areas, particularly around the door seal. This creates a prime environment for unwelcome guests.
The confined space and reduced water volume contribute to problems. Over time, detergent, fabric softener, and dirt from clothes accumulate. This sticky mix clings to internal surfaces. If not regularly removed, it becomes a food source for bacteria and fungi. You might notice a musty smell emanating from your laundry room. This is a clear sign your machine needs a deep clean. Addressing these issues early prevents them from worsening. It keeps your clothes smelling truly clean, not just covered by detergent fragrance.
The Problem of Mildew and Odor
Mildew and mold are the primary culprits behind unpleasant smells in front loader washing machines. These organisms thrive in dark, damp environments. The rubber gasket around the door is particularly prone to mold growth. Water and lint often get trapped in its folds. This creates an ideal breeding ground for mildew. Each time you close the washer door, you seal in moisture. This allows mold spores to multiply rapidly.
When mold builds up, it produces a distinctive, earthy odor. This smell can transfer to your freshly washed clothes. It makes them smell less than clean, even right out of the machine. Beyond the smell, mold can also cause allergic reactions in sensitive individuals. It can even leave dark, unsightly stains inside your machine. Preventing and removing mold is crucial for a hygienic washing environment. Regular cleaning cycles and proper drying are essential. This will help you keep the mildew at bay. How to clean mold from washing machine can offer more detailed steps for this specific issue.
Residue Buildup and Performance
Beyond mold, residue buildup is another significant issue for front loaders. Detergents, fabric softeners, and hard water minerals leave behind a film. This film coats the drum, hoses, and dispenser trays. Over time, this residue hardens and can become difficult to remove. It can also clog spray nozzles and drains. When residue accumulates, your washing machine cannot clean clothes as effectively.
Soap scum and lint combine to form a slimy layer. This layer harbors bacteria. It reduces the efficiency of your machine. Your clothes may not rinse properly, leaving them with detergent spots. The machine might even develop drainage issues. A buildup of residue also puts stress on the machine’s components. This can shorten its lifespan. Regular maintenance ensures water flows freely. It also ensures cleaning agents work as intended. This improves both your machine’s performance and its longevity.
Essential Tools and Cleaning Agents
Before you begin cleaning your front loader washing machine, gather the necessary tools and supplies. Having everything ready saves time. It makes the cleaning process much smoother. You likely have most of these items already in your home. Choosing the right cleaning agents is important. Some are best for general maintenance, while others tackle tough mold or odors. Always check your washer’s manual for specific recommendations or warnings.
Basic cleaning tools include old cloths or rags. These are useful for wiping down surfaces. A small brush, like an old toothbrush, can reach tight spots. A spray bottle helps apply solutions evenly. For tougher jobs, a sponge or scrub brush may be needed. Safety gloves protect your hands, especially when using stronger chemicals. Having these items on hand ensures you can tackle every part of your machine effectively.
Natural Solutions: Vinegar and Baking Soda
White vinegar and baking soda are powerful, natural cleaning agents. They are safe for most washing machines. White vinegar is an excellent disinfectant and deodorizer. Its acidic nature helps break down mineral deposits and soap scum. It also kills mold and mildew. Baking soda is an abrasive cleaner that absorbs odors. It can also help lift grime. Using these together creates a powerful cleaning action. How to clean washer with vinegar provides more detailed instructions for using this common household item effectively.
To use white vinegar, pour two cups directly into the detergent dispenser or drum. Run a hot water wash cycle. For baking soda, sprinkle half a cup into the detergent dispenser. Then add half a cup to the drum directly. Run a hot water wash cycle. You can also combine them. First, run a cycle with vinegar. Then, run a separate cycle with baking soda. Never mix vinegar and baking soda directly in the dispenser at the same time. They neutralize each other’s cleaning power. For an effective natural alternative, you can consider methods on how to clean washer without Affresh.
Commercial Cleaners and Bleach
Commercial washing machine cleaners are specifically formulated for appliance maintenance. Brands like Affresh, Washer Magic, or Tide Washing Machine Cleaner are popular choices. These products often contain ingredients that dissolve detergent buildup. They also neutralize odors. Follow the product’s instructions carefully. Most require you to run a hot water cycle with the cleaner. They are generally effective for routine deep cleaning.
Bleach is another strong cleaning agent. It is very effective at killing mold and mildew. Use bleach sparingly and carefully. Add half a cup of liquid chlorine bleach to the bleach dispenser. Then run a hot water cycle. Never mix bleach with vinegar. This combination creates dangerous chlorine gas. Always ventilate your laundry area when using bleach. Some manufacturers advise against using bleach in certain machines. Check your washer’s manual first. Both commercial cleaners and bleach offer powerful solutions for a thorough machine cleaning.
Basic Cleaning Tools
Having the right tools makes cleaning your front loader much easier. You do not need specialized equipment. Simple household items work perfectly. These tools help you reach every nook and cranny. They ensure no spot is missed in your cleaning routine.
Here is a list of essential tools:
- Microfiber Cloths or Rags: These are great for wiping down surfaces. They absorb moisture and trap grime effectively. Keep a few dedicated cloths just for machine cleaning.
- Old Toothbrush or Small Brush: An old toothbrush is perfect for scrubbing the narrow crevices of the gasket. It also works well for cleaning inside the detergent dispenser. A small scrub brush can help with tougher grime on the drum.
- Spray Bottle: Use a spray bottle to apply cleaning solutions, especially for the gasket. This ensures even coverage. It helps penetrate dried-on residue.
- Bucket or Bowl: A small bucket or bowl is useful when cleaning the drain pump filter. It catches any water that spills out. This prevents a mess on your floor.
- Paper Towels: These are handy for drying surfaces quickly. They are also good for absorbing excess moisture, especially from the gasket.
- Gloves: Wear rubber gloves to protect your hands from harsh cleaning agents. They also keep your hands clean during the process.
These basic tools, combined with your chosen cleaning agents, will help you achieve a sparkling clean front loader.
Step-by-Step Guide to Deep Cleaning Your Front Loader Drum
The drum is the heart of your washing machine. It is where all the laundry magic happens. Unfortunately, it is also where detergent residue, lint, and hard water minerals build up. This accumulation leads to a musty smell and can hinder cleaning performance. Deep cleaning the drum is essential. It revitalizes your machine and ensures clothes come out truly fresh. There are two main approaches: using the machine’s self-clean cycle or performing a manual clean.
Always start with an empty washer. Remove any clothes or items from the drum. This allows the cleaning agents to work directly on the machine’s surfaces. Ensure the detergent dispenser is also empty. A clean drum is the foundation of a clean washing machine. This section will guide you through the best methods to achieve a spotless interior.
Running a Self-Clean Cycle
Many modern front loader washing machines come with a “Clean Washer” or “Self-Clean” cycle. This feature is designed to clean the interior of the drum. It often uses very hot water and a high spin speed. Check your appliance manual for specific instructions. The self-clean cycle is the easiest way to maintain your drum. It is usually effective for routine cleaning.
To run a self-clean cycle:
- Empty the Washer: Ensure no clothes are inside the drum.
- Add Cleaner: Pour the recommended amount of commercial washing machine cleaner into the detergent dispenser. Some machines suggest adding it directly to the drum. If using bleach, add half a cup to the bleach dispenser. Never use bleach and a commercial cleaner together in the same cycle. If using vinegar, add two cups to the detergent dispenser.
- Select Cycle: Choose the “Clean Washer” or “Self-Clean” cycle on your machine.
- Start Cycle: Close the door and start the cycle. Let the machine complete the cycle without interruption.
- Wipe Down: After the cycle finishes, wipe down the inside of the drum. Use a clean, dry cloth to remove any remaining residue. This helps dry the drum too.
Running this cycle once a month is a good habit. It prevents significant buildup and keeps odors away. This method is often the simplest for regular maintenance of your drum. How to clean washing machine drum provides further insights into keeping your drum pristine.
Manual Drum Cleaning with Solutions
If your machine does not have a self-clean cycle, or if you prefer a more hands-on approach, manual drum cleaning is effective. This method uses common household ingredients. It provides a deep clean, tackling stubborn grime. This process works well even for machines without specific cleaning features.
Follow these steps for a manual drum clean:
- Initial Rinse (Optional but Recommended): Run an empty hot water cycle first. This flushes out loose debris. It preps the drum for cleaning.
- First Cycle (Vinegar or Bleach):
- For Vinegar: Add two cups of white distilled vinegar to the detergent dispenser.
- For Bleach: Add half a cup of liquid chlorine bleach to the bleach dispenser.
- Choose the hottest water setting. Select the largest load size. Start a regular wash cycle.
- Let the cycle run for a few minutes to mix the solution. Then, pause the machine.
- Allow the solution to soak in the drum for 30 minutes to an hour. This lets the cleaner penetrate grime.
- Resume the cycle and let it complete.
- Second Cycle (Baking Soda - If using Vinegar): If you used vinegar, repeat the process with half a cup of baking soda. Add it to the detergent dispenser and run another hot water cycle. This helps neutralize any lingering vinegar smell. It also scrubs away dissolved residue.
- Wipe Down: Once both cycles are complete, open the washer door. Use a clean cloth dampened with a little water and vinegar solution. Wipe down the entire inside of the drum. Pay attention to any spots of residue or mold.
- Dry Thoroughly: Leave the washer door ajar to allow the drum to air dry completely. This prevents new mold growth.
This thorough manual cleaning will leave your front loader drum sparkling clean and odor-free. It is a powerful way to address persistent issues.
Tackling the Gasket: Your Front Loader’s Odor Hotspot
The rubber gasket, or door seal, is a critical component of your front loader. It creates a watertight seal when the door is closed. This prevents water from leaking during the wash cycle. However, this very essential part is also the most common source of mold, mildew, and foul odors. Its folds and crevices trap moisture, lint, hair, and detergent residue. This creates a perfect environment for bacterial and fungal growth. Ignoring the gasket means your “clean” clothes may still pick up unpleasant smells.
Cleaning the gasket regularly is non-negotiable for a fresh washing machine. It prevents the buildup of black mold. It also stops the musty odor from spreading. A clean gasket ensures optimal performance and hygiene. This section will explain why the gasket is such an issue. It will provide clear steps on how to clean this often-overlooked area effectively.
Why the Gasket Gets Grimy
The design of the front loader gasket makes it prone to collecting grime. The rubber material is non-porous but has many folds. These folds are perfect for trapping small items like socks or hair. They also collect lint and soap scum. Water collects in these folds, especially if the door is closed immediately after a wash. This trapped moisture, combined with organic matter, leads to rapid mold and mildew growth.
Detergent and fabric softener residue also contribute. These sticky substances cling to the rubber. They provide nutrients for mold and bacteria. If you use too much detergent, the problem can worsen. The buildup can become slimy and black. This is usually black mold. The constant dampness and warmth inside the machine create an ideal breeding ground. A strong, musty smell indicates a heavily contaminated gasket. Addressing this area is key to eliminating washer odors. For more comprehensive solutions on combating smells, check out how to clean washer smell.
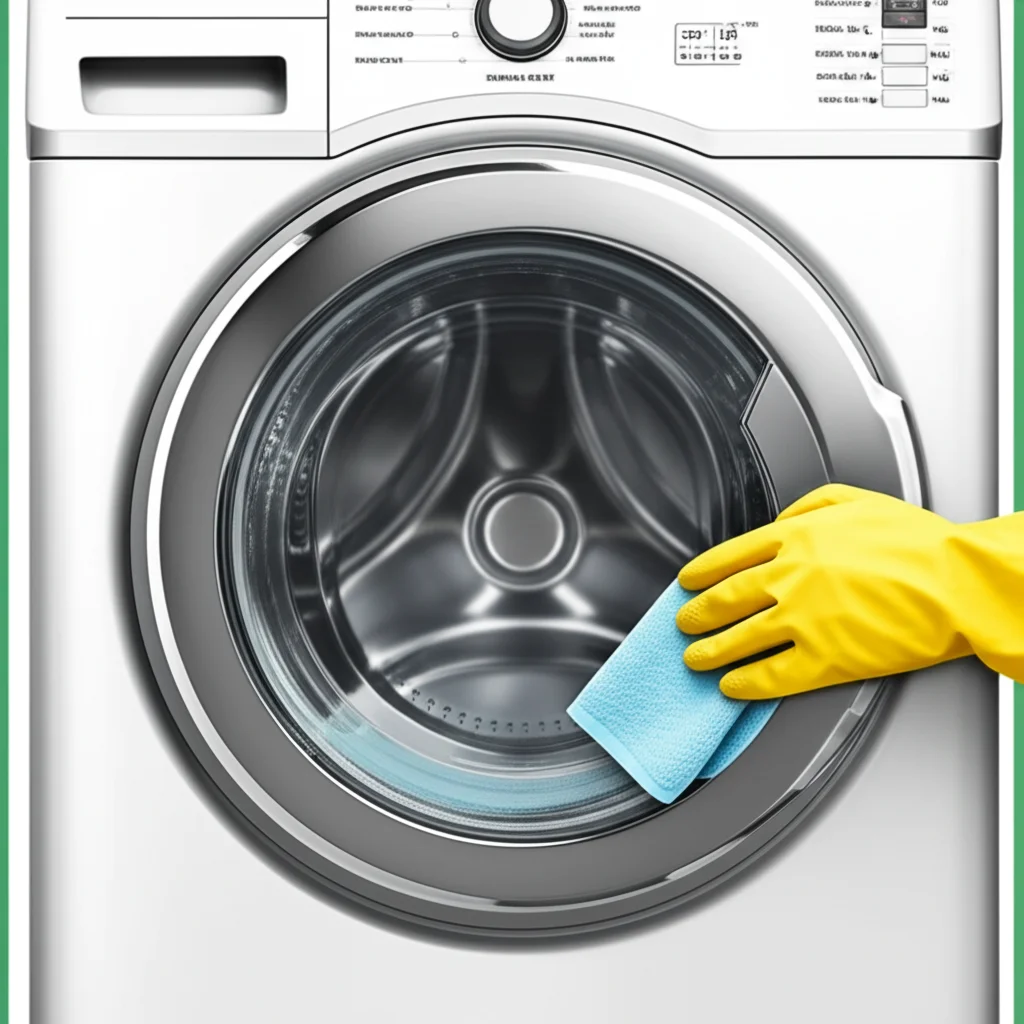
How to Clean the Gasket Effectively
Cleaning the gasket requires a bit of effort. It is a crucial step in maintaining a clean front loader. This process should be done regularly, at least once a month. For very dirty gaskets, you might need to clean it more often. How to clean front load washer gasket offers a dedicated guide for this specific task.
Here is how to clean the gasket thoroughly:
- Preparation: Put on a pair of rubber gloves. Gather an old cloth or sponge, a spray bottle, and your cleaning solution.
- Pull Back the Gasket: Open the washer door wide. Gently pull back the rubber gasket. Inspect all the folds and crevices. You will likely find lint, hair, mold, and residue trapped inside.
- Initial Wipe: Use a dry paper towel or cloth to remove any loose debris, lint, or hair. This makes the cleaning solution more effective.
- Apply Cleaning Solution:
- For Mildew/Mold: Mix equal parts white vinegar and water in a spray bottle. Spray the solution generously over all moldy and grimy areas of the gasket. For tougher mold, you can use a solution of 1/4 cup bleach to 1 gallon of water. Alternatively, commercial mold removers specifically for rubber can be used.
- For General Grime: A mixture of warm water and dish soap works well.
- Scrub Thoroughly: Let the solution sit for 5-10 minutes to penetrate the grime. Then, use an old toothbrush or a small scrub brush. Work the brush into all the folds and crevices of the gasket. Scrub away any visible mold, mildew, or residue. Be firm but gentle to avoid damaging the rubber.
- Wipe Clean: Use a clean, damp cloth to wipe away all the loosened grime and cleaning solution. Rinse the cloth frequently. Make sure no cleaning agent remains.
- Dry Completely: This is a vital step. Use a dry, clean towel to thoroughly dry the entire gasket. Pay extra attention to the inner folds where moisture can hide. Leave the washer door ajar for several hours after cleaning. This allows any remaining moisture to evaporate. Air circulation is key to preventing new mold growth.
Regularly wiping down the gasket after each wash cycle also helps prevent buildup. This small habit makes a big difference.
Maintaining the Detergent Dispenser and Drain Filter
While the drum and gasket get most of the attention, other components of your front loader also need regular cleaning. The detergent dispenser and the drain pump filter are often overlooked. Yet, they play crucial roles in your machine’s performance and hygiene. Neglecting these parts can lead to clogs, poor detergent distribution, and even odors.
Detergent and fabric softener can leave sticky residues inside the dispenser. This can block the flow, causing your clothes to not get the proper amount of cleaning agents. The drain pump filter, on the other hand, catches debris. This includes lint, coins, buttons, and other small items. If this filter gets clogged, it can prevent your machine from draining properly. This can lead to standing water and a smelly machine. Cleaning both these areas ensures your machine operates efficiently and remains odor-free.
Cleaning the Detergent Dispenser Tray
The detergent dispenser tray can accumulate a slimy buildup of detergent and fabric softener. This residue can become moldy. It also restricts the flow of cleaning agents into the drum. Many front loader dispensers are removable, making them easy to clean.
Here is how to clean your detergent dispenser:
- Remove the Tray: Most dispenser trays slide out easily. Consult your washer’s manual if you are unsure how to remove it.
- Inspect for Buildup: Look for any visible slime, mold, or hardened residue in all compartments (detergent, fabric softener, bleach).
- Soak (If Needed): If the tray is very dirty, soak it in hot, soapy water for 15-30 minutes. You can use a mixture of warm water and dish soap. For stubborn mold, a vinegar and water solution can be used.
- Scrub Clean: Use an old toothbrush or a small brush to scrub all compartments. Pay attention to the corners and dispenser nozzles. Remove all residue and mold.
- Clean the Dispenser Housing: While the tray is out, use a damp cloth to wipe inside the dispenser housing. This is where the tray sits. Check for any mold or residue in this area.
- Rinse and Dry: Rinse the dispenser tray thoroughly under running water. Ensure all soap or cleaning solution is gone. Dry it completely with a cloth or paper towel.
- Replace: Slide the clean, dry dispenser tray back into its slot in the washing machine.
Cleaning the dispenser once a month helps prevent clogs and ensures your detergent is dispensed properly.
Clearing the Drain Pump Filter
The drain pump filter (also known as the coin trap or lint trap) catches debris before it enters the pump. This prevents clogs in the drain system. This filter needs regular cleaning. If it gets clogged, your washer may not drain properly. It can also produce a foul smell from stagnant water and trapped grime. The location of this filter varies by machine. It is usually found at the bottom front of the washer, behind a small access panel. For more details, consider checking how to clean washer drain.
Follow these steps to clean the drain pump filter:
- Locate and Prepare: Find the access panel at the bottom front of your machine. Place a shallow pan or old towels underneath it. This will catch any water that drains out. Have a small bucket ready.
- Drain Water: Some machines have a small hose next to the filter. Pull this hose out and uncap it to drain residual water into your pan. Let all the water drain out.
- Remove Filter: Twist the filter counter-clockwise to remove it. Be prepared for a small amount of water to spill out, even if you drained the hose.
- Clean Filter: Remove any lint, coins, buttons, or other debris caught in the filter. You might be surprised by what you find! Rinse the filter under running water. Use an old toothbrush to scrub away any slime or residue.
- Clean Filter Housing: Use a cloth or paper towel to wipe inside the filter housing opening. Check for any trapped debris or slime.
- Reinstall Filter: Once the filter is clean, twist it back into place clockwise. Make sure it is securely tightened to prevent leaks.
- Close Panel: Close the access panel.
Clean this filter every 3-6 months. If you wash a lot of pet hair or heavily soiled items, check it more often. Regular filter cleaning prevents drainage problems and foul odors.
Preventing Future Odors and Buildup in Your Front Loader
Cleaning your front loader is important, but preventing future problems is even better. Many common issues like mold, mildew, and odors can be minimized with simple habits. These preventative measures keep your machine fresher for longer. They reduce the need for frequent deep cleans. Implementing these practices into your laundry routine saves you time and effort in the long run.
A proactive approach ensures your front loader remains an efficient, clean appliance. It also helps preserve the longevity of your washing machine. Let’s look at easy daily habits and recommended cleaning schedules. These tips will help you keep your front loader in pristine condition.
Daily Habits for a Fresh Machine
Small changes in your daily laundry routine can make a big difference. These habits are simple to adopt. They are very effective at preventing moisture buildup and mold growth.
- Leave the Door Ajar: After every wash cycle, leave the washer door slightly open. This allows air to circulate inside the drum. It helps the interior dry out completely. This is the single most effective way to prevent mold and mildew from forming.
- Wipe Down the Gasket: After each load, quickly wipe down the rubber gasket. Use a clean cloth to remove any excess water, lint, or hair. This prevents moisture from lingering in the folds.
- Remove Laundry Promptly: Do not leave wet laundry sitting in the machine. Remove clothes as soon as the cycle finishes. Damp clothes create a humid environment. This encourages mold growth inside the drum.
- Use HE Detergent: Always use high-efficiency (HE) detergent for front loaders. HE detergents are low-sudsing. They produce fewer suds and less residue. Too many suds can leave a film inside the machine. This contributes to mold and odor.
- Use Proper Detergent Amount: Follow the detergent manufacturer’s recommendations. Using too much detergent does not make your clothes cleaner. It creates excess suds and residue. This leaves a sticky film that attracts mold.
- Avoid Overloading: Do not stuff your machine. Overloading prevents proper rinsing. This leaves more detergent residue in the machine and on your clothes.
- Dry Dispenser: If your detergent dispenser remains damp, remove it and let it air dry. Or, wipe it dry after each use.
Adopting these habits will significantly reduce the chances of your front loader developing odors or mold.
Scheduling Regular Deep Cleans
Even with daily preventative habits, regular deep cleaning is still necessary. Over time, some residue will accumulate. Scheduling deep cleans ensures persistent hygiene. It addresses any buildup that daily efforts might miss.
Here is a suggested deep cleaning schedule:
- Monthly Deep Clean: Once a month, run a “Clean Washer” cycle. Use a commercial washer cleaner, white vinegar, or bleach (as discussed previously). This targets the drum and internal components. This frequency is usually enough to prevent odors. It stops significant residue buildup.
- Quarterly Gasket and Dispenser Clean: Every three months, perform a thorough manual cleaning of the rubber gasket. Also, clean out the detergent dispenser tray. This addresses areas prone to collecting visible grime and mold.
- Bi-Annual Drain Filter Check: Twice a year, or every six months, clean the drain pump filter. This prevents clogs and ensures proper drainage. If you have pets or wash heavily soiled items often, you might do this more frequently.
By following this schedule, you maintain a fresh, efficient, and long-lasting front loader washing machine. Consistent care is the best way to avoid stubborn problems and unpleasant surprises.
Troubleshooting Common Front Loader Cleaning Issues
Even with regular cleaning, you might encounter specific issues with your front loader. Persistent odors, visible mold, or drainage problems can be frustrating. Understanding how to troubleshoot these common issues helps you resolve them efficiently. It prevents small problems from escalating. This section will address typical challenges users face.
- front load washer cleaning
- washing machine maintenance
- laundry care tips
- mold prevention washer
- odor removal washer
- appliance cleaning

Todd Martin
Senior Writer
With over 15 years of experience in home renovation and design, I started HEG to share what I’ve learned with homeowners who want to create spaces that are both beautiful and functional. I’ve always believed in a hands-on approach, and over the years, I’ve picked up practical solutions that actually work. Through HEG, I aim to make home improvement more approachable, sharing real tips that help you create a home you truly love.