
· Todd Martin · Home Cleaning · 15 min read
How To Clean Wax Warmer Pot
How To Clean Wax Warmer Pot: A Complete Guide
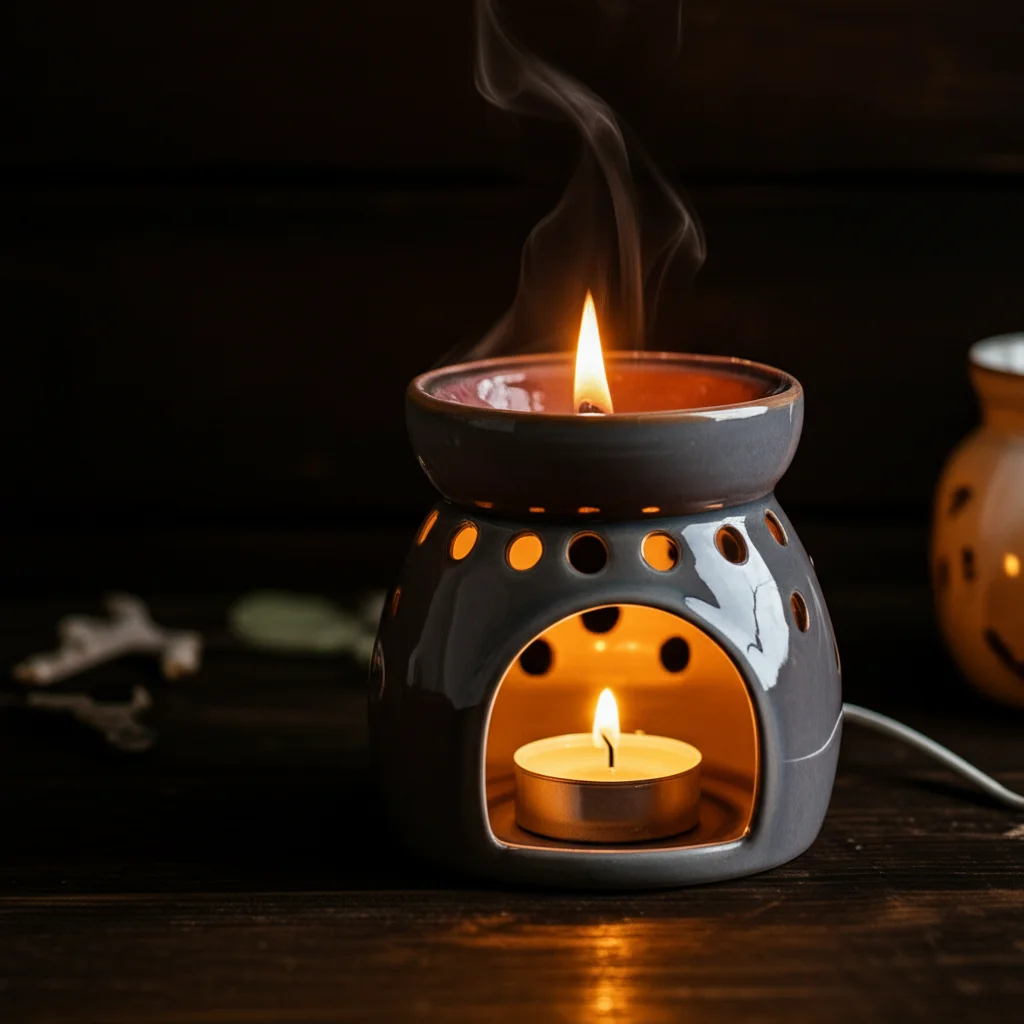
A clean wax warmer pot means a fresh-smelling home. You love the cozy ambiance and delightful scents your wax warmer creates. Over time, however, residual wax and fragrance oils can build up. This buildup can affect new scents and even shorten your warmer’s life.
Keeping your wax warmer pot spotless is a simple task that offers big rewards. This guide will show you how to clean wax warmer pot effectively. We will explore various methods, essential tools, and important safety tips. Get ready to refresh your warmer and enjoy pure, vibrant aromas again.
Takeaway
- Freeze Method: Use a freezer to shrink and pop out hardened wax.
- Melt Method: Gently re-melt wax for easy wiping.
- Alcohol Rub: Use isopropyl alcohol for stubborn residue.
- Natural Solutions: Try dish soap or vinegar for gentle cleaning.
- Regular Maintenance: Clean after every few uses to prevent buildup.
To clean a wax warmer pot, first ensure it is cool and unplugged. Use the freeze method by placing the pot in the freezer for 10-15 minutes, allowing hardened wax to pop out easily. Alternatively, gently warm the wax to a liquid state, then soak it up with cotton balls or paper towels. Finish by wiping any remaining residue with a clean cloth and a small amount of rubbing alcohol or dish soap.
Why Regular Cleaning Matters for Your Wax Warmer Pot
Regular cleaning of your wax warmer pot is essential. It helps maintain the quality of your home’s fragrance. Over time, wax residue and fragrance oils accumulate. This buildup can interfere with new scents you place in the warmer.
A dirty pot may cause new wax melts to smell “off” or weak. The old scent can mix with the new, creating an unpleasant blend. This defeats the purpose of enjoying fresh aromas in your space. Moreover, excessive wax buildup can impact the warmer’s performance.
Persistent residue makes the warmer less efficient at heating new wax. It can also cause discoloration or damage to the warming dish itself. A clean pot ensures consistent heat distribution. This means your wax melts fully and releases their true scent. Regular maintenance extends the life of your warmer, saving you money in the long run. It is a simple habit that keeps your home smelling its best.
Clean warmers also reduce the risk of grime or dust sticking to old wax. This creates a more hygienic environment. You want your fragrance source to be as clean as possible. I always feel better knowing my warmers are sparkling. Regular cleaning is a small effort with great benefits.
Essential Tools and Supplies for Cleaning a Wax Warmer Pot
Before you start cleaning, gather your tools. Having everything ready makes the process smooth and quick. You probably have most of these items around your home already. These simple supplies will help you tackle any wax residue.
Here is a list of what you will need:
- Cotton Balls or Cotton Pads: These are excellent for soaking up liquid wax. They are also gentle on the warmer’s surface. I use several during a cleaning session.
- Paper Towels: Absorbent paper towels are useful for wiping away excess wax. They are also good for general cleanup. Keep a roll handy.
- Rubbing Alcohol (Isopropyl Alcohol): This is a powerful degreaser for wax residue. It evaporates quickly, leaving no film behind. It is my go-to for stubborn spots.
- Dish Soap: A few drops of standard dish soap cut through greasy wax residue. It is a gentle yet effective cleaner for the final wipe-down. Use it with warm water.
- Soft Cloth or Microfiber Towel: For polishing the warmer pot after cleaning. This helps prevent streaks and leaves a sparkling finish. Always use something non-abrasive.
- Plastic Scraper or Old Credit Card: Useful for gently nudging out hardened wax. Avoid metal tools, as they can scratch the warmer’s surface. My old gift card works perfectly.
- Freezer (Optional): If you plan to use the freeze method, your freezer is the best tool. It makes wax removal incredibly easy. This method is a real time-saver.
Always make sure your wax warmer is unplugged and cool before touching it. Safety comes first when handling electrical appliances. These simple supplies ensure you can effectively clean your wax warmer pot. For more general wax clean-up advice, check out how to clean wax off glass surfaces too.
The Freeze Method: Safely Removing Hardened Wax
The freeze method is one of the easiest ways to remove hardened wax from your warmer pot. This technique uses cold temperatures to make the wax shrink. Once shrunk, the wax usually pops right out. It is a very satisfying way to clean your warmer.
First, ensure your wax warmer is completely cool and unplugged. Never place a hot or warm pot directly into the freezer. This could damage the warmer or create a sudden temperature shock. Safety is always important. Wait until the pot is at room temperature.
Next, carefully place the removable wax warmer pot into your freezer. If your warmer does not have a removable pot, you can try placing ice cubes in a plastic bag on top of the hardened wax. Leave the pot in the freezer for about 10 to 15 minutes. The exact time depends on the thickness of the wax.
After 10-15 minutes, remove the pot from the freezer. You will likely see the wax disc has shrunk slightly. Gently press on one side of the wax with your thumb or a plastic scraper. The cold wax should pop right out in a solid piece. If it does not pop out, put it back in the freezer for a few more minutes. Do not force it, as you could crack the ceramic.
Once the wax is out, wipe the pot clean with a soft, dry cloth. This removes any small residue or oil. If there is a slight film, a quick wipe with a paper towel dampened with a bit of rubbing alcohol will make it spotless. This method is incredibly effective for removing hard wax quickly. It leaves your warmer ready for a new scent with minimal fuss. This method also works well for how to clean dry wax from various surfaces.
The Melt Method: Cleaning with Warm Wax
The melt method is another popular way to clean your wax warmer pot. This technique involves gently re-melting the wax. It is perfect if you want to change scents without waiting for the wax to fully harden. This method uses the wax itself to help with the cleaning process.
First, turn on your wax warmer and let the wax melt completely. Allow it to become fully liquid. This usually takes about 10-20 minutes, depending on your warmer and the amount of wax. Make sure the wax is entirely fluid. I often let it sit for a few extra minutes to ensure it is very warm.
Once the wax is liquid, turn off the warmer. This is a crucial step for safety. Next, carefully place several cotton balls or cotton pads into the melted wax. They will quickly absorb the liquid wax. You can also use paper towels folded into a thick pad.
Allow the cotton balls to soak up all the wax. Once saturated, carefully use a spoon or tongs to remove them. Be very cautious, as the wax will still be hot. Discard the wax-soaked cotton balls or paper towels immediately. You will notice that most of the wax is now gone from the pot.
Finally, wipe the remaining residue from the pot with a clean paper towel. If there is a greasy film, dampen a fresh paper towel or soft cloth with a small amount of rubbing alcohol. Gently wipe the entire surface of the pot. This will remove any last traces of fragrance oil or wax. Your pot will be sparkling clean and ready for a new wax melt. This method is excellent for managing how to clean melted wax spills or just routine cleaning. For more tips on general wax warmer maintenance, check out our guide on how to clean wax warmer.
The Alcohol Rub Method: Tackling Stubborn Residue
Sometimes, even after removing the bulk of the wax, a stubborn, greasy film remains in the warmer pot. This film is often made of fragrance oils and tiny wax particles. The alcohol rub method is perfect for tackling this residue. It leaves your pot completely clean and odor-free.
To begin, ensure your wax warmer pot is completely cool and free of large wax chunks. If you used the freeze or melt method, you should have removed most of the wax. Now, focus on the thin, sticky layer left behind. This residue can trap old scents.
Dampen a cotton ball or a soft cloth with rubbing alcohol (isopropyl alcohol). You do not need a lot; just enough to make the cotton ball moist. Rub the damp cotton ball firmly over the entire surface of the wax warmer pot. You will see the residue start to lift away onto the cotton. For a very sticky film, you might need to apply a bit more pressure or use a fresh cotton ball.
Rubbing alcohol is highly effective because it dissolves wax and oils. It evaporates quickly, which means it leaves no watery residue behind. This is ideal for electric warmers. Once you have wiped away all the visible film, the pot should feel smooth and clean. I always double-check by running my finger over the surface.
After cleaning with alcohol, you might want to give the pot a quick wipe with a clean, dry cloth. This ensures no alcohol residue remains. Your wax warmer pot will now be perfectly clean. It will be ready for a new, pure scent experience. This method is also useful for dealing with stubborn residue on other items, much like you might handle how to clean coffee pot residue.
Natural Cleaning Solutions for Your Wax Warmer Pot
If you prefer using natural products, several household items can effectively clean your wax warmer pot. These methods are gentle and avoid harsh chemicals. They are perfect for maintaining a clean and fresh home without synthetic cleaners. I often reach for these options first.
Dish Soap and Warm Water
Dish soap is excellent for cutting through greasy wax residue. After removing the main wax chunk (using the freeze or melt method), you might have a slippery film. Fill the wax warmer pot with a small amount of warm water and a few drops of dish soap. Let it sit for a few minutes. This helps to loosen any remaining oil.
Then, use a soft sponge or cloth to gently scrub the inside of the pot. The soap will emulsify the wax and oil, making it easy to wipe away. Rinse the pot thoroughly with clean water. Make sure no soap residue remains. Finally, dry the pot completely with a clean towel. Ensure it is completely dry before placing it back on the warmer.
Vinegar Solution
White vinegar is a fantastic natural cleaner and deodorizer. It can also help break down wax residue. After removing the bulk of the wax, pour a small amount of white vinegar into the warmer pot. Let it sit for about 10-15 minutes. The acidity helps to loosen the waxy film.
After soaking, use a soft cloth or paper towel to wipe the pot clean. You might need to gently rub stubborn spots. Rinse the pot with water to remove any vinegar smell. Dry it thoroughly before use. Vinegar can also help eliminate lingering odors from old wax scents. It truly freshens the pot.
Coconut Oil or Mineral Oil
For a very thin, stubborn film of wax, a small amount of coconut oil or mineral oil can work wonders. Apply a tiny amount to a paper towel. Rub it onto the wax residue. The oil helps to dissolve the waxy film. This makes it easier to wipe away.
Once the film has dissolved, wipe the pot clean with a fresh paper towel. Follow up with a little dish soap and warm water to remove any oiliness. Rinse and dry thoroughly. This method is surprisingly effective. It also conditions the surface of the pot, leaving it smooth.
These natural cleaning solutions offer effective ways to keep your wax warmer pot spotless. They are safe for your home and your warmer. You can choose the method that best suits your preference.
Maintaining Your Wax Warmer Pot: Best Practices
Keeping your wax warmer pot clean is not just about occasional deep cleans. It is also about adopting good maintenance habits. Simple practices can prevent excessive buildup and keep your warmer performing its best. Regular care extends the life of your warmer. I always try to follow these steps.
Clean After Every Few Uses
Do not wait until your wax warmer pot is heavily crusted with old wax. Make cleaning a routine. I recommend cleaning it after every two to three wax melt changes. This prevents residue from hardening and becoming difficult to remove. A quick wipe down is much easier than a major cleaning job.
Use Wax Warmer Liners
Wax warmer liners are a game-changer for easy cleanup. These disposable cups fit inside your warmer pot. You simply place your wax melt in the liner. When you want to change scents, lift out the liner and throw it away. No mess, no fuss. They protect your wax warmer pot from direct contact with wax.
Liners reduce the need for frequent deep cleaning. They also allow you to swap scents quickly without mixing fragrances. I find them incredibly convenient for busy days. Just make sure the liners fit snugly in your warmer.
Avoid Overfilling the Pot
Always check your wax warmer’s instructions for its maximum fill line. Overfilling can lead to spills. Spilled wax can drip onto the warmer base or your furniture. This creates a bigger cleaning headache. Only add enough wax melts to fill the pot to the recommended level.
Too much wax can also cause uneven heating. This means your wax might not melt properly or release its scent effectively. Proper filling ensures optimal performance and less mess.
Handle Wax Gently
When adding or removing wax, be careful. Do not scrape the pot with metal utensils. Metal can scratch the surface of ceramic or glass pots. Scratches can make the pot harder to clean in the future. They can also affect its appearance. Use plastic scrapers or paper towels instead. This gentle approach prevents damage.
Allow Complete Cooling Before Cleaning
Always let your wax warmer pot cool down completely before cleaning it. Trying to clean a hot pot is dangerous. Hot wax can cause burns. Rapid temperature changes can also crack ceramic or glass pots. Patience prevents accidents and damage. Always unplug the warmer before you start cleaning. Following these best practices will help you keep your wax warmer pot in excellent condition. This ensures you enjoy fresh, clean scents in your home for a long time. For comprehensive care of your wax warmer, consider our full guide on how to clean wax warmer.
FAQ Section
How often should I clean my wax warmer pot?
You should clean your wax warmer pot after every 2-3 uses, or whenever you change scents. This prevents old fragrance oils from mixing with new ones. Regular cleaning stops wax residue from building up and becoming difficult to remove. It keeps your warmer performing its best.
What should I do if wax spills outside the warmer pot?
If wax spills outside the pot, let it cool and harden first. Once hard, you can usually scrape it off gently with a plastic scraper. For residue, use rubbing alcohol on a cotton ball to wipe it away. Avoid using metal tools that could scratch surfaces. For spills on different materials, consider guides like how to clean wax off floor.
Can I put my wax warmer pot in the dishwasher?
Most wax warmer pots are not dishwasher safe. The high heat and harsh detergents can damage the finish or material. Always check your warmer’s specific instructions. Hand washing with mild soap and water is usually the safest method. This prevents cracking or discoloration.
What if my wax warmer pot smells burnt?
If your wax warmer pot smells burnt, it likely has scorched wax or residue. First, unplug and cool the warmer. Remove all wax. Then, use rubbing alcohol or a paste of baking soda and water to scrub the affected area. Rinse well. If the smell persists, the heating element might be damaged, or the pot might need replacement. For more severe burning, guides like how to clean a pot that burned might offer additional insights.
Are wax warmer liners worth it for cleaning?
Yes, wax warmer liners are highly worth it for easy cleaning. They create a barrier between the wax and the pot. This means you just remove the liner when you want to change scents or clean. They prevent mess and prolong the life of your warmer pot. They are a convenient solution.
Can I use essential oils directly in my wax warmer pot?
No, do not use essential oils directly in a wax warmer pot designed for wax melts. Essential oils are highly concentrated and can evaporate quickly. This can lead to overheating, potential fire hazards, or damage to your warmer. Always use products specifically designed for wax warmers, like wax melts.
Conclusion
Keeping your wax warmer pot clean is a small task with significant benefits. It ensures your home always smells fresh and inviting. Regular cleaning also helps maintain your warmer’s efficiency and extends its lifespan. You now have several effective methods at your disposal.
Whether you prefer the quick freeze method, the gentle melt method, or the powerful alcohol rub, a clean pot is within reach. Remember to choose natural solutions if you prefer. Incorporate simple best practices into your routine. This includes using liners and cleaning after every few uses. A well-maintained wax warmer brings continuous joy and beautiful scents to your living space. Enjoy your clean, fragrant home.
- wax warmer cleaning
- wax pot maintenance
- remove wax residue
- home fragrance care

Todd Martin
Senior Writer
With over 15 years of experience in home renovation and design, I started HEG to share what I’ve learned with homeowners who want to create spaces that are both beautiful and functional. I’ve always believed in a hands-on approach, and over the years, I’ve picked up practical solutions that actually work. Through HEG, I aim to make home improvement more approachable, sharing real tips that help you create a home you truly love.


