
· Todd Martin · Home Maintenance · 20 min read
How To Clean White Walls Houses
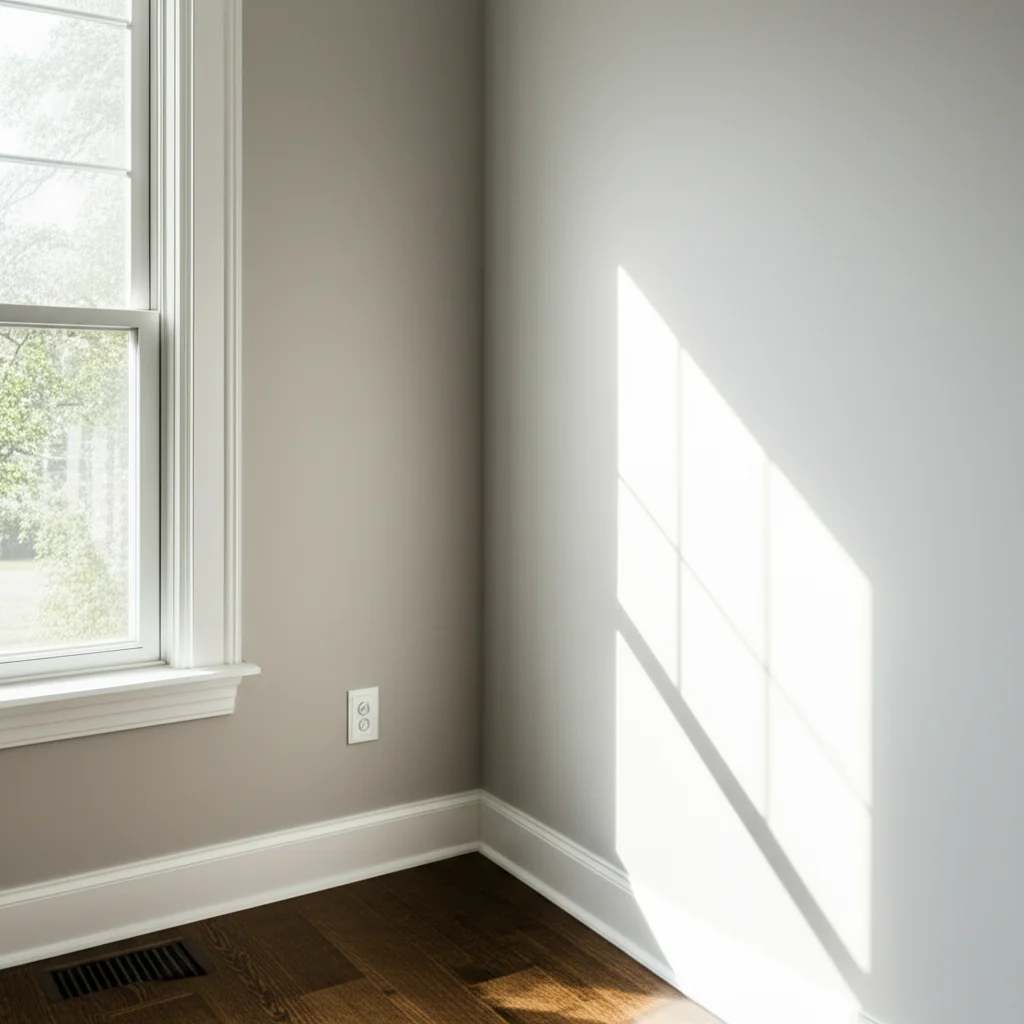
Brighten Your Home: How To Clean White Walls Houses
White walls bring a fresh, clean feel to any home. They make rooms appear larger and brighter. However, white walls also show every smudge, scuff, and splash. Keeping them pristine can feel like a constant battle. But it does not have to be a struggle.
I know the frustration of seeing a fresh mark on a perfectly clean white wall. Maintaining their sparkle is important for your home’s overall look. This guide will show you how to clean white walls houses, keeping them bright and beautiful. We cover gentle daily cleaning, specific stain removal techniques, and advice for different paint finishes. You will learn easy methods to tackle dirt and grime. I will help you preserve the crisp, clean aesthetic of your living space with confidence.
Takeaway:
- Always test cleaning solutions on an inconspicuous area first.
- Start with the gentlest cleaning method and increase strength as needed.
- Dust white walls regularly to prevent dirt buildup.
- Address stains quickly to prevent them from setting.
- Protect floors and furniture before cleaning.
To effectively clean white walls in houses, begin by dusting the surface. Then, use a mild solution of warm water and a gentle dish soap. Apply it with a soft cloth or sponge, working in small sections. Rinse with a clean, damp cloth and dry immediately to prevent streaks. For tougher stains, specific stain removers or natural solutions may be necessary.
Preparation is Key: Setting Up for White Wall Cleaning
Cleaning white walls in your house needs some preparation. Rushing into the task can lead to more mess or even damage. Proper setup makes the cleaning process much smoother. It also protects your belongings. I always start by gathering everything I need before I begin.
First, clear the area around the walls. Move furniture away from the walls. This creates space to work. It also protects furniture from splashes. Remove any wall hangings, pictures, or decorations. This prevents them from getting wet or damaged. Cover large furniture pieces with old sheets or plastic tarps. This adds another layer of protection.
Next, lay down drop cloths or old towels on the floor along the base of the walls. White walls highlight dirt, and drips from cleaning solutions can stain floors. These coverings will catch any drips or spills. They prevent water damage to wood floors or stains on carpets. Proper preparation helps you clean efficiently and safely.
Essential Tools and Supplies
Having the right tools is half the battle when you clean white walls houses. I always make sure my cleaning caddy is stocked. You do not need many items, but the right ones make a big difference. Using the wrong tools can spread dirt or even damage your paint.
Here is a list of what you will need:
- Soft cloths or microfiber towels: These are gentle on paint. They absorb dirt and water well. I prefer several cloths so I can swap them out as they get dirty.
- Two buckets: One for your cleaning solution, one for clean rinse water. This helps prevent reapplying dirty water.
- Mild dish soap: A small amount goes a long way. Choose a basic, clear dish soap without strong dyes or fragrances.
- Warm water: Warm water helps dissolve dirt and soap better than cold water.
- Sponge (non-abrasive): For applying solution to larger areas. Make sure it is soft.
- Magic Eraser (melamine foam sponge): Excellent for scuff marks. Use with caution on delicate finishes.
- Duster or vacuum with brush attachment: For initial dust removal.
- Clean, dry towels: For drying the walls. This step is important to prevent streaks.
- Protective gloves: To protect your hands from cleaning solutions.
Protecting Your Space
Protecting your home is just as important as cleaning your walls. I learned this the hard way once with a small drip on a wooden floor. Before you introduce any moisture, protect your surroundings. This simple step saves you from extra cleanup or potential damage.
Move all furniture a few feet away from the wall. This gives you clear access to the entire wall surface. Cover any furniture you cannot move with plastic sheeting or old blankets. This shields them from splashes and drips. Lay down drop cloths or old towels along the baseboards. They will catch any water that runs down the wall. This is especially important if you have hardwood floors or carpets. Taking these precautions protects your home. You can focus on cleaning your white walls houses without worrying about other messes. Start with a clean slate and keep your home protected.
Gentle Approaches: Everyday Cleaning for White Walls
White walls demand regular, gentle care. They show dust and light marks quickly. I find that consistent, gentle cleaning keeps them looking their best. This prevents dirt from building up and becoming tougher to remove. Starting with the least aggressive method is always a good rule of thumb.
Dusting is the first step in any wall cleaning routine. It removes loose dirt and cobwebs. This prevents them from turning into muddy streaks when you add water. For everyday cleaning, a simple soap and water solution works wonders. It is mild yet effective for light grime. I always make sure my cloths are soft. This avoids scratching the delicate paint surface.
Dusting White Walls Effectively
Dust settles everywhere, including your walls. On white walls, dust and cobwebs are very noticeable. I always begin my wall cleaning with a thorough dusting. This step is crucial. If you skip dusting, you will just spread dusty mud around when you add water.
Use a soft, dry microfiber duster with an extendable handle. This lets you reach high spots easily. You can also use a vacuum cleaner with a brush attachment. Work from the top of the wall down to the baseboards. This ensures all loose dirt falls to the floor, where it can be vacuumed later. Pay attention to corners and edges, as dust often gathers there. Regularly dusting your white walls reduces the need for deeper cleaning. It keeps them looking fresh day after day. You can also clean dust off walls with a dry mop.
Mild Soap and Water Method
For general dirt and light smudges, a simple mild soap and water solution is often enough. This is my go-to for routine cleaning of white walls. It is gentle on paint but tough on everyday grime. This method removes light dirt without harsh chemicals.
Fill one bucket with warm water and add a few drops of mild dish soap. Do not use too much soap; it can leave residue. Dip a soft microfiber cloth into the soapy water. Wring it out very well. The cloth should be damp, not dripping wet. Excess water can damage walls or leave streaks. Gently wipe down a small section of the wall. Avoid scrubbing vigorously. Use a second clean cloth, dampened with plain water, to rinse the section. Then, immediately dry the area with a third clean, dry cloth. This prevents water spots or streaks. Work in small sections to keep control and ensure thorough rinsing and drying. You can also learn how to clean walls with a mop for larger areas.
Targeting Tough Stains: Specific Solutions for White Walls
White walls, despite their beauty, are magnets for tough stains. From scuffs to grease, these marks stand out. Knowing specific solutions for different stains is important. General cleaning methods may not work for stubborn spots. I have found targeted approaches save time and prevent damage.
Always identify the type of stain first. This helps you choose the right product or method. Different stains respond to different treatments. For instance, an abrasive cleaner might remove a scuff but damage the paint finish. A greasy mark needs something to cut through the oil. Always test any new cleaning solution on a hidden spot. This ensures it does not damage or discolor your white paint.
Scuff Marks and Pencil Marks
Scuff marks are common, especially in high-traffic areas. They happen when shoes or objects rub against the wall. Pencil marks often appear in kids’ rooms or near desks. Both are highly visible on white walls. Luckily, they are often easy to remove.
For scuff marks, a Magic Eraser (melamine foam sponge) is incredibly effective. Dampen the Magic Eraser slightly with water. Gently rub the scuff mark. The eraser works by acting like a very fine sandpaper, so use light pressure. Do not scrub hard. Too much pressure can remove paint or leave dull spots. For pencil marks, a regular rubber eraser often works. Lightly rub the mark away. Ensure the eraser is clean. If these do not work, try a paste of baking soda and water. Apply the paste, let it sit for a few minutes, then gently wipe away. Rinse the area with a damp cloth and dry. These methods can help you clean marks off painted walls effectively.
Dealing with Grease and Grime
Kitchens and dining areas often suffer from grease and grime on white walls. Cooking splashes and general household buildup create sticky, discolored spots. These stains need a cleaning agent that cuts through oil. Plain soap and water may not be strong enough.
For grease stains, try a solution of warm water and a few drops of degreasing dish soap. Use a clean cloth or sponge to apply the solution. Gently blot or wipe the greasy area. Avoid rubbing vigorously, which can spread the grease. For tougher grease, a mixture of equal parts white vinegar and water can be effective. Spray it on the stain, let it sit for a few minutes, then wipe clean. Remember to rinse the area with plain water and dry thoroughly. For very stubborn grease, a small amount of rubbing alcohol on a cotton ball can work as a last resort, but test it first. Getting rid of grease helps you clean grease off walls properly.
Removing Crayon and Ink
Crayon and ink marks are common challenges on white walls, especially with children around. These stains can seem daunting, but there are effective ways to remove them. You need to be patient and use the right approach to avoid spreading the color.
For crayon, a surprising but effective method is to use a dab of mayonnaise or toothpaste (non-gel). Apply a small amount directly onto the crayon mark. Let it sit for about 10-15 minutes. The oils in mayonnaise or the mild abrasives in toothpaste help break down the wax. Then, gently wipe away with a damp cloth. For ink, rubbing alcohol or hairspray can work. Apply a small amount to a clean cloth. Blot the ink stain, do not rub. Blotting prevents the ink from spreading. Repeat until the ink lifts. Always rinse the area with plain water and dry afterwards. These tricks can help you clean crayon off walls and other similar marks.
Special Considerations: Cleaning Different White Wall Finishes
White walls come in various paint finishes. Each finish reacts differently to cleaning. Matte and flat paints are more porous and delicate. Semi-gloss and gloss paints are more durable and easier to clean. Knowing your paint finish is important before you start. Using the wrong method can damage the paint or leave unsightly marks.
Always identify your paint finish before applying any cleaning solution. You can usually tell by how shiny the wall appears. Flat paints have no shine, while gloss paints are very reflective. I always recommend testing any cleaning method on a small, hidden area first. This applies to all finishes. This precaution prevents accidental damage to your beautiful white walls.
Cleaning Matte and Flat Paints
Matte and flat paint finishes give walls a soft, sophisticated look. They absorb light and hide minor imperfections well. However, they are also the most challenging white paint finishes to clean. Their porous nature makes them absorb stains more readily. They are also more prone to showing marks from scrubbing.
For matte and flat white walls, use the gentlest methods first. Dust regularly to prevent buildup. For light marks, a very slightly damp microfiber cloth with plain water might be enough. If you need a cleaning solution, use a tiny amount of mild dish soap diluted heavily in water. Wring your cloth until it is almost dry. Blot the stain gently rather than rubbing. Scrubbing can remove paint or leave shiny spots. For stubborn marks, a Magic Eraser can work, but use it with extreme caution and very light pressure. Always test on an inconspicuous area first. Avoid harsh cleaners or excessive water. You can also get tips on how to clean matte paint walls and how to clean flat paint walls.
Caring for Eggshell and Satin Finishes
Eggshell and satin finishes offer a subtle sheen, making them more durable than flat paints. They are a good balance between aesthetics and cleanability. These finishes are commonly used in living areas and bedrooms. They resist stains better than matte paints. Cleaning them is generally easier.
You can use the mild soap and water method with more confidence on eggshell and satin white walls. Mix a few drops of mild dish soap with warm water in a bucket. Use a soft sponge or microfiber cloth. Make sure the cloth is well-wrung before wiping. Gently wipe down sections of the wall. Rinse with a clean, damp cloth. Dry immediately with a separate clean, dry towel to prevent water spots. These finishes can tolerate a bit more gentle wiping pressure than flat paints. Still, avoid harsh scrubbing or abrasive cleaners. Always test your method in a hidden spot first.
Tackling Semi-Gloss and Gloss Paints
Semi-gloss and gloss paints are the most durable and easiest to clean. They have a high sheen that reflects light well. These finishes are often found in kitchens, bathrooms, and high-traffic areas like hallways. Their smooth, non-porous surface resists stains and moisture effectively. This makes them ideal for white walls in busy parts of the house.
For semi-gloss and gloss white walls, you can generally use a slightly stronger cleaning solution. A mixture of warm water and a few drops of dish soap works very well. For tougher grime, a diluted all-purpose cleaner might be suitable. Apply the solution with a sponge or cloth. You can wipe with more pressure if needed, but still avoid harsh scrubbing. Rinse the area thoroughly with a clean, damp cloth. Always dry the wall immediately with a dry towel. This prevents streaking, which can be more visible on shiny surfaces. These robust finishes are forgiving. They still benefit from gentle care. You can learn more about how to clean walls without removing paint.
Natural Cleaning Solutions: Eco-Friendly White Wall Cleaning
Many people prefer to use natural cleaning solutions. They are often safer for homes with children and pets. Natural cleaners can be very effective for white walls. They avoid harsh chemicals and strong fumes. Common household items like vinegar and baking soda are versatile cleaners. I often turn to these for everyday stains and general upkeep.
Using natural solutions is a gentle way to clean your white walls. These methods are also budget-friendly. You likely already have these ingredients in your pantry. Always remember to test any natural solution on a small, hidden area first. This ensures it does not harm your white paint. These solutions are great alternatives to commercial products.
The Power of White Vinegar
White vinegar is a cleaning powerhouse. It is acidic, which helps break down dirt, grease, and mild stains. It also deodorizes. I use white vinegar often for general cleaning around the house. It is especially useful for cutting through light grime on white walls.
For cleaning white walls, dilute white vinegar with water. A 1:1 ratio (one part vinegar to one part water) is a good starting point. You can adjust the ratio based on the stain’s toughness. For lighter cleaning, use more water. Pour the mixture into a spray bottle. Lightly mist a clean cloth with the solution. Do not spray directly onto the wall, as too much moisture can be bad for paint. Gently wipe the dirty area. The vinegar smell will dissipate as it dries. White vinegar is excellent for general grime and light mold spots. This is a very effective way to clean walls with vinegar.
Baking Soda Pastes for Stains
Baking soda is a mild abrasive and a natural deodorizer. It works wonders on tough, set-in stains that need a bit of gentle scrubbing. I find it particularly useful for scuffs, crayon marks, and other stubborn spots on white walls. It is gentle enough not to damage most paint finishes.
To use baking soda, make a paste. Mix a small amount of baking soda with just enough water to form a thick paste. It should resemble toothpaste. Apply a small dab of this paste directly onto the stain. Let it sit for a few minutes. This allows the baking soda to work on the stain. Then, gently rub the paste with a soft, damp cloth or sponge. Use light, circular motions. The mild abrasive action helps lift the stain. After the stain lifts, wipe away any residue with a clean, damp cloth. Finally, dry the area thoroughly with a clean, dry towel. This method is excellent for localized tough spots.
Advanced Stain Removal & Problem Areas
Some stains on white walls require more focused attention. Mold, smoke, and yellowing are common, persistent issues. These problems affect the appearance and often the air quality of your home. They need stronger, yet still careful, cleaning methods. I have tackled all these challenges on white walls. It often requires specific products or techniques.
Always wear protective gear, such as gloves, when dealing with these more challenging stains. Good ventilation is also important. These issues often go deeper than surface dirt. They need a thorough approach. Remember to test any solution in an inconspicuous area first. This prevents damage to your white walls.
Addressing Mold and Mildew on White Walls
Mold and mildew appear as black, green, or fuzzy spots on walls. They thrive in damp, poorly ventilated areas like bathrooms or basements. Beyond being unsightly, mold can affect air quality. Cleaning mold from white walls needs careful attention.
For small mold spots, a mixture of bleach and water (1 part bleach to 3 parts water) is effective. Alternatively, white vinegar (undiluted) can also kill mold without harsh fumes. Spray or wipe the solution onto the moldy area. Let it sit for 10-15 minutes. This allows the solution to penetrate and kill the mold. Scrub gently with a soft brush or sponge. Rinse with a clean, damp cloth. Ensure the area dries completely. Improve ventilation in the room to prevent future mold growth. For extensive mold, professional help may be needed. You can get more details on how to clean mold off walls.
Cleaning Smoke and Soot Stains
Smoke and soot stains on white walls are difficult to clean. They result from fires, candles, or even long-term tobacco use. These stains are oily and smear easily. They also leave a distinct odor. Standard cleaning methods often just spread the mess.
Start by using a dry cleaning sponge (chemical sponge). These sponges are designed to absorb soot without smearing. Gently wipe the wall with the dry sponge, working from top to bottom. Do not wet the sponge. This will help lift loose soot particles. After removing the dry soot, create a cleaning solution. Mix a cup of white vinegar with a gallon of warm water. Add a few drops of mild dish soap. Use a clean cloth dampened with this solution. Wipe the wall gently, working in small sections. Rinse with plain water and dry immediately. For very stubborn smoke damage, a professional cleaner might be necessary. This process is important to clean smoke off walls and clean yellow walls from smoke. Also, for specific types of black residue, refer to how to clean soot off walls.
Restoring Yellowed White Walls
Over time, white walls can yellow. This is often due to sunlight exposure, airborne pollutants, or simply age. Smoking in the house can also cause significant yellowing. Restoring yellowed white walls can be a challenge. It might not always return them to their original brightness.
For light yellowing, a thorough cleaning with mild soap and water might help. For more stubborn yellowing, a solution of white vinegar and water (1:1 ratio) can be tried. Apply with a clean cloth. Wipe gently, then rinse and dry. If yellowing is caused by smoke, follow the smoke cleaning steps mentioned earlier. Sometimes, the yellowing is too deep-set. It might be in the paint itself. In such cases, repainting is the most effective solution. Consider using a stain-blocking primer before applying a fresh coat of white paint. This will prevent the old stains from bleeding through.
Maintaining White Walls: Preventing Future Stains and Damage
Keeping white walls clean is an ongoing process. Prevention is always better than cure. Once you have cleaned your white walls, you want to keep them looking fresh. Implementing regular maintenance habits helps a lot. It reduces the need for intense cleaning sessions. I find that a few simple steps can make a big difference in maintaining their pristine look.
Routine care prevents dirt and stains from accumulating. It saves you time and effort in the long run. Thinking about areas prone to damage is also important. Protecting these spots proactively helps. This keeps your white walls brighter for longer.
Regular Dusting and Spot Cleaning
Regular maintenance is key to keeping white walls bright. I make it a habit to dust my walls weekly or bi-weekly. This prevents dust and cobwebs from settling and becoming stubborn grime. Dusting white walls helps a lot. It keeps them looking fresh.
Use a long-handled duster or a vacuum cleaner with a brush attachment. Work from top to bottom. This ensures all loose particles fall to the floor. Spot cleaning is equally important. Address any new marks or smudges as soon as you notice them. Do not let them sit and set into the paint. A damp microfiber cloth is usually enough for fresh spots. Catching stains early makes them much easier to remove. This proactive approach saves you from bigger cleaning tasks later.
Protecting High-Traffic Areas
High-traffic areas are prone to more dirt and damage. Hallways, entryways, and areas near light switches or door frames often show wear first. These spots on white walls get touched frequently. They are also subject to more scuffs and accidental marks. Protecting these areas helps maintain your white walls.
Consider applying a clear, protective topcoat specifically designed for high-traffic walls. This adds a layer of defense against marks. You can also install clear plastic wall protectors near light switches. Fingerprints and smudges are common there. Use washable paint in these areas if you are repainting. Washable paint is more durable and easier to clean than flat finishes. Placing furniture slightly away from walls also helps. This prevents constant rubbing and scuffing. These protective measures keep your white walls cleaner for longer.
FAQ Section
Can I use a Magic Eraser on white walls?
Yes, you can use a Magic Eraser on white walls, but with caution. These sponges are abrasive and can remove paint or leave dull spots if you scrub too hard. Always test on an inconspicuous area first. Use very light pressure. Gently rub the mark until it disappears.
How often should I clean my white walls?
For general maintenance, dust your white walls every 1-2 weeks. Spot clean any new marks as soon as you notice them. A deeper cleaning with soap and water can be done every 3-6 months, or as needed. High-traffic areas may require more frequent attention.
What is the best way to clean textured white walls?
Cleaning textured white walls requires care to avoid damaging
- white walls cleaning
- house wall care
- stain removal walls
- DIY cleaning tips
- home cleaning guide

Todd Martin
Senior Writer
With over 15 years of experience in home renovation and design, I started HEG to share what I’ve learned with homeowners who want to create spaces that are both beautiful and functional. I’ve always believed in a hands-on approach, and over the years, I’ve picked up practical solutions that actually work. Through HEG, I aim to make home improvement more approachable, sharing real tips that help you create a home you truly love.


