· Todd Martin · Home & Kitchen · 18 min read
How To Clean Wooden Spoons
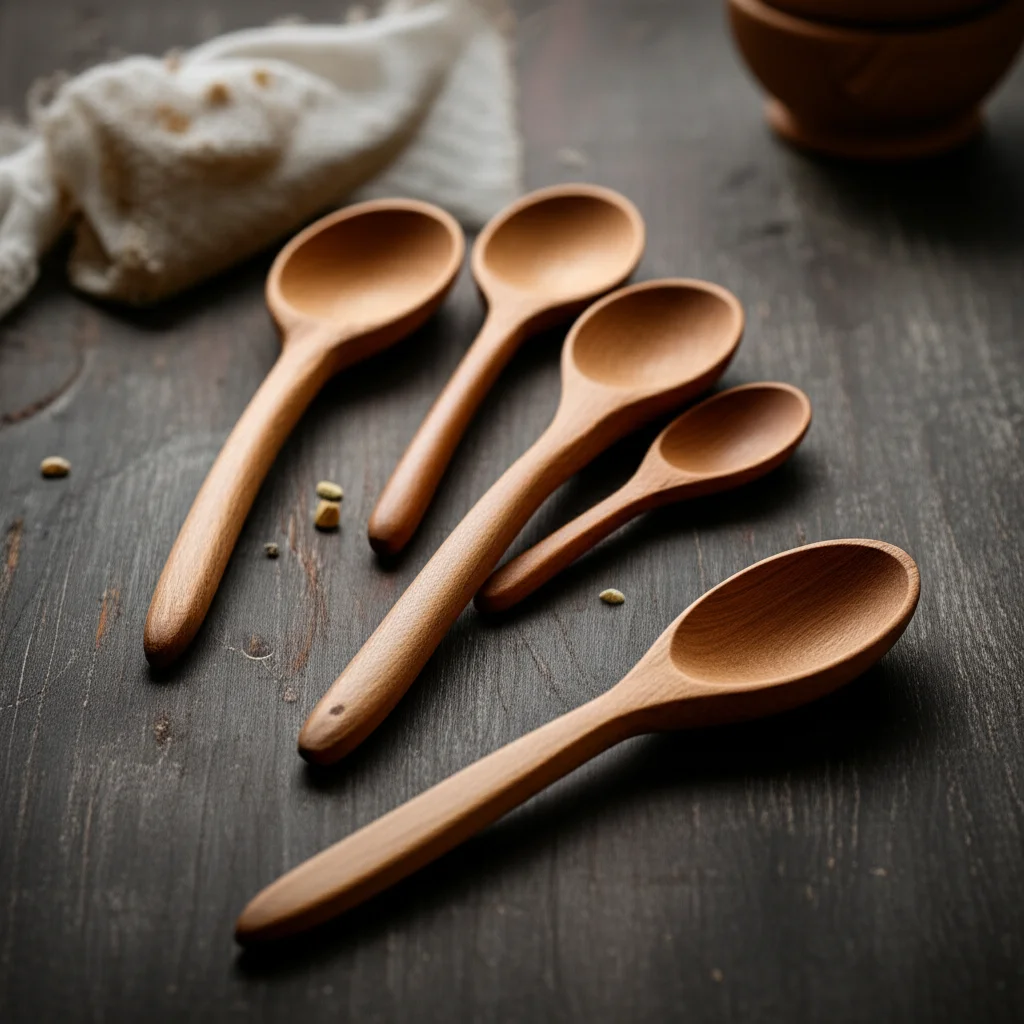
How to Clean Wooden Spoons: Essential Care Tips
Wooden spoons are true workhorses in any kitchen. They are gentle on cookware, durable, and bring a classic warmth to your cooking experience. But do you really know how to clean wooden spoons properly? Many people make simple mistakes that shorten the life of these beloved utensils. Neglecting proper care can lead to cracking, splintering, and even mold growth.
Keeping your wooden spoons clean and well-maintained is crucial. This ensures they remain hygienic and last for many years. A clean spoon protects your food from bacteria and unwanted odors. This comprehensive guide will walk you through daily washing, deep cleaning techniques, stain removal, and essential maintenance practices. We will help you keep your wooden spoons in top condition.
Takeaway
- Hand Wash Daily: Use warm soapy water, rinse well, and dry immediately.
- Deep Clean Regularly: Use lemon and salt or baking soda to remove odors and stains.
- Never Dishwash: Dishwashers strip wood of natural oils, causing damage.
- Dry Thoroughly: Air dry completely before storing to prevent mold and warping.
- Oil Periodically: Condition your spoons with food-grade mineral oil or beeswax to prevent cracking.
To clean wooden spoons, wash them by hand immediately after use with warm water and mild dish soap. Rinse thoroughly and dry them completely with a towel. For deep cleaning, use natural solutions like lemon and salt or a baking soda paste to remove stains and odors. Always oil your spoons regularly to keep the wood nourished.
Understanding Your Wooden Spoons: Why Special Care Matters
Wooden spoons are not like your metal or silicone utensils. Wood is a natural, porous material. It absorbs liquids, oils, and odors from food. This absorption can lead to stains, smells, and even bacteria if not cleaned correctly. Think of your wooden spoon as a living material that needs specific care.
Water is both a friend and a foe to wood. While necessary for cleaning, excessive soaking can cause the wood to swell, crack, and warp. Harsh detergents can strip away natural oils. This leaves the wood dry and brittle. This is why you must avoid the dishwasher and choose gentle cleaning methods.
Proper care extends the life of your wooden spoons. It keeps them beautiful and functional. It also prevents the growth of harmful bacteria. A well-cared-for wooden spoon can become an heirloom piece. It will serve you for many years of cooking adventures.
Daily Cleaning Ritual: The Basics of Wooden Spoon Care
Daily cleaning is the most important step in maintaining your wooden spoons. This simple routine prevents food residue from hardening. It stops odors from setting in. This method is quick, easy, and effective for everyday use.
I always wash my wooden spoons right after I finish cooking. This prevents food from drying onto the surface. Dried food is much harder to remove. It can also leave stubborn stains.
Step-by-Step Daily Wash
- Rinse Immediately: Right after use, rinse the spoon under warm running water. This removes loose food particles.
- Apply Mild Soap: Put a small amount of mild dish soap onto a sponge or brush. Avoid harsh detergents.
- Scrub Gently: Scrub the entire surface of the spoon. Pay attention to crevices and ends. Make sure to clean the handle as well.
- Rinse Thoroughly: Rinse the spoon under warm water until all soap residue is gone. Soap left on the wood can dry it out.
- Dry Instantly: This step is crucial. Immediately dry the spoon with a clean towel. Do not let it air dry completely on its own, especially if it’s still very wet. Excess moisture is the enemy of wood.
Remember, never put your wooden spoons in the dishwasher. The high heat and harsh detergents will damage the wood. They will cause it to crack, split, and splinter. This can also remove the protective oils from the wood.
Deep Cleaning Your Wooden Spoons: Tackling Stains and Odors
Even with daily washing, wooden spoons can absorb stubborn odors and develop stains over time. This is especially true after cooking with strong spices or tomato-based sauces. Deep cleaning helps to refresh your spoons. It removes lingering smells and discoloration. I use these methods regularly to keep my spoons looking and smelling new.
These techniques are simple and use common household ingredients. They are also gentle on the wood. You do not need harsh chemicals. Natural ingredients work wonders for wooden items like these.
The Lemon and Salt Method for Brightness
This method is excellent for brightening dull wood and removing mild stains and odors. Lemon acts as a natural bleach and disinfectant. Salt provides gentle abrasion. This helps to lift dirt and grim.
- Sprinkle Salt: Lay your wooden spoon flat. Sprinkle a generous amount of coarse salt (like sea salt or kosher salt) over the surface.
- Cut a Lemon: Cut a lemon in half.
- Scrub with Lemon: Use the cut side of the lemon to scrub the salt into the spoon. Squeeze the lemon slightly as you scrub. The lemon juice and salt create a powerful cleaning paste.
- Let Sit: Let the mixture sit on the spoon for 5-10 minutes. This allows it to work its magic.
- Rinse and Dry: Rinse the spoon thoroughly with warm water. Ensure all salt and lemon residue is gone. Immediately dry with a towel.
This method works well for general discoloration. It also helps remove a garlic smell. It is a natural way to clean your wood items. You can use a similar approach to clean other wooden items, like a wooden chopping board or wooden bowls.
The Baking Soda Paste for Odor Absorption
Baking soda is a fantastic natural deodorizer. It can absorb strong smells from your wooden spoons. This method is especially useful for lingering onion or curry odors. It works by neutralizing acidic and basic odors.
- Make a Paste: Mix baking soda with a small amount of water to create a thick paste. The consistency should be like toothpaste.
- Apply the Paste: Spread the paste over the entire surface of the wooden spoon. Pay special attention to stained or smelly areas.
- Let Sit: Allow the paste to sit on the spoon for at least 30 minutes, or even overnight for very strong odors.
- Scrub and Rinse: Use a brush or sponge to gently scrub the spoon. Rinse thoroughly under warm water.
- Dry Immediately: As always, dry the spoon completely with a clean towel.
For serious smells, you can try combining this with a quick rinse of diluted vinegar after the baking soda, but ensure you rinse well between steps. Vinegar itself is a great deodorizer and disinfectant, effective for many cleaning tasks, even tackling mold with vinegar.
Tackling Stubborn Stains and Unwanted Scents
Sometimes, regular deep cleaning is not enough for the toughest stains or most persistent odors. Certain foods, like curries, tomatoes, or berries, can leave deep-seated marks. Strong aromatics like garlic or fish can impregnate the wood with their scent. Do not despair; there are still steps you can take. These methods require a bit more effort. They are effective when other solutions fail.
I have personally battled stubborn tomato sauce stains. These stains make my spoons look old and tired. These techniques have always brought them back to life. It is satisfying to see the wood return to its natural beauty.
Hydrogen Peroxide for Discoloration
Hydrogen peroxide is a mild bleaching agent. It can help lift deep stains from wood. Use it cautiously and always dilute it. This is more for discoloration than for daily cleaning.
- Dilute Peroxide: Mix one part 3% hydrogen peroxide with two parts water.
- Apply to Stain: Dampen a cloth or paper towel with the diluted solution. Place it directly over the stain on the spoon.
- Let Sit: Allow it to sit for 15-30 minutes. Check periodically to ensure it is not overly bleaching the wood.
- Rinse and Dry: Rinse the spoon very thoroughly with warm water. Dry it immediately with a clean towel.
- Re-oil: Because hydrogen peroxide can be drying, re-oiling your spoon after this treatment is essential.
This method can be strong. It works on many types of wood stains. It is similar to methods used for stains on wood furniture or floors.
Sun Bath for Natural Deodorizing
The sun is a powerful natural disinfectant and deodorizer. UV rays can kill bacteria and break down odor molecules. This is an easy, no-cost way to refresh your wooden spoons. This method is passive. It requires patience.
- Wash and Dry: First, wash and dry your spoon as usual.
- Place in Sun: Place the clean, dry spoon in direct sunlight. Leave it there for several hours. You can even leave it for a full day.
- Flip: Turn the spoon periodically to expose all sides to the sun.
- Bring Indoors: Bring the spoon indoors once the odors are gone or after a full day.
This method is especially effective for removing lingering odors. It is also good for general sanitization. It leaves your spoons smelling fresh and clean.
The Importance of Drying and Proper Storage
After washing, how you dry and store your wooden spoons is as critical as the cleaning itself. Improper drying is the leading cause of cracked, warped, or moldy wooden spoons. Water is the enemy of wood if it lingers. Wood expands when wet and contracts when it dries. Repeated cycles of this can cause stress and damage.
I have seen many beautiful wooden spoons ruined by neglect at this stage. It is a small step that makes a huge difference. Taking care here saves you money in the long run. It helps your spoons perform well.
Drying Your Wooden Spoons Correctly
- Towel Dry Immediately: As mentioned before, always dry your wooden spoon with a clean towel right after rinsing. This removes most of the surface moisture.
- Air Dry Completely: Even after towel drying, allow the spoon to air dry completely. Do not put it away in a drawer immediately.
- Use a Drying Rack: Place spoons in a dish drying rack or stand them upright in a utensil holder. This allows air to circulate around all sides. Good airflow prevents moisture from getting trapped.
- Avoid Flat Surfaces: Do not lay wet spoons flat on a countertop. This traps moisture underneath. It can lead to mold or warping on one side.
- Patience is Key: Ensure the spoon is completely dry to the touch before storing it. This may take a few hours. Sometimes, it might take overnight depending on humidity.
Storing Your Wooden Spoons
Proper storage protects your dry spoons from dust and damage. It also keeps them ready for your next cooking adventure.
- Utensil Crocks: Standing spoons upright in an open utensil crock or jar on your countertop is ideal. This allows any residual moisture to evaporate. It also keeps them easily accessible.
- Drawer Organizers: If you prefer to store them in a drawer, use a drawer organizer. This prevents spoons from being stacked tightly. It allows for some air circulation. Ensure the drawer is completely dry inside.
- Avoid Humid Areas: Do not store wooden spoons in damp or humid areas. High humidity can lead to moisture absorption and mold growth. Keep them away from dishwashers or sinks where steam is common.
Oiling and Conditioning: Nourishing Your Wooden Spoons
Cleaning is essential, but it is only half the battle. Wooden spoons need conditioning to stay healthy and vibrant. Regular oiling prevents the wood from drying out. It stops cracking and splintering. It also enhances the natural beauty of the grain. Think of it as moisturizing your skin. Your wooden spoon needs similar care.
I make it a point to oil my wooden spoons monthly. This small effort yields big returns. It helps them resist moisture and last much longer. This step is often overlooked by many home cooks.
Why Oil Your Wooden Spoons?
- Prevents Drying and Cracking: Wood loses its natural oils over time, especially with repeated washing. Oiling replenishes these oils.
- Repels Water: A well-oiled spoon is less likely to absorb water. This reduces the risk of warping and swelling.
- Enhances Appearance: Oiling deepens the wood’s color. It brings out the natural grain, making your spoons look richer and more appealing.
- Extends Lifespan: Regular conditioning significantly prolongs the life of your wooden utensils.
Choosing the Right Oil
Use only food-grade oils for your wooden spoons. This is important because the oil will come into contact with your food.
- Food-Grade Mineral Oil: This is my top recommendation. It is inexpensive, tasteless, odorless, and will not go rancid. It penetrates the wood well. You can find it in the pharmacy section.
- Beeswax/Mineral Oil Blends: Many products combine beeswax with mineral oil. These offer extra protection and a nice sheen. Beeswax creates a protective barrier.
- Fractionated Coconut Oil: Some people use this. Ensure it is fractionated so it does not go rancid. Regular coconut oil can become sticky and rancid.
- Avoid: Do not use cooking oils like olive oil, vegetable oil, or canola oil. These oils will go rancid over time. They will leave a sticky, smelly residue on your spoons. This can ruin them.
How to Oil Your Wooden Spoons
- Ensure Cleanliness: Make sure your wooden spoon is completely clean and dry before oiling. Any moisture trapped underneath the oil can cause problems.
- Apply Oil: Pour a small amount of food-grade mineral oil onto a clean, soft cloth or paper towel.
- Rub In: Rub the oil generously into all surfaces of the wooden spoon. Use a circular motion. Make sure to cover every part, including the handle and edges. The wood should look saturated.
- Let Absorb: Let the oil soak into the wood for at least 30 minutes. For very dry or new spoons, let it sit overnight. The wood will absorb as much as it needs.
- Wipe Excess: After the absorption period, use a clean, dry cloth to wipe off any excess oil. The spoon should feel smooth, not greasy.
- Repeat as Needed: Repeat this process monthly. You can do it more often if your spoons look dry or dull. Or if you use them very frequently.
Oiling your wooden spoons is a small act of care. It provides long-term benefits. It helps preserve them for cooking. This is also similar to how you would care for a wooden table or a wooden hair brush.
What NOT to Do: Common Mistakes to Avoid
Knowing how to clean is important, but knowing what not to do is equally vital. Many common habits can severely damage your wooden spoons. Avoiding these mistakes will significantly extend the life and beauty of your utensils. I have seen many people unknowingly ruin their spoons. These mistakes are easy to avoid once you know them.
Always think about the wood. It is a natural material. It reacts to heat and moisture in specific ways. Treat it with respect.
1. Never Use the Dishwasher
This is the golden rule of wooden spoon care. Dishwashers are the ultimate enemy of wooden utensils.
- Extreme Heat: The high temperatures in a dishwasher will dry out the wood very quickly. This causes it to crack and warp.
- Harsh Detergents: Dishwasher detergents are much stronger than hand dish soap. They strip the natural oils from the wood. This leaves it brittle and prone to splintering.
- Excessive Water: The prolonged exposure to hot water and steam causes the wood to swell. Then, as it dries, it contracts unevenly. This leads to splitting.
Always wash wooden spoons by hand. There is no exception to this rule if you want them to last.
2. Avoid Prolonged Soaking
Leaving wooden spoons to soak in water for extended periods is almost as bad as using a dishwasher.
- Water Absorption: Wood is porous. It will absorb water like a sponge. This causes swelling.
- Cracking and Warping: When the wood dries after prolonged soaking, it shrinks unevenly. This results in cracks, warping, and deformation.
- Mold Growth: Constant moisture is a breeding ground for mold and mildew. This can lead to unpleasant smells and unhygienic conditions.
Wash your spoons promptly. Dry them immediately. Do not leave them in a sink full of water.
3. Steer Clear of Harsh Chemical Cleaners
Abrasive cleaners, bleach, or other strong chemical disinfectants are not suitable for wooden spoons.
- Damage to Wood: These chemicals can stain the wood. They can strip its natural finish. They can also break down the wood fibers.
- Food Safety Risk: Residue from harsh chemicals can leach into your food during cooking. This poses a health risk.
- Odor Absorption: Wood can absorb the chemical smell. This can transfer to your food.
Stick to mild dish soap, natural ingredients like lemon, salt, baking soda, and food-grade oils. These are safe and effective.
4. Do Not Store Wet or in Humid Places
Storing a wooden spoon before it is completely dry creates a perfect environment for mold and mildew.
- Mold and Mildew: Trapped moisture leads to unsightly black spots and a musty smell. Mold can penetrate deep into the wood.
- Unpleasant Odors: Mold growth also creates foul odors. These odors can transfer to your food.
- Wood Rot: Over time, consistent dampness can lead to wood rot. This will destroy the spoon.
Ensure your spoons are bone dry before placing them in a drawer or crock. Store them in a well-ventilated area.
When to Retire a Wooden Spoon: Signs It’s Time for a Replacement
Even with the best care, wooden spoons do not last forever. They are natural products. They will show signs of wear and tear over time. Knowing when to replace a spoon is important for hygiene and safety. Using a damaged spoon can introduce splinters into your food. It can also harbor bacteria in deep cracks.
I inspect my wooden spoons periodically. This ensures they are still safe and effective for cooking. It is better to replace an old spoon than to risk food contamination.
Here are the key signs that your trusty wooden spoon has reached the end of its life:
- Deep Cracks or Splits: Small surface cracks can sometimes be managed with oiling. Deep cracks or splits, especially those running through the spoon head or handle, are problematic. They provide perfect hiding spots for bacteria. They also indicate structural weakness. The spoon could break mid-stir.
- Rough or Fuzzy Texture: If the wood feels rough, fuzzy, or splintery, it means the wood fibers are breaking down. This can be caused by excessive drying or age. Splinters can break off into your food.
- Unpleasant Odors That Persist: Even after deep cleaning with lemon, salt, or baking soda, some odors might stubbornly remain. This usually indicates that the wood has absorbed too much. It might also signal mold growth deep within the pores.
- Dark Stains That Won’t Lift: Persistent dark stains, especially black spots, can indicate mold or mildew that has penetrated deeply. If these stains do not come out with thorough cleaning, it is best to discard the spoon.
- Soft or Spongy Feel: If a part of the spoon feels soft or spongy, it is a sign of water damage and potential wood rot. This means the structural integrity is compromised.
- Warping: While some minor warping can occur, significant warping means the spoon is no longer effective for stirring. It can also be a sign of internal damage.
If your wooden spoon exhibits any of these signs, it is time to say goodbye. Replace it with a new one. Invest in good quality wooden spoons and follow these cleaning and care tips. They will serve you well for years to come.
FAQs About Cleaning Wooden Spoons
Q1: Can I put wooden spoons in the dishwasher?
No, you should never put wooden spoons in the dishwasher. The extreme heat, harsh detergents, and prolonged exposure to water will strip the wood’s natural oils. This causes it to dry out, crack, warp, and splinter. Always hand wash your wooden spoons.
Q2: How often should I oil my wooden spoons?
You should oil your wooden spoons approximately once a month. This helps to replenish the wood’s natural oils, preventing drying and cracking. If you use your spoons very frequently or they look dull, you might oil them more often. Use only food-grade mineral oil.
Q3: How do I remove stubborn odors from wooden spoons?
To remove stubborn odors, try the baking soda paste method. Mix baking soda with water to form a thick paste. Apply it to the spoon and let it sit for at least 30 minutes before scrubbing and rinsing. For strong odors, sun exposure can also help neutralize them.
Q4: My wooden spoon has black spots. What are they, and how do I remove them?
Black spots on wooden spoons are usually mold or mildew, caused by trapped moisture. Try scrubbing with lemon and salt. For persistent spots, a diluted hydrogen peroxide solution might help. If the spots are deep or widespread and do not come out, it is best to discard the spoon for hygiene reasons.
Q5: What kind of oil is safe to use on wooden spoons?
Only use food-grade oils on your wooden spoons. Food-grade mineral oil is highly recommended because it is tasteless, odorless, and will not go rancid. You can also use food-grade beeswax/mineral oil blends. Avoid common cooking oils like olive or vegetable oil, as they will turn rancid over time.
Q6: Can wooden spoons be sanitized?
Yes, wooden spoons can be sanitized. Regular washing with hot, soapy water helps. For deeper sanitization, the lemon and salt scrub provides a natural antibacterial effect. Allowing spoons to dry completely in direct sunlight can also kill bacteria through UV exposure. Proper drying is key to preventing bacterial growth.
Conclusion
Caring for your wooden spoons is a simple yet essential practice for any home cook. By following these straightforward steps on how to clean wooden spoons, you can ensure they remain hygienic, functional, and beautiful for many years. Remember, consistent daily washing, regular deep cleaning, and proper oiling are the pillars of long-lasting wooden utensil care. Avoid the dishwasher and prolonged soaking at all costs.
Treat your wooden spoons with the care they deserve. They are more than just kitchen tools; they are a connection to culinary tradition and a joy to use. Embrace these habits, and your wooden spoons will continue to be reliable companions in your kitchen adventures. Start today, and give your wooden spoons the TLC they need to thrive!
- wooden spoon care
- kitchen cleaning
- wood utensil cleaning
- natural cleaning tips

Todd Martin
Senior Writer
With over 15 years of experience in home renovation and design, I started HEG to share what I’ve learned with homeowners who want to create spaces that are both beautiful and functional. I’ve always believed in a hands-on approach, and over the years, I’ve picked up practical solutions that actually work. Through HEG, I aim to make home improvement more approachable, sharing real tips that help you create a home you truly love.