· Davia Murnell · Electronics Care · 18 min read
How To Clean Xbox One
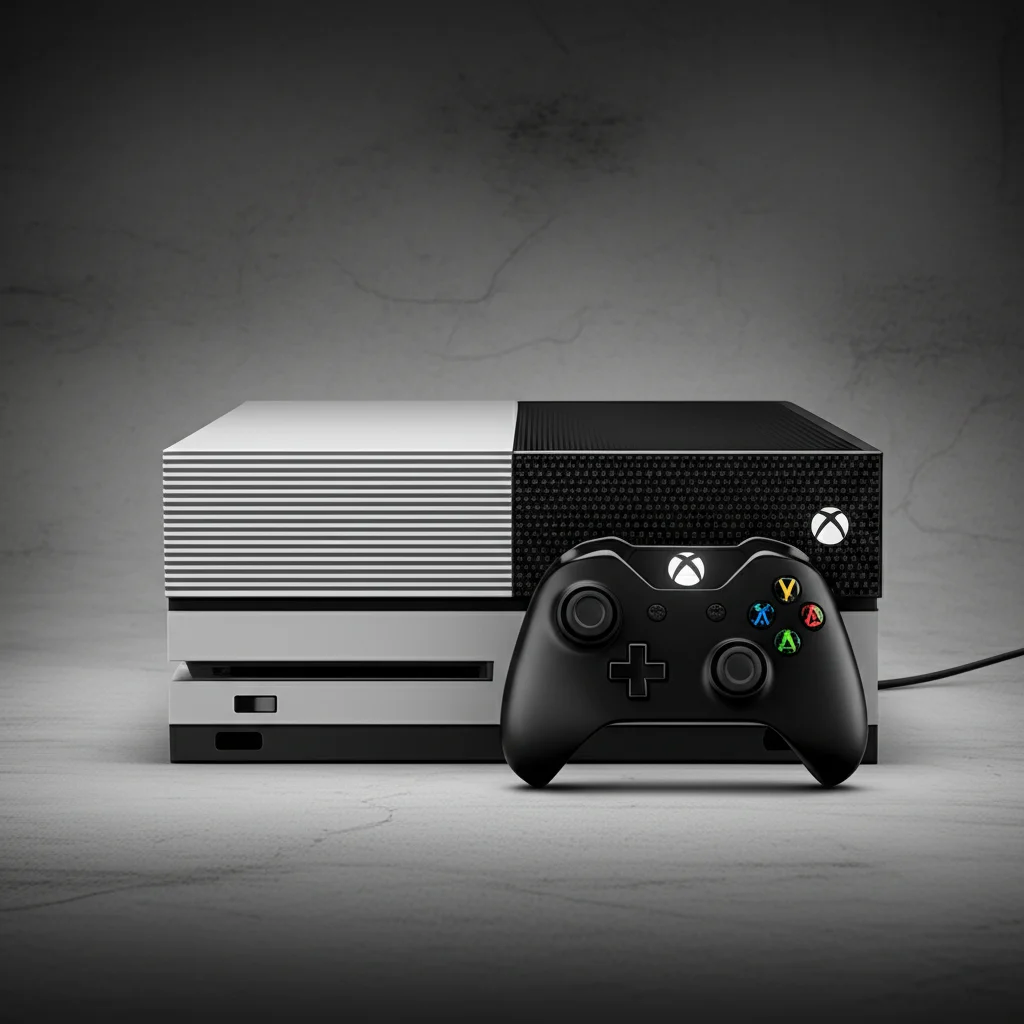
How to Clean Your Xbox One for Peak Performance
Do you ever wonder why your Xbox One sounds like a jet engine? Or perhaps your controller feels a bit sluggish? A dusty console is often the culprit. Just like any electronic device, your Xbox One gathers dust, dirt, and grime over time. This buildup can impact performance. Cleaning your Xbox One is simple. It helps your system run cooler and quieter. It also extends the life of your gaming essential. This guide will walk you through the proper steps to clean your console, controller, and accessories. We will cover everything from simple exterior wipes to deeper controller care. Get ready to give your Xbox One the refresh it needs for many more hours of enjoyable gameplay.
Takeaway
Cleaning your Xbox One is important for its health and your gaming experience.
- Unplug the console before cleaning.
- Use gentle tools like microfiber cloths and compressed air.
- Focus on vents, ports, and controller surfaces.
- Regular cleaning prevents dust buildup and overheating.
- A clean Xbox performs better and lasts longer.
You can clean your Xbox One by unplugging it first. Use a microfiber cloth and rubbing alcohol for the exterior. Use compressed air to clear vents. For the controller, use cotton swabs and rubbing alcohol to clean around buttons and sticks. This simple cleaning keeps your console running well and avoids performance issues.
Why Cleaning Your Xbox One Matters for Performance
Your Xbox One is a powerful gaming machine. It works hard for you. But, like all electronics, it attracts dust. Dust collects inside the console. It covers internal components. This dust acts like a blanket. It traps heat inside your Xbox. When heat stays trapped, your console gets hot. This is called overheating. Overheating hurts performance. It can make your games stutter or freeze. The fan also works harder. A hard-working fan makes a lot of noise. It sounds like a jet taking off. This noise distracts from your game.
A dirty console runs slowly. Dust blocks airflow through the vents. Good airflow keeps the system cool. Poor airflow means the system cannot cool itself well. This leads to slower processing. Your games might not load as fast. They may not run as smoothly. Over time, constant overheating can damage parts. This damage shortens your Xbox One’s life. Regular cleaning prevents these problems. It keeps your console cool. It keeps it quiet. It makes sure your games run their best. A clean Xbox One performs better for longer. It protects your investment in gaming fun.
Dust also affects your controller. Grime builds up under buttons and around joysticks. This makes buttons sticky. It causes “stick drift” in joysticks. These issues make gaming frustrating. You might miss shots or make wrong moves. Cleaning your controller improves responsiveness. It brings back smooth control. Both the console and controller benefit greatly from regular cleaning.
Essential Tools for a Safe Xbox One Clean
Before you start cleaning your Xbox One, gather the right tools. Using the correct items ensures a safe and effective clean. You do not need many things. Most items are common household goods. Others are special for electronics. Using wrong tools can damage your console. Avoid harsh chemicals or abrasive cloths. These can scratch or corrode surfaces. Always choose soft and gentle options.
Here is what you will need:
- Microfiber cloths: These are soft and lint-free. They will not scratch plastic surfaces. Use them to wipe down the exterior of your console and controller. They pick up dust and fingerprints well.
- Compressed air can: This tool is great for blowing dust out of vents and ports. It gets into small spaces. Hold the can upright. Use short bursts of air. Do not tip it. Tipping can release a cold liquid. This liquid can harm electronics.
- Isopropyl alcohol (90% or higher): This type of alcohol evaporates quickly. It leaves no residue. It is safe for electronics. Use it for stubborn grime or disinfecting surfaces. Do not spray it directly onto the console. Dampen a cloth or cotton swab instead.
- Cotton swabs (Q-tips): These are perfect for cleaning small, tight spots. Use them for controller crevices. They also work for ports on the console. Dip them in isopropyl alcohol for a deeper clean.
- Small soft brush (e.g., a clean paintbrush or soft toothbrush): This helps dislodge dust from vents. Use it gently. It can also clean around buttons on your controller.
- Small vacuum cleaner (optional, but helpful): A handheld vacuum with a brush attachment can suction dust. Use it on the vents. Make sure it has low suction. Do not use strong vacuums directly on open ports.
Gathering these items makes the cleaning process easy. It also protects your valuable gaming equipment. You are now ready to make your Xbox One sparkle.
How to Clean the Xbox One Exterior (Surface Cleaning)
Cleaning the outside of your Xbox One is the first step. This process removes visible dust and grime. It helps your console look new. More importantly, it clears the main vents. Clear vents allow for good airflow. This prevents overheating. Remember to always unplug your Xbox One first. Safety is key when working with electronics. Make sure the console is cool. It should not be running.
Follow these simple steps for exterior cleaning:
- Unplug Everything: Disconnect the power cable. Remove all HDMI cables, USB accessories, and network cords. This removes any risk of electric shock. It also prevents accidental button presses during cleaning. Move your console to a well-lit area. This helps you see all the dust.
- Initial Dusting with a Microfiber Cloth: Take a dry microfiber cloth. Gently wipe down all smooth surfaces of the console. Go over the top, sides, and front. Focus on getting rid of loose dust and fingerprints. For any sticky spots or marks, you can slightly dampen your microfiber cloth with a small amount of isopropyl alcohol. This helps to clean plastic surfaces without damage. For more details on this, you can learn how to clean stains on plastic. Ensure the cloth is damp, not wet.
- Clean the Vents: The vents are crucial for heat dissipation. They are often found on the sides and back of the console.
- Brush Away Surface Dust: Use a soft, small brush. Gently brush along the vent openings. This dislodges dust trapped on the grilles.
- Use Compressed Air: Hold your compressed air can upright. Spray short bursts into the vents. Do this from a few inches away. The air will blow dust out of the console. Avoid long sprays. Long sprays can introduce moisture or cold liquid. You will see dust clouds come out. It is normal. You may want to do this outside or in a well-ventilated room.
- Wipe Ports and Connections: Use a cotton swab lightly dampened with isopropyl alcohol. Carefully clean around the USB ports, HDMI ports, and Ethernet port. Do not push the swab deep into the ports. Just clean the outer edges. This removes dust or debris that could affect connectivity. Let all surfaces dry completely before plugging anything back in. This ensures no moisture remains. It protects your console from short circuits.
Regular exterior cleaning helps your Xbox One breathe. It keeps it looking good. It also maintains its top performance. Make this a part of your routine.
Deep Cleaning Your Xbox One Controller
Your Xbox One controller takes a lot of action. Over time, it collects sweat, oils, and dirt. This grime can cause problems. Buttons might feel sticky. Joysticks might drift. These issues make gaming frustrating. Cleaning your controller improves its feel and response. It helps it last longer too. Always remove the batteries before you start. This prevents accidental power-on. It also keeps chemicals away from the battery compartment.
Here’s how to give your controller a deep clean:
- Remove Batteries: Open the battery compartment. Take out the AA batteries or rechargeable pack. Set them aside in a safe place.
- Clean the Shell: Wipe down the entire controller shell with a microfiber cloth. For general dirt and fingerprints, a dry cloth works well. If there are noticeable stains or grime, dampen your cloth slightly with isopropyl alcohol. Rub gently to remove the dirt. Isopropyl alcohol is safe for plastic and evaporates quickly. You can learn more about how to clean stains on plastic if you encounter stubborn marks.
- Address Buttons and D-Pad:
- Sticky Buttons: Use a cotton swab dampened with isopropyl alcohol. Gently rub around the edges of each button. Press the button down lightly. Clean the gap around it. This removes sticky residue. It allows the button to move freely again. Be careful not to let liquid seep inside.
- D-Pad: Use a similar method for the D-Pad. Clean around its edges with a damp cotton swab. Push each direction to expose more area for cleaning.
- Clean Joysticks: Joysticks are prone to collecting dust and skin cells. This often causes “stick drift.”
- Surface Cleaning: Dampen a cotton swab with isopropyl alcohol. Wipe around the base of the joystick. Rotate the stick as you clean to reach all sides.
- Deep Crevice Cleaning: Gently push the joystick to one side. This creates a small gap at the base. Use a fine-tipped cotton swab or the corner of a clean cloth. Clean carefully in this gap. Rotate the joystick to clean all sides. This helps to remove hidden debris. If your controller buttons are already feeling stuck or slow, you can find specific solutions on how to clean sticky buttons on your Xbox controller.
- Clean Triggers and Bumpers: Use a slightly dampened cotton swab or the edge of your microfiber cloth. Wipe the surfaces of the triggers and bumpers. Clean any visible grime in their crevices. These areas get a lot of contact during gameplay.
- Clean Ports: Use a dry cotton swab to clean the charging port (if applicable) and the headset jack. Do not use liquid in these ports. Just remove any lint or dust.
- Air Dry: Let your controller air dry completely for at least 15-20 minutes. Ensure all alcohol has evaporated. Then, replace the batteries. Test your controller. You should feel a noticeable difference in responsiveness. Your gaming experience will improve.
Cleaning Xbox One Ports and Disc Drive
The ports on your Xbox One are vital for connectivity. USB ports connect accessories. HDMI ports link to your TV. The Ethernet port connects to the internet. The disc drive reads your games. These areas can collect dust and lint. Blocked ports can cause connection issues. A dirty disc drive can lead to reading errors. Cleaning these areas requires a gentle touch. Precision is key. You do not want to damage delicate pins or mechanisms.
Here’s how to safely clean your console’s ports and disc drive:
- Ensure Power is Off and Unplugged: Just like before, make sure your Xbox One is completely off and unplugged from the wall. This is a critical safety step. It protects both you and your console.
- Cleaning USB and HDMI Ports:
- Visual Inspection: Look closely at each port. Use a flashlight if needed. See if you can spot any visible dust bunnies or debris.
- Use Compressed Air: For USB and HDMI ports, compressed air is your best friend. Hold the can upright. Use short, controlled bursts of air. Aim directly into the port. The air will dislodge and blow out dust. Keep the can a few inches away. Do not spray too close. Avoid spraying liquid propellant into the ports.
- Cotton Swabs (Optional for Outer Edge): You can lightly dampen a cotton swab with isopropyl alcohol. Carefully wipe the outer edges of the metal casing around the port. Do not insert the wet swab deep into the port itself. This could cause damage. The goal is to clean the surrounding plastic and metal, not the internal contacts.
- Cleaning the Ethernet Port: The Ethernet port is similar to USB ports. It can also gather dust. Use short bursts of compressed air to clear it out. Again, avoid touching the internal pins with anything.
- Cleaning the Disc Drive Slot:
- External Dust: Use your microfiber cloth to wipe the visible area around the disc slot. This removes any surface dust.
- Compressed Air for Inside: For the slot itself, use compressed air. Aim short bursts into the disc drive opening. This helps blow out dust that might be inside. Do not stick anything solid into the disc slot. You risk damaging the laser lens or the disc loading mechanism.
- Avoid Liquids: Never spray any liquid directly into the disc drive slot. This includes isopropyl alcohol. Liquid can cause severe damage to the internal components.
- Audio and Optical Ports: If your Xbox One has audio or optical ports, treat them similarly to USB ports. Use compressed air to clear dust. Avoid inserting anything solid or wet into them.
After cleaning all ports and the disc drive, allow a few minutes for any lingering moisture from the isopropyl alcohol to evaporate. Then, you can safely plug your Xbox One back in. A clean disc drive helps prevent “disc unreadable” errors. Clean ports ensure reliable connections for your gaming accessories and display.
Advanced Cleaning: Opening Your Xbox One (Caution Advised)
Sometimes, surface cleaning is not enough. If your Xbox One is still loud, overheating, or shutting down, dust inside might be severe. This requires opening the console. However, this step comes with significant warnings. Opening your Xbox One typically voids its warranty. It also carries a risk of damage. If you are not comfortable with electronics or repair, do not do this yourself. Consider professional repair services. They have the right tools and knowledge.
This section provides information only. It is not a recommendation to proceed. If you choose to open your console, you do so at your own risk.
When to Consider Opening Your Console:
- Excessive Fan Noise: The fan runs constantly and loudly, even when idle.
- Frequent Overheating: The console feels very hot to the touch. It may display overheating warnings. It might shut down unexpectedly during gameplay.
- Poor Airflow: Even after external cleaning, you can barely feel air moving from the vents.
What to Expect if Opening (General Steps, Not a How-To):
- Specialized Tools: You will need specific tools. Torx screwdrivers (T8 and T10) are usually required. You may also need plastic prying tools. These help separate the casing without damage.
- Disassembly: The outer shell of the Xbox One needs to be carefully removed. This often involves hidden clips and screws. Patience is key. Force can break plastic tabs.
- Component Access: Once open, you can access the internal fan, heatsink, and circuit board. These are the main areas where dust collects.
- Cleaning Internal Components:
- Fan: Use compressed air to blow dust off the fan blades. You can also use a soft brush. Hold the fan still with your finger while blowing air. This prevents over-spinning. Over-spinning can damage the fan bearings.
- Heatsink: The heatsink is a metal component with fins. It helps dissipate heat. Blow compressed air through its fins. Remove any dust buildup.
- Motherboard/Circuit Board: Gently blow air over the circuit board. Avoid touching components directly. Do not use liquid cleaners here unless you are very skilled.
- Thermal Paste (Advanced): In some severe cases, the thermal paste between the CPU/GPU and heatsink might need replacement. This is for advanced users only. It involves removing the heatsink. Cleaning off old paste. Applying new thermal paste. Incorrect application can cause more heating issues.
- Reassembly: Put the console back together carefully. Make sure all screws are in place. All clips are secure. Test it before fully buttoning it up.
Opening your Xbox One is a big step. It offers a deeper clean. It can significantly improve performance. But it carries risks. If you are uncertain, seek professional help. Your Xbox One is a valuable device. Protecting it is important.
Best Practices for Maintaining a Clean Xbox One
Cleaning your Xbox One is not a one-time event. It is an ongoing process. Regular maintenance prevents heavy dust buildup. This keeps your console running well all the time. Good habits extend your console’s life. They also ensure a smooth gaming experience. Here are some simple, effective practices to keep your Xbox One clean and healthy:
- Strategic Placement is Key:
- Open Spaces: Do not place your Xbox One in an enclosed cabinet. It needs space for airflow. Keep at least a few inches of clearance on all sides. This includes the top, bottom, and sides where vents are.
- Hard Surfaces: Place the console on a hard, flat surface. Avoid carpets or rugs. Soft surfaces can block vents. They also collect more dust. A wooden shelf or entertainment center is ideal.
- Away from Dust Sources: Keep your console away from open windows. Keep it away from high-traffic areas. Avoid placing it near pets or plants. These are common sources of dust, hair, and debris.
- Regular Exterior Dusting:
- Weekly Wipe-Down: Make it a habit to wipe down your Xbox One’s exterior once a week. Use a dry microfiber cloth. This removes surface dust before it can enter the console.
- Quick Vent Clean: Every few weeks, use a soft brush or a quick burst of compressed air on the external vents. This prevents dust from clogging them.
- Controller Care:
- Wipe After Use: Wipe your controller with a dry cloth after each gaming session. This removes sweat and oils.
- Monthly Deep Clean: Aim for a more thorough controller clean once a month. Focus on buttons and joysticks. This prevents stickiness and drift.
- Protect from Pets and Food:
- Pet Hair: If you have pets, brush them regularly. This reduces loose hair. Keep pets away from your console area if possible. Pet hair can easily clog vents.
- Eating/Drinking: Avoid eating or drinking directly over your console or controller. Spills and crumbs are hard to remove. They attract pests too.
- Use Dust Covers (Optional):
- When Not In Use: If you do not use your Xbox One for extended periods, consider a dust cover. Place it over the console when it is off. This protects it from dust accumulation. Remember to remove the cover when using the console.
- Maintain Your Gaming Area: A clean room helps keep your console clean. Dust your entertainment center and shelves regularly. Vacuum the floor around your console. Less dust in the air means less dust entering your Xbox One.
Following these simple practices reduces the need for deep cleaning. It ensures your Xbox One stays in top condition. This means more seamless gaming and less worry about performance issues.
Frequently Asked Questions About Cleaning Your Xbox One
How often should I clean my Xbox One?
You should clean the exterior of your Xbox One weekly with a microfiber cloth. Use compressed air on the vents monthly. Give your controller a deep clean every 1-2 months. If you game often or have pets, you might need to clean more frequently. Regular cleaning prevents major dust buildup.
Can I use rubbing alcohol to clean my Xbox One?
Yes, you can use isopropyl alcohol (90% or higher) to clean your Xbox One. Dampen a microfiber cloth or cotton swab with it. Use it on the exterior plastic and controller surfaces. Do not spray alcohol directly onto the console. Ensure it is completely dry before turning on your Xbox One.
What happens if I don’t clean my Xbox One?
If you do not clean your Xbox One, dust builds up inside. This leads to overheating, loud fan noise, and reduced performance. Your console may slow down or even shut off unexpectedly. Long-term, it can damage internal components. This shortens the lifespan of your Xbox One.
Is it safe to use a vacuum cleaner to clean my Xbox One?
You can use a small handheld vacuum with a brush attachment on the vents of your Xbox One. Use low suction. Do not use a powerful household vacuum. Do not put the vacuum nozzle directly into ports. Too much suction can cause static electricity or damage internal components. Compressed air is generally safer for ports.
Can cleaning my Xbox One fix loud fan noise?
Yes, often cleaning your Xbox One can fix loud fan noise. Dust buildup forces the fan to work harder. This creates more noise. Clearing dust from the vents and inside the console (if you open it carefully) allows the fan to run more efficiently and quietly.
Will cleaning improve my Xbox One’s performance?
Absolutely. A clean Xbox One performs better. Removing dust allows the console to cool properly. This prevents thermal throttling, where the system slows down to prevent overheating. A cooler system runs at its optimal speed. This leads to smoother gameplay and faster load times.
Conclusion
Taking the time to clean your Xbox One is a simple yet powerful way to protect your investment. We have covered everything from basic exterior wipes to deep controller care. You now know the right tools to use. You understand the specific steps for each part of your system. Remember, a dust-free Xbox One is a happy Xbox One. It runs quieter and cooler. It performs better and lasts longer.
Make cleaning your Xbox One a regular habit. Simple weekly dusting and monthly deep cleans will make a big difference. If you encounter sticky buttons or noisy fans, you now have the knowledge to address these issues. Do not let dust slow down your gaming experience. Take action today. Give your Xbox One the care it deserves. Enjoy many more hours of seamless gaming on a well-maintained console. Your games, and your wallet, will thank you.
- Xbox One cleaning
- console maintenance
- gaming console care
- dust removal
- controller cleaning
- Xbox longevity

Davia Murnell
Room Cleaning Expert
Before joining HEG, I spent over a decade running my own window cleaning business, where I perfected streak-free techniques and learned the ins and outs of specialty glass care. Now, I bring that expertise to a broader mission—helping homeowners maintain sparkling windows and beautiful outdoor spaces. From skylights and sliding doors to patio glass and outdoor furniture, I believe every surface deserves attention and care. I share practical tips and proven methods that make even the toughest cleaning jobs feel manageable. Whether you're battling pollen on the porch or smudges on high windows, I’m here to help you see your home in a whole new light—literally.