· Todd Martin · Home Maintenance · 17 min read
How To Deep Clean Fridge

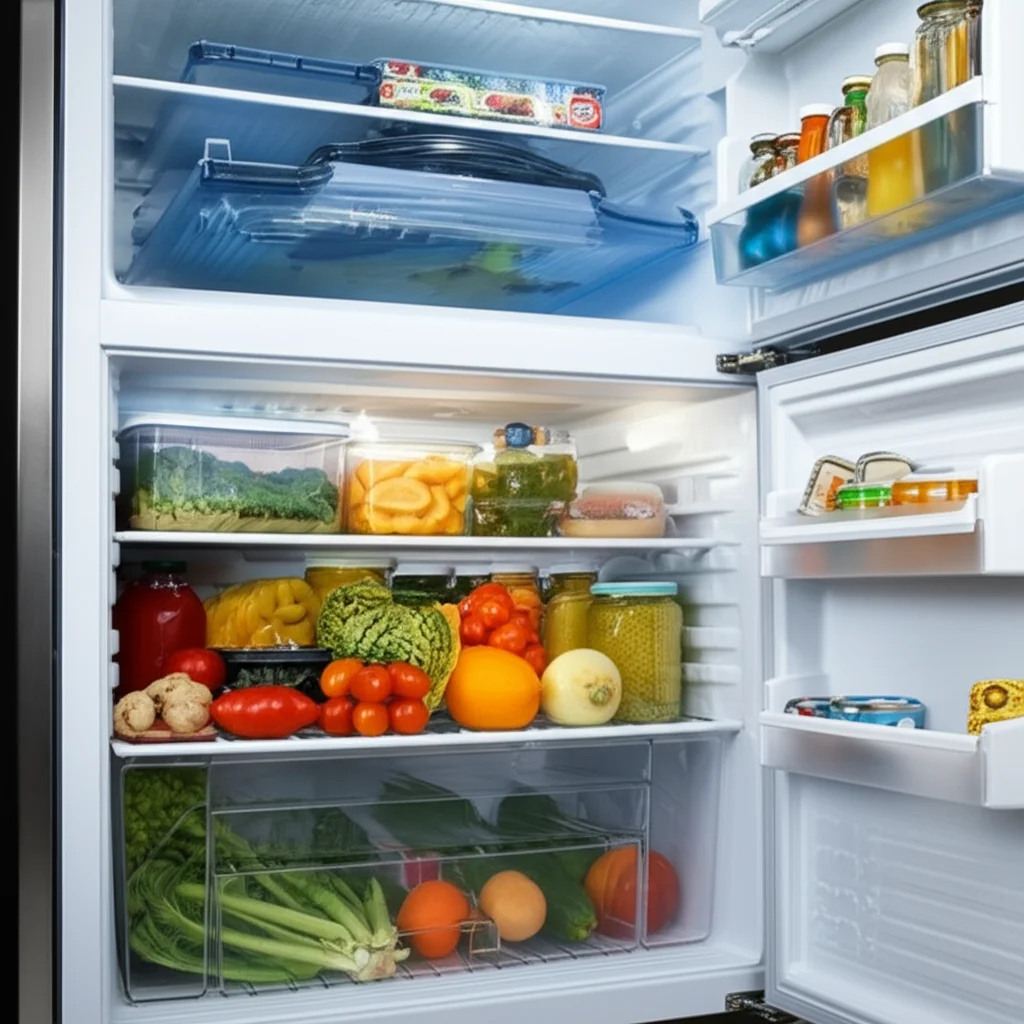
Deep Clean Your Fridge for a Fresh Kitchen
Is your refrigerator looking a little sad? A truly clean fridge goes beyond a quick wipe-down. Knowing how to deep clean your fridge properly makes a big difference. It helps your food last longer and keeps your kitchen smelling fresh. This guide will help you transform your appliance from grimy to gleaming.
Deep cleaning your refrigerator is more than just a chore. It is an investment in your health and your home’s efficiency. Old spills, forgotten food, and lingering odors can make your fridge an unhealthy place. Our guide walks you through every step. We cover everything from gathering supplies to maintaining freshness. Get ready to experience a truly clean and organized refrigerator.
Takeaway:
- Regular deep cleaning extends food freshness and improves fridge efficiency.
- Gather simple cleaning supplies like baking soda, vinegar, and mild soap.
- Always unplug the fridge and empty it completely before starting.
- Clean all removable parts separately and thoroughly.
- Address specific areas like coils, water dispensers, and door seals.
- Implement a routine to maintain cleanliness after the deep clean.
To deep clean a fridge, first empty all contents and unplug the appliance. Remove and wash all shelves, drawers, and removable parts. Then, clean the interior walls with a baking soda or vinegar solution. Wipe down the exterior, condenser coils, and door seals. Finally, return cleaned items and plug the fridge back in.
Why Deep Cleaning Your Fridge Matters
Deep cleaning your fridge offers many benefits. It makes your kitchen a cleaner, safer place. Many people only wipe down their fridge when a spill happens. This approach misses hidden dirt and grime. A full deep clean addresses all areas.
My own fridge once had a mystery smell. I thought a quick wipe would fix it. Only after a deep clean did I find the source and truly eliminate the odor. This taught me the importance of thorough cleaning. It ensures every nook and cranny is addressed.
Food Safety and Preservation
Your refrigerator protects your food. It keeps items fresh and safe to eat. However, bacteria can grow from spills and forgotten food. This growth can contaminate fresh items. A dirty fridge is not a safe fridge.
Regular deep cleaning kills harmful bacteria. It stops cross-contamination. This helps your food stay good for longer. This also prevents you from wasting food.
Energy Efficiency Benefits
A dirty fridge works harder to stay cool. Dust and grime collect on condenser coils. These coils release heat. When they are dirty, they cannot release heat well. The fridge then uses more energy.
Cleaning the coils helps your fridge run efficiently. This saves you money on electricity bills. It also extends the life of your appliance. A clean fridge is a happy fridge, and a happy wallet.
Eliminating Unpleasant Odors
Have you ever opened your fridge to a strange smell? Old food, spoiled items, or even mold can cause bad odors. These smells can transfer to other foods. This makes everything taste and smell off.
Deep cleaning removes the source of these odors. It gets rid of lingering smells from spills. Baking soda and vinegar are excellent natural deodorizers. They leave your fridge smelling truly clean.
Essential Supplies for a Fridge Deep Clean
Before you begin, gather all your cleaning supplies. Having everything ready saves time. It makes the deep cleaning process smooth. You likely have most of these items already at home.
I always prepare my cleaning station before starting. This prevents me from running around mid-clean. It helps me focus on the task. Having the right tools ensures a thorough job.
Cleaning Solutions
You do not need harsh chemicals to clean your fridge. Natural solutions are effective and safe. They do not leave strong chemical smells behind. This is good for your food and your health.
- Baking Soda and Water: Mix a quarter cup of baking soda with one gallon of warm water. This solution is great for general cleaning. It neutralizes odors.
- White Vinegar and Water: Mix equal parts white vinegar and water. This solution disinfects and cuts through grease. It also helps remove stubborn stains.
- Mild Dish Soap: Use a few drops of mild dish soap in warm water. This works well for washing removable parts. It cuts through sticky residues.
- Hydrogen Peroxide: For tough stains or mold, a diluted hydrogen peroxide solution works. Mix one part hydrogen peroxide with two parts water. Always rinse thoroughly after using it.
Tools and Equipment
The right tools make the job easier. Simple items found around your home are often enough. Avoid abrasive scrubbers that can scratch surfaces.
- Soft Cloths or Microfiber Towels: You will need several for wiping and drying. Microfiber is gentle and absorbs well.
- Sponges: Use a soft sponge for scrubbing. A non-scratch sponge is best for delicate surfaces.
- Small Brush or Old Toothbrush: This helps clean tight spots. It gets into crevices and corners.
- Bucket or Basin: You will need a container for your cleaning solutions. It is also useful for soaking removable parts.
- Vacuum Cleaner (with hose attachment): Essential for cleaning condenser coils. It removes dust buildup.
- Spray Bottle: Handy for applying cleaning solutions evenly.
- Lint-Free Cloths: For drying stainless steel to prevent streaks.
Protective Gear
Protect yourself during the cleaning process. Even natural cleaners can irritate skin. Wearing gloves is always a good idea.
- Rubber Gloves: Protect your hands from water and cleaning solutions. They also help with grip.
Having these supplies ready makes the deep cleaning process much more efficient. You can then focus on making your fridge shine.
Step-by-Step Guide to Deep Cleaning Your Refrigerator
Deep cleaning your fridge seems like a big task. Breaking it down into steps makes it manageable. Follow these steps for a truly sparkling appliance. I find that working systematically helps me not miss any spots. This method ensures every part of your fridge gets the attention it needs.
Step 1: Empty and Disconnect
This is the first and most important step. You cannot clean around food. Remove everything from your fridge and freezer. Place perishable items in a cooler with ice. This keeps them safe while you clean.
Next, unplug your refrigerator from the wall outlet. This is for your safety. It also allows the fridge to warm slightly. This makes ice and grime easier to remove. Never clean an active appliance.
Step 2: Remove Removable Parts
Take out all shelves, drawers, and door bins. These parts often collect spills and crumbs. They need individual attention. Bring them to a sink or bathtub.
Wash these parts thoroughly with warm water and mild dish soap. For stubborn dried-on spills, let them soak in the water first. You can refer to our guide on how to clean fridge shelves for more detailed instructions. Use a soft sponge or cloth. Rinse them well and let them air dry completely before putting them back.
Step 3: Clean Interior Surfaces
Now, tackle the inside of the fridge. Use your chosen cleaning solution. The baking soda and water mixture works well here. Spray or wipe down all interior walls. Pay special attention to sticky spots or dried spills.
Let the solution sit for a few minutes on tough spots. This helps loosen the grime. Use a soft cloth or sponge to wipe everything clean. For really stuck-on messes, a plastic scraper can help. Just be gentle.
Step 4: Tackle Drawers and Shelves
Once the main interior is clean, focus on the empty spaces left by shelves and drawers. These areas can hide forgotten crumbs or liquid spills. Clean the tracks and grooves where the drawers slide in and out. An old toothbrush can be helpful here.
Ensure every surface is wiped clean and dry. This prevents mold growth. It also removes any remaining odors. My personal tip is to use a slightly damp cloth followed by a dry one.
Step 5: Sanitize Walls and Doors
After cleaning, it is time to sanitize. A white vinegar and water solution is perfect for this. Spray or wipe down all interior surfaces again. This kills any remaining bacteria. It also helps with odor control.
Do not forget the inside of the fridge doors. Clean the door seals and gaskets thoroughly. Food particles and mold often accumulate there. Use a small brush or an old toothbrush to get into the folds. Wipe down the interior of the freezer section too, if applicable. This full sanitization ensures a truly clean appliance.
Step 6: Clean Exterior Surfaces
The outside of your fridge also needs attention. Wipe down the top, sides, and front. Use a general all-purpose cleaner or your baking soda solution. For stainless steel fridges, use a specialized cleaner. Our guide on how to clean a stainless steel fridge offers specific advice. Wipe in the direction of the grain.
Do not forget the handles. Handles are high-touch areas. They collect a lot of dirt and germs. Clean them with a disinfecting wipe or your vinegar solution. This final exterior clean makes your whole fridge look fresh.
Step 7: Address Specialized Components
Some parts of your fridge require special care. These areas are crucial for proper function and hygiene. Ignoring them can lead to problems. This step ensures your fridge runs well.
How to Clean the Water Dispenser and Ice Maker
If your fridge has a water dispenser or ice maker, clean these areas. Bacteria can grow in water lines. Refer to our article on how to clean water dispenser on fridge for a full guide. For ice makers, empty the ice bin. Wash the bin with soap and water. Clean the ice chute. Run a cleaning cycle if your ice maker has one.
Maintaining Condenser Coils for Efficiency
Condenser coils are usually at the back or bottom of your fridge. They release heat. Dust buildup on these coils makes your fridge work harder. This wastes energy. For details on how to perform this task, check our guide on how to clean condenser coils on fridge.
Use a vacuum cleaner with a brush attachment to gently remove dust. If you see stubborn grime, a coil brush works well. Do this at least once or twice a year. It greatly improves efficiency.
Cleaning the Drip Pan
The drip pan collects condensation. It can become a breeding ground for mold and odors. It is usually located at the bottom of the fridge, near the coils. Slide it out gently. Wash it with warm soapy water and a bit of vinegar. Rinse it well and dry completely before replacing.
Cleaning Specific Fridge Components
Different parts of your fridge require slightly different cleaning methods. Understanding these nuances helps you clean effectively. It ensures you do not damage any surfaces. I have learned that a one-size-fits-all approach does not work for every component.
How to Clean Fridge Shelves
Fridge shelves, whether glass or wire, get dirty quickly. Spills, crumbs, and sticky residues accumulate. Remove all shelves from the fridge. Wash them in a sink or bathtub with warm, soapy water. A mild dish soap works best.
For glass shelves, avoid extreme temperature changes. Do not use very hot water on cold glass, as it might crack. Use a soft sponge or cloth to scrub away grime. For stubborn sticky spots, let them soak for a few minutes. Rinse thoroughly and dry completely before placing them back into the fridge. For a detailed guide, see how to clean fridge shelves.
Cleaning the Water Dispenser and Ice Maker
These features provide clean water and ice. However, they can harbor bacteria if not cleaned. Start by turning off the water supply to the fridge. Then, empty the ice bin. Wash the ice bin with warm, soapy water.
For the water dispenser nozzle, use a small brush or cotton swab dipped in vinegar solution. Clean the tray beneath the dispenser. Some models have a removable water filter. If yours does, consider changing or cleaning it as per manufacturer instructions. Our article on how to clean water filter in fridge offers comprehensive steps.
Maintaining Condenser Coils for Efficiency
Condenser coils are vital for your fridge’s performance. They release heat from the refrigerant. Over time, dust, pet hair, and lint build up on them. This blanket of debris traps heat, making the compressor work harder. This increases energy consumption and can shorten the fridge’s lifespan.
Locate the coils. They are usually at the back or underneath the fridge. Unplug the fridge first. Use a vacuum cleaner with a hose and brush attachment to carefully suck away dust. For tighter spots, a coil brush or stiff long brush is useful. Clean these coils at least twice a year.
Cleaning Stainless Steel Exteriors
Stainless steel fridges look sleek, but they show fingerprints and smudges easily. Cleaning stainless steel requires specific products to avoid streaks. Do not use abrasive cleaners or scrubbers. They can scratch the surface.
Use a cleaner specifically designed for stainless steel. Alternatively, a mix of white vinegar and water works well. Spray the solution onto a microfiber cloth, not directly onto the appliance. Wipe in the direction of the grain of the stainless steel. Follow with a dry, clean microfiber cloth for buffing. This helps prevent streaks and brings out the shine.
Odor Removal and Prevention Tips
Even after a deep clean, sometimes lingering odors can reappear. This happens if the source is not fully removed or if new smells are introduced. Preventing odors is an ongoing process. I have found a few simple habits make a big difference.
Natural Odor Absorbers
Activated charcoal or baking soda are excellent natural odor absorbers. They do not just mask smells. They actually trap and neutralize them. Place an open box of baking soda in the back of your fridge. Change it every three months.
You can also use coffee grounds or fresh lemon halves. Place a small bowl of coffee grounds in the fridge for a day or two. This absorbs strong smells. Lemon halves also add a fresh scent.
Regular Wipe-Downs
Do not wait for your next deep clean. Wipe down spills as soon as they happen. This prevents stains from setting. It also stops odors from forming. Keep a small spray bottle of vinegar solution and a cloth handy.
Wipe shelves and drawers weekly. This quick action makes future deep cleans easier. It also ensures your fridge stays fresh every day. Consistent effort pays off.
Proper Food Storage
How you store food impacts fridge cleanliness. Air-tight containers prevent food smells from spreading. They also keep food fresh longer. Wrap strong-smelling foods like onions or garlic well.
Label foods with dates. This helps you identify old items quickly. Regularly check expiry dates. Throw out spoiled food immediately. This simple practice prevents many odor issues.
Organizing Your Fridge After Cleaning
A clean fridge is great, but an organized one is even better. Organization helps you see what you have. It prevents food waste. It also makes your fridge more efficient. I love opening a clean, organized fridge. It makes meal prep so much easier.
Group Similar Items
Place similar items together. All dairy products can go on one shelf. All fresh produce can go in designated drawers. This makes it easy to find what you need. It also helps you quickly see what needs restocking.
For example, I keep all my condiments on the door shelves. All my leftover containers go on one shelf. This simple grouping saves me time.
Use Bins and Containers
Clear bins and containers are game-changers. They keep small items together. They also prevent spills from spreading. You can pull out a whole bin to access items. This avoids rummaging.
Use specific bins for snacks, yogurt, or drinks. Drawer dividers also help keep produce separate. This also makes future cleaning simpler. You can just lift out the bins and wipe under them.
Label Everything
Labeling is especially useful for leftovers or homemade sauces. Write the item and the date it was made. This helps you use food before it spoils. It also prevents guesswork.
Use washable labels or painter’s tape. A simple marker works well. This practice helps ensure food safety. It also reduces food waste in your home.
First-In, First-Out (FIFO) Method
The FIFO method means using older food first. When you put new groceries away, place them behind older items. This pushes older items to the front. This ensures you consume food before its expiry.
This method is common in restaurants. It works great for home fridges too. It prevents food from getting lost in the back. It is a simple habit that saves money and reduces waste.
Maintaining a Clean Fridge Regularly
Deep cleaning is a big effort. To keep your fridge clean, regular maintenance is key. Small, consistent actions prevent grime buildup. This makes the next deep clean much easier. I have found that a little effort often saves a lot of work later.
Weekly Wipe-Downs
Dedicate a few minutes each week to quick fridge maintenance. This could be on grocery day. Quickly wipe down any visible spills. Check the door shelves for sticky spots. Wipe down the most used shelves.
This prevents small messes from becoming big problems. It also keeps your fridge smelling fresh. A quick weekly wipe stops mold and odors before they start. It takes less than 10 minutes.
Monthly Checks
Once a month, do a slightly more thorough check. Look inside drawers. Check expiration dates on items. Toss anything expired or spoiled. Wipe down the entire interior quickly.
This monthly check ensures no forgotten items are hiding. It is also a good time to check the door seals for cleanliness. This step bridges the gap between weekly wipes and annual deep cleans.
Annual Deep Clean Schedule
Even with regular maintenance, a full deep clean is still important. Mark your calendar for an annual or bi-annual deep clean. This ensures all parts of your fridge get attention. It includes coils, drip pan, and seals.
Picking a specific time, like spring cleaning or before holidays, helps. This regular schedule keeps your fridge in top condition. It also ensures proper food safety. A well-maintained fridge lasts longer.
FAQ Section
How often should I deep clean my fridge?
You should deep clean your fridge at least once every three to six months. This helps prevent major grime buildup and odors. Regular light cleaning is important too. A consistent schedule ensures food safety and appliance efficiency.
What is the best natural cleaner for a fridge?
A mixture of baking soda and warm water is excellent. Use 1/4 cup baking soda per gallon of water. White vinegar mixed with equal parts water also works well. These solutions are safe for food contact surfaces. They effectively remove odors and clean surfaces.
Can I deep clean my fridge without turning it off?
It is best to turn off and unplug your fridge for a thorough deep clean. This ensures safety and allows you to clean all areas properly. If turning it off is not an option, you can clean it in sections, but be very careful.
How do I get rid of bad smells in my fridge?
To eliminate bad smells, first remove the source of the odor. Then, clean all surfaces thoroughly with a baking soda or vinegar solution. Place an open box of baking soda inside the fridge. Activated charcoal or fresh coffee grounds can also absorb lingering odors.
What should I do with food during a deep clean?
Place all perishable food items in a cooler with ice packs. This keeps them at a safe temperature. Non-perishable items can be placed on a counter. This ensures your food remains safe while you clean.
Why are my fridge coils important to clean?
Condenser coils release heat from your fridge. When dust and dirt cover them, they cannot release heat efficiently. This makes your fridge work harder, using more energy. Cleaning coils improves efficiency and extends the appliance’s lifespan.
Conclusion
Deep cleaning your fridge is a truly rewarding task. It transforms a frequently used appliance. You get a hygienic space for your food. You also enjoy improved energy efficiency. Remember, a clean fridge means safer food and a healthier home.
I hope this guide helps you feel confident. You now have the steps to achieve a sparkling clean refrigerator. Embrace these deep cleaning habits. Then, maintain your fridge with regular care. Your kitchen will thank you. Start your how to deep clean fridge project today. Enjoy the freshness it brings!
- fridge cleaning
- deep cleaning
- kitchen hygiene
- appliance maintenance

Todd Martin
Senior Writer
With over 15 years of experience in home renovation and design, I started HEG to share what I’ve learned with homeowners who want to create spaces that are both beautiful and functional. I’ve always believed in a hands-on approach, and over the years, I’ve picked up practical solutions that actually work. Through HEG, I aim to make home improvement more approachable, sharing real tips that help you create a home you truly love.