
· Todd Martin · Home Maintenance · 21 min read
How To Deflate A Mattress
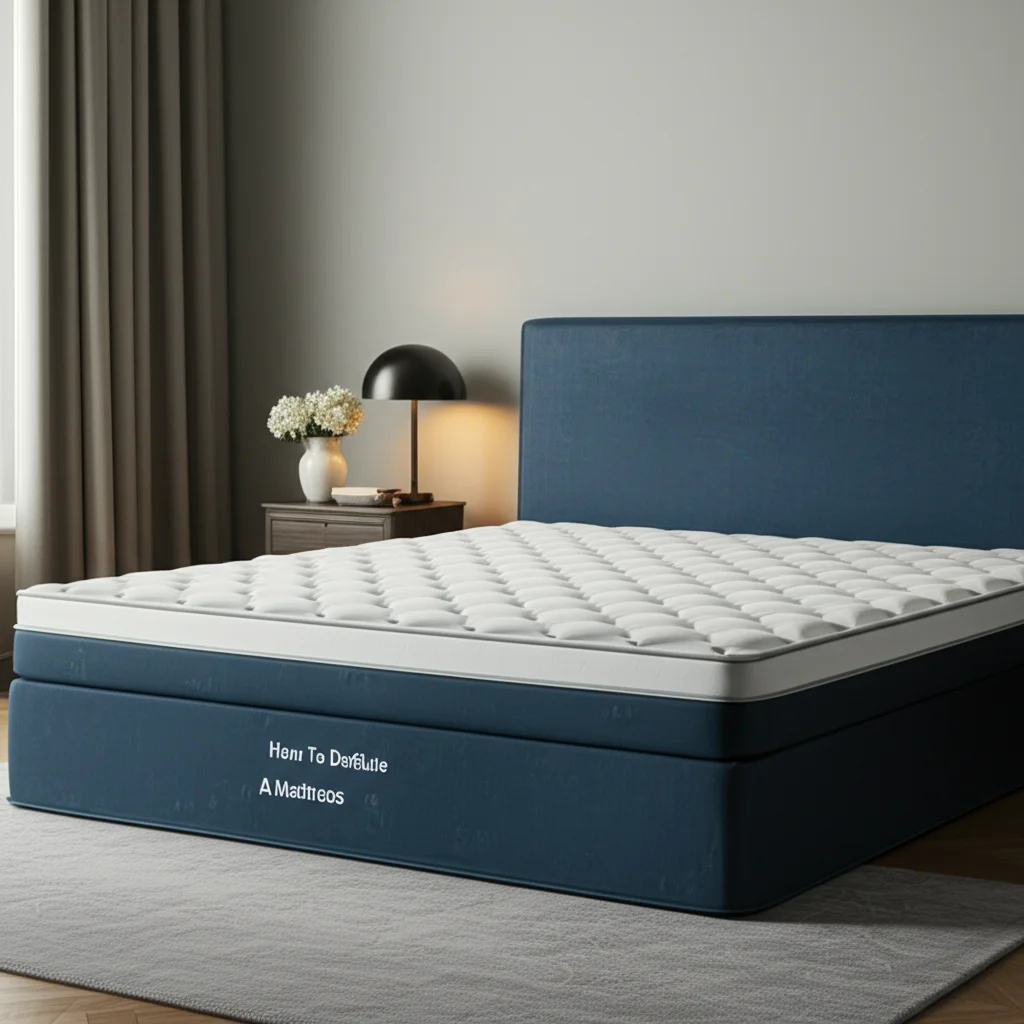
How to Deflate a Mattress Easily: Your Ultimate Guide
Preparing a mattress for moving, storage, or even disposal often means you need to deflate it. This task can seem daunting, especially for larger beds. I know the feeling of trying to squeeze a bulky mattress through a narrow doorway. However, with the right techniques, deflating a mattress becomes a simple process.
This guide will show you exactly how to deflate various types of mattresses. We will cover everything from inflatable air mattresses to solid foam and traditional spring models. You will learn the specific steps for each, along with useful tools and safety tips. My goal is to make your mattress deflation project straightforward and efficient.
Takeaway:
To effectively deflate a mattress for moving or storage, follow these steps:
- Air Mattress: Locate and open the air valve, then use a pump or manual compression to force air out.
- Memory Foam Mattress: Use a vacuum seal bag and a strong vacuum cleaner to remove air and compress the foam.
- Traditional Spring Mattress: Securely wrap and bind the mattress to reduce its bulk, focusing on careful handling.
How do you deflate a mattress?
To deflate a mattress, identify its type. For air mattresses, open the main valve and use a pump or body weight to expel air. For foam mattresses, use a vacuum storage bag with a strong vacuum cleaner to remove air and compress the material. Traditional spring mattresses do not deflate but can be compressed with straps for transport.
Understanding Mattress Types and Deflation Needs
Different mattresses require different deflation approaches. You cannot deflate a traditional spring mattress in the same way you deflate an air mattress. Understanding these differences is key to success. We will look at three main types: air mattresses, foam mattresses, and traditional innerspring mattresses. Each type presents unique challenges and solutions for reducing its size.
Knowing the mattress type helps you gather the right tools. An air mattress needs a pump for quick deflation, while a foam mattress needs a vacuum cleaner. Traditional mattresses often require straps and careful wrapping. My approach changes depending on what kind of mattress I am dealing with. This initial identification saves time and effort.
Air Mattresses: The Easiest to Deflate
Air mattresses are designed for easy inflation and deflation. They usually have a large valve or an integrated pump. Deflating them properly ensures they fit back into their storage bag. This also prevents damage when you fold them. I always make sure the valve is clear of debris before starting.
Many air mattresses come with a built-in pump that also has a deflate setting. This makes the job incredibly simple. If yours does not, a separate electric or manual pump can do the trick. You can also use your body weight to press out the air. Proper deflation helps keep your air mattress in good condition for future use.
Foam Mattresses: Compression is Key
Foam mattresses, like memory foam or latex, do not deflate in the same way as air mattresses. Instead, you compress them. This means removing air from the foam structure itself. This significantly reduces their volume, making them easier to move or store. A vacuum seal bag is essential for this process.
Compressing a foam mattress requires care to avoid damaging the foam. You need a strong vacuum cleaner to create enough suction. Once compressed, the mattress becomes much more manageable. This method is especially useful if you need to put a mattress back in the box for shipping or long-term storage. I always double-check the bag seal to ensure it holds the compression.
Traditional Spring Mattresses: Reducing Bulk
Traditional innerspring mattresses contain metal coils. These coils do not allow the mattress to truly deflate or compress in the same way as foam. Their structure means they maintain their shape. However, you can still reduce their overall bulk for moving. This involves careful wrapping and securing.
The goal with a spring mattress is to make it less unwieldy. You do this by binding it tightly with straps or rope. This prevents it from flopping around during transport. While it will not shrink in size, it will become easier to handle. Think of it as making a soft object rigid for a short period. I learned quickly that protecting the mattress edges is vital during this process.
Essential Tools for Mattress Deflation
Having the right tools makes the deflation process much smoother. Attempting to deflate a mattress without the necessary equipment can lead to frustration or even damage. I always gather my tools before I start. This saves me from stopping halfway through the job.
The tools you need depend on the type of mattress. An air mattress will require different tools than a foam mattress. Preparing ahead ensures a quick and efficient process. This section covers the common tools for each mattress type.
Tools for Air Mattress Deflation
Air mattresses are relatively simple to deflate. Often, the tools are built right into the mattress. If not, common household items can help.
- Integrated Pump (if available): Many modern air mattresses have a built-in electric pump. This pump usually has both inflate and deflate functions. This is the easiest way to remove air.
- External Electric Air Pump: If your mattress lacks an integrated pump, an external electric air pump is a great investment. It quickly sucks air out. Make sure it has a deflate option and the correct nozzle size.
- Manual Pump: A manual foot or hand pump can also work. It takes more effort but is effective. Some manual pumps include a reverse setting for deflation.
- Vacuum Cleaner (with hose attachment): A regular vacuum cleaner can also be used. Attach the hose to the exhaust port, not the suction port. This allows the vacuum to blow air, which can sometimes aid in pushing air out. Alternatively, using the suction end on the valve can also draw air out, depending on the valve design.
- Large Storage Bag or Box: For packing the deflated air mattress.
- Cleaning Supplies: A damp cloth for wiping down the mattress before folding. This helps to clean an air mattress before storage.
I find that an electric pump speeds up the process significantly. It ensures maximum air removal. This leads to a more compact mattress.
Tools for Foam Mattress Compression
Compressing a foam mattress requires specialized equipment to do it safely and effectively. Without these, you risk damaging the foam or failing to reduce its size.
- Heavy-Duty Vacuum Storage Bag: These are large, thick plastic bags designed for mattress compression. They come in various sizes (Twin, Full, Queen, King). Ensure the bag is big enough for your mattress. These bags are crucial for putting your mattress back in the box for return or moving.
- Powerful Vacuum Cleaner: A strong household vacuum cleaner is essential. It needs good suction power to remove air from the foam. The hose attachment must fit the valve on the vacuum bag.
- Duct Tape or Packaging Tape: To seal any accidental punctures in the bag.
- Ratchet Straps or Strong Rope: After compression, you might want to secure the rolled mattress. This prevents it from re-expanding or unrolling.
- Protective Covering (optional): A mattress bag or heavy-duty plastic sheeting for added protection during transport or storage. This helps to protect your mattress when moving.
- Cleaning Supplies: Before sealing, you might want to deep clean your mattress.
I always invest in a good quality vacuum bag. A cheap bag can tear easily, wasting your effort. The vacuum’s power directly affects how well the mattress compresses.
Tools for Traditional Spring Mattress Handling
Traditional mattresses do not deflate. However, they need proper handling to make them easier to move. These tools help manage their size and protect them.
- Heavy-Duty Mattress Bag or Plastic Sheeting: To protect the mattress from dirt, dust, and tears. This is especially important if you need to store a mattress in the garage.
- Ratchet Straps or Strong Moving Straps: To secure the mattress and make it more rigid. You will wrap these around the mattress to hold its shape.
- Dolly or Moving Cart: To easily transport the heavy mattress.
- Moving Blankets: For padding and protecting the mattress corners and edges.
- Box Cutter or Scissors: To open packaging.
- Cleaning Supplies: It is always a good idea to clean mattress stains before wrapping it up.
While these do not “deflate” the mattress, they make it much more manageable. Proper wrapping prevents damage to the fabric and internal structure. I always use at least two people to move a spring mattress.
Step-by-Step Guide to Deflating an Air Mattress
Deflating an air mattress is usually a quick process. Following these steps ensures you remove all the air efficiently. This makes the mattress compact and ready for storage or transport. I find it easiest to work on a flat, clear surface.
1. Clear the Area and Prepare the Mattress
First, remove all bedding, pillows, and anything else on top of the air mattress. Make sure the area around the mattress is clear. This prevents tripping hazards and gives you room to work. I always wipe down the mattress surface before deflating to remove any dust or debris. This helps to clean an air mattress before storage.
Next, locate the air valve. Most air mattresses have one large inflation/deflation valve. Some might have multiple smaller valves. If there’s an integrated pump, identify the “deflate” setting.
2. Open the Valve and Initiate Deflation
For mattresses with an integrated pump:
- Plug in the pump.
- Switch the pump to the “deflate” setting.
- Turn on the pump. It will start sucking air out of the mattress.
- Allow the pump to run until most of the air is removed.
For mattresses with an external valve:
- Open the valve cap.
- If there is a one-way stopper, push it in or unscrew it to fully open the air passage. You will hear air start to rush out.
- If using an external electric pump, attach the correct nozzle to the deflate port (usually where air blows out of the pump) and fit it securely into the mattress valve. Turn on the pump.
I always ensure the valve is fully open. A partially open valve slows the process.
3. Apply Pressure to Expel Remaining Air
Once the pump or initial air release has done most of the work, you will need to help remove the stubborn remaining air.
- Manual Compression: Start rolling the mattress tightly from the end opposite the valve. As you roll, you will push the air towards the open valve. Kneel or lean on the rolled sections to apply more pressure.
- Use Your Body Weight: Walk or crawl on the mattress, starting from the end furthest from the valve. This method works well for larger mattresses. You can also press down with your hands and knees.
- Fold and Press: For smaller air mattresses, you can fold them in half or thirds, then press down firmly to push out air.
I like to use a combination of rolling and kneeling. This gets the mattress as flat as possible. Ensure no air pockets remain, as this makes folding difficult.
4. Close the Valve and Secure the Mattress
Once you have expelled as much air as possible:
- Quickly close the air valve while still applying pressure. This traps the vacuum inside.
- Replace any valve caps or stoppers securely.
- If you rolled the mattress, use straps or bungee cords to keep it tightly rolled. This is similar to how you might fold an inflatable mattress for storage.
- Place the deflated mattress into its storage bag or a suitable box.
A well-deflated air mattress takes up minimal space. This makes it perfect for camping trips or temporary guest rooms. This care also helps keep your air mattress from deflating during use later.
Step-by-Step Guide to Compressing a Foam Mattress
Compressing a foam mattress requires precision and the right tools. This process is essential for moving, long-term storage, or returning a mattress. I have done this many times, and a clear plan always helps.
1. Prepare the Mattress and Working Area
First, strip all bedding from the foam mattress. Place the mattress on a large, clean, flat surface. This could be your bedroom floor or an open space in a living room. Ensure the area is free of sharp objects that could puncture the vacuum bag. You should also ensure the mattress is dry and clean. If there are any stains, consider cleaning stains from the mattress before compression.
Unfold your heavy-duty vacuum storage bag. Lay it out flat next to the mattress. Make sure the bag’s opening is wide enough to easily slide the mattress in.
2. Place the Mattress Inside the Vacuum Bag
Carefully lift and slide the foam mattress into the open vacuum storage bag. This step can be tricky, especially with larger mattresses. It is often a two-person job.
- For smaller mattresses (Twin/Full): You might be able to fold it in half lengthwise before sliding it into the bag. Check your mattress manufacturer’s recommendations for folding. Some foam types should not be folded.
- For larger mattresses (Queen/King): It’s usually best to slide it in flat. Once inside, center the mattress within the bag. Ensure there is enough excess bag material around the mattress to create a good seal.
I always double-check for sharp edges on the mattress or bed frame nearby. These can tear the bag.
3. Seal the Bag and Attach the Vacuum
Once the mattress is inside the bag and properly positioned, close the bag’s seal. Most vacuum bags have a double-zipper seal that you press together. Run your fingers along the seal multiple times to ensure it is completely closed. A small gap will prevent proper compression.
Next, locate the air valve on the vacuum bag. Unscrew the cap or open the valve. Attach the hose of your powerful vacuum cleaner firmly to this valve. The connection needs to be airtight for effective suction.
4. Vacuum the Air Out and Compress
Turn on your vacuum cleaner. The vacuum will start sucking air out of the bag. As the air is removed, the foam mattress will begin to compress and shrink.
- Monitor the Process: Watch as the mattress flattens. Guide the vacuum hose to keep the connection secure.
- Assist with Pressure: For large mattresses, you might need to apply some body weight or gently walk on the mattress as it compresses. This helps push air out and makes the compression more even.
- Continue until Flat: Keep the vacuum running until the mattress is as flat and compact as possible. The vacuum will create a hard vacuum seal around the mattress.
I let the vacuum run until it struggles to pull any more air. This indicates maximum compression.
5. Seal the Valve and Secure the Compressed Mattress
Once the mattress is fully compressed:
- Quickly remove the vacuum hose from the bag valve.
- Immediately screw the cap back onto the valve, or close the valve completely. This seals the vacuum inside and keeps the mattress compressed.
- If you plan to move the mattress, carefully roll the compressed mattress into a more compact cylinder. Use ratchet straps or strong rope to secure the roll. This prevents it from expanding if the seal breaks. This step is similar to how to wrap a mattress for moving.
- For long-term storage, place the compressed mattress in a protected area.
Compressed foam mattresses are significantly easier to move and store. This method is especially useful for moving a Tempur-Pedic mattress or other dense foam types. Always handle the compressed mattress with care to avoid bag punctures.
Preparing a Traditional Spring Mattress for Transport
Traditional spring mattresses do not deflate. Their internal metal coils keep their shape. However, you can make them easier to move. This involves protecting them and making them more rigid. I focus on securing the edges and protecting the fabric.
1. Remove All Bedding and Clean
First, take off all sheets, blankets, and mattress protectors. Ensure the mattress surface is clear. If your mattress has stains, consider cleaning stains from a mattress before wrapping. This prevents odors or dirt from being sealed in. A quick vacuuming can remove dust and debris.
2. Protect the Mattress
A mattress bag is essential for transport. It protects the fabric from dirt, dust, and tears.
- Slide into a Mattress Bag: Carefully slide the mattress into a heavy-duty plastic mattress bag. These are available at moving supply stores. Ensure the bag is the correct size.
- Seal the Bag: Use strong packing tape to seal the opening of the bag completely. Pay extra attention to corners and edges, as these are prone to tearing.
- Add Moving Blankets (Optional): For extra protection, especially for corners, you can wrap moving blankets around the mattress after it is in the bag. Secure these with tape or rope. This adds a layer of padding.
Protecting the mattress well prevents damage during transport. It also makes it easier to protect your mattress when moving or store a mattress in the garage.
3. Secure with Ratchet Straps or Rope
While you cannot deflate a spring mattress, you can make it more rigid for easier handling. This prevents it from bending awkwardly during movement.
- Apply Straps: Use two or three ratchet straps or strong moving ropes. Place one strap roughly a quarter of the way down from the top. Place another a quarter of the way up from the bottom. If the mattress is very long, add a third strap in the middle.
- Tighten Securely: Tighten the straps firmly. This will slightly compress the mattress and make it more solid. Be careful not to over-tighten and damage the internal springs. The goal is to make it less flexible, not to compress its thickness significantly.
- Check for Rigidity: Try to gently bend the mattress. It should feel much firmer and less prone to flopping.
I always test the straps to ensure they are tight but not too tight. This makes moving the mattress much safer.
4. Transporting the Mattress
Once secured, the mattress is ready for transport.
- Use a Dolly: For heavy mattresses, use a moving dolly. Stand the mattress on its side on the dolly. Secure it with a strap if the dolly has one.
- Team Lift: Always lift a spring mattress with at least two people. Use proper lifting techniques to avoid injury. Bend at your knees, not your back.
- Clear Path: Ensure your path is clear. Remove any obstacles, open doors wide, and clear hallways.
Proper preparation makes moving a spring mattress significantly easier and safer.
Tips for Safe and Efficient Deflation
Deflating any type of mattress, especially larger ones, requires careful planning. Safety is always a top priority. Efficiency also saves time and effort. I always consider these tips before starting.
Prioritize Safety
Safety should always come first. Moving and deflating large items can pose risks if not handled correctly.
- Clear Your Workspace: Remove any furniture, rugs, or items that could cause you to trip. You need ample space to maneuver the mattress.
- Lift with Your Legs: When moving or lifting even partially deflated mattresses, use proper lifting techniques. Bend at your knees, keep your back straight, and use your leg muscles.
- Teamwork: Enlist help for larger mattresses. Two people can lift and position a mattress much more safely than one. This reduces the risk of injury.
- Beware of Re-expansion: If compressing a foam mattress, be mindful that the mattress can quickly re-expand if the vacuum seal breaks. Keep hands and fingers clear.
- Electrical Safety: If using an electric pump or vacuum cleaner, ensure cords are not frayed. Do not operate in wet conditions.
- Ventilation: If cleaning or using any sprays on the mattress, ensure the area is well-ventilated.
I learned the hard way that trying to do it alone often leads to strain. Asking for help is smart.
Work in a Clean Environment
A clean mattress and a clean workspace contribute to a better outcome.
- Clean the Mattress First: Before deflating or packing, clean your mattress. Vacuum the surface to remove dust, crumbs, and pet hair. Address any spills or stains using appropriate cleaning methods. This is a good time to deep clean your mattress.
- Dust and Dirt: Deflating can kick up dust. Ensure the floor is clean before laying the mattress down.
- Odor Prevention: Storing a dirty mattress can lead to mildew or odors. Cleaning prevents this.
A clean mattress stays clean during storage and is ready for use later.
Maximize Space and Minimize Damage
The goal of deflation is to save space and protect your mattress.
- Get All the Air Out: For air mattresses and foam mattresses, strive for maximum air removal. The more air you remove, the smaller and lighter the mattress becomes.
- Roll or Fold Tightly: Once air is out, roll or fold the mattress as tightly as possible. Use straps or bungee cords to maintain this compact shape. This is especially important when you need to fold an inflatable mattress for its original bag.
- Protect the Bag: When using a vacuum seal bag for foam mattresses, be careful not to drag the bag on rough surfaces. Sharp objects can easily puncture it, breaking the seal.
- Store Properly: Place the deflated or compressed mattress in a climate-controlled environment if possible. Avoid extreme temperatures or humidity, which can damage materials over time. If storing in a garage, ensure it is off the floor and protected. This helps you to store a mattress in the garage correctly.
By following these tips, you ensure your mattress is deflated effectively and remains in good condition.
Common Mistakes to Avoid When Deflating a Mattress
Even with clear instructions, mistakes can happen. Avoiding common pitfalls saves time, effort, and prevents damage to your mattress or yourself. I have learned from my own mistakes, and I want to share them so you don’t repeat them.
Not Fully Opening Air Valves (Air Mattresses)
A common error with air mattresses is not fully opening the valve. Many air mattresses have a two-part valve or a one-way stopper. If you do not fully open it, air escapes very slowly. This turns a quick task into a long, frustrating one.
- Solution: Always check the valve instructions. Push the stopper all the way in or unscrew both parts of the valve for maximum airflow. Listen for the strong rush of air.
I always ensure the valve is completely open. This ensures air escapes rapidly.
Using the Wrong Vacuum Bag Size (Foam Mattresses)
People often buy vacuum bags that are too small for their foam mattress. This makes it impossible to get the mattress inside, or the bag may tear during compression. A bag that is too big also makes it harder to seal and remove all the air.
- Solution: Measure your mattress accurately. Purchase a heavy-duty vacuum bag specifically designed for mattresses. Ensure it matches your mattress size (Twin, Full, Queen, King). Always go for a slightly larger bag if unsure.
I always size up if I am between sizes. This gives me more room to work.
Not Using a Powerful Enough Vacuum (Foam Mattresses)
Compressing a foam mattress requires significant suction. A small handheld vacuum or one with weak suction will not work. It will not remove enough air to truly compress the dense foam.
- Solution: Use a powerful upright or canister vacuum cleaner with a strong motor. The hose attachment must fit snugly onto the vacuum bag’s valve. If your vacuum struggles, try cleaning its filter or emptying its canister.
I learned that a good vacuum is non-negotiable for foam mattress compression.
Folding or Rolling Innerspring Mattresses (Traditional Mattresses)
Traditional innerspring mattresses are not designed to be folded or rolled. Doing so can permanently damage the internal coils and compromise the mattress’s support and comfort. This can ruin the mattress entirely.
- Solution: Instead of folding, protect and secure innerspring mattresses with heavy-duty plastic bags and ratchet straps. This makes them more rigid for moving but maintains their flat shape. This also helps you correctly wrap your mattress for moving.
I never attempt to fold an innerspring mattress. It is not worth the damage.
Not Securing Compressed or Deflated Mattresses
A common mistake is not securing the mattress after deflation or compression. An air mattress can slowly re-inflate if the valve isn’t perfectly sealed. A vacuum-sealed foam mattress can expand rapidly if the bag gets a tear.
- Solution: For air mattresses, ensure the valve cap is tight. For foam mattresses, use ratchet straps around the compressed, rolled mattress. This provides a backup if the vacuum seal fails. For spring mattresses, straps keep them rigid.
Securing the mattress adds an extra layer of protection.
Rushing the Process
Deflating a mattress takes patience. Rushing can lead to incomplete deflation, torn bags, or personal injury. Forcing air out too quickly or improperly sealing can lead to issues.
- Solution: Take your time with each step. Ensure the air is fully expelled, bags are properly sealed, and straps are securely tightened. Plan enough time for the task.
Patience always pays off when handling large items.
When to Deflate Your Mattress
Knowing when to deflate your mattress is as important as knowing how. There are several common scenarios where deflation or compression becomes necessary. I find myself deflating mattresses for various reasons throughout the year.
Moving Homes
Moving is the most common reason to deflate a mattress. A deflated or compressed mattress is much easier to transport. It fits through doorways, down stairs, and into moving trucks with less hassle. This makes the moving process smoother and faster.
- Space Saving: A deflated air mattress or a compressed foam mattress takes up significantly less space in a moving truck. This can save you money on truck rental size.
- Easier Handling: Lighter and smaller mattresses are easier to carry. They are less prone to bumping into walls or door frames.
- Protection: When sealed in a bag, the mattress is protected from dirt, dust, and moisture during transit. This protects the mattress when moving.
I always deflate my guest air mattress if I am helping a friend move.
Long-Term Storage
If you need to store a mattress for an extended period, deflation or compression is ideal. This
- mattress deflation
- air mattress storage
- foam mattress compression
- moving mattress
- space saving

Todd Martin
Senior Writer
With over 15 years of experience in home renovation and design, I started HEG to share what I’ve learned with homeowners who want to create spaces that are both beautiful and functional. I’ve always believed in a hands-on approach, and over the years, I’ve picked up practical solutions that actually work. Through HEG, I aim to make home improvement more approachable, sharing real tips that help you create a home you truly love.


