· Todd Martin · Home Improvement · 21 min read
How To Drain Portable Air Conditioner With Hose
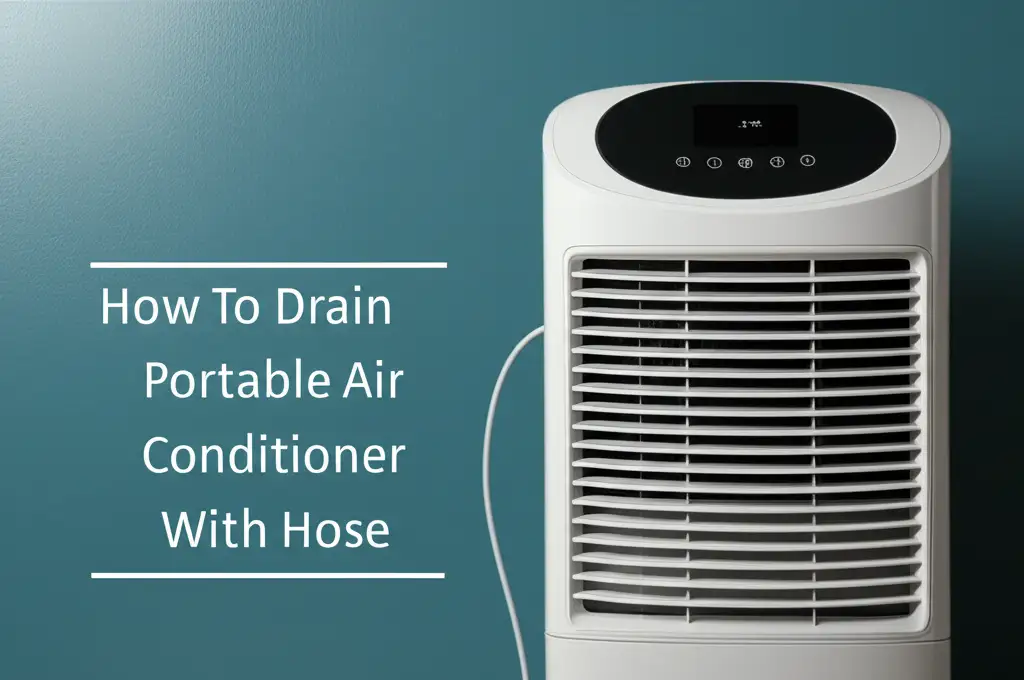
Drain Portable AC: Hose Connection Guide
Is your portable air conditioner struggling to cool, or perhaps displaying a “full tank” error? Many people face this common issue. A portable AC unit removes moisture from the air as it cools, leading to water accumulation. Proper drainage is key to keeping your unit running efficiently. Without it, your AC might stop cooling or even shut down entirely.
I know how frustrating a malfunctioning AC can be, especially on a hot day. This article will walk you through the simple process of how to drain a portable air conditioner with a hose. We will cover why drainage is crucial, the tools you need, and a step-by-step guide to ensure your portable AC operates at its best. Get ready to enjoy continuous, cool air without interruptions.
Takeaway
- Regular Drainage: Prevent performance issues and unit shutdowns.
- Choose Right Method: Identify your AC’s drainage type (manual, continuous).
- Gather Tools: Prepare a hose, bucket, and towels.
- Follow Steps: Connect hose, position for gravity, monitor drainage.
- Troubleshoot Issues: Address clogs or improper setup promptly.
- Maintain Routinely: Clean components to prevent future problems.
How To Drain Portable Air Conditioner With Hose?
You can drain a portable air conditioner with a hose by locating its continuous drainage port. Connect a standard garden hose or a specialized drain hose to this port. Position the hose downward into a bucket or floor drain, allowing gravity to remove accumulated water from the unit.
Understanding Portable AC Condensation and Drainage Needs
Portable air conditioners work by pulling warm, moist air from your room. The unit then cools this air, and the moisture in it condenses into liquid water. This water collects inside the unit, usually in an internal tank or pan. This process is essential for reducing humidity and making your space more comfortable.
Over time, this collected water fills up. If the water tank becomes full, most portable AC units have a safety feature. The unit will automatically shut off to prevent spills and damage. This is why you might find your portable air conditioner turning off by itself. Draining the unit regularly prevents this shutdown. It ensures continuous cooling and maintains the efficiency of your appliance. I always make sure to drain my unit before it reaches this point.
Some portable AC units have an auto-evaporation feature. These units can often evaporate most of the collected water out through the exhaust hose. However, even these units might need manual draining in very humid conditions. High humidity means more water condenses. The auto-evaporation system might not keep up. This can lead to the tank filling up anyway. Understanding your unit’s specific drainage type is important.
Neglecting drainage can cause several problems. First, the unit stops cooling. If the water tank is full, the AC cannot remove more moisture, leading to reduced cooling capacity. Second, standing water can become a breeding ground for mold and mildew. This can lead to unpleasant odors and poor indoor air quality. Regular drainage is a simple task that prevents these issues, keeping your home fresh and cool. It also extends the life of your portable AC unit. I always recommend checking your unit’s manual for specific instructions on its drainage system.
Types of Portable AC Drainage Systems
Portable air conditioners use different methods to remove the water they collect. Understanding your unit’s system helps you choose the correct drainage procedure. Most units fall into one of two main categories: manual drainage or continuous drainage. Some units offer a combination of both options.
Manual drainage is the most common method for many portable AC units. These units collect water in an internal reservoir or tray. When this reservoir fills up, the unit typically stops operating and displays an indicator light or error code. To drain these units, you must manually remove a plug or cap, allowing the water to flow out. This usually involves placing a shallow pan or bucket underneath the drain port. This method works well for units in less humid environments. I find this method simple, but it requires regular attention.
Continuous drainage involves connecting a hose directly to the unit. This hose directs the water to a drain, bucket, or another collection point. This setup allows the water to drain as it collects, without needing manual intervention. Many portable AC units have a specific port for continuous drainage. This port is often located near the bottom of the unit. This is the best option for continuous operation, especially in very humid climates. If your portable air conditioner keeps filling up with water quickly, continuous drainage can prevent frequent interruptions.
Some portable AC models feature an auto-evaporation system. These units evaporate most of the condensate and expel it through the exhaust hose. This reduces the need for frequent manual draining. However, even these units may have a small drain plug for extreme humidity. Or they may have one for seasonal storage. My unit has auto-evaporation, but I still check its drain plug occasionally. This ensures no excess water builds up. Knowing your unit’s drainage system is the first step to effective maintenance. Check your user manual to confirm which system your portable AC uses.
Gathering Your Tools: What You Need for Hose Drainage
Before you start draining your portable air conditioner, you need to gather a few simple tools. Having everything ready beforehand makes the process smooth and quick. You probably have most of these items around your house already. I always prepare my tools first to avoid interruptions during the draining process.
First, you will need a suitable hose. Most portable air conditioners use a standard garden hose for continuous drainage. Check your unit’s manual for the exact hose size or type recommended. Some units might come with a specific drain hose. If yours does not, a standard garden hose with a compatible connector will usually work. Ensure the hose is long enough to reach your chosen drainage point from the AC unit. A flexible hose is often easier to maneuver into position.
Next, you will need a collection vessel. This could be a large bucket, a deep pan, or a drain. If you are using continuous drainage, the hose will direct the water. If you are manually draining, a shallow pan will catch the water directly from the drain port. Choose a container large enough to hold a significant amount of water. This prevents overflow, especially if you are draining a full tank. I like to use a 5-gallon bucket for my unit.
You will also need old towels or rags. Water spills can happen, even with careful draining. Placing towels around the base of the portable AC unit and near the drain port will protect your floors. They will also quickly absorb any unexpected drips. It is always better to be prepared for minor spills than to clean up a large mess. A flathead screwdriver might be useful for some drain plugs. These plugs can sometimes be a bit tight.
Finally, consider having a pair of gloves. This is optional, but it can keep your hands clean. Some people also prefer to use a flashlight. This helps illuminate the drain port, especially if it is in a dark or hard-to-reach area. With these simple tools, you are well-prepared to drain your portable air conditioner efficiently and safely.
Step-by-Step Guide: Draining Your Portable AC with a Hose
Draining your portable air conditioner with a hose is a straightforward process. Following these steps will help you empty the water tank safely and efficiently. I always follow this routine to keep my unit in top shape.
Turn Off and Unplug the Unit: Safety is paramount. Before you do anything, switch off your portable AC unit. Then, unplug it from the wall outlet. This prevents any electrical hazards during the drainage process. This also ensures the unit is not running while you are working on it.
Locate the Drain Port: Most portable air conditioners have a drain port near the bottom. This port usually has a cap or a rubber plug. It might be on the back or side of the unit. For continuous drainage, look for a threaded port where a hose can attach. For manual drainage, locate the simple plug. Your user manual will show the exact location of the portable AC unit’s drain port.
Position the Unit for Drainage: You need to use gravity to help the water flow out. If your unit is on a level floor, you might need to slightly elevate one side. Place the AC unit on blocks or sturdy books. Ensure the drain port side is lower than the opposite side. This creates a downward slope for the water to exit. Position your collection bucket or direct the hose to a floor drain below the drain port. This ensures the water flows smoothly.
Connect the Hose (for continuous drainage): If your unit has a continuous drainage option, screw your garden hose or specialized drain hose onto the threaded drain port. Make sure the connection is snug to prevent leaks. Once connected, direct the other end of the hose into your collection bucket. You could also route it to a nearby floor drain, or even outside if safe and feasible. Ensure the hose has a continuous downward slope. This prevents water from sitting in the hose.
Remove the Drain Plug: Carefully remove the cap or rubber plug from the drain port. Water will immediately start to flow out. If you are doing manual drainage, ensure your collection bucket or pan is directly underneath. If using a hose, confirm water flows through the hose into your chosen drain point. The water may come out quickly at first.
Allow Complete Drainage: Let all the water drain from the unit. This can take several minutes, depending on how full the tank is. You might hear gurgling sounds as air enters the tank. Wait until the water flow stops completely. I often tilt the unit slightly more to get the last drops out. This ensures thorough drainage.
Replace the Drain Plug/Cap: Once all the water has drained, replace the drain plug or cap firmly. If using a hose for continuous drainage, you can leave the hose connected. Otherwise, disconnect the hose and replace the cap. Ensure there are no drips before moving the unit.
Clean Up: Mop up any spilled water with your towels. Return your portable AC unit to its original position. You can now plug it back in and resume operation. Regular drainage helps to avoid issues like your portable air conditioner blowing out water from places it shouldn’t.
Troubleshooting Common Portable AC Drainage Issues
Even with careful steps, you might encounter issues when draining your portable air conditioner. Knowing how to troubleshoot these problems can save you time and frustration. I have faced some of these myself and learned effective solutions.
One common problem is water not draining or draining very slowly. First, check the tilt of your unit. Gravity is essential for drainage. Make sure the drain port is at the lowest point. Elevate the opposite side of the unit if needed. Another reason could be a clogged drain port or hose. Debris, dust, or mold can accumulate over time. This blocks the water flow. Disconnect the hose and visually inspect the drain opening for obstructions. You can gently clear any visible blockages using a small brush or pipe cleaner. If using a hose, ensure the hose itself is not kinked or blocked. Sometimes, flushing the hose with clean water can clear minor clogs. This is similar to how to clean an air conditioner drain line.
If your unit has an auto-evaporation feature, but the tank still fills up quickly, it might be due to extremely high humidity. In very humid environments, the unit produces more condensation than it can evaporate. In this case, you will need to rely more on continuous drainage. Ensure your continuous drain hose is properly installed and sloped downwards. If the hose is positioned higher than the drain port, water will not flow out. The hose must always go downhill.
Another issue could be persistent leaks around the drain plug or hose connection. This usually means the connection is not secure. For drain plugs, ensure it is firmly in place and not worn out. A worn or cracked plug might need replacement. For hose connections, tighten the hose securely to the port. You might consider using plumber’s tape around the threads of the port before attaching the hose. This creates a tighter, leak-proof seal. If your portable air conditioner keeps filling up with water and leaking, these checks are crucial.
Sometimes, the unit shuts off but shows no error code. This can still be a drainage issue. The internal float switch may be stuck or malfunctioning, indicating a full tank even if it is not. Try gently shaking the unit to dislodge the float. If the problem persists after drainage and checks, consult your user manual for specific troubleshooting steps or contact customer support. Regular maintenance, including cleaning your portable air conditioner’s water tank, can prevent many of these issues from arising.
Preventative Maintenance for Optimal AC Performance
Draining your portable air conditioner is a crucial part of its overall maintenance. However, other preventative measures can ensure your unit runs efficiently and lasts longer. Regular care prevents common problems and keeps your home cool. I have found that a little consistent effort goes a long way in avoiding major issues.
One of the most important tasks is cleaning the air filters. Portable AC units have filters that trap dust, pet dander, and other airborne particles. When these filters become dirty, airflow is restricted. This reduces cooling efficiency and makes the unit work harder. It can also increase condensation because the coils get colder with less airflow. Most manufacturers recommend cleaning filters every two to four weeks, depending on usage and air quality. I clean my filters at least once a month. This simple step significantly improves performance. You can usually remove filters easily and wash them with warm, soapy water.
Regularly inspecting the condensate drain pan and drain line is also vital. Even with continuous drainage, some residue can build up in the pan or near the drain port. This residue can lead to clogs over time. Periodically, you can pour a small amount of distilled water or a mild bleach solution (diluted 1:16 with water) through the drain port. This helps flush out any potential blockages. Always consult your manual before using any cleaning solutions inside the unit. This also helps prevent issues like your portable air conditioner not cooling effectively.
Keeping the exterior of the unit clean is also beneficial. Dust can accumulate on the vents and outer casing. Use a soft, damp cloth to wipe down the surfaces. Ensure that the exhaust hose is not crushed or kinked. A proper exhaust setup is essential for expelling hot air and maintaining efficiency. If the hot air cannot escape, the unit will struggle to cool the room. This can also cause the unit to work harder and increase condensation.
Finally, consider the environment where your portable AC operates. Avoid placing it in direct sunlight, which adds to the heat load. Ensure there is adequate space around the unit for proper airflow, as recommended in your manual. Proper placement and consistent cleaning routines help prevent issues. This means you will enjoy reliable cooling without unexpected shutdowns or performance drops. Regular maintenance prevents the unit from turning off by itself due to internal issues related to clogs or strain.
Safety Tips for Draining Your Portable Air Conditioner
Draining your portable air conditioner is generally safe, but following some basic precautions ensures no accidents occur. Safety should always be your top priority when working with any appliance that uses electricity and water. I always keep these tips in mind.
First, always unplug the portable AC unit from the power outlet before you begin any draining or maintenance. This is the most crucial step. It eliminates the risk of electric shock. Never attempt to drain the unit while it is running or still plugged in. Even if the unit is off, residual power can still be a hazard. I make sure the plug is completely out of the socket.
Next, be mindful of water spills. Even small spills can create a slip hazard, especially on hard floors. Always have towels or rags ready to immediately wipe up any water that escapes. Consider placing a waterproof mat or old newspapers under the unit to protect your flooring from potential damage. Water can warp wood floors or stain carpets. Ensure your collection bucket or drain is stable and not easily knocked over.
When tilting the unit to encourage drainage, ensure it is stable and won’t tip over. Portable AC units can be heavy and awkward. Ask for help if you need to lift or tilt a particularly large or heavy unit. Avoid excessive tilting, as this could damage internal components. A slight elevation of one side is usually enough for proper gravity drainage.
Also, avoid using excessive force when removing or replacing the drain plug or attaching the hose. Plastic parts can crack or strip if overtightened or forced. If the plug is stiff, try gently wiggling it or twisting it slightly. Lubricants are generally not recommended for these parts. If a connection feels too tight or loose, re-evaluate the hose size or plug type.
Finally, remember to follow the specific instructions in your portable AC’s user manual. Each model might have slight variations in drain port location or hose connection. The manual provides the most accurate and safe procedures for your specific unit. If you encounter a problem you cannot resolve, contact the manufacturer’s customer support. Do not attempt complex repairs yourself, especially those involving electrical components or sealed refrigerant systems. By following these safety tips, you can ensure a smooth and risk-free draining process for your portable air conditioner.
Cleaning and Storing Your Portable AC Unit
Proper cleaning and storage of your portable AC unit are just as important as regular drainage. These steps ensure your unit remains in good condition, especially during off-seasons. I make sure to give my unit a thorough cleaning before storing it away.
Begin by draining all water from the unit completely. This is critical. Any leftover water can lead to mold and mildew growth inside the unit during storage. Use the continuous drainage method with a hose to empty as much water as possible. Then, remove the drain plug and tilt the unit to ensure every last drop drains out. You might want to leave the drain plug open for a few hours to allow the internal components to air dry fully.
Next, clean the air filters. As mentioned before, dirty filters restrict airflow and reduce efficiency. Remove the filters according to your manual’s instructions. Wash them with warm, soapy water. Rinse them thoroughly and let them air dry completely before putting them back into the unit. Do not put damp filters back into the AC, as this can encourage mold growth.
It is also important to clean the exterior and interior components. Use a soft, damp cloth to wipe down the outside casing. Pay attention to vents and grilles, removing any accumulated dust. For a deeper clean, you may need to access the condensate tray or coils. Consult your manual for specific instructions on how to clean these parts. Some units allow for easy access, while others are more enclosed. If possible, gently clean the cooling fins with a soft brush or vacuum attachment. Be very careful not to bend the delicate fins.
Before storing, ensure the unit is completely dry. Any residual moisture can cause damage or odors. Store the portable AC unit upright in a cool, dry place. Avoid storing it in areas with extreme temperatures or high humidity, like an uninsulated garage or attic. Covering the unit with a dust cover or an old sheet will protect it from dust accumulation during storage. This preparation ensures your portable AC is ready for efficient cooling when you bring it out again. This full cleaning helps keep your unit running well, preventing problems like a portable air conditioner turning off by itself due to internal dirt or mold.
Maximizing Portable AC Efficiency and Lifespan
Beyond draining and cleaning, several practices help maximize your portable air conditioner’s efficiency and extend its operational life. A well-maintained unit not only cools better but also uses less energy. I always look for ways to get the most out of my appliances.
One key factor is proper ventilation. Portable AC units exhaust hot air and moisture. This hot air must be expelled outside. Ensure your exhaust hose is properly vented through a window or a designated vent kit. A loose or damaged exhaust hose will allow hot air to leak back into the room. This forces the unit to work harder. Make sure the hose is as straight and short as possible. This minimizes bends that can restrict airflow. The unit needs to pull air from outside (for cooling) and then expel hot air outside.
Consider the size of your portable AC unit relative to the room it is cooling. An undersized unit will run constantly without effectively cooling the space. An oversized unit might short-cycle, leading to inefficient operation and increased wear. Match the British Thermal Unit (BTU) rating of the AC to your room size. This ensures optimal performance.
Maintain a sealed environment in the room. Keep windows and doors closed when the AC is running. Seal any gaps around windows or doors to prevent warm air from entering. Use blackout curtains or blinds to block direct sunlight. This reduces the heat load on your portable AC. The unit will not have to work as hard to maintain the desired temperature.
Lastly, do not run your portable AC continuously at its lowest setting. This can strain the compressor and other components. Instead, set the temperature to a comfortable level and allow the unit to cycle on and off as needed. Using an energy-saving mode or timer, if available, can also optimize performance. Regular drainage and these efficiency tips work together. They ensure your portable air conditioner provides reliable, long-lasting cooling. This careful use can help prevent issues such as why your portable air conditioner is not cooling effectively.
FAQ Section
How often should I drain my portable air conditioner with a hose?
The frequency depends on your local humidity and how often you use the unit. In highly humid environments or with continuous use, you might need to drain it daily. In drier climates or with occasional use, weekly or bi-weekly drainage might suffice. Units with auto-evaporation may need draining less often, typically when the “full tank” indicator appears.
Can I leave the hose connected for continuous drainage permanently?
Yes, if your portable AC unit supports continuous drainage, you can leave the hose connected indefinitely. Ensure the hose has a constant downward slope to a suitable drain or collection point. This setup allows water to drain as it collects, preventing the internal tank from filling up and stopping the unit’s operation.
What kind of hose do I need to drain my portable AC?
Most portable air conditioners use a standard garden hose connection for continuous drainage. Check your unit’s user manual for the specific size and type of hose recommended. Some units may come with a dedicated drain hose. Ensure the hose is long enough and allows for a continuous downward flow.
What if my portable AC does not have a hose connection for drainage?
Some basic or older portable AC models may only support manual drainage. These units require you to periodically empty an internal water tank by removing a drain plug. You would then tip the unit to let the water flow into a shallow pan or bucket. Check your user manual to confirm your unit’s specific drainage type.
My portable AC is draining, but still shows a “full tank” error. What’s wrong?
This could indicate a stuck float switch inside the unit, which detects the water level. Try gently shaking the unit to dislodge the float. It might also mean there’s still some water pooling that the float is detecting due to improper leveling. Ensure the unit is tilted enough for complete drainage.
Can I drain my portable AC directly into a carpet?
No, you should never drain your portable AC directly onto a carpet. The water can cause significant damage to the carpet and the flooring underneath, leading to mold, mildew, and unpleasant odors. Always drain into a bucket, a designated floor drain, or outside.
Conclusion
Draining your portable air conditioner with a hose is a simple yet essential maintenance task. It ensures your unit operates efficiently, prevents water leaks, and extends its lifespan. By understanding how your unit handles condensation and following the straightforward steps for hose drainage, you can easily manage this task. Remember to always prioritize safety by unplugging the unit before you start.
I encourage you to make regular drainage a part of your portable AC maintenance routine. Combined with cleaning filters and ensuring proper ventilation, consistent drainage will keep your home cool and comfortable. Don’t let a full water tank stop your comfort. Take control of your portable air conditioner’s drainage today and enjoy uninterrupted, refreshing air all season long.
- portable AC
- drainage
- hose
- maintenance
- air conditioner
- condensation
- appliance care
- home cooling


