
· Todd Martin · Home Maintenance · 22 min read
How To Fix A Ret retractable Screen Door
Fix Your Retractable Screen Door: A Comprehensive Guide
My retractable screen door is a fantastic feature. It provides fresh air and keeps bugs out without taking up valuable space. However, when it stops retracting smoothly or develops a tear, it can be really frustrating. Many homeowners like you face similar issues. You might think about professional help, but often, you can fix these problems yourself. I’ve learned that a little patience and the right steps go a long way.
This guide will walk you through common problems and provide clear, actionable solutions. We will cover everything from fixing torn mesh to addressing stubborn tracks and restoring proper tension. You will learn to identify the root cause of issues. Then, you can apply simple fixes. By the end, you will feel confident in your ability to maintain and repair your retractable screen door. Let’s get your door working perfectly again.
Takeaway
Fixing a retractable screen door is often a straightforward DIY task. Focus on these key areas:
- Identify the Problem: Determine if the issue is with the mesh, tracks, tension, or hardware.
- Clean and Lubricate: Many problems stem from dirty or dry tracks. Regular cleaning is crucial.
- Repair or Replace: Patch small tears, but consider full mesh replacement for extensive damage.
- Adjust Tension: Proper spring tension is essential for smooth retraction.
- Check Hardware: Ensure rollers, glides, handles, and latches work correctly.
What Is The Simplest Way To Fix A Ret retractable Screen Door?
The simplest way to fix a retractable screen door involves identifying the specific problem, cleaning the tracks thoroughly, lubricating moving parts with silicone spray, and making minor adjustments to the tension or alignment. For small mesh tears, a simple repair patch can be applied. Many issues are resolved with routine maintenance.
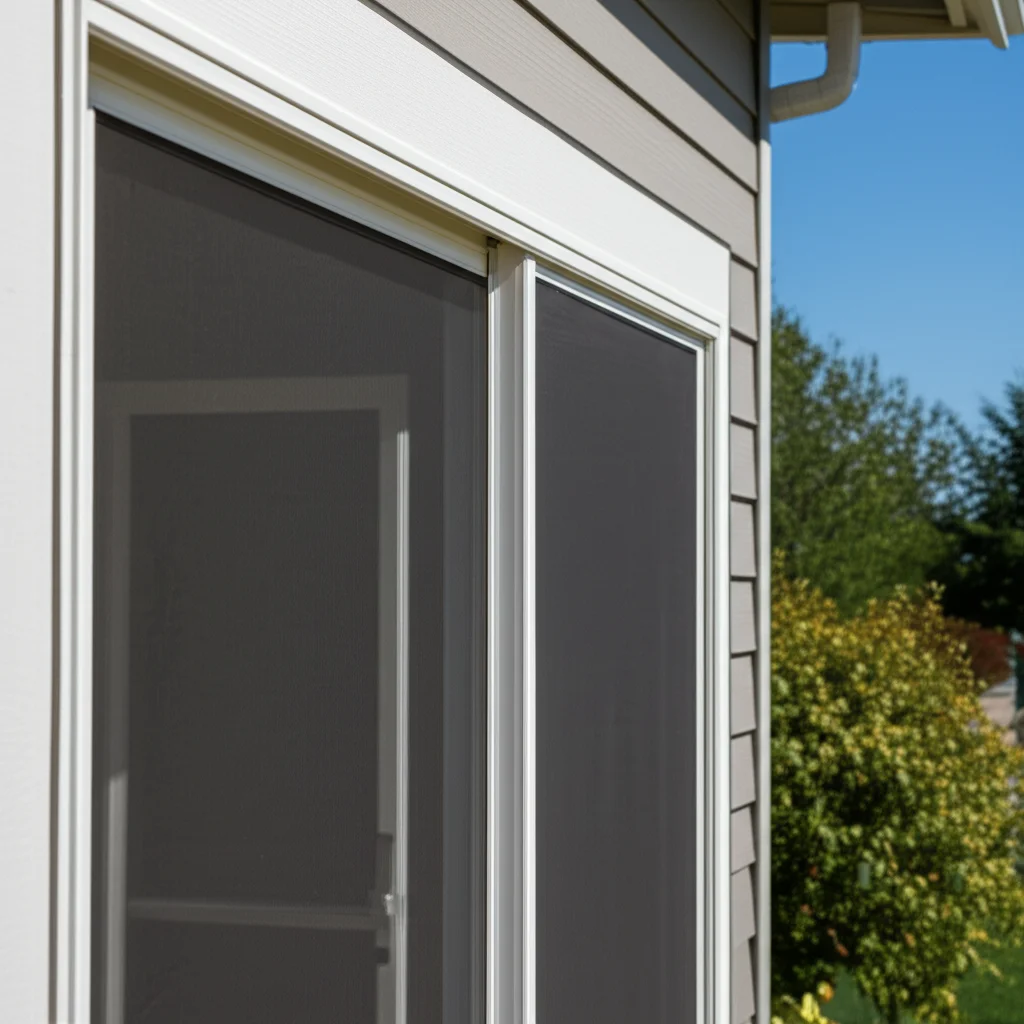
Understanding Your Retractable Screen Door: Common Problems
My retractable screen door brings so much convenience to my home. It slides away neatly when I do not need it, preserving my view and maximizing space. But like any frequently used mechanism, these doors can develop issues. Understanding how they work and what often goes wrong is the first step toward fixing them. I always start by observing the door’s behavior. Does it stick? Does it retract slowly? Is the mesh damaged? Answering these questions helps me pinpoint the problem.
Common issues often involve the door not fully retracting or extending. Sometimes, the screen may stick or snag along the track. Mesh damage, like tears or holes, is also a frequent complaint, especially if you have pets or children. The door’s spring mechanism can lose tension over time, leading to sluggish operation. Rollers or glides can become dirty or worn, preventing smooth movement. Before I grab any tools, I take a moment to diagnose. This initial inspection saves time and ensures I am tackling the right problem from the start.
Identifying the Root Cause
Diagnosing the problem correctly is the most important step in how to fix a retractable screen door. I always begin by visually inspecting the entire door system. First, I check the tracks along the top and bottom. Are they clear of debris? Are they bent or damaged? Even a small pebble can cause major sticking. Next, I examine the screen mesh itself. Look for tears, holes, or frayed edges. A torn screen can snag and prevent smooth operation.
Then, I gently pull the screen out and let it retract. Does it move smoothly or does it hesitate? If it moves slowly or does not fully retract, the problem might be with the spring tension or dirty tracks. I also pay attention to any strange noises, like grinding or squeaking. These sounds often indicate worn rollers or a dry track. I use this systematic approach. It helps me narrow down the issue efficiently.
Essential Tools You’ll Need
Gathering the right tools before you start makes the repair process much smoother. I always make sure I have a basic toolkit ready. You will typically need a few common household items. A Phillips head screwdriver and a flathead screwdriver are usually essential. These help with adjusting screws and prying small parts. A utility knife or a sharp pair of scissors is useful for cutting screen material.
For cleaning the tracks, a stiff brush and a vacuum cleaner with a narrow attachment are very helpful. You will also want a clean cloth and a bottle of silicone spray lubricant. This lubricant is perfect for door tracks and moving parts. If your mesh is torn, a screen repair kit will be invaluable. For more extensive repairs, you might need replacement rollers or a new spring cartridge. Having these items on hand saves you multiple trips to the hardware store.
Addressing Track Issues and Obstructions
One of the most frequent reasons a retractable screen door stops working correctly is an issue with its tracks. Dirt, debris, or even slight damage to the tracks can prevent the screen from gliding smoothly. I have found that cleaning and inspecting the tracks should always be one of the first steps in troubleshooting. Over time, dust, pet hair, leaves, and other small particles accumulate in the bottom and top tracks. This buildup creates friction. It makes the door stick or jam.
Sometimes, the tracks can become bent or warped, especially the bottom one, due to constant foot traffic or impacts. A bent track will snag the screen and prevent proper retraction. My approach is to address these track issues systematically. By ensuring the tracks are clean, straight, and properly lubricated, I can often resolve many door problems without needing more complex repairs. This simple maintenance step is crucial for the longevity and smooth operation of your retractable screen door.
Thorough Track Cleaning
Cleaning the tracks is a simple yet incredibly effective step in how to fix a retractable screen door. I start by fully extending the screen door. This exposes the entire length of the tracks. Then, I use a vacuum cleaner with a crevice tool to suck out any loose dirt, dust, and debris. You would be surprised how much grime can accumulate there. After vacuuming, I take a stiff brush, like an old toothbrush, and scrub the tracks. This loosens stubborn dirt.
For a deeper clean, I dampen a cloth with warm soapy water and wipe down the inside of the tracks. I make sure to remove any sticky residue. It is important to dry the tracks thoroughly afterward to prevent rust or further stickiness. This simple cleaning process often resolves minor sticking issues. It allows the screen to glide much more freely. Clean tracks are happy tracks. If you have other doors with tracks that need attention, consider applying these cleaning techniques to them too, like learning how to clean garage door tracks or even how to clean shower door tracks.
Straightening Bent Tracks
Sometimes, the tracks of your retractable screen door are not just dirty; they can be bent or warped. This is more common with the bottom track, which sees a lot of foot traffic. If you notice the screen snagging consistently at one point, a bent track might be the culprit. I carefully examine the track for any visible deformities. Even a slight bend can cause significant friction. To fix this, I use a pair of pliers, sometimes padded with a cloth to avoid scratching the finish.
I gently apply pressure to straighten any bent sections. It is important to work slowly and carefully, as too much force can cause more damage. For more stubborn bends, I might use a small rubber mallet to tap the track back into shape. After straightening, I run my finger along the track to ensure it is smooth and even. Proper track alignment ensures the door moves freely. This can prevent damage to the screen itself. You can also apply similar principles when dealing with other sliding systems, like learning how to clean sliding glass door track or even how to clean patio door track for optimal function.
Lubrication for Smooth Gliding
Once the tracks are clean and straight, the next crucial step is lubrication. This ensures smooth and effortless operation of your retractable screen door. I always use a silicone-based spray lubricant for this task. It is important to avoid oil-based lubricants, as they can attract dust and grime, making the problem worse over time. Silicone spray creates a slippery, non-sticky surface that repels dirt.
To apply, I hold the can a few inches away and spray a thin, even coat along the entire length of both the top and bottom tracks. I then extend and retract the screen door several times. This distributes the lubricant evenly. You will notice an immediate difference in how smoothly the door glides. This step also helps protect the tracks from wear and tear. A well-lubricated track extends the life of your door.
Repairing or Replacing Damaged Screen Mesh
A common issue I encounter with retractable screen doors is damage to the mesh itself. Whether it is a small tear from a pet’s claw or a larger hole from an accidental impact, mesh damage compromises the door’s primary function: keeping insects out. I always assess the extent of the damage before deciding on a repair method. Small tears or punctures can often be fixed with a simple patch. This saves time and money. However, if the mesh has extensive rips, multiple large holes, or is brittle from sun exposure, a full replacement of the screen material might be the better long-term solution.
Repairing the mesh does not just restore functionality. It also maintains the aesthetic appeal of your door. I prefer to address mesh damage quickly. Small tears can easily grow larger if left unattended. Having a clear plan, whether patching or replacing, is key. It ensures your retractable screen door continues to serve its purpose effectively. I want my door to be both functional and visually appealing.
Small Tear Patching
For small tears or holes in your retractable screen door mesh, patching is a quick and effective solution. I find this method perfect for minor damage. First, I make sure the area around the tear is clean and dry. Any dirt or debris can prevent the patch from adhering properly. You can purchase screen repair kits specifically designed for this purpose. These kits usually come with self-adhesive patches.
I cut the patch slightly larger than the hole, ensuring it covers the damaged area completely. Then, I peel off the backing and carefully press the patch firmly over the tear. Some kits require a little heat from a hairdryer to activate the adhesive. I make sure to press out any air bubbles for a smooth finish. This simple repair restores the screen’s integrity. It keeps the bugs out.
Full Screen Replacement Process
When the mesh of your retractable screen door has extensive damage, or if it is brittle and worn out, a full screen replacement is often necessary. This is a more involved process, but it is certainly manageable for a DIY enthusiast. First, I carefully remove the door cartridge or the entire door assembly from its frame. Each manufacturer has slightly different instructions for this. You might need to consult your door’s manual.
Once the cartridge is out, I locate the end caps that hold the screen roll. I gently remove these caps to access the spring-loaded roller mechanism. Carefully unroll the old screen from the roller and discard it. Then, I attach the new screen material to the roller according to the manufacturer’s instructions. This usually involves a channel or adhesive strip. After securing the new screen, I slowly and evenly roll it onto the cartridge, ensuring it is taut and wrinkle-free. Replace the end caps and reinstall the door assembly. This gives your door a fresh start.
Tackling Tension and Retraction Problems
One of the most distinctive features of a retractable screen door is its ability to neatly disappear into its housing. This magic happens thanks to a spring-loaded tension system. When your door starts to retract slowly, stops halfway, or does not retract at all, the tension mechanism is usually the culprit. I have found that this is a common issue as doors age or after heavy use. The spring can lose its elasticity over time. It can also become misaligned.
Addressing tension problems requires a bit of care. The spring is under tension, so safety is important. But with the right approach, you can restore your door’s smooth, snappy retraction. I always start by checking if there are any obvious obstructions preventing full retraction before assuming it’s a tension issue. If the tracks are clean and the mesh is clear, then it is time to look at the spring. This will get your door retracting like new again.
Adjusting Spring Tension
Adjusting the spring tension is a key step in how to fix a retractable screen door that isn’t retracting properly. Many retractable screen doors have an adjustable spring mechanism within the main housing or cassette. I start by carefully removing the cover of the housing. This exposes the spring cartridge. You will usually see a mechanism for increasing or decreasing the spring tension. It often involves rotating a gear or turning a screw.
I follow the manufacturer’s instructions for adjusting the tension, as methods vary. Generally, you will turn the mechanism to wind the spring tighter, which increases tension. It’s important to do this in small increments and test the door’s retraction after each adjustment. Too much tension can make the door hard to pull out, and too little will not allow it to retract fully. I aim for a balance where the door retracts smoothly and completely without excessive force.
Replacing the Spring Cartridge
Sometimes, adjusting the tension is not enough. If the spring inside your retractable screen door is old, broken, or has completely lost its springiness, you might need to replace the entire spring cartridge. This is a more involved repair, but it is certainly feasible for a determined homeowner. First, I carefully remove the door’s main housing or cassette from the door frame. You will likely need a screwdriver for this.
Once the housing is off, I locate the spring cartridge inside. It is usually a cylindrical component at one end of the screen roll. I carefully unhook or unbolt the old cartridge, making sure to release any remaining tension safely. It is wise to wear gloves and eye protection. Then, I install the new spring cartridge, ensuring it is correctly aligned and secured. Finally, I reassemble the housing and reinstall the door. This replacement brings back the full retraction power.
Fixing Rollers, Glides, and Alignment
For a retractable screen door to operate smoothly, its rollers and glides must be in excellent condition. These small but mighty components bear the weight of the screen and guide it along the tracks. Over time, rollers can become worn, cracked, or accumulate debris. Glides, which are often plastic inserts, can also wear down or break. When these parts are compromised, the door will not slide effortlessly. It might stick, squeak, or even become difficult to open or close.
I find that issues with rollers and glides are often intertwined with track problems. Even if your tracks are clean, worn rollers will hinder smooth movement. Proper alignment of the door panel itself is also critical. If the door is off-kilter, it will bind against the frame. Addressing these components directly improves the door’s overall functionality. It ensures a seamless user experience.
Inspecting and Cleaning Rollers/Glides
If your retractable screen door feels stiff or grinds when opening or closing, the rollers or glides are likely the culprits. I begin by carefully inspecting them. I fully extend the screen and look closely at the small wheels or plastic glides on the top and bottom of the screen housing. Check for any visible damage, such as cracks, flat spots, or missing pieces. Sometimes, the problem is simply accumulated dirt or hair wrapped around the roller axles.
To clean them, I use a small brush or a pair of tweezers to remove any debris. A damp cloth can wipe away grime from the glides. If the rollers are visibly worn, cleaning might not be enough. If they appear fine, apply a small amount of silicone spray to the axles of the rollers. This helps them spin freely. This simple inspection and cleaning often restores smooth movement.
Replacing Worn Components
When inspection reveals that rollers or glides are significantly worn, cracked, or broken, replacing them is the best course of action. I start by identifying the specific type of roller or glide your door uses. You might need to remove one to take it to a hardware store. Many retractable screen door manufacturers offer replacement parts. Carefully remove the old, damaged components. This often involves unscrewing them or prying them out of their slots.
Then, I insert the new rollers or glides. Make sure they are seated correctly and move freely. If screws secure them, tighten them gently. This ensures they are firm but not over-tightened. Replacing these small parts can make a huge difference. Your door will glide much more smoothly and quietly. It feels like getting a new door.
Realigning the Door Panel
Even with clean tracks and healthy rollers, a retractable screen door can struggle if it is out of alignment. If your door snags, binds, or does not close flush, it might be slightly askew. I find that proper alignment is crucial for smooth operation. Most retractable screen doors have adjustment screws or mechanisms, typically located at the top or bottom of the housing. These allow you to slightly shift the door panel.
I loosen the adjustment screws just enough to allow for movement. Then, I gently push or pull the door panel to square it within the door frame. You want it to be perfectly vertical and parallel to the frame. Once aligned, I carefully tighten the adjustment screws. Test the door by opening and closing it several times. This step ensures the screen is not rubbing against the frame. Proper alignment contributes significantly to the door’s longevity.
Troubleshooting Handles, Latches, and Magnets
A functional retractable screen door is not just about smooth retraction and a pristine mesh. It also needs to open, close, and stay securely shut. This is where the handles, latches, and magnets come into play. If your door is difficult to grab, does not latch properly, or constantly blows open, these components are likely the source of the problem. I have found that these issues, while seemingly minor, can be incredibly annoying. They reduce the overall convenience of the door.
Sometimes, a handle can become loose or even break off. Latches might misalign or wear down. Magnetic strips, which often provide the final seal, can lose their strength or become detached. My approach is to inspect each of these elements systematically. Ensuring they are all in good working order is essential for a fully functional and enjoyable retractable screen door. These small fixes make a big difference in daily use.
Repairing or Replacing Handles
A loose or broken handle on your retractable screen door can make it frustrating to operate. I always check the handle first if I am having trouble opening or closing the door. Often, the screws securing the handle to the door frame or the screen cassette simply become loose over time. I start by grabbing a screwdriver and gently tightening these screws. Be careful not to overtighten, as this can strip the screw holes or crack the plastic.
If the handle itself is cracked or broken, replacement is usually the best option. I look for replacement handles specific to my door model. Many manufacturers sell these parts. Removing the old handle typically involves unscrewing it. Then, I simply attach the new handle with the existing or new screws. A sturdy handle is crucial for ease of use. It makes a big difference in the user experience. You might also find it helpful to learn how to clean old door hardware to keep all parts of your door in top shape.
Adjusting Latch Mechanisms
The latch mechanism on your retractable screen door ensures it stays closed when you want it to. If your door is not latching securely, or if it is difficult to engage the latch, it probably needs an adjustment. I start by examining the strike plate on the door frame and the latch mechanism on the screen itself. They should align perfectly when the door is closed. Sometimes, the strike plate might have shifted or become loose.
I loosen the screws on the strike plate slightly. Then, I reposition it so that the latch aligns perfectly and engages smoothly. Once aligned, I tighten the screws firmly. If the latch mechanism on the screen is worn, some models allow for minor adjustments to the latch’s projection. Consult your door’s manual for specific instructions. A properly adjusted latch provides a secure closure. It keeps unwanted visitors out.
Enhancing Magnetic Closures
Many retractable screen doors use magnetic strips along the vertical edge of the screen and the door frame to provide a secure, gap-free closure. If your door is not sealing tightly, or if it pops open easily, the magnets might be weak or misaligned. I start by checking the magnetic strips on both the screen edge and the frame. Make sure they are clean and free of debris that could prevent them from connecting fully.
If a magnetic strip is peeling off, I reattach it with strong adhesive or small screws if possible. For weak magnets, sometimes adding small, thin neodymium magnets (available at hardware stores) to the existing strips can boost their holding power. I carefully attach them using a strong adhesive. This ensures a tight seal. A strong magnetic closure keeps bugs out. It also prevents the door from swinging open unexpectedly.
Essential Maintenance for Lasting Performance
Fixing a retractable screen door is one thing, but keeping it in top condition is another. I have learned that regular maintenance is key to preventing future problems and extending the life of my door. These doors are exposed to the elements and daily wear and tear. Dust, dirt, and moisture can accumulate, leading to sticky tracks and sluggish operation. Neglecting basic care can cause parts to wear out prematurely.
By dedicating a little time to routine cleaning and inspection, you can avoid many common issues. This proactive approach saves you time and money on more extensive repairs down the line. It also ensures your door always performs smoothly. My goal is to keep my retractable screen door functioning perfectly for many years. Regular maintenance is how I achieve that.
Regular Cleaning Schedule
Establishing a regular cleaning schedule is the most important step in maintaining your retractable screen door. I make it a point to clean the tracks every few months, or more often if my door sees heavy use or if I live in a dusty area. I use a vacuum with a crevice tool to remove loose dirt and debris. Then, I wipe down the tracks with a damp cloth and mild soap. This prevents buildup that causes sticking.
I also gently clean the screen mesh itself. A soft brush or a damp cloth is good for removing dust and cobwebs. Avoid harsh chemicals or excessive water pressure. They can damage the mesh or components. Regular cleaning not only improves performance but also keeps your door looking its best. Cleanliness is close to functionality here. If you’re cleaning other doors, you might find tips like how to clean screen doors helpful.
Periodic Component Checks
Beyond cleaning, I make sure to perform periodic checks on all the components of my retractable screen door. This allows me to catch small issues before they become major problems. Every six months or so, I inspect the rollers and glides for signs of wear or damage. If they look worn, I consider replacing them proactively. I also check the spring tension to ensure the door retracts smoothly. If it is sluggish, I adjust it.
I test the handle and latch mechanisms for proper function and tightness. Any loose screws get tightened immediately. I also inspect the magnetic strips for any signs of detachment or weakness. Addressing these minor issues promptly prevents bigger headaches down the road. Proactive checks keep your door running smoothly.
Seasonal Care Tips
Retractable screen doors are exposed to varying weather conditions, so seasonal care is important. In preparation for colder months, I ensure the door is thoroughly cleaned and lubricated before potential freezing temperatures hit. This prevents any moisture from freezing components in place. If you do not plan to use the screen door during winter, it is a good idea to keep it fully retracted within its housing. This protects the mesh and internal mechanisms from harsh winter elements.
During warmer, more humid months, I pay extra attention to keeping the tracks clean. Humidity can make dust stick more effectively. I also check for any signs of mold or mildew on the mesh, especially in shaded areas. Promptly cleaning any growth prevents damage. Taking these seasonal precautions helps your retractable screen door endure the changing weather. It ensures it is ready for use when you need it.
FAQ Section
Why does my retractable screen door not retract all the way?
Your retractable screen door might not retract fully due to several reasons. The most common issues include dirt and debris in the tracks, which create friction. The spring mechanism inside the door’s housing might also have lost tension over time. Additionally, worn-out rollers or glides can prevent smooth movement. Begin by cleaning the tracks thoroughly and then check the spring tension.
Can I replace the mesh on a retractable screen door myself?
Yes, you can absolutely replace the mesh on a retractable screen door yourself. It is a manageable DIY project. You will need to carefully remove the door’s cassette or housing from the frame. Then, you can access the spring-loaded roller to remove the old mesh and attach the new one. Always follow the manufacturer’s specific instructions for your door model for the best results.
How do I lubricate a retractable screen door?
To lubricate your retractable screen door, use a silicone-based spray lubricant. I always extend the screen fully to expose the entire length of the top and bottom tracks. Then, I apply a thin, even coat of the silicone spray along the inside of both tracks. Avoid oil-based lubricants, as they can attract dirt. Extend and retract the door several times to distribute the lubricant.
What causes a retractable screen door to
- retractable screen door
- screen door repair
- DIY door fix
- mesh repair
- door maintenance

Todd Martin
Senior Writer
With over 15 years of experience in home renovation and design, I started HEG to share what I’ve learned with homeowners who want to create spaces that are both beautiful and functional. I’ve always believed in a hands-on approach, and over the years, I’ve picked up practical solutions that actually work. Through HEG, I aim to make home improvement more approachable, sharing real tips that help you create a home you truly love.


