· Todd Martin · Home Appliance Repair · 15 min read
How To Fix Electric Oven That Wont Heat Up
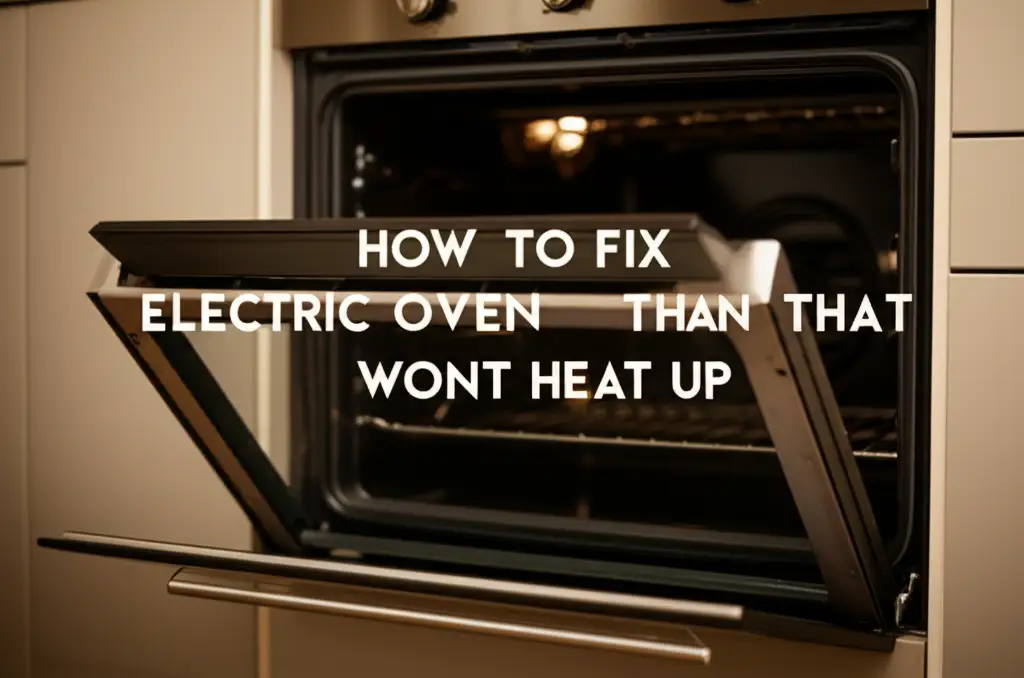
How to Fix Your Electric Oven When It Won’t Heat Up
Imagine preparing to bake a delicious meal, only to find your electric oven remains stubbornly cold. This is a common and frustrating problem. An electric oven that won’t heat up can disrupt your entire cooking schedule. Many homeowners face this issue at some point.
You do not need to call a repair person immediately. Many common problems have simple solutions you can handle yourself. This guide will help you understand the parts of your electric oven and how to troubleshoot why it is not heating. We will walk through basic checks, component testing, and when to seek professional help. My goal is to empower you to diagnose and fix your oven, saving you time and money.
Takeaway
- Prioritize Safety: Always disconnect power before touching oven components.
- Check Basics First: Verify power supply, circuit breakers, and oven settings.
- Inspect Heating Elements: Look for visible damage on bake and broil elements.
- Test Components: Use a multimeter to check continuity of elements, temperature sensors, and thermal fuses.
- Consider Control Board: A faulty control board can prevent heating.
- Know When to Call: Some repairs need professional expertise.
An electric oven that won’t heat up often has issues with its power supply, heating elements, temperature sensor, or thermal fuse. You can fix most problems by checking the circuit breaker, inspecting elements for breaks, or testing components with a multimeter for continuity to find the faulty part.
Safety First: Before You Begin Oven Troubleshooting
Before you touch any part of your electric oven, safety must be your top concern. Electricity can cause serious injury or even death. Never skip these critical first steps. You must prepare your workspace and yourself before starting any repair.
Disconnecting Power
The most important step is to cut power to the oven. Do not just turn the oven off at the dial. You need to disconnect it from its power source completely. Find your home’s main electrical panel. Locate the breaker labeled for your kitchen or oven. Flip it to the “OFF” position. If your oven is plugged into a wall outlet, simply unplug it. Confirm there is no power by trying to turn the oven on or by using a voltage tester. I always double-check this step; it is vital for your safety.
Essential Safety Gear
Wearing the right safety gear protects you from unexpected hazards. Even with the power off, sharp edges or heavy components can pose a risk. I recommend wearing heavy-duty work gloves to protect your hands. Safety glasses are also a good idea. They shield your eyes from debris or unexpected sparks if power is accidentally reconnected. A headlamp can help illuminate dark areas inside the oven, allowing you to see parts clearly. Always have a clean, dry workspace.
Initial Checks: Power Supply and Basic Issues
When your electric oven refuses to heat, start with the simplest possible explanations. Many times, the problem is not a broken part inside the oven itself. It might be an issue with your home’s electrical system or an incorrect oven setting. Checking these basic points first can save you a lot of time and effort. I always begin here; it prevents unnecessary disassembly.
Check the Circuit Breaker
Your oven draws a lot of power. If it draws too much, or if there is a short, your circuit breaker will trip. This is a safety feature to prevent electrical fires. Go to your home’s main electrical panel. Look for a tripped breaker. It will usually be in the “OFF” position, or sometimes halfway between “ON” and “OFF.” If you find one, flip it completely to “OFF” first, then firmly to “ON.” If the breaker trips again immediately, there is a more serious electrical problem. You should call a qualified electrician.
Inspect the Power Cord and Outlet
Sometimes, the simplest things are overlooked. Check the power cord if your oven is plugged into an outlet. Ensure it is fully seated in the wall outlet and not loose. Look for any visible damage on the cord itself, like frayed wires or burn marks. These can indicate a fault. If your oven is hardwired, you cannot easily check the connection without an electrician. If you suspect an issue with the outlet, test it with another appliance. If the outlet does not work for other appliances, you might have a problem with the outlet or the wiring to it.
Verify Oven Settings
It sounds obvious, but incorrect settings often cause problems. Make sure your oven is set to the “Bake” or “Broil” function, not “Clean” or “Warm.” Ensure the temperature is set correctly. Some ovens have a “Sabbath mode” or “delay bake” feature that can prevent heating. Consult your owner’s manual to ensure no special modes are active. I have personally seen ovens not heat because someone accidentally left them in “Sabbath mode.” Also, confirm the oven door is completely closed. Most ovens will not heat if the door is ajar for safety reasons.
Diagnosing Heating Elements: Bake and Broil
The heating elements are the most common reason an electric oven won’t heat up. Electric ovens have at least two main heating elements: the bake element at the bottom and the broil element at the top. Sometimes, there is also a convection element in the back. If one or both of these elements fail, your oven will not get hot. You can often spot a bad element with a simple visual check. If not, testing with a multimeter provides a definitive answer.
Visual Inspection of Elements
Turn on your oven to a high temperature, like 400°F (200°C), and allow it to preheat for a few minutes. Carefully open the door. Look at both the bake element at the bottom and the broil element at the top. A working element should glow red-orange. If an element does not glow, it might be faulty. Look for any visible damage on the element itself, such as cracks, breaks, or blisters. A broken element will look physically compromised. Sometimes, an element can short out and cause the circuit breaker to trip repeatedly. This is a clear sign it needs replacement.
Testing Elements with a Multimeter
If you do not see visible damage, you need to test the elements for electrical continuity. First, unplug the oven or turn off its breaker. Access the elements. You might need to remove a few screws to pull them forward or remove the oven’s back panel. Disconnect the wires from the terminals of the element you are testing. Set your multimeter to the “ohms” (Ω) setting, which measures resistance. Touch one probe to each terminal of the element. A good working element will show a resistance reading between 10 to 50 ohms. If the multimeter shows “OL” (open loop) or infinity, the element has no continuity, meaning it is broken. This element needs replacement. For more detailed troubleshooting on heating issues, you might find specific model information helpful, such as diagnosing problems like why won’t my electric oven heat past 250 degrees.
Assessing the Oven’s Temperature Sensor or Thermostat
After checking the heating elements, the next common culprit for an oven not heating correctly is the temperature sensor or thermostat. These components tell the oven’s control board what the internal temperature is. If the sensor gives an inaccurate reading, or if it fails completely, the oven might not heat up at all. It could also cause the oven to heat poorly. I have seen many cases where a simple sensor replacement fixes an oven’s heating problem.
Locating and Inspecting the Sensor
The oven temperature sensor is usually a small metal probe located inside the oven cavity. It often sticks out from the upper back wall or near the top element. It usually looks like a pencil-thin metal rod with two wires connected to it. Before removing it, ensure the oven’s power is disconnected. Visually inspect the sensor for any signs of damage, such as corrosion, burnt marks, or bent wires. Sometimes, the wire connections at the back of the oven can be loose or corroded. Check these connections first. Pulling the oven slightly away from the wall might be necessary to access the back panel.
Testing the Temperature Sensor
To test the temperature sensor, you will need your multimeter set to the “ohms” (Ω) setting. Disconnect the sensor’s wires. Touch one multimeter probe to each of the sensor’s terminals. A healthy sensor should show a resistance reading. At room temperature (around 70°F or 21°C), the resistance typically ranges from 1000 to 1100 ohms. The resistance should change as the temperature changes. You can carefully warm the sensor with your hand or a hairdryer (do not get it too hot) and watch the resistance change. If the sensor shows “OL” (open loop), a reading significantly outside this range, or no change with temperature, it is likely faulty. A bad sensor sends incorrect signals, preventing the oven from heating up. Knowing how to tell if your electric oven is going out can help you decide if it’s worth fixing.
Investigating the Thermal Fuse: A Safety Cut-Off
The thermal fuse acts as a safety device in your electric oven. It is a one-time fuse designed to blow if the oven overheats to a dangerous level. This prevents damage to the oven or potential fires. If the thermal fuse blows, it completely cuts off power to the heating circuit, causing the oven to not heat at all. This is a common reason for a dead oven. It is a small component, but its failure has a big impact.
Finding the Thermal Fuse
Locating the thermal fuse can be tricky because its exact placement varies by oven model. It is usually found behind the back panel of the oven, often near the control board or the cooling fan. It looks like a small, cylinder-shaped or rectangular component with two wires connected to it. You will need to pull your oven away from the wall and remove the back access panel to find it. Some models might have it near the top or bottom of the oven chassis. Always consult your oven’s service manual or a parts diagram for its precise location. I often find it near the area where main power enters the oven.
Checking for Continuity
Once you locate the thermal fuse, disconnect the two wires connected to it. Set your multimeter to the “ohms” (Ω) setting. Touch one probe to each terminal of the thermal fuse. A good thermal fuse should show very little or no resistance, typically close to 0 ohms. It effectively acts as a closed switch, allowing current to pass. If your multimeter displays “OL” (open loop) or an infinite resistance, the thermal fuse has blown. This means it has opened the circuit, and no power is reaching the heating elements. A blown thermal fuse must be replaced. It is designed for one-time use. Remember, if it blew, there was likely an underlying overheating issue. You should investigate why it blew.
Examining the Oven Control Board or Clock
The control board, often called the main control board or clock, is the “brain” of your electric oven. It receives commands from the user interface, monitors temperature through the sensor, and sends power to the heating elements. If this board malfunctions, it can prevent your oven from heating up, even if all other components are in good working order. A failing control board can be a frustrating issue because it affects multiple functions.
Signs of a Faulty Control Board
A faulty control board can present various symptoms beyond just not heating. You might notice the oven display is blank or flickers. Buttons might not respond correctly, or the oven might make unusual beeping noises. Sometimes, only certain functions fail; for example, the bake element works, but the broil element does not, or vice versa. Visible signs on the board itself, such as burnt spots, bulging capacitors, or a distinct burnt smell, clearly indicate a problem. If you have checked all other components and they test fine, the control board is a strong suspect. For specific errors, such as an F9 error code on an LG electric oven, the control board is often implicated.
Replacing the Control Board
Replacing the control board is generally a straightforward process, but it requires careful handling. Ensure the power to the oven is off. Access the control board, which is usually located behind the oven’s control panel. You will need to remove a few screws to get to it. Take pictures of the wire connections before you disconnect anything. This helps you reconnect them correctly. Carefully detach all wires and mounting screws. Install the new control board, ensuring all connections are secure and in their proper places. Replacing a control board can be an expensive repair, so always confirm it is the problem before buying a new one.
When to Call a Professional: Knowing Your Limits
While troubleshooting and repairing your electric oven can save money, there are times when calling a professional appliance technician is the best and safest option. Knowing your limits prevents further damage to your oven or, more importantly, injury to yourself. Do not hesitate to seek expert help when the situation calls for it. My rule of thumb is: if you are unsure, call a pro.
One instance where you should call a professional is if you are uncomfortable with electrical work. Dealing with high voltage components can be dangerous. If you have checked the basic steps and tested the main components (elements, sensor, thermal fuse) and cannot identify the problem, a professional has specialized tools and experience. They can diagnose complex issues with the wiring harness or internal electrical shorts that are hard for a DIYer to find. If your circuit breaker repeatedly trips even after you reset it, this signals a serious electrical problem. Do not keep resetting it. This indicates a short circuit that needs immediate attention from a qualified electrician or appliance technician. Sometimes, repairing an older oven can be more expensive than replacing it, a professional can offer honest advice on the cost-effectiveness of repair versus replacement. For general maintenance and care, knowing how to clean an electric oven can prolong its life, but fixing complex failures needs expertise.
FAQ Section
Q1: Why does my electric oven click but not heat? A: If your electric oven clicks but does not heat, it often points to a problem with the igniter (if it were gas, but for electric, this indicates a faulty relay) or the heating elements. The clicking sound might be a relay on the control board trying to engage the elements. Check for visible breaks in the bake or broil elements first. Also, test the elements with a multimeter for continuity. A clicking sound can also come from a failing control board trying to send power.
Q2: Can a bad oven sensor stop the oven from heating? A: Yes, absolutely. A bad oven temperature sensor can prevent the oven from heating at all. The sensor communicates the oven’s internal temperature to the control board. If the sensor is faulty, it might send an incorrect reading (e.g., that the oven is already hot) or no reading at all. This prevents the control board from activating the heating elements, as it believes no heat is needed or cannot regulate temperature.
Q3: How long do electric oven elements last? A: Electric oven heating elements typically last between 5 to 10 years. Their lifespan depends on usage frequency, cooking habits, and how well the oven is maintained. Over time, constant heating and cooling cycles cause the metal to weaken and eventually break. Regular inspection can help you spot signs of wear before complete failure.
Q4: Is it worth fixing an old electric oven that won’t heat? A: It depends on the oven’s age, overall condition, and the cost of the repair. If the repair involves replacing a relatively inexpensive part like a heating element or temperature sensor, it is often worth it. However, if the control board is faulty, or if the oven is very old and other components are failing, the repair cost might approach the price of a new oven. Consider the oven’s age and reliability.
Q5: Can a power surge cause an electric oven not to heat? A: Yes, a power surge can definitely cause an electric oven not to heat. A surge can damage sensitive electronic components like the control board or blow a thermal fuse, which is designed to protect the oven from overheating or electrical faults. If your oven stopped working after a storm or power fluctuation, these components are prime suspects. Always check your circuit breaker first after a power event.
Q6: What does it mean if only one element is not heating? A: If only one element (either bake or broil) is not heating, it most likely means that specific element is faulty. It could have a visible break, or it might have lost continuity. Less commonly, the relay on the control board that controls that specific element could be bad. Start by visually inspecting the non-heating element. Then, test it for continuity with a multimeter. Replacing the faulty element usually resolves this issue.
Conclusion
Having an electric oven that won’t heat up is frustrating, but it is often a solvable problem. We have covered several common issues, from simple power supply checks to more involved component testing. Remember to always put safety first by disconnecting power before you begin any work inside your oven. By systematically checking your circuit breaker, inspecting heating elements, and testing the temperature sensor or thermal fuse, you can often diagnose and fix the problem yourself. I have found that patience and careful observation are your best tools in these situations.
Empowering yourself with basic troubleshooting knowledge can save you both time and money on appliance repairs. If you find yourself in doubt, or if the repair seems too complex, do not hesitate to call a certified appliance technician. They have the expertise to safely diagnose and fix more intricate issues. With this guide, you now have a clear path to follow when your electric oven decides to take a cold break. Get your oven heating again and enjoy home-cooked meals once more!
- electric oven repair
- oven not heating
- appliance troubleshooting
- oven heating element
- home repair

Todd Martin
Senior Writer
With over 15 years of experience in home renovation and design, I started HEG to share what I’ve learned with homeowners who want to create spaces that are both beautiful and functional. I’ve always believed in a hands-on approach, and over the years, I’ve picked up practical solutions that actually work. Through HEG, I aim to make home improvement more approachable, sharing real tips that help you create a home you truly love.