· Davia Murnell · Home Improvement · 20 min read
How To Install Window Air Conditioner In Vinyl Windows
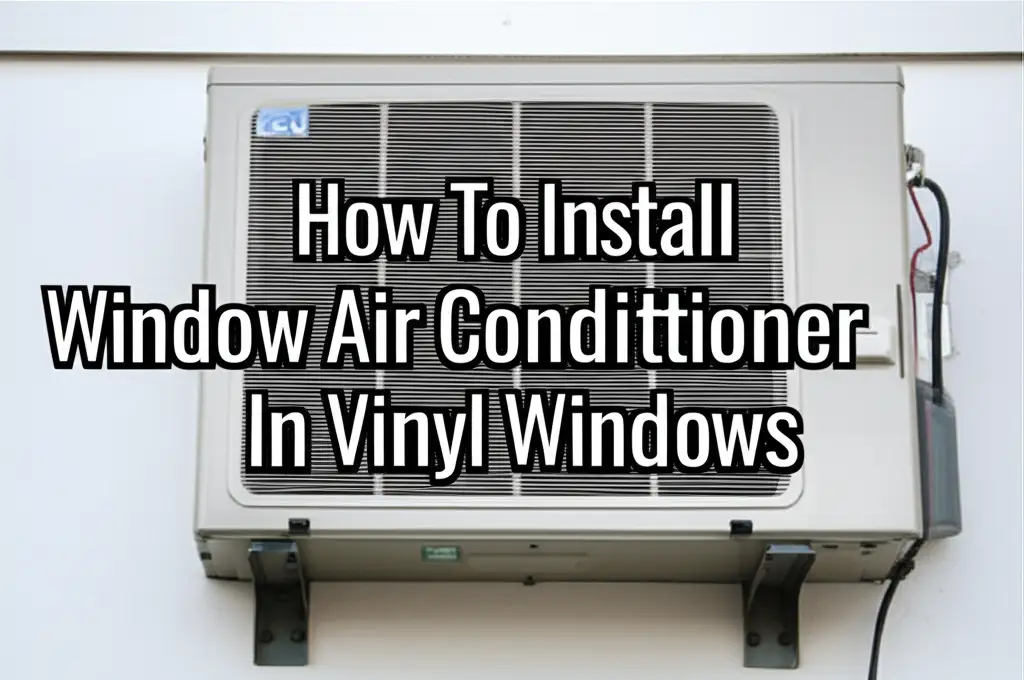
Installing a Window Air Conditioner in Vinyl Windows Safely
Summer heat often arrives with a surprising intensity. When temperatures rise, a window air conditioner becomes a welcome addition to any home. But what if your home has vinyl windows? Installing a window AC unit in vinyl frames requires a careful approach. Vinyl windows are durable, but their frames are less rigid than wood or metal. This means you need to take extra steps to protect them from damage during the installation process.
This guide helps you understand the specific needs of vinyl windows. We will cover everything from choosing the right unit size to securing it safely. You will learn about essential tools, proper support, and effective sealing techniques. By following these instructions, you can ensure your home stays cool without harming your window frames. Get ready to enjoy a comfortable, energy-efficient summer.
Takeaway
Installing a window air conditioner in vinyl windows requires specific care.
- Always use a robust external support bracket to prevent stress on vinyl frames.
- Avoid screwing directly into the vinyl sash or frame; use the unit’s provided frame or alternative methods.
- Measure accurately to choose an AC unit that fits your window dimensions.
- Seal all gaps with foam, weatherstripping, and the unit’s side panels for energy efficiency.
- Ensure the unit is slightly tilted outward for proper drainage.
How to Install a Window Air Conditioner in Vinyl Windows
To install a window air conditioner in vinyl windows, use a support bracket to bear the unit’s weight, avoiding direct screws into the vinyl. Position the AC unit, secure it with the window sash, extend side panels, and seal all gaps with foam and weatherstripping. This method protects the vinyl frame while ensuring stable and efficient cooling.
Understanding Vinyl Windows Before AC Installation
Vinyl windows are a popular choice for many homes. They offer excellent insulation and require minimal maintenance. However, their unique construction means you must approach air conditioner installation differently. Unlike wood or metal frames, vinyl can bend or warp under heavy weight. This is a crucial point to remember for any window AC installation.
The flexibility of vinyl frames makes them vulnerable. A standard window air conditioner is heavy. Placing this weight directly on the vinyl sash can cause damage over time. This damage might include warping, cracking, or even dislodging the window from its frame. Such issues can lead to costly repairs and reduced energy efficiency. Therefore, specific precautions are necessary. You must prioritize protecting the integrity of your window.
Why Vinyl Needs Specific Considerations
Vinyl window frames use a multi-chambered design for insulation. This design makes them lightweight and energy-efficient. However, it also means they are not designed to bear significant point loads. A window AC unit concentrates a lot of weight in a small area. This concentration of weight can stress the vinyl material. Over time, this stress can deform the frame.
Another concern is drilling. Drilling directly into vinyl frames is not ideal. Screws can compromise the frame’s structural integrity. They can also create pathways for moisture intrusion. This can lead to mold growth or reduced insulation performance. We want to avoid any action that permanently alters or weakens the window. The goal is a secure, temporary installation that causes no lasting harm.
Choosing the Right AC Unit Size
Selecting the correct air conditioner size is the first step towards a successful installation. An oversized unit will cycle on and off too frequently. This wastes energy and does not remove humidity effectively. An undersized unit will run constantly. It struggles to cool the room, leading to higher energy bills. Both scenarios are undesirable.
To determine the right size, you need the room’s square footage. A general rule is 20 BTUs per square foot. For example, a 250 square foot room needs a 5,000 BTU unit. Consider other factors too, like direct sunlight exposure or high ceilings. These factors might require a slightly larger unit. Proper sizing ensures efficient cooling and prevents unnecessary strain on your vinyl window.
Measuring Your Vinyl Window
Accurate measurements are vital for a proper fit. Measure the width of your window opening from side to side. Measure from the inside of the frame. Also, measure the height of the opening when the sash is fully raised. Most window AC units fit double-hung windows. These windows have a lower sash that slides up and down.
Your AC unit will come with specific window opening requirements. Compare your measurements to the unit’s specifications. Pay close attention to the minimum and maximum width the unit can accommodate. This information is usually in the product manual. A unit that is too wide or too narrow will be impossible to install securely. A good fit minimizes gaps and improves energy efficiency.
Gathering Essential Tools and Materials for the Job
Proper preparation makes any DIY project smoother. For installing a window air conditioner in vinyl windows, having the right tools and materials is crucial. This not only ensures a safe installation but also protects your valuable window frames. You want to make sure you have everything you need before you start. This prevents stops and starts during the process.
Think of it like preparing for a big meal. You gather all ingredients and utensils beforehand. This way, the cooking flows without interruption. The same logic applies here. A well-equipped workspace means a more efficient and safer installation. Gather all items in one place.
List of Tools
You will need a few common household tools for this project. These tools help with measuring, securing, and sealing the unit.
Here is a list of what you should have on hand:
- Tape Measure: For accurate window and unit measurements.
- Pencil: To mark measurements if needed.
- Drill with appropriate bits: For installing the support bracket screws.
- Screwdriver set (Phillips and flathead): For assembling the AC unit components or tightening screws.
- Level: To ensure the AC unit is slightly tilted for drainage.
- Utility Knife or Scissors: For cutting foam insulation or weatherstripping.
- Safety Glasses and Gloves: For personal protection during installation.
- Caulk Gun (optional): If using caulk for extra sealing, though not always recommended for vinyl.
Having these tools ready saves time. It also makes the installation process much simpler.
Importance of Proper Materials for Vinyl Protection
The materials you use are just as important as the tools. These materials create a buffer between the AC unit and the vinyl. They protect the window frame from direct pressure and potential damage. They also help seal gaps for better energy efficiency.
Consider these materials carefully:
- External AC Support Bracket: This is non-negotiable for vinyl windows. It transfers the unit’s weight from the window sash to the exterior wall. This bracket prevents warping and damage to the vinyl. It is the most critical item on your list for vinyl window installations.
- Non-Compressible Foam or Rubber Shims: These can be placed between the AC unit and the vinyl sill. They help distribute weight evenly. They also prevent direct contact and potential friction damage.
- Weatherstripping (foam or rubber): Essential for sealing gaps around the unit. This prevents air leaks, dust, and insects from entering.
- Insulation Foam Panels: Many AC units come with accordion-style side panels. These are often thin. Adding extra rigid foam insulation to these panels improves energy efficiency.
- Heavy-Duty Duct Tape or Foil Tape: For extra sealing around the unit’s edges and foam panels.
- Silicone Sealant (optional, exterior only): If you need an extra weather seal on the outside after installation. Use sparingly and ensure it’s removable.
Remember, the goal is to protect your vinyl windows. Choosing the right materials ensures a secure and damage-free installation. For more general advice on AC care, consider reading about how to clean air conditioner. Regular maintenance helps your unit run efficiently.
Support Brackets and Their Necessity
Support brackets are essential for window air conditioner installation in vinyl windows. These brackets bear the majority of the unit’s weight. They transfer this weight directly to the exterior wall or window sill. This keeps the delicate vinyl frame from supporting the heavy appliance. Without a support bracket, the vinyl window sash or frame can warp, crack, or even break.
Most support brackets are made of sturdy metal. They typically include adjustable legs and arms. These allow for a custom fit to your window and wall. Installation usually involves screwing the bracket into the exterior window sill or the wall beneath the window. Always follow the bracket manufacturer’s instructions for proper installation. This step alone can save you from significant window repair costs down the line. It ensures your vinyl windows remain in good condition.
Step-by-Step Preparation: Readying Your Vinyl Window
Before you lift that heavy air conditioner, thorough preparation of your vinyl window is key. This stage ensures a smooth, safe installation and protects your window from potential damage. Think of it as laying a solid foundation for your cooling efforts. A little time spent here saves a lot of trouble later.
You want the window area to be clean and clear. This makes the AC unit fit better and reduces future issues. Proper preparation also ensures that the sealing materials adhere correctly. This helps maintain your home’s energy efficiency.
Cleaning the Window Frame
Start by cleaning the entire window frame. Use a mild soap and water solution. Wipe down the vinyl surfaces. Remove any dirt, dust, or grime. A clean surface helps sealing materials stick better. It also allows you to spot any existing damage to the frame.
Pay special attention to the window sill and the tracks. These areas can accumulate debris. Use a soft cloth or sponge. Avoid abrasive cleaners or tools that could scratch the vinyl. Once cleaned, let the frame dry completely. This step is often overlooked but important. For detailed guidance on caring for your vinyl, you might find this article helpful: how to clean vinyl window frames. Keeping your frames clean helps them last longer.
Inspecting Window Integrity
After cleaning, carefully inspect your vinyl window for any signs of damage. Look for cracks, chips, or warped sections in the frame. Check the window sash for proper movement. Ensure the locking mechanisms work correctly. If you find significant damage, it might be wise to address it before installing a heavy AC unit.
Minor issues, like a slightly stiff sash, can be addressed with lubrication. However, serious structural damage might require professional repair. Installing an AC unit into an already compromised window can worsen the problem. You want a stable, strong window to support even a bracketed AC unit. A thorough inspection ensures safety for both you and your home.
Sash Protection
Protecting the lower window sash is critical. This is the part of the window that will rest on top of the AC unit. Vinyl sashes can be delicate. I recommend placing a piece of wood or a thick rubber mat on top of the AC unit before lowering the sash. This spreads the weight of the sash evenly across the top of the unit. It prevents direct pressure points on the vinyl.
Alternatively, some AC units come with a top mounting rail. If your unit has this, ensure it is properly installed. This rail helps distribute the sash’s weight. Never force the sash down. It should rest gently on the unit. This step prevents the sash from bending or cracking.
Considering External Factors
Before installation, look at the area outside your window. Is there a clear path for the AC unit’s drainage? Window AC units collect condensation, which drips outside. Ensure nothing will obstruct this drainage. Also, check for any obstacles that might interfere with the support bracket installation.
Consider the slope of your ground or patio outside. The AC unit needs a slight downward tilt towards the exterior. This ensures proper water drainage. Most units have a pre-set tilt, but you might need to adjust it with shims under the bracket. Clear the area below the window to prevent water damage to plants or structures. A clear exterior space makes for a better installation.
Securely Placing the Window AC Unit in Your Vinyl Frame
With your vinyl window prepared, it is time for the main event: placing the air conditioner. This step requires careful handling and adherence to safety guidelines. Remember, the goal is to install the unit without stressing your vinyl frames. A secure placement means stable cooling and no damage to your home.
You will need to work slowly and methodically. Enlist help if the AC unit is heavy. Safety comes first, always. Avoid rushing, as this can lead to mistakes or injury.
Lifting and Positioning
First, carefully lift the air conditioner unit. If it is heavy, ask a friend for help. Position the unit in the window opening. The bottom rail of the AC unit should rest on the window sill. Make sure the unit is centered in the opening.
The accordion side panels, if attached, should compress as you place the unit. They will expand to fill the gaps later. Ensure the unit’s weight is not solely on the vinyl sash or sill. This is where your external support bracket becomes crucial. If you are questioning whether a window AC unit must be in a window, you can read more here: does window air conditioner have to be in window. For this installation, it will be in the window opening.
Ensuring Level Placement
Use your level to check the AC unit’s tilt. Most window air conditioners need a slight downward tilt towards the outside. This allows condensation to drain properly from the back of the unit. If the unit is level or tilts inward, water can accumulate inside. This can lead to leaks inside your room or mold growth.
Adjust the support bracket arms or add shims under the bracket to achieve the correct tilt. A common recommendation is a 1/4-inch drop for every foot of the unit’s width. Your AC unit’s manual will provide the exact recommendation. Getting this right prevents future water damage.
Attaching the Support Bracket
The external support bracket is vital for vinyl window installations. Once the AC unit is in place and tilted correctly, attach the support bracket. Follow the bracket manufacturer’s instructions precisely. This usually involves screwing the bracket into the exterior wall beneath the window sill or directly into a sturdy part of the window frame if it has a non-vinyl section designed for such screws. Do not screw into the vinyl sash or main vinyl frame.
The bracket takes the unit’s weight off the vinyl window. This prevents warping or cracking of the vinyl. Ensure the bracket is securely fastened. It should be able to hold the entire weight of the AC unit. A stable bracket means a secure air conditioner.
Securing the Unit Within the Window
Once the support bracket is in place and taking the weight, you can secure the unit within the window opening. Slowly lower the top window sash down onto the top rail of the AC unit. Make sure the sash rests firmly but gently on the unit. Do not force it down.
Most AC units come with a window sash lock or bracket. This metal brace attaches to the top of the lower sash and the bottom of the upper sash. It prevents the window from being opened from the outside. Install this for added security. This also helps hold the AC unit firmly in place. This final step keeps the unit from shifting.
Sealing and Insulating for Optimal Performance and Protection
Once your window air conditioner is securely in place, the next crucial step is sealing all gaps. This is not just about keeping bugs out. Proper sealing and insulation prevent cool air from escaping and warm air from entering. This dramatically improves your AC unit’s efficiency. It also protects your vinyl windows from moisture and drafts.
Think of your AC unit and window as a unified system. Any gap, no matter how small, compromises its performance. Sealing also helps dampen noise from outside. It ensures your cool air stays exactly where you want it: inside your home.
Using Accordion Panels
Most window air conditioners come with accordion-style side panels. These panels extend from the sides of the AC unit to the window frame. They fill the space between the unit and the vertical sides of your window. Gently pull these panels out until they meet the window frame.
Some units allow you to screw these panels into the side of the window frame. For vinyl windows, avoid screwing into the vinyl itself. Instead, use a strong, removable adhesive tape, like heavy-duty duct tape, to secure the panels to the vinyl frame. You can also use non-permanent fasteners if your unit has that option. The goal is a snug fit without damaging the vinyl.
Adding Foam Insulation
The accordion panels often do not provide much insulation. They mainly block air movement. For better energy efficiency, add additional foam insulation. Cut rigid foam board or thick foam weatherstripping to fit the spaces behind the accordion panels. You can also use foam pipe insulation, split lengthwise, to fill narrow gaps.
Press the foam into these gaps. This creates a more substantial barrier against heat transfer. Foam insulation also helps deaden sound. This makes your room quieter. You can often buy these foam rolls or sheets at hardware stores. Make sure the foam is thick enough to fill the gap without compressing too much.
Weatherstripping for Drafts
Even after using foam panels, small gaps might remain. This is where weatherstripping comes in. Use self-adhesive foam weatherstripping tape. Apply it around the edges of the AC unit where it meets the window frame and sash. Focus on the top edge where the window sash rests on the unit. Also, seal any visible gaps along the sides.
Weatherstripping provides a flexible seal. It helps block drafts, dust, and insects. Choose a weatherstripping thickness that fills the gaps without being too bulky. This creates a tight, energy-efficient seal. This step is a small effort for a big gain in comfort and savings.
Preventing Water Intrusion
Proper sealing also protects your home from water. Rain and humidity can find their way through unsealed gaps. This can lead to water damage or mold growth inside your home. Ensure all exterior-facing gaps are sealed effectively. Use exterior-grade tape or, if necessary, a thin bead of clear silicone caulk. Apply caulk only to the outside edges where the unit meets the frame, and ensure it is removable if possible.
Remember the slight downward tilt of the AC unit. This directs any collected water outside. Check the unit’s drainage hole to ensure it is clear. A well-sealed and properly tilted unit prevents water issues. This protects your vinyl windows and your home’s interior from moisture.
Final Checks and Post-Installation Care for Your AC and Vinyl
You have successfully installed your window air conditioner in your vinyl window. Now, it is time for the final checks. These steps ensure everything is working correctly and safely. Post-installation care also helps prolong the life of your AC unit and your vinyl windows. A little attention now can prevent bigger problems later.
Think of it as the grand finale to your project. You want to make sure everything is perfect before you sit back and enjoy the cool air. These checks give you peace of mind.
Testing the Unit
Plug in your air conditioner unit. Turn it on. Start with a low fan speed and then switch to cooling mode. Listen for any unusual noises. Feel for cold air coming out. Check that the fan is blowing properly. Let the unit run for a few minutes. This initial test confirms that the AC unit is functioning as it should.
If the unit does not turn on, check the power outlet and the unit’s circuit breaker. If it turns on but does not cool, check the thermostat setting. Ensure the temperature is set low enough. If problems persist, consult the unit’s troubleshooting guide. For general issues, you might find this article useful: why is my window air conditioner not turning on.
Checking for Gaps
With the unit running, perform a final visual inspection for any remaining gaps. Stand inside and look for light coming through around the unit. Use your hand to feel for drafts, especially around the edges of the accordion panels and where the window sash meets the unit. If you find any gaps, apply more weatherstripping or foam insulation.
Go outside and check for gaps there too. Ensure the external support bracket is still secure. Look for any areas where water could potentially enter. Seal any such gaps with exterior-grade tape or sealant if absolutely necessary. A tight seal means maximum efficiency.
Cleaning the AC Unit
Once installed, regular cleaning of your AC unit is important. This maintains its efficiency and air quality. The air filter should be cleaned or replaced every few weeks, depending on usage. Dirty filters restrict airflow. This makes the unit work harder. It also reduces cooling effectiveness.
Wipe down the exterior of the unit with a damp cloth. You can also clean the front grille. Keeping the unit clean prevents dust buildup. This helps maintain good indoor air quality. For a more detailed guide on cleaning, refer to how to clean air conditioner.
Preventing Mold
Window air conditioners can be prone to mold growth if not maintained. This is especially true if water collects inside the unit. Ensure the unit maintains its slight outward tilt for proper drainage. Regularly clean the drain pan if accessible.
Cleaning the air filter also helps prevent mold spores from circulating. If you notice a musty smell, it could be mold. Address it immediately. You can find specific instructions on how to clean mold from your unit here: how to clean mold from window air conditioner. Preventing mold protects your health and the lifespan of your AC unit.
Comparing to Other Window Types
Installing a window AC in vinyl windows has specific challenges. Other window types might have different requirements. For instance, installing in wooden windows might allow for more direct screwing into the frame. However, wooden windows still benefit from external support to prevent sash damage.
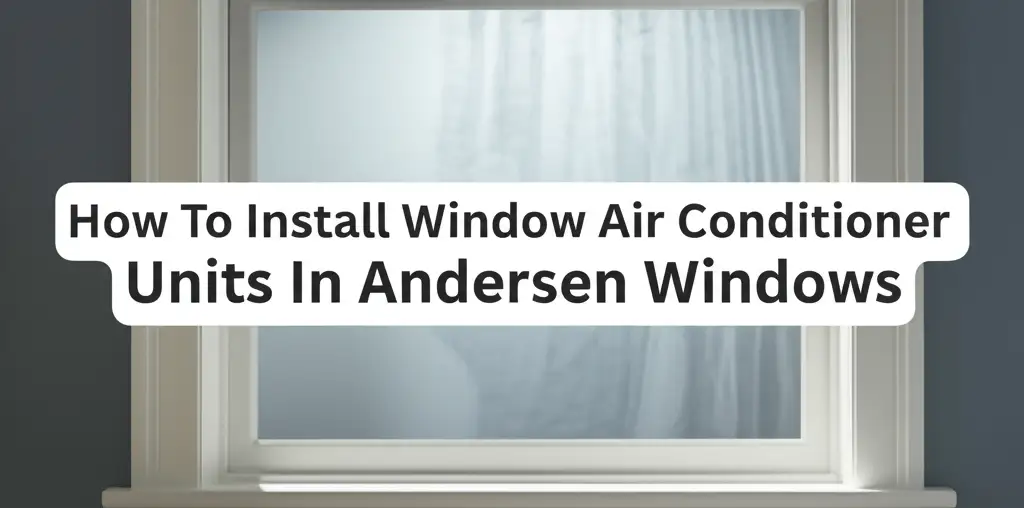
Andersen windows, for example, might have specific frame materials or designs that require unique approaches. If you have different window types, researching their specific installation needs is wise. For example, you can learn about how to install window air conditioner units in Andersen windows. Each window type has its own best practices for AC installation.
Troubleshooting Common Issues and Maintenance Tips
Even with a perfect installation, air conditioners can sometimes present issues. Knowing how to troubleshoot common problems saves you time and frustration. Regular maintenance also ensures your unit performs at its best. This extends its life and keeps your home cool efficiently.
Being proactive about care helps you avoid unexpected breakdowns. It also ensures you get the most value from your investment. Let’s look at some common concerns and how to address them.
Unit Not Cooling
If your AC unit runs but does not cool, several factors could be at play. First, check the thermostat setting. Make sure it is set to a temperature lower than the current room temperature. Also, ensure the mode is set to “Cool,” not just “Fan.” A dirty air filter is another common culprit. A clogged filter restricts airflow, reducing cooling power. Clean or replace it.
Check for any blockages in the unit’s vents, both intake and exhaust. Ensure the room is adequately sealed. Open windows or doors will let warm air in, making cooling difficult. If none of these solutions work, there might be a refrigerant issue. This typically requires professional help.
Leaking Water
Water leaking from your window AC unit is a common complaint. The most frequent reason is improper drainage. The unit must have a slight tilt towards the outside. This allows condensation to flow out through the drain hole. If it is level or tilted inward, water will collect inside. Adjust the unit’s tilt using shims or by repositioning the external support bracket.
A clogged drain pan or drain hose can also cause leaks. Dust, debris, or mold can block the drainage path. Regularly clean the drain pan if it is accessible. Ensure
- Window AC
- Vinyl Windows
- AC Installation
- DIY Home Cooling
- Energy Efficiency

Davia Murnell
Room Cleaning Expert
Before joining HEG, I spent over a decade running my own window cleaning business, where I perfected streak-free techniques and learned the ins and outs of specialty glass care. Now, I bring that expertise to a broader mission—helping homeowners maintain sparkling windows and beautiful outdoor spaces. From skylights and sliding doors to patio glass and outdoor furniture, I believe every surface deserves attention and care. I share practical tips and proven methods that make even the toughest cleaning jobs feel manageable. Whether you're battling pollen on the porch or smudges on high windows, I’m here to help you see your home in a whole new light—literally.