· Katria Melrose · Home Decor · 22 min read
How To Make A Ruffle For A Pillow
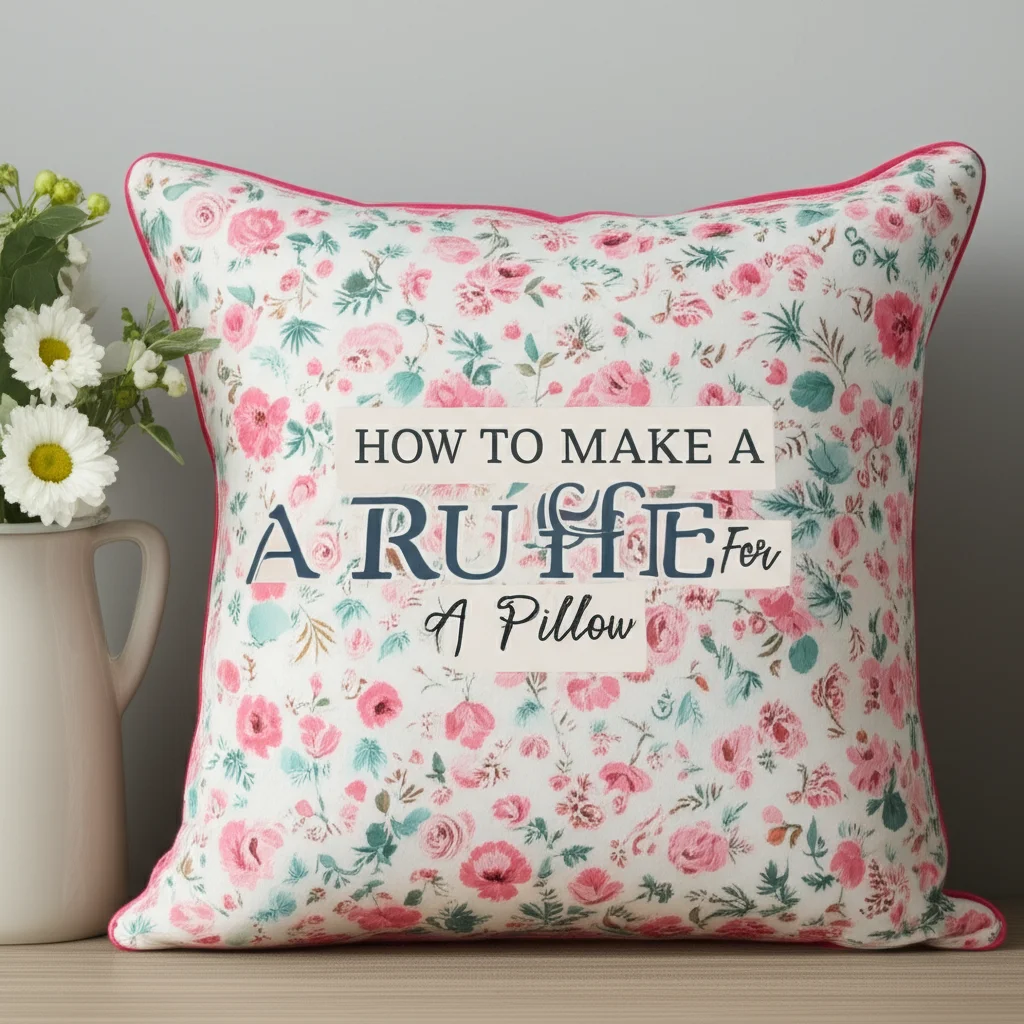
Make a Ruffle for Your Pillow: A Simple Guide
Transforming a plain pillow into a decorative accent makes a big difference in a room. Adding a ruffle brings texture and style. A beautiful ruffled pillow can elevate any space. I love seeing how a simple fabric strip can create such a charming detail. This guide shows you exactly how to make a ruffle for a pillow.
Pillow ruffles give softness and visual interest. They fit various decor styles, from farmhouse to romantic. You can match your ruffle fabric to your existing decor. This project is a fun way to personalize your home items. I will walk you through each step.
Takeaway
- Gather all necessary tools and materials before starting.
- Measure and cut fabric precisely for the desired ruffle fullness.
- Master simple gathering techniques to create even ruffles.
- Attach the ruffle securely to your pillow for a neat finish.
- Personalize your pillow with unique fabric choices and styling.
To make a ruffle for a pillow, you cut a long strip of fabric, gather it to create the wavy effect, and then sew it onto the edges of your pillow cover. This process adds a decorative, soft touch, enhancing the pillow’s appearance and contributing to your home’s aesthetic.
Understanding Pillow Ruffles: Styles and Fabric Choices
Adding ruffles to pillows is a wonderful way to enhance your home’s comfort and style. Ruffles instantly change a pillow’s look. They add softness, volume, and a decorative edge. Knowing different ruffle styles helps you pick the right one for your pillow project.
There are various ruffle styles you can create. A simple ruffle is a gathered strip of fabric. A pleated ruffle involves folding fabric into pleats before attaching it. Cascade ruffles fall in layers. Each style gives a distinct appearance to your pillow.
Choosing the correct fabric is important for a nice ruffle. Lightweight fabrics like cotton, linen, or voile gather easily. They create soft, flowing ruffles. Heavier fabrics like denim or canvas create stiffer ruffles. Think about how you want your ruffle to look and feel. I often pick cotton blends for their versatility. They are easy to work with and come in many patterns.
Consider the pillow’s purpose when selecting fabric. If the pillow is for decorative use, almost any fabric works. For a pillow that gets daily use, choose durable, washable fabrics. This ensures your ruffled pillow lasts a long time. Also, match your fabric choice with your room’s existing colors and textures.
- Simple Ruffle: This is the most common and easiest to make. You gather a fabric strip along one edge. It creates a soft, wavy look.
- Box Pleated Ruffle: This style uses crisp, folded pleats. It gives a more structured, tailored appearance. This option is good for a formal feel.
- Gathered Lace or Trim Ruffle: Instead of fabric, you can use pre-made lace or trim. You gather it just like fabric. This adds delicate detail without extensive cutting.
Selecting the fabric color and pattern also matters. A solid color ruffle can provide a subtle texture contrast. A patterned fabric can add a bold design element. Make sure the fabric weight matches your sewing machine’s ability. Some machines struggle with very thick fabrics. I always test a scrap piece first.
The amount of fabric needed depends on your desired fullness. A general rule is to use fabric 1.5 to 2 times the length of the pillow’s perimeter. This creates a good amount of gathers. More fabric means a fuller ruffle. Less fabric results in a flatter ruffle. Always buy a little extra fabric just in case.
Essential Tools and Materials for Ruffle Making
Starting any sewing project requires the right tools. Having everything ready makes the process smooth. Before you begin to make a ruffle for a pillow, gather these items. I always lay out my tools on a clean surface. This helps me stay organized during the project.
First, you need fabric. As discussed, pick one suitable for your ruffle style. Cotton broadcloth, linen, or even an old sheet works well. If you are reusing fabric, ensure it is clean and ironed. For example, you could repurpose a sturdy sheet to create new home items, similar to how one might make a chair cover from a sheet.
Next, you need thread. Match the thread color to your fabric. A good quality polyester thread is strong and durable. Make sure you have enough for all your seams and gathering. I keep a large assortment of thread colors on hand.
A sewing machine is vital for efficiency. While hand sewing is possible, a machine offers speed and consistent stitches. Make sure your machine is threaded properly. Check that your bobbin has enough thread. You may need a gathering foot or a ruffler attachment for your machine. These accessories make gathering fabric much easier. If your machine does not have these, a regular presser foot works too.
Scissors are necessary for cutting fabric accurately. Use sharp fabric scissors. Dull scissors can fray edges and make cuts uneven. I have a pair solely for fabric to keep them sharp. You will also need a rotary cutter and mat if you prefer precise, straight cuts. This tool is excellent for long strips of fabric.
Measuring tools are also key. A tape measure or a quilting ruler helps measure fabric dimensions. A fabric marker or tailor’s chalk helps mark cutting lines. Accuracy in measuring leads to better results. I double-check all my measurements.
Finally, pins hold fabric pieces together before sewing. Choose pins with sharp points that do not snag fabric. A seam ripper is a handy tool for correcting mistakes. Even experienced sewers make errors. An iron and ironing board are essential for pressing seams. Pressing creates crisp, professional-looking finishes. This helps your finished ruffle look polished.
- Fabric: Choose appropriate fabric like cotton, linen, or voile.
- Matching Thread: Select a durable polyester thread.
- Sewing Machine: Ensure it is in good working order. Consider a gathering foot.
- Sharp Scissors: Use fabric-specific scissors for clean cuts.
- Measuring Tape/Ruler: For accurate fabric measurements.
- Fabric Marker/Chalk: To mark cutting and sewing lines.
- Pins: To secure fabric pieces during assembly.
- Seam Ripper: For correcting any sewing errors.
- Iron and Ironing Board: For pressing seams and achieving a neat finish.
Having these tools ensures your ruffle-making project goes smoothly. You will create a beautiful, professional-looking ruffle. I always feel prepared when all my supplies are ready.
Measuring and Cutting Fabric for Your Pillow Ruffle
Accurate measurements are the foundation of a successful sewing project. When you make a ruffle for a pillow, precise cutting prevents frustration. I always measure twice and cut once. This saves fabric and time. Let’s break down how to get your fabric ready.
First, determine the length of fabric you need. Measure the perimeter of your pillow or pillow cover. This is the distance around all four sides. For a fuller ruffle, multiply this perimeter measurement by 1.5 to 2.5 times. For example, if your pillow perimeter is 60 inches, you would need 90 to 150 inches of fabric for the ruffle strip. I usually aim for 2 times the perimeter for a generous ruffle.
Next, decide the width of your ruffle. This is how tall you want the finished ruffle to be. A common ruffle width is 2 to 4 inches. Remember to add seam allowances to this width. A standard seam allowance is 1/2 inch on each edge. So, if you want a finished ruffle that is 3 inches wide, you would cut your fabric strip 4 inches wide (3 inches + 1/2 inch for top seam + 1/2 inch for bottom hem).
You will likely need to cut several strips of fabric and sew them together to get the necessary length. Most fabric is 44 or 60 inches wide. For a standard pillow, you will probably need two or three strips. Cut these strips along the grain of the fabric. This ensures they drape well and do not distort.
- Measure Pillow Perimeter: Go all the way around your pillow cover.
- Calculate Ruffle Length: Multiply the perimeter by 1.5 to 2.5 (I suggest 2 for good fullness).
- Determine Ruffle Width: Decide how wide you want the finished ruffle.
- Add Seam Allowances: Include 1/2 inch for the top seam and 1/2 inch for the bottom hem.
- Cut Fabric Strips: Cut multiple strips to the calculated width and desired length.
- Join Strips: Sew the short ends of your strips together using a 1/2-inch seam. Press seams open for a flatter join.
Lay your fabric flat on a large surface. Use your tape measure and fabric marker to draw straight lines. Use a ruler as a guide for accuracy. If using a rotary cutter, a cutting mat protects your surface. Carefully cut along your marked lines. Accuracy at this stage makes sewing easier later on.
Once your strips are cut, sew them together end-to-end to create one long continuous strip. Use a straight stitch with a 1/2-inch seam allowance. Press the seams open with an iron. This reduces bulk and helps the ruffle lie flat. Your continuous strip is now ready for the next steps. This careful preparation prevents issues later in the project.
Preparing Your Fabric: Hemming and Seaming
After cutting your long fabric strip, preparing its edges is the next important step. Properly finished edges prevent fraying. They also give your pillow ruffle a professional look. I always take time to press my fabric for crisp results. This attention to detail really makes a difference.
First, focus on the bottom edge of your ruffle strip. This edge will be visible. You need to create a neat hem. A double-fold hem is ideal because it fully encloses the raw edge. Start by pressing the bottom raw edge up by 1/4 inch. Use your iron to create a sharp crease. Then, fold it up another 1/4 inch and press again. This hides the raw edge completely.
Now, stitch this double-fold hem in place. Use a straight stitch close to the inner folded edge. Use thread that matches your fabric for an invisible finish. This hem creates a clean, durable bottom for your ruffle. I find that a perfectly pressed hem enhances the overall look of the finished pillow.
Next, consider the top edge of your ruffle strip. This is the edge that will attach to your pillow cover. You do not need to hem this edge in the same way as the bottom. It will be hidden inside a seam. However, you might want to finish it with a serger or a zigzag stitch if your fabric frays easily. This prevents bulk in the seam and keeps the raw edge tidy.
If you made multiple fabric strips and sewed them together, ensure those seams are flat. Press the seams open with an iron. This reduces bulk where the strips join. It helps the ruffle gather evenly without bulky spots. A flat seam makes the gathering process much smoother.
- Hem the Bottom Edge:
- Press the bottom raw edge up by 1/4 inch.
- Fold it up another 1/4 inch and press again.
- Stitch close to the inner folded edge.
- Finish Top Edge (Optional but Recommended): Use a serger or zigzag stitch if your fabric frays easily.
- Press All Seams Flat: If you joined multiple strips, press their seams open.
Proper fabric preparation ensures your ruffle looks beautiful and lasts longer. It also makes the gathering and attachment steps much easier. I always find that skipping these preparation steps leads to frustration later on. Taking the time now pays off. Your pillow will look like it came from a high-end store.
Creating the Ruffle: Gathering Techniques
Creating the actual gathers is what transforms a flat fabric strip into a beautiful ruffle. There are several ways to gather fabric using your sewing machine. Each method produces slightly different results, but all achieve the wavy effect. I have tried them all, and some are easier than others.
The most common method is using two rows of basting stitches. Set your sewing machine to its longest stitch length. Do not backstitch at the beginning or end. Sew one row of stitches about 1/4 inch from the top raw edge of your ruffle strip. Sew a second row about 1/2 inch from the top raw edge. Leave long thread tails at both ends of each stitch line.
After stitching, gently pull on the bobbin threads of both stitch lines simultaneously. As you pull, the fabric will start to gather. Distribute the gathers evenly along the entire length of the strip. Keep pulling until the ruffle strip matches the perimeter measurement of your pillow. Pin the gathers in place to hold them. This method gives you good control over the fullness of your ruffle.
Another effective technique is using a gathering foot or a ruffler attachment for your sewing machine. These special presser feet are designed to gather fabric automatically as you sew. They are incredibly time-saving, especially for long ruffles. Simply attach the foot to your machine, set the stitch length according to the instructions, and feed your fabric through. The machine does the gathering for you. I highly recommend these if you plan to make many ruffles.
- Two Rows of Basting Stitches:
- Set machine to longest stitch length.
- Sew one row 1/4 inch from top edge.
- Sew a second row 1/2 inch from top edge.
- Leave long thread tails.
- Pull bobbin threads to gather fabric evenly.
- Adjust gathers to match pillow perimeter.
- Pin gathers to secure.
- Gathering Foot/Ruffler Attachment:
- Attach the specialized foot to your sewing machine.
- Follow foot instructions for stitch length and tension settings.
- Feed fabric through; the foot gathers it automatically.
You can also use the zigzag over cord method. Place a strong string or cord (like dental floss) on top of your fabric along the gathering line. Use a wide zigzag stitch over the cord, making sure not to stitch into the cord itself. Once stitched, pull the cord to gather the fabric. This method is very durable and less likely to break threads.
No matter which method you choose, take your time. Ensure the gathers are evenly distributed. This makes your ruffle look uniform and beautiful. Pressing the gathered edge lightly can help set the gathers. Your ruffle is now ready to be attached to the pillow.
Attaching the Ruffle to Your Pillow
Now that your ruffle strip is perfectly gathered, it is time to attach it to your pillow cover. This step brings your ruffled pillow to life. I find this part very rewarding, as the pillow starts to take its final shape. Attaching the ruffle neatly makes all the difference.
First, prepare your pillow cover. You will attach the ruffle to the front panel of the pillow cover. If you are making a new pillow, you will attach the ruffle to the raw edge of the front fabric piece. If you are adding a ruffle to an existing pillow cover, you can attach it to the outer edge of the cover. Ensure the pillow cover is clean and pressed. For tips on keeping pillow covers clean, you might find information on how to clean pillow cases useful.
Align the raw, gathered edge of your ruffle with the raw edge of your pillow cover’s front panel. Place the ruffle with its right side facing the right side of the pillow fabric. The gathered edge of the ruffle should match the edge where it will be sewn. Pin the ruffle in place, starting from a corner. Distribute the gathers evenly around the entire perimeter as you pin. Overlap the ends of the ruffle where they meet by about 1 inch.
Use your sewing machine to stitch the ruffle to the pillow front. Use a standard straight stitch. Sew with a 1/2-inch seam allowance. Stitch slowly, ensuring all layers of the gathered ruffle fabric are caught in the seam. If you are sewing around corners, make small snips into the ruffle’s seam allowance at the corners. This helps the ruffle lie flat. Stitch all the way around the pillow front.
- Prepare Pillow Cover: Ensure it is clean and pressed.
- Align Ruffle: Place the gathered, raw edge of the ruffle (right side up) with the raw edge of the pillow cover’s front panel (right side up).
- Pin in Place: Securely pin the ruffle around the entire pillow perimeter. Distribute gathers evenly. Overlap ruffle ends by 1 inch.
- Stitch Ruffle: Sew with a 1/2-inch seam allowance, using a straight stitch.
- Trim Excess: Trim any excess fabric from the ruffle ends.
- Press Seam: Press the seam allowance towards the pillow body.
After sewing, trim any excess ruffle fabric at the overlapping ends. Press the seam allowance towards the pillow body. This helps the ruffle lay flat and points away from the pillow’s center. Now your pillow front has a beautiful ruffle attached.
If you are making a full pillow cover, you will now join this ruffled front panel to the back panel. Place the ruffled front panel and the back panel right sides together. Pin them in place, being careful not to catch the ruffle in the pins too much. Stitch around the edges, leaving an opening to turn the pillow cover right side out. Turn, press, and insert your pillow form. Your ruffled pillow is complete.
Finishing Touches and Styling Your Ruffled Pillow
You have put in the effort to make a ruffle for a pillow. Now it is time to make it shine. Finishing touches ensure your pillow looks its best. Proper styling makes your ruffled creation a true centerpiece. I always find this stage very satisfying.
First, press your finished pillow cover. Use an iron to press all seams flat. Pay special attention to the ruffle itself. Gently press the ruffle to help it lay nicely. A well-pressed ruffle looks crisp and professional. Avoid flattening the gathers completely; you want them to retain their volume. A light steam often works wonders.
Next, consider the pillow form. Choose a pillow form that fits your cover snugly. A full pillow form helps the ruffle stand out. If your pillow form is too small, the ruffle might look deflated. An overstuffed pillow also creates a more luxurious look.
Think about placement for your new ruffled pillow. Ruffled pillows look great on beds, sofas, or accent chairs. They can add a touch of romance to a bedroom. On a sofa, they can soften a rigid furniture line. Consider placing them against solid-colored pillows to make the ruffle stand out. I love how a ruffled pillow can instantly transform a seating area.
- Press Thoroughly: Iron all seams and the ruffle gently for a crisp, neat appearance.
- Choose Correct Pillow Form: Ensure the form fits snugly to fill out the ruffle.
- Strategic Placement: Position the ruffled pillow on beds, sofas, or chairs to maximize visual impact.
- Layer with Other Pillows: Mix and match with different textures and sizes for a cohesive look.
- Consider Room Decor: Match the ruffle style and fabric to your existing home aesthetic.
Layering is a great styling technique. Combine your ruffled pillow with other pillows of different sizes, shapes, and textures. For instance, a square ruffled pillow could sit in front of a larger rectangular one. Mixing velvet with linen or knits with cotton creates visual interest. This strategy is similar to how you might make your bed look like a magazine by adding layers and varying textures.
Consider the overall room decor. Does your ruffle fit a farmhouse, shabby chic, modern, or traditional theme? The fabric choice and ruffle fullness contribute to this. A subtle, natural linen ruffle suits a minimalist space. A vibrant, full cotton ruffle fits a more playful room. Your handmade ruffled pillow can be a reflection of your personal style.
Finally, enjoy your creation! A handmade ruffled pillow adds a unique touch to your home. It shows your skill and creativity. These simple finishing and styling steps make a big difference in how your pillow looks and feels.
Tips for Durable and Beautiful Ruffles
You have successfully learned how to make a ruffle for a pillow. Now, let’s ensure your beautiful creation lasts. A little care and attention to detail during construction and after can extend its life. I believe longevity is as important as beauty in handmade items.
First, consider the seam allowances during construction. Always use a consistent seam allowance, typically 1/2 inch. This provides enough fabric for strong seams. Trimming excess fabric from the seam allowances after stitching reduces bulk. But do not trim too close to the stitches. This maintains seam integrity.
When sewing the gathering stitches, use a strong thread. Standard polyester thread is usually sufficient. However, for very long or frequently washed ruffles, consider using a stronger topstitching thread for the gathering lines. This reduces the chance of threads breaking when you pull them. I sometimes use a heavier duty thread for this specific step.
Reinforce corners where the ruffle is attached. When sewing the ruffle around the perimeter of the pillow cover, stitch slowly at corners. You might even backstitch a few stitches at each corner for added strength. This area often experiences more stress. This reinforcement prevents tears over time.
- Consistent Seam Allowances: Use 1/2 inch throughout for strong seams.
- Strong Gathering Thread: Use durable thread for gathering lines to prevent breakage.
- Reinforce Corners: Backstitch at corners for added durability.
- Proper Care and Cleaning: Follow fabric care instructions; consider gentle washing.
- Prevent Fraying: Finish raw edges with zigzag stitch or serger.
- Ironing for Shape: Lightly press ruffles regularly to maintain their shape.
Washing and care are crucial for maintaining your ruffled pillow. Always follow the care instructions for your chosen fabric. Most cotton ruffles can be machine washed on a gentle cycle with cold water. Tumble dry on low or air dry. Over-drying can make ruffles stiff. Avoid harsh detergents or excessive heat. For pillows themselves, depending on their material, you might need specific cleaning methods, such as learning how to wash a memory foam pillow or even specialized cleaning for other types, like a feather pillow, if the inner cushion is not removable.
To prevent fraying, always finish all raw edges of your fabric. This means the side seams of the ruffle strip, as well as the gathered edge before attachment. A zigzag stitch on your sewing machine works well. A serger provides an even more professional finish. Finished edges mean your ruffle will not unravel.
Finally, lightly iron or steam your ruffle periodically. This helps maintain its shape and fullness. Over time, ruffles can get crushed or lose their crispness. A quick press can bring them back to life. I do this every few washes to keep my ruffled pillows looking fresh. These tips help you enjoy your handmade ruffled pillow for many years.
Advanced Ruffle Techniques and Creative Ideas
You have mastered the basics of how to make a ruffle for a pillow. Now, let’s explore ways to add more flair and creativity. Advanced techniques and unique design ideas can make your ruffled pillow truly stand out. I love experimenting with different looks.
Consider adding multiple layers of ruffles. Instead of one wide ruffle, you can create two or three narrower ruffles. Layer them on top of each other, slightly offset, to create a fuller, more dramatic effect. You can use different fabrics or shades of the same color for each layer. This adds depth and visual interest.
Experiment with different gathering ratios. A 2:1 ratio (twice the fabric length as the pillow perimeter) gives a standard ruffle. A 3:1 ratio creates a much fuller, more voluminous ruffle. A 1.5:1 ratio results in a flatter, softer ripple. Play with these ratios to see what look you prefer. A denser ruffle often has a more luxurious feel.
- Layered Ruffles:
- Create multiple narrow ruffles.
- Layer them, slightly offset, for added fullness.
- Use different fabrics or shades for each layer.
- Vary Gathering Ratios:
- Use 2:1 for standard fullness.
- Try 3:1 for very dense ruffles.
- Use 1.5:1 for a softer ripple.
- Combine Fabrics:
- Use contrasting fabrics for the ruffle and pillow body.
- Add a decorative trim to the ruffle’s edge.
- Consider different textures for visual appeal.
- Shaped Ruffles:
- Instead of straight strips, cut curved strips for unique ruffle shapes.
- Create ruffles that frame specific parts of the pillow.
Think about combining different fabrics. For example, use a plain cotton for the pillow body and a patterned fabric for the ruffle. Or, use two different textures, like a smooth sateen pillow with a linen ruffle. This creates a tactile experience. You can also sew a decorative trim, like pom-poms or lace, onto the bottom edge of your ruffle before gathering. This adds another layer of detail.
You are not limited to straight ruffles. Consider shaped ruffles. Instead of cutting straight strips, you can cut fabric on a curve. When gathered, these curved strips create ruffles that fall differently, often with more natural waves. These can be used to frame an initial or a specific design element on your pillow. Similarly, if you are looking to personalize other home items, you might explore techniques like how to make a slip cover for a chair, which also involves fabric manipulation and customization.
Another idea is to create directional ruffles. Instead of a continuous ruffle around all four sides, you could apply ruffles only to two opposite sides. Or, create a diagonal ruffle across the pillow. These specific placements create dynamic visual effects. Let your imagination guide you. Your handmade ruffled pillow can be a truly unique piece.
Frequently Asked Questions
What kind of fabric is best for making pillow ruffles?
Lightweight to medium-weight fabrics work best for pillow ruffles. Cotton, linen, voile, and broadcloth are excellent choices. They gather easily and drape softly. Avoid very stiff or very slippery fabrics if you are a beginner. I find cotton blends forgiving and easy to handle.
How much fabric do I need for a full ruffle?
For a full ruffle, you generally need fabric 2 to 2.5 times the length of your pillow’s perimeter. If your pillow is 60 inches around, you would need 120 to 150 inches of fabric length. The width of your fabric strip depends on how wide you want the finished ruffle to be, plus seam allowances.
Can I hand sew a pillow ruffle?
Yes, you can hand sew a pillow ruffle, but it will take much longer. You can create gathering stitches by hand using a running stitch. Then, hand stitch the ruffle onto the pillow cover. A sewing machine offers faster and more consistent results. I recommend a machine for ease and durability.
How do I make sure my ruffles are even?
To ensure even ruffles, use two parallel rows of gathering stitches. Pull both bobbin threads simultaneously. As you gather, continuously adjust the fabric along the thread until the gathers are spread uniformly. Pin the ruffle to the pillow frequently to hold the even distribution before sewing.
What is the ideal seam allowance for attaching a ruffle?
A 1/2-inch seam allowance is ideal for attaching a ruffle. This provides a strong seam that will not easily fray or pull out. It also leaves enough room to trim excess bulk without compromising the stitches. Always press your seams open to reduce bulk.
- pillow ruffle
- DIY sewing
- home decor
- fabric crafts
- sewing project

Katria Melrose
Cleaning Specialist
With over 12 years of experience in commercial cleaning and a certification in workplace ergonomics, I’ve developed a deep understanding of what makes a workspace truly productive. At HEG, I specialize in helping people transform their home offices into clean, efficient, and comfortable environments. Through smart cleaning routines and strategic organization solutions, I empower readers to create spaces that support focus, comfort, and success—one well-organized desk at a time.