· Todd Martin · DIY · 21 min read
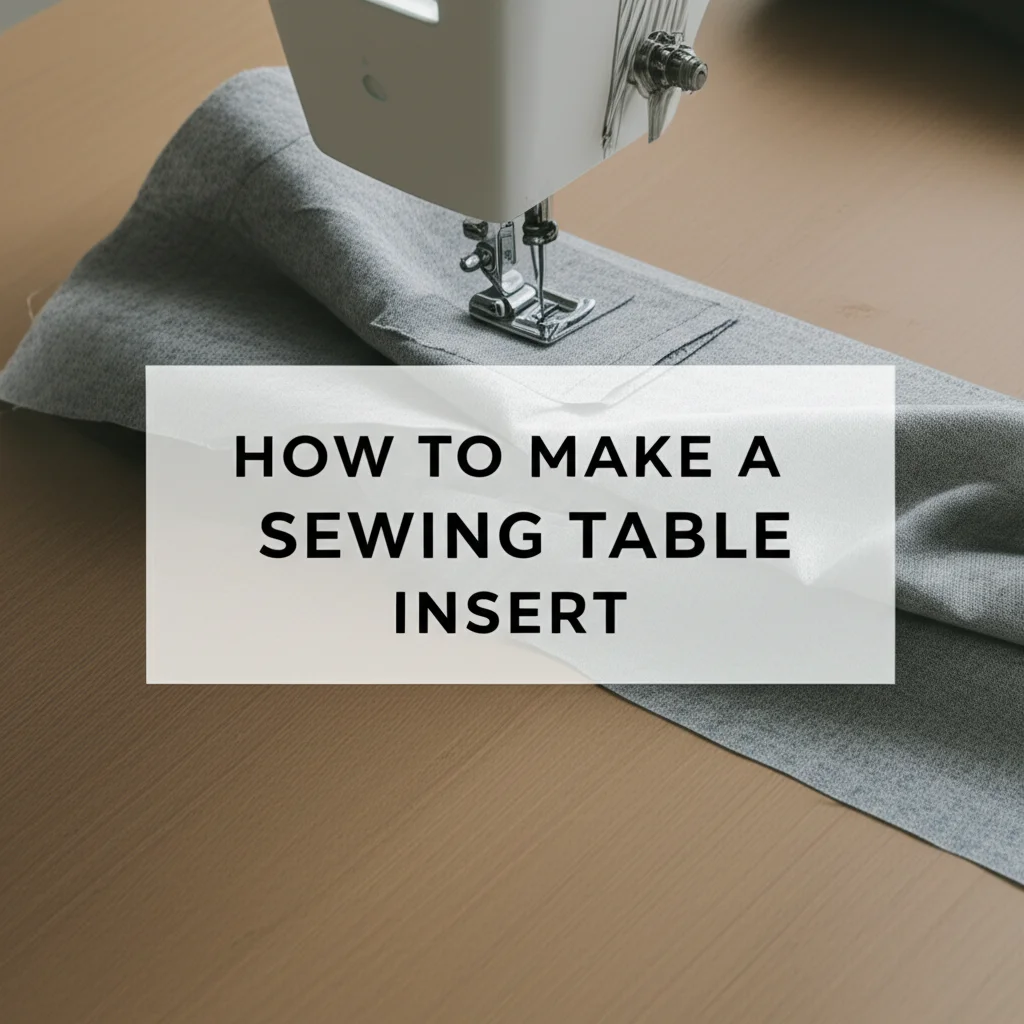
How To Make A Sewing Table Insert
Unlock Your Sewing Potential: How To Make A Custom Sewing Table Insert
Do you ever feel a crick in your neck or back after a long sewing session? Many sewers face this problem. Your sewing machine sits too high on the table. This forces you to hunch over while working. A custom sewing table insert can change everything. It levels your machine with the tabletop. This creates a smooth, flat workspace. This guide will show you exactly how to make a sewing table insert. We will cover everything from measuring to final installation. Get ready to transform your sewing experience.
Takeaway
Creating your own sewing table insert is a straightforward DIY project that will:
- Significantly improve your sewing ergonomics by leveling your machine.
- Provide a larger, seamless work surface for better fabric control.
- Save you money compared to buying a specialized sewing cabinet.
- Give you a custom fit, specific to your machine and table.
To make a sewing table insert, you cut a precise opening in your existing table. This opening matches the base of your sewing machine. Then, you craft a support frame beneath the table. A custom-cut piece of material, often wood or acrylic, forms the insert itself. This insert fits snugly around the machine, creating a flush, level work surface.
Why a Sewing Table Insert Is a Game Changer
A sewing table insert makes your sewing life much easier. Many people sew on a standard table. Their sewing machine sits on top. This means the sewing bed is higher than the table surface. This height difference can cause a lot of strain. Your arms are constantly working at an awkward angle. This leads to tired shoulders and a sore back.
An insert solves this issue directly. It drops your sewing machine into the table. The sewing bed becomes perfectly level with the tabletop. This smooth, continuous surface offers many benefits. You can easily guide fabric. Your arms and shoulders remain in a natural position. This setup reduces fatigue and discomfort. You can sew for longer periods without pain. It makes a big difference for your health and your projects.
This custom fit also improves your work quality. Fabric flows freely across the table. It does not snag on the machine’s base. This is especially helpful for large projects like quilts or garments. It prevents fabric drag. This means more accurate stitching. A flush surface also helps you manage your materials better. You have more space for cutting and pinning. This simple addition can truly elevate your entire sewing experience. It turns a basic table into a professional sewing station.
Gathering Your Materials and Tools
Before you start building, you need to collect your supplies. Having everything ready saves time and frustration. The right tools make the job much easier. Here is a comprehensive list of what you will need. Think of this as your project checklist.
Essential Materials
- Plywood or MDF (Medium-Density Fiberboard): Choose a flat, stable piece. It needs to be thick enough for stability. A common thickness is 1/2 inch (12mm) or 3/4 inch (18mm). This will form the insert itself and the support frame.
- Wood Glue: Strong wood glue is essential for assembling the support frame.
- Wood Screws: Various lengths may be needed. You will use them to secure the support frame.
- Finishing Supplies: Sandpaper (various grits), wood filler, paint, stain, or clear coat. These materials will give your insert a smooth, finished look. They also protect the wood.
- Clamps: Woodworking clamps hold pieces together while glue dries. They ensure a tight bond.
Necessary Tools
- Measuring Tape: For all your measurements. Accuracy is key.
- Pencil: To mark cuts and outlines.
- Straightedge or Ruler: For drawing straight lines. A large carpenter’s square is very helpful.
- Jigsaw: This tool cuts curves and straight lines in wood. It is perfect for cutting the machine’s opening.
- Drill: For drilling pilot holes and driving screws.
- Router (Optional but Recommended): A router creates a recessed ledge for the insert to sit on. This ensures a perfectly flush fit. If you don’t have one, you can build up the support frame instead.
- Router Bit (if using a router): A straight bit or a rabbeting bit.
- Safety Glasses: Always protect your eyes when working with power tools.
- Dust Mask: Protects your lungs from wood dust.
- Ear Protection: Power tools can be noisy. Protect your hearing.
- Sander (Optional, but hand sanding is fine): An orbital sander speeds up the sanding process.
Gathering these items before you begin will make the whole process smoother. Double-check your list. Make sure you have everything ready. This preparation step sets you up for success.
Precision Measuring: Your Machine and Table
Accurate measurements are the most critical step. Even a small error can ruin your custom fit. Take your time here. Measure twice, cut once is a golden rule in woodworking. This ensures your sewing machine sits perfectly flush.
Measuring Your Sewing Machine
First, focus on your sewing machine. You need two key dimensions: length and width of the machine’s base. This is the part that sits on the table.
- Identify the flat base: Look at your sewing machine. Find the flat part that touches the table. This is what you will be recessing.
- Measure the base length: Use your tape measure. Measure from one end of the base to the other. Do this in both directions (front to back, side to side). Write down these numbers.
- Account for irregular shapes: Some machines have a rounded corner or a small protrusion. If your machine is not a perfect rectangle, you will need to create a template. Use a large piece of paper or cardboard. Place your machine on it. Trace around the entire base with a pencil. Cut out this template. This will be your precise guide later.
- Measure the machine’s height: You also need to know how deep your machine will sit. Measure from the very bottom of the machine to the top surface of its sewing bed. This measurement tells you how much space you need below the tabletop.
Measuring Your Table
Next, you need to measure your existing sewing table or desk.
- Determine insert location: Decide where you want the machine to sit on your table. Centering it is often best. Mark this area.
- Measure table thickness: Use your tape measure to find the thickness of your tabletop. This measurement is important for how deep your recess will be. It also affects the length of screws you will use.
- Check for obstructions: Look under your table. Are there any support beams or drawers? You need to make sure your machine will fit without hitting anything below the surface. Plan your cut-out area to avoid these obstructions. You may need to shift your planned insert location slightly.
Write down all your measurements clearly. Label them. Store your machine’s template carefully if you made one. This meticulous measuring ensures your custom sewing table insert will fit like a glove. This precision step makes all the difference in the final product. Your efforts here will result in a perfectly ergonomic sewing setup.
Crafting the Insert and Support Frame
This is where your project really takes shape. You will cut the opening in your table and build the support structure. This step requires careful work. Remember, accuracy here means a perfect fit for your machine.
Preparing the Table Opening
- Mark the cut-out area: Based on your machine’s base measurements (or template), mark the exact outline on your table. If using a template, trace it carefully. Make sure the lines are clear.
- Drill pilot holes: Drill a small hole in each corner of your marked cut-out. Make sure these holes are just inside your cutting line. These holes will allow your jigsaw blade to enter the wood.
- Cut the opening: Carefully insert your jigsaw blade into a pilot hole. Begin cutting along your marked line. Take your time. Keep the jigsaw firmly on the table. Cut slowly to ensure a straight and clean edge. Follow your lines precisely. Once you have cut all four sides, the piece of the tabletop will fall out.
Building the Support Frame
This frame will hold your machine and the insert level with the tabletop.
- Determine frame dimensions: Your frame needs to be slightly larger than your machine’s opening. This allows the frame to rest on the solid part of your tabletop. The frame’s height needs to match your table thickness, minus the thickness of your insert material.
- Example: If your table is 1.5 inches thick and your insert is 0.5 inches thick, your frame should be 1 inch tall.
- Cut frame pieces: From your plywood or MDF, cut four pieces for the frame. Two pieces will be the length of your opening plus twice the frame material thickness. The other two will be the width of your opening plus twice the frame material thickness. This creates an outer perimeter that is a precise fit for your machine.
- Assemble the frame: Use wood glue and screws to assemble these four pieces into a sturdy rectangle. Pre-drill pilot holes before screwing to prevent splitting the wood. Ensure the corners are square. Let the glue dry completely.
- Attach the frame to the table: Flip your table upside down. Carefully position the assembled frame around the opening you cut. The top edge of the frame should be flush with the bottom edge of the tabletop. Secure the frame to the underside of the table using screws. Make sure the screws are long enough to hold firmly but not so long they go through the tabletop.
Creating the Insert Ledge (Router Method Recommended)
This step creates the lip for your insert to sit on.
- Router setup: If using a router, attach a straight bit or a rabbeting bit. Set the depth of the router bit to the exact thickness of your insert material (e.g., 1/2 inch).
- Rout the ledge: With the table right side up, carefully guide the router along the inner edge of the opening you cut. The router will create a recessed ledge or “rabbet” around the perimeter of the opening. This ledge is where your custom insert will rest. This method creates a very clean, professional finish.
- Alternative (No Router): If you do not have a router, you can achieve a similar effect. Instead of a single frame, build a two-part frame. The first part is the primary support frame, as described above. The second part is a thinner layer of wood (the thickness of your insert) glued and screwed on top of the primary frame, but inset from the edge of the opening. This creates the necessary ledge. This method requires more precision in cutting and assembly.
Crafting these components carefully ensures your sewing machine will have a stable and flush home. Your patience and accuracy here will truly pay off. This solid foundation makes the rest of the project easier.
Shaping and Finishing Your Custom Insert
Now that the table is ready, it is time to focus on the insert itself. This piece will fill the opening around your sewing machine. It needs to be precise and well-finished. This ensures a seamless and comfortable work surface.
Cutting the Insert Piece
- Measure the opening: Measure the exact dimensions of the opening you routed or created the ledge for. This measurement should be slightly larger than your machine’s base. You are measuring the outer perimeter of the recessed ledge.
- Cut the insert blank: Cut a piece of your plywood or MDF to these precise dimensions. This piece will be the main body of your insert.
- Trace your machine’s template: Place your sewing machine’s paper or cardboard template directly onto the center of this newly cut insert blank. Carefully trace the outline of your machine onto the blank. This ensures the opening in the insert matches your machine’s shape.
- Cut the machine opening in the insert: Drill pilot holes inside the traced outline, just as you did for the table. Use your jigsaw to carefully cut along the traced line. Take your time. Cut slowly to get a smooth, precise curve or straight line. The inside piece will fall out. Test fit your machine into this opening. It should fit snugly but not be too tight. You might need to make small adjustments with sandpaper.
Sanding and Smoothing
A smooth surface is important for fabric. Rough edges can snag material.
- Start with coarse grit: Begin sanding all edges and surfaces of your insert with a medium-grit sandpaper (around 80-100 grit). This removes any rough spots or splinters from cutting.
- Progress to finer grits: Gradually move to finer grits (150-220 grit). This creates a very smooth finish. Pay special attention to the edges that will be near your fabric. The goal is a surface free of imperfections.
- Clean the dust: After sanding, wipe down the insert with a damp cloth. This removes all dust particles. Let it dry completely before moving to the next step.
Applying a Finish
Finishing your insert protects the wood. It also makes it easy to clean. This is important for a sewing area.
- Choose your finish:
- Paint: Offers color customization. Use a durable, semi-gloss or gloss paint for easy cleaning.
- Stain: Enhances the natural wood grain. Follow with a clear coat for protection.
- Polyurethane or Lacquer: Provides a durable, clear protective layer. This is a common choice for workspaces.
- Apply the finish: Follow the manufacturer’s instructions for your chosen finish.
- Apply thin, even coats.
- Allow adequate drying time between coats.
- Lightly sand with very fine grit (e.g., 320-400) between coats if recommended, then wipe clean.
- Apply at least 2-3 coats for good protection.
- Ensure full curing: Allow the finish to fully cure before placing your machine or fabric on it. This can take several days, depending on the product.
This careful shaping and finishing process creates a professional-looking and highly functional sewing table insert. Your hard work in these steps results in a durable and beautiful workspace. For general table maintenance and finishing, you might find tips on how to paint a wood table white or how to clean a wood table useful for long-term care of your new insert.
Installing and Fine-Tuning Your New Insert
With your table opening prepared and your insert beautifully finished, it is time for the final assembly. This step involves placing the insert and your machine. It also includes making any necessary adjustments. The goal is a perfect, flush fit that enhances your sewing experience.
Inserting the Machine
- Place the machine: Carefully lower your sewing machine into the opening in your table. The base of the machine should rest on the support frame you built earlier.
- Check height: Look closely at the machine’s sewing bed. It should be perfectly level with the tabletop surface. If it is slightly too low, you may need to add shims under the machine’s base on the support frame. Thin pieces of cardboard or craft foam work well. If it is too high, you might need to adjust your support frame or re-evaluate the height of your ledge.
Positioning the Insert
- Place the insert: Now, take your custom-cut insert. Place it around the sewing machine. The insert should sit snugly on the routed ledge or the alternative support frame.
- Check for flushness: The top surface of the insert should be perfectly level with both the tabletop and the sewing machine bed. Run your hand across the surface. You should feel no bumps or gaps. This flush surface is crucial for smooth fabric flow.
- Adjust if needed: If the insert is not flush, you may need to make small adjustments.
- If the insert is too low: Add very thin shims under the insert along the ledge.
- If the insert is too high: You might need to sand down the edges of the insert slightly. Or, if you used a router, re-route the ledge a tiny bit deeper. If you built a layered frame, you may need to reduce the height of the thinner layer.
Securing the Insert (Optional but Recommended)
For most setups, the weight of the machine and the tight fit of the insert will keep it stable. However, if you want extra security:
- Small L-brackets: You can attach small L-brackets to the underside of the table and the support frame. These brackets can hold the insert firmly in place. This is especially useful if you plan to move the table often.
- Magnetic catches: Small magnetic catches on the underside of the insert and table can also help keep it from shifting.
- Non-slip pads: Placing small non-slip rubber pads on the ledge before placing the insert can prevent it from sliding.
Test and Enjoy
- Perform a test sew: Sit down at your newly configured sewing station. Run your sewing machine. Sew a few scraps of fabric. Pay attention to how the fabric moves across the surface. Notice your posture and comfort level.
- Observe fabric flow: Does the fabric glide smoothly over the seam between the table, insert, and machine? If you feel any snagging, check for any unevenness or sharp edges and sand them down further.
- Admire your work: You have just created a custom, ergonomic sewing setup. Your efforts will translate into more comfortable and productive sewing sessions. This custom solution is designed to fit your unique machine. It truly optimizes your workspace. For broader table construction knowledge, resources like how to attach a table top to base might offer additional insights into securing components.
Customization and Advanced Tips
You have successfully made your basic sewing table insert. Now, let’s talk about making it even better. Customization allows you to tailor your workspace to your exact needs. These advanced tips can add functionality and style.
Material Choices Beyond Wood
While wood is common, other materials offer different benefits:
- Acrylic (Plexiglass):
- Pros: Clear, allowing you to see through to objects or light sources below. Very smooth surface for fabric. Lightweight.
- Cons: Can scratch more easily than wood. Requires specialized tools for cutting (a fine-tooth blade or laser cutter). Can be more expensive.
- Tip: If using acrylic, you might have a local plastics shop cut it for you. Provide them with your exact measurements and machine template.
- MDF (Medium-Density Fiberboard):
- Pros: Very smooth, uniform surface. Stable, less prone to warping than plywood. Easy to cut and finish. More affordable.
- Cons: Not water-resistant. Needs sealing. Heavier than plywood.
- Tip: Always seal MDF thoroughly, especially if spills are a concern.
Consider the look and feel you want. Also think about the tools you have available.
Adding Storage Solutions
A sewing table can always use more storage. Integrating small storage features into your design is smart.
- Drawer under the insert: If you have space below your table, you could build a shallow drawer. This drawer would slide out from under the insert. It is perfect for bobbins, needles, or small tools.
- How to make a drawer out of wood could offer general guidance for this.
- Side pockets/trays: Attach small fabric pockets or wooden trays to the sides of the table opening. These can hold scissors, seam rippers, or thread spools. They keep supplies within easy reach.
Lighting Integration
Good lighting is essential for sewing. You can integrate lighting into your table design.
- Under-mount LED strips: Attach thin LED light strips to the underside of the table, just above the support frame. This provides direct illumination to your sewing area. It reduces shadows from your machine. Look for strips with adjustable brightness.
Enhancing Stability
Even with a sturdy frame, you might want more stability.
- Adjustable feet for the support frame: If your table surface is not perfectly level, or if you want to slightly adjust the height of your machine, consider adding adjustable feet to the bottom of your support frame. These screw in and allow for fine-tuning.
- Reinforce the table legs: If your original table is wobbly, reinforcing its legs will improve the overall stability of your sewing station. This will make your sewing more pleasant. General table construction guides, like how to make an outdoor table top, might offer insights into reinforcing table structures.
Creating Multiple Inserts
If you own more than one sewing machine, you can create multiple inserts. Each insert would be custom-fit for a different machine. This allows you to swap machines easily in the same table opening. Store the unused inserts safely. This versatility is a major benefit for multi-machine households.
These customization ideas transform your basic DIY insert into a truly personalized and professional sewing command center. Tailor these ideas to your specific needs and tools.
Troubleshooting Common Issues
Even with careful planning, things can sometimes go wrong. Do not worry. Most issues with a sewing table insert are fixable. Here are some common problems and their solutions.
Issue 1: The Insert Is Not Flush (Too High or Too Low)
This is the most common problem. A non-flush insert creates an uneven surface. This can snag fabric.
- If the insert is too high:
- Solution 1 (Router): If you used a router for the ledge, you might need to re-route the channel slightly deeper. Go slowly, removing very little material at a time.
- Solution 2 (Sanding): Carefully sand down the bottom edges of the insert. Test fit often. This is better for minor high spots.
- Solution 3 (Built-up frame): If you built a layered frame without a router, you may need to reduce the height of the top layer of wood.
- If the insert is too low:
- Solution: Add thin shims under the insert along the ledge. Use wood veneer, cardboard, or plastic shims. Place them evenly to lift the insert to the correct height. Secure them with a small dab of glue if they shift.
Issue 2: The Machine Is Not Flush (Too High or Too Low)
This means your machine’s sewing bed is not level with the insert.
- If the machine is too high:
- Solution: You might need to adjust the height of your support frame. If the machine’s base is resting on the frame, you might need to lower the frame. This is a more involved fix. It may require cutting down the height of your frame pieces or re-evaluating how deep your machine sits.
- If the machine is too low:
- Solution: Add shims directly under your sewing machine’s base, on top of the support frame. Use sturdy, flat materials like plywood scraps or plastic shims. Distribute them evenly for stability.
Issue 3: The Insert Slides Around
An insert that shifts can be annoying and unsafe.
- Solution 1 (Non-slip pads): Apply small rubber or silicone non-slip pads to the underside of the insert where it rests on the ledge. Furniture pads work well.
- Solution 2 (L-brackets): Install small L-brackets under the table. Position them to gently hold the insert in place. You can use wing nuts on the screws for easy removal.
- Solution 3 (Snugger fit): If the gap is too large, you might need to replace the insert with a slightly larger one. Or, add very thin wood strips to the ledge to reduce the gap.
Issue 4: Rough Edges or Splinters
These can snag fabric and be painful.
- Solution: Thoroughly sand all edges of the insert and the table opening. Use progressively finer grits of sandpaper. Ensure all surfaces that fabric might touch are silky smooth. Apply additional coats of finish for extra protection.
Issue 5: Noise or Vibration
Sometimes a new setup can increase machine noise or vibration.
- Solution 1 (Padding): Place thin rubber or felt pads between the machine’s base and the support frame. This can absorb vibrations.
- Solution 2 (Secure connections): Ensure all screws in your support frame are tight. Make sure the support frame is securely attached to the table. Loose connections can cause rattling.
- Solution 3 (Table stability): Check the stability of your entire table. If the table itself is wobbly, reinforce its legs or add cross-bracing.
Patience is key when troubleshooting. Address each issue systematically. A little extra effort now will ensure your custom sewing table insert provides years of comfortable and efficient sewing. Don’t forget that regular maintenance, like knowing how to clean your sewing machine, will keep your entire setup running smoothly.
FAQs About Making a Sewing Table Insert
What kind of wood is best for a sewing table insert?
Plywood or MDF (Medium-Density Fiberboard) are excellent choices. Plywood is strong and stable. MDF offers a very smooth, uniform surface for painting. Both are easy to work with and readily available. Choose a thickness of 1/2 inch to 3/4 inch for good stability and durability.
Can I use a universal sewing machine insert?
Universal inserts exist, but they often do not provide a perfect flush fit. Your sewing machine’s base has a unique shape and height. A custom-made insert ensures your machine’s bed is perfectly level with your table. This creates the smoothest possible work surface. It is always better to make a custom one.
How long does it take to make a sewing table insert?
The actual construction can take a day or two. This depends on your experience level and tools. However, you must account for drying time for wood glue and finish coats. This can add several days. Plan for about a week from start to finish to ensure proper curing.
Do I need special woodworking tools for this project?
You need basic woodworking tools. A jigsaw for cutting is essential. A drill for pilot holes and screws is also necessary. A router is highly recommended for creating a professional, flush ledge, but alternatives exist. Safety glasses and a dust mask are a must for all power tool use.
- sewing table insert
- DIY sewing
- custom sewing table
- sewing machine setup
- woodworking for crafters

Todd Martin
Senior Writer
With over 15 years of experience in home renovation and design, I started HEG to share what I’ve learned with homeowners who want to create spaces that are both beautiful and functional. I’ve always believed in a hands-on approach, and over the years, I’ve picked up practical solutions that actually work. Through HEG, I aim to make home improvement more approachable, sharing real tips that help you create a home you truly love.