· Todd Martin · Home Improvement · 22 min read
How To Mount Floating Tv Stand

Mount Your Floating TV Stand for a Modern Look
Imagine a sleek living room with no clutter on the floor, just a television seemingly suspended in air, accompanied by a stylish, minimalist cabinet. This vision becomes real with a floating TV stand. These stands offer a clean, modern aesthetic that instantly elevates any living space. They free up valuable floor space, making rooms feel larger and easier to clean.
Mounting a floating TV stand is a rewarding DIY project that adds both function and flair to your home. It involves careful planning and precise execution, ensuring the stand is secure and level. This comprehensive guide will walk you through every step of the process. We will cover selecting the right tools, preparing your walls, the exact installation steps, and important safety considerations. By the end, you will have the confidence to successfully mount your own floating TV stand and transform your room.
Takeaway
Mounting a floating TV stand requires careful steps for a secure and stylish result:
- Always locate wall studs to ensure a strong anchor for your stand.
- Use the right tools, including a stud finder, level, and drill, for accuracy.
- Measure and mark precisely before drilling any holes.
- Follow the manufacturer’s instructions for your specific model.
- Prioritize safety by double-checking all connections and weight limits.
A floating TV stand is mounted by carefully selecting a wall location, marking stud positions, drilling pilot holes into studs, attaching the stand’s mounting bracket to these studs with appropriate hardware, and then securing the main stand body to the installed bracket. This ensures the unit is stable and can safely support its intended weight.
Understanding Floating TV Stands and Their Benefits
Floating TV stands are a popular choice for modern homes. They offer a unique design that makes your television area look clean and spacious. Unlike traditional TV cabinets, these stands attach directly to the wall. This gives them the appearance of “floating” above the floor.
This design is not just about looks; it is also highly practical. A floating TV stand frees up floor space, which is great for smaller rooms. It also makes cleaning easier, as there are no legs or base to gather dust beneath. Many people choose them to create a minimalist and uncluttered living environment.
What Makes Them “Float”?
The “floating” effect comes from how these stands attach to the wall. Most floating TV stands use a sturdy mounting bracket system. This bracket typically secures to wall studs, which are the wooden or metal frames inside your walls. The main body of the TV stand then hooks onto or attaches to this bracket.
This hidden support system creates the illusion of the stand being unsupported. The design prioritizes strength and stability. Quality floating TV stands are built to hold the weight of your TV and media components safely. The installation method is similar to how you might install other wall-mounted items. For example, understanding how to remove a floating shelf provides insight into the general principles of wall attachment and detachment for similar structures.
Aesthetic and Practical Advantages
Choosing a floating TV stand brings many benefits to your home. Aesthetically, they provide a sleek, contemporary look. They can make a room feel more open and less crowded. You can also customize the height to perfectly suit your viewing needs. This flexibility is a major advantage over fixed-height stands.
From a practical standpoint, floating stands simplify cable management. Wires can be hidden behind the stand and routed discreetly. This helps maintain the clean look. They are also excellent for homes with children or pets, as there are fewer obstacles on the floor. Think about how these design choices can coordinate coffee table and TV stand for a cohesive living space.
Additionally, a floating stand can be a focal point in a room. It draws attention to your television setup without overpowering the space. This minimalist approach fits well with various decor styles. It truly transforms the feel of your entertainment area.
Essential Tools and Materials for Mounting
Before you begin the mounting process, gathering all necessary tools and materials is crucial. Having everything ready ensures a smooth and efficient installation. Rushing or missing a tool can lead to frustration and potential mistakes. A proper toolkit makes all the difference in achieving a secure and level installation.
Always check the instructions that come with your specific floating TV stand. Manufacturers often specify the exact hardware and tools needed for their product. Some stands might come with a mounting template, which simplifies marking the wall. Take the time to read through these instructions completely.
Gathering Your Toolkit
You will need a few standard household tools for this project. These tools help ensure accuracy and safety. Do not skip any of these items, as each plays a vital role in the installation process.
Here is a list of essential tools:
- Stud Finder: This tool is non-negotiable. It helps locate the wooden or metal studs inside your walls. Mounting a floating TV stand directly into studs is essential for stability and safety.
- Level: A good level ensures your TV stand is perfectly straight. An uneven stand will not only look bad but could also be unstable.
- Drill: You will need a power drill with appropriate drill bits. These bits must match the size of your mounting screws and wall anchors.
- Tape Measure: Accurate measurements are key to positioning your stand correctly.
- Pencil: For marking stud locations, drill points, and overall layout on the wall.
- Phillips Head Screwdriver: For tightening screws, especially if your stand has assembly components.
- Safety Glasses: Always protect your eyes when drilling or working with tools.
- Work Gloves: To protect your hands and provide a better grip.
Having these tools readily available will streamline your work. They help ensure precision and prevent common DIY errors. Preparation is truly half the battle when it comes to mounting projects.
Specific Hardware Needs
While some floating TV stands come with all the necessary hardware, it is always a good idea to confirm. You might need to purchase additional items depending on your wall type. The right hardware ensures your stand stays firmly in place.
Here are the specific hardware items you might need:
- Mounting Screws: These are typically heavy-duty wood screws or lag bolts. They are designed to go deep into wall studs.
- Wall Anchors (if not mounting into studs): If you cannot hit a stud, you might need heavy-duty drywall anchors or toggle bolts. However, direct stud mounting is always preferred for a floating TV stand due to weight. For situations where you might need extra support, understanding how to support a floating desk can provide insights into various anchoring methods.
- Washers: These distribute the pressure from the screw head, preventing damage to the mounting bracket.
- Spacers (optional): Some stands might require spacers if the wall is uneven or if you need to create a slight gap.
Always match your drill bit size to the recommended size for your screws or anchors. Drilling a pilot hole that is too large will reduce the screw’s grip. A hole that is too small can make installation difficult or even crack the stud. Proper hardware selection is critical for the stability and longevity of your mounted TV stand.
Preparing Your Wall for Installation
Proper wall preparation is the most critical step in mounting a floating TV stand. The safety and stability of your stand depend entirely on how well it is anchored to the wall. This stage involves locating the best position for your stand, identifying suitable anchor points, and ensuring the wall can support the weight. Do not rush this part of the process.
Consider the height you want your TV and stand to be. A common guideline is to position the center of your TV at eye level when you are seated. Your floating TV stand should sit directly below it, offering a cohesive look. Mark your desired height lightly on the wall with a pencil.
Locating Wall Studs Safely
Locating wall studs is crucial for a secure installation. Wall studs provide the structural support needed to hold heavy objects. Drywall alone cannot support the weight of a floating TV stand, its contents, and the TV it supports. Mounting directly into studs prevents the stand from pulling away from the wall over time.
To find studs, use a stud finder. Move the stud finder slowly across the wall at the approximate height where your stand will be mounted. When it indicates a stud, mark the edges lightly with a pencil. Studs are typically spaced 16 or 24 inches apart on center. Once you find one, measure out from it to find others. For instance, if you’re exploring how to build a floating bathroom vanity, the principles of stud location and secure attachment are quite similar.
It is a good practice to drill a small, shallow test hole at your marked stud locations. This helps confirm that you have indeed found the center of a stud, not just its edge. If you hit wood, you are good to go. If you hit empty space, you need to adjust your mark. Use a very small drill bit for these test holes, as they are easily patched later.
Understanding Different Wall Types
The type of wall you have dictates the specific hardware and techniques you will use. Most homes in the United States have drywall over wood or metal studs. However, older homes or certain rooms might have plaster and lath, brick, or concrete walls. Each material presents unique challenges and requires different mounting methods.
- Drywall over Wood Studs: This is the ideal scenario. Once studs are found, you will drill pilot holes and use long, heavy-duty screws or lag bolts directly into the studs.
- Drywall over Metal Studs: While less common for home construction, metal studs are used. You will need specialized metal-to-metal screws or toggle bolts. It is best to consult a professional if unsure.
- Plaster and Lath Walls: These older walls are more brittle. Locating studs can be harder. You may need to use plaster anchors in addition to or instead of screws into studs, or consider toggle bolts if studs are not accessible. Drilling slowly is key to prevent cracking the plaster.
- Brick or Concrete Walls: These walls are very strong but require masonry drill bits and concrete anchors or sleeve anchors. You will need a hammer drill for this task. Ensure you select anchors rated for the weight of your stand.
Never assume your wall type without checking. Using the wrong hardware can result in a failed installation, damaging your stand and wall. If you are uncertain about your wall type or feel uncomfortable, consider hiring a professional. They have the expertise and tools to handle any wall safely.
Step-by-Step Guide to Mounting Your Floating TV Stand
Now that your wall is prepared and your tools are ready, it is time to mount your floating TV stand. This process requires precision and patience. Follow each step carefully to ensure a secure and level installation. Double-checking your work at each stage will prevent errors and ensure a successful outcome.
Remember to keep your manufacturer’s instructions handy throughout this process. While these steps are general, your specific stand might have unique requirements. Always refer to your product manual for details.
Marking and Drilling Precisely
Accurate marking is the foundation of a successful mount. Start by holding the mounting bracket or the stand itself (if it has a direct mounting system) against the wall at your desired height. Use your level to ensure it is perfectly horizontal. With the level in place, mark the exact locations for your pilot holes. These marks should align with the center of the studs you located earlier. If your stand comes with a mounting template, tape it to the wall and use it to mark your drill points.
Before drilling, use your stud finder one last time to confirm your marks are centered on the studs. Drill pilot holes at each marked spot. The drill bit size must match the recommended size for your mounting screws. Drill straight and deep enough for the screws to fully engage the stud. If you are not hitting studs and must use heavy-duty anchors, drill holes according to the anchor manufacturer’s instructions.
Securing the Mounting Bracket
Once pilot holes are drilled, it is time to secure the mounting bracket to the wall. Align the holes on the bracket with your freshly drilled pilot holes. Insert the appropriate mounting screws. Use a drill with the correct bit or a wrench to drive the screws firmly into the wall studs. Ensure they are tightened until the bracket is flush against the wall and feels very secure. Do not overtighten, as this can strip the screws or damage the wall.
After securing the first few screws, re-check the bracket with your level. Make any minor adjustments before fully tightening all screws. A securely fastened bracket is paramount for the stability of your floating TV stand. This step creates the strong foundation for your entire setup.
Attaching the Stand Body
With the mounting bracket firmly in place, you can now attach the main body of the floating TV stand. Most floating stands are designed to easily hook onto or slide over the installed bracket. Carefully lift the stand and align its rear mounting points with the bracket on the wall. Gently lower or push it into place until it locks or sits securely. You might hear a click or feel it settle into position.
Once the main body is in place, you will likely need to secure it further. Many floating stands have screws that go through the top or bottom of the stand into the mounting bracket or directly into the wall for added stability. Locate these securing points and insert the provided screws. Tighten them to prevent the stand from lifting or shifting. Ensure all connections are snug but avoid overtightening. This final step locks your floating TV stand into its “floating” position.
Ensuring Stability and Safety After Installation
Mounting a floating TV stand is not just about getting it on the wall; it is about ensuring it stays there safely. After the physical installation, taking steps to verify its stability and manage its use is crucial. This helps protect your investment, your valuable electronics, and most importantly, your family. A wobbly or improperly installed stand poses a serious hazard.
Always conduct a thorough inspection once your stand is fully mounted. Gently push and pull on the stand to check for any movement. It should feel completely rigid and secure against the wall. If there is any give, recheck all screws and anchors. This post-installation check is a vital safety measure.
Weight Capacity and Distribution
Every floating TV stand has a specified weight capacity. It is critical to know and respect this limit. Overloading the stand can lead to structural failure, causing damage to the stand, your TV, and any items stored within it. Always check the manufacturer’s maximum weight recommendation. Do not guess or assume.
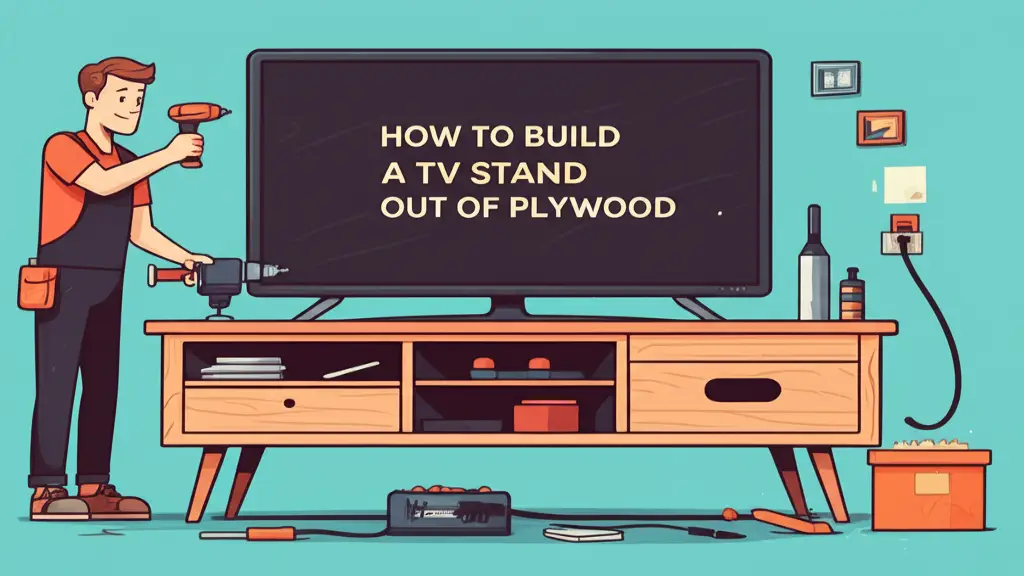
When placing items on your new stand, distribute the weight evenly. Avoid putting all your heaviest components on one side. For example, if you have a heavy receiver and a game console, try to balance them. Place the heaviest items directly over or near the wall studs if possible. This helps to distribute the load directly to the strongest points of the installation. Remember, the TV itself often has a separate wall mount. If you’re building a stand, consider its ability to handle additional weight beyond just the TV. Even if you build a TV stand out of plywood, structural integrity is key.
Cable Management Solutions
A key benefit of floating TV stands is their ability to enhance a clean aesthetic. Messy cables can ruin this look. Effective cable management is essential for a polished, functional setup. Plan how you will route your power cords, HDMI cables, and other wires before you put your TV and devices in place.
Many floating TV stands include built-in cable management channels or holes. Use these to feed your wires discreetly. If your stand does not have them, consider adding cable ties, adhesive cable clips, or flexible tubing. You can run cables along the back of the stand or down the wall, hiding them behind furniture. For added convenience, you might even consider how to mount a surge protector under a desk to keep power strips out of sight and neatly managed. Concealing wires not only improves the appearance but also prevents tripping hazards and keeps your entertainment area tidy.
Troubleshooting Common Mounting Challenges
Even with careful planning, you might encounter a few challenges when mounting your floating TV stand. Knowing how to address these common issues can save you time and frustration. Approaching problems systematically helps you find effective solutions. Do not be discouraged if something does not go perfectly the first time.
Most mounting problems stem from inaccurate measurements or unexpected wall conditions. Take a deep breath and reassess the situation. Often, a small adjustment can fix a big issue. Your goal is a stable and visually appealing result.
Uneven Installation
An uneven floating TV stand is a common complaint. This usually happens because the mounting bracket was not perfectly level during installation. Even a slight tilt can be noticeable and distracting. If your stand is uneven, you will need to adjust it.
- Re-check with a Level: Place your level on top of the mounted stand. Identify which side is higher or lower.
- Loosen and Adjust: Carefully loosen the screws on the side that needs to be lowered or raised. If you mounted into studs, you might need to slightly unscrew one or two lag bolts. If using anchors, you might need to gently adjust their position.
- Re-level and Re-tighten: With the screws loose, adjust the stand until it is perfectly level. Have a helper hold it in place while you re-tighten all screws firmly. Be careful not to strip the screw heads or damage the wall.
In some cases, if the unevenness is severe, you might need to remove the stand and remount the bracket. Always prioritize a perfectly level installation. An even stand looks professional and functions best.
Dealing with Difficult Wall Materials
Mounting a floating TV stand onto non-ideal wall materials like plaster, old brick, or walls without easily accessible studs can be challenging. Standard drywall anchors are not strong enough for the weight of a TV stand. Using the wrong hardware can cause the stand to pull away from the wall.
- Plaster Walls: These walls are fragile. Drill pilot holes slowly to prevent cracking. Use specialized plaster anchors or toggle bolts if studs are not found. Always try to hit studs for maximum support.
- Brick/Concrete Walls: You absolutely need a hammer drill and masonry bits for these. Use sleeve anchors or wedge anchors, which are designed for heavy loads in masonry. Ensure the anchor size matches your mounting hardware.
- No Studs Accessible: If you cannot mount into studs where you want the stand, do not proceed with standard drywall anchors. For a floating TV stand, hitting at least two studs is crucial. If studs are unavailable in your desired location, consider using a French cleat system spanning multiple studs or reinforcing the wall with plywood before mounting the stand. Alternatively, choose a different wall or a traditional stand. The stability required for a heavy TV stand means you cannot compromise on anchor strength.
Always verify the weight rating of your chosen anchors for difficult walls. It is better to over-engineer the support than risk a collapse. If you are unsure about dealing with challenging wall types, consult a professional. They have the expertise and tools for secure installation on any surface.
Final Touches and Decorating Your New Setup
Congratulations! Your floating TV stand is now securely mounted. The hardest part is over. Now comes the enjoyable stage: styling your new entertainment area. A floating TV stand offers a fantastic canvas for expressing your personal style. It can truly become the focal point of your living space.
Take a moment to step back and admire your work. Ensure everything looks clean and tidy. The final touches make a big difference in how your room feels. A well-organized and decorated entertainment center enhances the entire home aesthetic.
Styling Your Floating Stand
Decorating your floating TV stand can elevate your room’s design. Think about balancing aesthetics with functionality. Since the stand is mounted, it offers a sleek, uncluttered surface. You can use this to your advantage.
Here are some ideas:
- Minimalist Approach: Keep the surface clear. Place only one or two thoughtfully chosen decor items. Examples include a small plant, a decorative bowl, or a framed photo. This maintains the clean lines of the floating design.
- Strategic Storage: Use the compartments or drawers of your stand for practical storage. Hide remote controls, gaming accessories, or media. This keeps surfaces free from clutter, reinforcing the minimalist look.
- Lighting: Consider adding subtle LED strip lighting behind or underneath the stand. This creates a warm glow and an impressive ambiance, especially for evening viewing. It highlights the “floating” effect even more.
- Art and Accents: Place a large piece of art or a decorative mirror above the TV to complement the stand. Use other decorative elements in the room, such as throw pillows or an area rug, to tie the whole space together. Just as you might decorate a TV stand for Christmas for a festive look, seasonal or permanent decor can personalize your floating stand year-round.
The key is to enhance, not overwhelm, the stand’s clean design. Less is often more when it comes to styling.
Integrating with Your TV
Your floating TV stand works best when it forms a cohesive unit with your television. The height and placement of both are critical for optimal viewing and aesthetic balance. If your TV is wall-mounted, ensure it is centered above the stand. The space between the bottom of the TV and the top of the stand should look proportional.
- Optimal Viewing Height: For a comfortable viewing experience, the center of your television screen should ideally be at eye level when you are seated. Adjust your TV’s wall mount accordingly.
- Cable Concealment: Revisit your cable management plan. Ensure all wires running from the TV to the stand are neatly tucked away. Use in-wall cable routing kits if you want a completely wire-free look. This means no visible wires from the TV down to the stand.
- Sound Integration: If you have a soundbar, place it neatly on top of the floating stand, centered below the TV. This creates a streamlined audio-visual setup.
- Component Placement: Arrange your media components (gaming consoles, streaming boxes, etc.) neatly within the stand’s compartments. Keep frequently used items easily accessible.
By integrating your TV and stand seamlessly, you create a powerful entertainment hub that is both functional and beautiful. This attention to detail transforms your living room into a sophisticated and inviting space. Consider how these elements contribute to arranging living room furniture with a fireplace and TV for a complete room design.
FAQ Section
Can I mount a floating TV stand on drywall without studs?
Mounting a floating TV stand directly into drywall without studs is generally not recommended. The weight of the stand, TV, and components is too heavy for standard drywall anchors. It will likely pull out of the wall over time, causing damage and potential injury. Always aim to mount into wall studs for secure installation.
How high should I mount my floating TV stand?
The ideal height for your floating TV stand depends on your TV’s mounting height. A good rule of thumb is to have the center of your TV at eye level when seated. The stand should sit directly below it, usually 4-8 inches from the bottom of the TV, to create a cohesive unit. Measure from your seating position to determine the best height.
What is the weight limit for most floating TV stands?
Weight limits vary significantly by model and manufacturer. Most floating TV stands can support between 50 to 150 pounds when properly installed into wall studs. Always check the specific weight capacity listed in your stand’s product manual. Do not exceed this limit to ensure safety and prevent damage.
How do I hide wires with a floating TV stand?
Hiding wires is crucial for a clean look. Many floating TV stands have built-in cable management holes or channels. You can also use cable ties, adhesive clips, or spiral wraps to bundle wires together. For a completely hidden look, consider using an in-wall cable management kit to route wires directly behind the drywall.
Is it hard to mount a floating TV stand?
Mounting a floating TV stand is a moderate DIY project. It requires basic tools, accurate measurements, and careful attention to detail. Finding wall studs and ensuring the unit is level are the most challenging parts. With patience and following instructions, most people can complete this task successfully.
Can I paint my floating TV stand after mounting?
Yes, you can paint most floating TV stands after mounting, especially if they are made of wood or MDF. Ensure the surface is clean and lightly sanded for proper paint adhesion. Use painter’s tape to protect wall areas. Choose a paint compatible with the stand’s material for a smooth, durable finish.
Conclusion
Mounting a floating TV stand is a transformative home improvement project. It brings a sleek, modern aesthetic and valuable functionality to any living space. We have walked through every crucial step, from gathering your essential tools to preparing your walls and executing the precise installation. The key takeaways emphasize the importance of locating wall studs, using the correct hardware, and meticulously measuring to ensure a secure and level mount.
By understanding how to mount a floating TV stand correctly, you gain a stylish and space-saving solution for your entertainment needs. You can confidently create a clean, organized, and contemporary environment in your home. Take pride in this DIY accomplishment. If you are ready to enhance your living area, embrace this project. Your beautifully mounted floating TV stand awaits, ready to be the centerpiece of your modern home.
- floating TV stand
- wall mount TV stand
- DIY furniture
- home decor

Todd Martin
Senior Writer
With over 15 years of experience in home renovation and design, I started HEG to share what I’ve learned with homeowners who want to create spaces that are both beautiful and functional. I’ve always believed in a hands-on approach, and over the years, I’ve picked up practical solutions that actually work. Through HEG, I aim to make home improvement more approachable, sharing real tips that help you create a home you truly love.