· Todd Martin · Home Decor · 19 min read
How To Paint Oak Cupboards
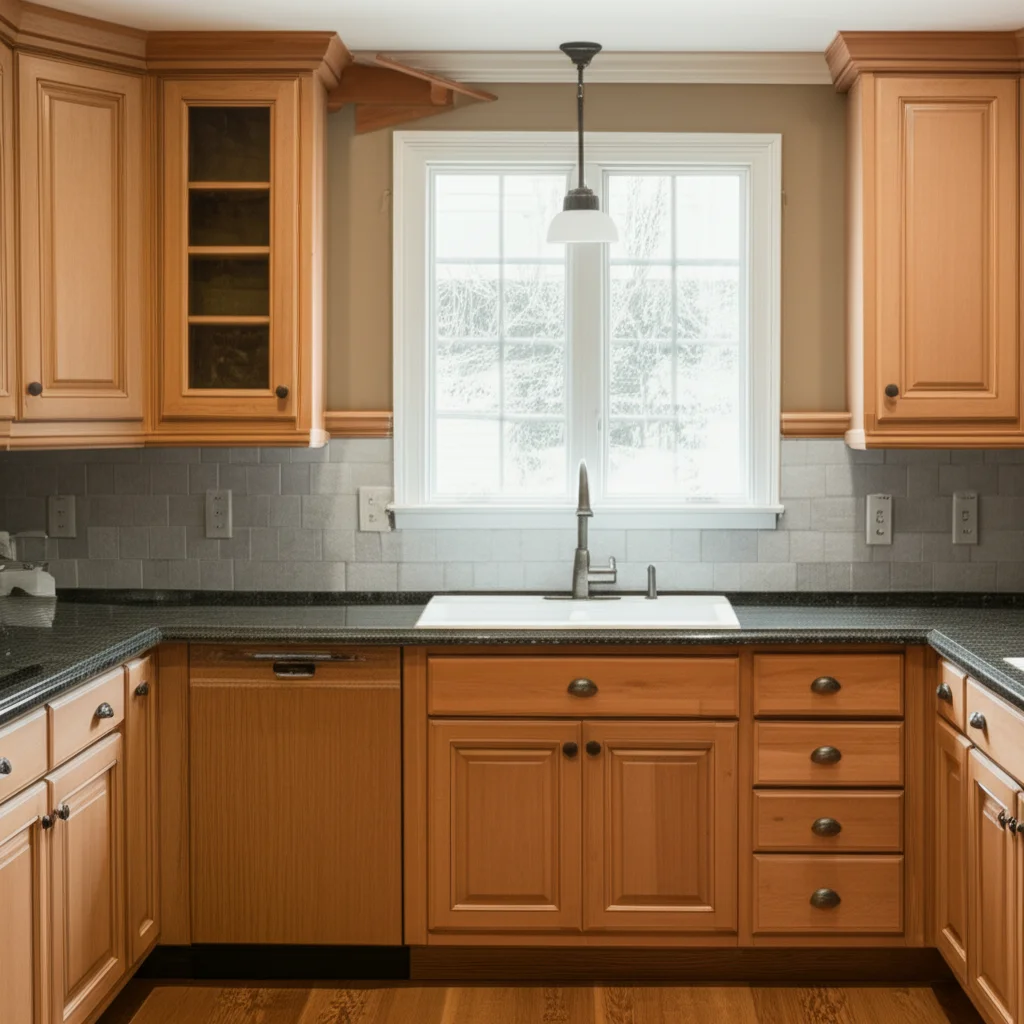
Transform Your Kitchen: How To Paint Oak Cupboards with Ease
Have you looked at your oak cupboards lately and wished for a fresh, new look? Oak has a classic appeal, but its natural wood tone can sometimes feel dated. Painting them offers a fantastic way to update your home without the expense of a full renovation. It is a rewarding project that brings significant visual change.
Learning how to paint oak cupboards gives your space a modern, clean, and personalized feel. This process is simpler than you might think, but it does require careful steps. We will walk you through everything, from choosing the right materials to applying the final coat. Get ready to give your oak cupboards a stunning transformation.
Takeaway: Your Oak Cupboard Transformation Roadmap
- Prepare Meticulously: Clean, degrease, and remove hardware for a smooth start.
- Sand Smartly: Light sanding ensures paint adhesion and helps minimize grain visibility.
- Prime Properly: Use a high-quality, stain-blocking primer to seal the wood and prepare for paint.
- Apply Thin Coats: Multiple thin coats of paint provide a durable, even, and professional finish.
- Seal for Durability: A protective topcoat extends the life and beauty of your painted cupboards.
Painting oak cupboards involves careful preparation, proper priming, and applying multiple thin coats of a high-quality paint. This process covers the strong oak grain, creating a smooth, updated look that revitalizes your kitchen or other living spaces.
Why Paint Oak Cupboards? Benefits and Considerations
Painting your oak cupboards is a popular choice for many homeowners. It offers a fresh look without the high cost of replacement. You can completely change the feel of a room with just paint. This project boosts your home’s aesthetic and value.
Oak is a durable wood, making it an excellent candidate for painting. The paint provides an extra layer of protection. This can extend the life of your cupboards. It also makes them easier to clean and maintain.
Cost-Effective Home Update
Replacing all your cupboards is a very expensive undertaking. Painting them offers a budget-friendly alternative. You save money on materials and labor costs. This allows you to allocate resources to other home improvements. It is a smart financial decision for many families.
A fresh coat of paint gives old cupboards new life. It creates a modern look without major construction. This updates your space quickly and efficiently. You get a completely different feel for a fraction of the price.
Aesthetic Transformation
Oak’s prominent grain can sometimes feel heavy or outdated. Painting over it allows for a lighter, brighter aesthetic. You can choose any color to match your home’s style. This personalizes your space. It makes the room feel more current and inviting.
Painting allows you to hide imperfections or old finishes. It creates a uniform, clean surface. This helps your kitchen look tidy and organized. A color change can dramatically alter the mood of a room. For more ideas on refreshing your oak, consider exploring how you can redo oak cabinets for a complete transformation.
Understanding Oak’s Unique Grain
Oak wood has a distinct, open grain pattern. This grain can be a challenge when painting. It may show through even after several coats. Some people prefer this natural texture. Others aim for a completely smooth finish.
If you want a smooth finish, extra steps are needed. You might use a grain filler before priming. This fills the wood pores. A good primer also helps to minimize grain show-through. Understanding this characteristic of oak is important before you start painting. It helps set realistic expectations for your project.
Essential Tools and Materials for Painting Oak Cupboards
Having the right tools and materials is critical for a successful paint job. High-quality products make the process easier. They also ensure a durable and attractive finish. Do not skimp on these items. Investing in good supplies pays off in the long run.
Careful selection of paint, primer, and application tools matters. This affects how well the paint adheres. It also determines how long your new finish lasts. Prepare everything before you begin. This saves time and frustration during the project.
Choosing the Right Paint and Primer
Selecting the correct paint and primer is crucial for oak cupboards. Oak is known for its strong grain and sometimes bleed-through. A high-quality, oil-based or shellac-based primer is essential. This type of primer seals the wood effectively. It also prevents tannins from bleeding through your topcoat. This ensures a uniform base for your paint.
For the topcoat, a durable, high-quality paint is best. Acrylic-latex or alkyd paints are excellent choices for cupboards. They offer good adhesion and a smooth finish. Many modern paints are water-based but have the durability of oil-based paints. They also clean up easily. When you choose white or light colors, selecting a primer like one that helps with how to paint oak cabinets white without grain showing becomes especially important.
List of Necessary Supplies
Gathering all your supplies before you start prevents interruptions. Here is a comprehensive list of what you will need:
- Screwdriver: For removing hardware.
- Plastic Bags and Labels: To keep hardware organized.
- Degreaser/Cleaner: For thorough cleaning.
- Drop Cloths or Plastic Sheeting: To protect floors and countertops.
- Painter’s Tape: For masking off areas.
- Sandpaper: Various grits (120-grit, 180-grit, 220-grit).
- Sanding Block or Orbital Sander: For efficient sanding.
- Tack Cloths or Microfiber Cloths: For dust removal.
- High-Quality Primer: Shellac or oil-based.
- Paint: Acrylic-latex or alkyd enamel specifically for cabinets.
- High-Quality Paint Brushes: Angled brushes for details.
- Small Foam Rollers or Mohair Rollers: For smooth application.
- Paint Trays: For easy paint loading.
- Protective Gear: Gloves, safety glasses, mask.
- Putty Knife and Wood Filler: For repairs.
- Optional: Grain Filler: If you want a perfectly smooth finish.
Having these items ready ensures a smoother process. This also helps you achieve professional results. Quality tools make a big difference in the final look and durability of your painted cupboards. After your project, remember how important it is to keep your tools in top shape; learn how to clean your paint brushes for future projects.
Preparation is Key: Cleaning and Dismantling Oak Cupboards
Proper preparation is the most important step in painting your oak cupboards. Skipping steps here leads to poor adhesion and a less durable finish. A clean, smooth surface ensures the paint sticks well. This results in a professional-looking outcome.
This stage takes time, but it is time well spent. Do not rush through cleaning and dismantling. These actions lay the foundation for your entire project. They ensure a successful and long-lasting paint job.
Removing Doors, Drawers, and Hardware
Begin by emptying all your cupboards. Next, remove all doors and drawer fronts. Use a screwdriver for this task. It is a good idea to label each door and drawer. You can use masking tape and a marker. Write down where each piece belongs. This makes reassembly much easier later. Also, remove all hinges, handles, and knobs. Store all hardware in labeled plastic bags. This keeps screws and pieces together. Losing small parts can delay your project.
Working with removed doors and drawers is simpler. You can lay them flat for painting. This prevents drips and allows for a more even finish. It also makes painting the frames much easier. Take your time with this step to ensure everything is organized.
Deep Cleaning and Degreasing
Cupboards, especially in kitchens, accumulate grease and grime. A thorough cleaning is essential for paint adhesion. Use a strong degreaser or a solution of mild detergent and warm water. Scrub all surfaces well. Pay close attention to areas around handles and cooking zones. These spots tend to have the most build-up. Rinse the surfaces thoroughly with clean water. Make sure no soap residue remains.
Allow the cupboards to dry completely before moving on. Any lingering moisture can affect paint adhesion. A clean surface ensures your primer and paint bond correctly. This step is non-negotiable for a lasting finish. For more details on this critical step, you can review guides on how to clean cabinets and kitchen cupboards effectively.
Protecting Your Workspace
Before you start sanding or painting, protect your surrounding areas. Lay down drop cloths or plastic sheeting on your floors. Cover countertops and appliances with plastic. Use painter’s tape to mask off areas you do not want to paint. This includes walls, ceilings, and inside edges of the cupboard frames. Press the tape down firmly to create crisp lines.
Proper protection prevents accidental spills and overspray. It also makes cleanup much easier. Taking a few extra minutes for this step saves hours of cleaning later. Ensure good ventilation in your work area as well. Open windows or use fans. This helps with fumes and speeds up drying times.
Sanding and Priming Oak Cupboards for a Smooth Finish
Once your cupboards are clean and dismantled, sanding is the next vital step. Sanding creates a surface for paint to grip onto. It also helps to smooth out any imperfections. This process is crucial for a durable and professional-looking result. Do not skip or rush the sanding.
Priming is equally important. Primer creates a barrier between the wood and the paint. It helps hide the strong oak grain and prevents stains from bleeding through. Choosing the right primer makes a significant difference in your final outcome.
Light Sanding for Adhesion
Oak wood often has a smooth, sometimes glossy, finish from the factory. Paint does not adhere well to such surfaces. A light sanding roughens up the surface, providing “tooth” for the primer and paint. Start with 120-grit sandpaper. Lightly sand all surfaces, including doors, drawer fronts, and cupboard frames. You do not need to remove the existing finish completely. Just scuff it up.
After the initial sanding, follow up with a finer grit, like 180 or 220-grit. This smooths out any sanding marks. After sanding, use a tack cloth or a damp microfiber cloth to remove all dust. Ensure the surface is completely clean and dust-free before priming. Sanding well ensures your paint sticks.
Using Grain Filler (Optional but Recommended)
Oak’s prominent grain can be a challenge if you want a super smooth finish. Even with primer, the grain might still show. If you prefer a flatter, less textured look, apply a grain filler. A grain filler is a thick paste that fills the pores of the wood. Apply it with a putty knife. Work it into the grain, then wipe off any excess.
Allow the grain filler to dry completely. Once dry, give it another light sanding with 220-grit sandpaper. This smooths the surface further. Wipe away all dust with a tack cloth. Using a grain filler adds an extra step. However, it gives you a truly professional, smooth finish.
Applying High-Quality Primer
Primer is your best friend when painting oak. It blocks tannins from bleeding through the paint, which can cause yellowing. It also helps to hide the strong oak grain. Use a high-quality, shellac-based or oil-based primer. These types are best for blocking stains and providing superior adhesion. Apply one thin, even coat of primer to all surfaces.
Use a good quality brush for edges and corners. Use a small foam roller for flat surfaces. This ensures an even application. Allow the first coat of primer to dry completely. Check the product instructions for drying times. Many primers benefit from two thin coats for optimal coverage and stain blocking. Lightly sand with 220-grit sandpaper between coats of primer for a smoother finish. Remove all dust after sanding each time.
Painting Techniques for Flawless Oak Cupboards
With proper preparation and priming, you are ready to paint. This stage is exciting as you see your cupboards transform. Applying paint correctly ensures a beautiful, durable finish. Take your time with each coat. Patience is key for professional results.
Focus on thin, even layers. Avoid thick coats that can lead to drips or an uneven surface. Good technique makes all the difference in the final appearance. You are almost there to your dream cupboards.
Best Practices for Applying Paint
Applying paint to cupboards requires careful technique. Always use high-quality brushes and rollers. For large, flat surfaces like door panels, use a small foam roller. This creates a smooth, even finish with minimal brush marks. For edges, corners, and detailed areas, use an angled paintbrush. Load your roller or brush with paint, but do not overload it.
Apply paint in thin, even coats. Multiple thin coats are always better than one thick coat. A thick coat can sag, drip, or take too long to dry. It can also hide less of the grain. Work in sections, painting one door or one frame section at a time. This helps you maintain a wet edge and avoid lap marks.
Multiple Thin Coats for Durability
Plan on applying at least two to three coats of paint. This builds up a durable finish. It also ensures good coverage, especially if you are changing a dark color to a light one. Allow each coat to dry completely before applying the next. Check the paint can for recommended drying times. Drying times can vary based on humidity and temperature.
Between coats, you can lightly sand with 220-grit sandpaper. This smooths any minor imperfections or dust particles. Always wipe away sanding dust with a tack cloth before the next coat. This step is crucial for achieving a glass-smooth finish. Following these steps helps your paint last longer. You can apply these techniques for any cabinet painting project, including when you paint oak kitchen cabinets.
Achieving a Smooth Finish
To minimize brush strokes and roller marks, paint in one direction. For doors, paint along the grain of the wood. Use long, even strokes. Do not overwork the paint. Once you have applied paint to an area, leave it alone. Going back over paint that has started to dry can create texture.
For the smoothest finish, some people use a paint sprayer. If you do not have a sprayer, high-density foam rollers work well. They leave very few texture marks. Practice on a spare piece of wood first. This helps you get a feel for the paint and tools. A smooth finish makes your newly painted cupboards look professional and sleek.
Finishing Touches: Sealing and Reassembly of Painted Oak Cupboards
After the final coat of paint has dried, you are in the home stretch. The finishing touches protect your hard work. They also bring your cupboards back to life. Sealing adds durability. Reassembly puts everything back in its place. These steps complete your transformation.
Take your time with these final stages. Rushing can cause damage to your newly painted surfaces. A little patience now ensures your beautiful new cupboards last for years.
Importance of a Protective Topcoat
A clear protective topcoat is highly recommended for painted cupboards. Especially for kitchen cupboards, they face daily wear and tear. A topcoat adds a layer of durability. It protects the paint from chips, scratches, and moisture. Polyurethane or water-based clear coats are good choices. Choose a clear coat that is non-yellowing. This is especially important if you painted your cupboards white or a light color.
Apply the topcoat in thin, even layers. Follow the product’s instructions for the number of coats and drying times. Typically, two to three coats provide good protection. Lightly sand with very fine grit sandpaper (e.g., 320-grit or higher) between coats. This ensures maximum adhesion and a smooth finish. Always remove sanding dust before the next coat. This step significantly extends the life and beauty of your painted cupboards. To learn more about this crucial step, refer to guides on how to seal cabinet paint properly.
Reattaching Hardware and Doors
Once the topcoat is fully cured, it is time for reassembly. This is where your labeling system pays off. Begin by reattaching the hinges to the cupboard doors. Use the original screws that you saved in your labeled bags. Then, attach the doors to the cupboard frames. Make sure they align properly. Adjust hinges if necessary to ensure doors hang straight and close smoothly.
Next, attach the handles or knobs to the doors and drawer fronts. Use the original screws for these as well. Be gentle when screwing in hardware. Overtightening can chip or crack your new paint finish. Finally, slide your drawers back into their tracks. Step back and admire your handiwork. Your newly painted oak cupboards are ready for use.
Curing Time and Initial Care
Paint and topcoats need time to fully cure, not just dry. While they may feel dry to the touch in hours, full curing can take days or even weeks. During this curing period, be gentle with your cupboards. Avoid heavy use. Do not wipe them down vigorously. This prevents scratches or marks on the still-soft finish.
Refer to the product labels for specific curing times. Usually, it takes 7-30 days for full hardness. After curing, clean your painted cupboards with mild soap and water. Avoid harsh chemicals or abrasive scrubbers. Gentle care ensures your beautiful finish lasts for years.
Troubleshooting Common Painting Issues and Maintenance Tips
Even with careful preparation, issues can arise during painting. Knowing how to fix them saves time and frustration. Addressing problems quickly helps maintain your project’s quality. This section covers common challenges and offers solutions.
Beyond painting, proper maintenance is key. Regular cleaning and care keep your painted oak cupboards looking fresh. These tips ensure your hard work lasts. They help protect your investment in your home.
Dealing with Brush Marks and Uneven Finish
Brush marks or roller texture can appear if paint is applied too thickly. They also show if paint dries too fast. To fix this, allow the paint to dry completely. Then, lightly sand the affected area with fine-grit sandpaper (220-grit or higher). Wipe away all dust. Apply another thin, even coat of paint. Using a good quality brush and foam roller helps minimize these issues. Do not overwork the paint. Apply it and move on.
Uneven finish can happen from inconsistent application. Ensure consistent paint loading on your brush or roller. Apply even pressure as you paint. If you see uneven spots, sand lightly and apply another thin coat. Aim for smooth, fluid strokes. Patience is key to achieving a flawless finish.
Preventing and Fixing Paint Peeling
Paint peeling often occurs due to poor surface preparation. If the surface was not clean, sanded, or primed correctly, paint will not adhere. To fix peeling, scrape away all loose paint. Sand the area thoroughly to create a smooth, clean surface. Clean the area with degreaser and rinse. Re-prime the area with a high-quality primer. Then, apply new coats of paint.
To prevent peeling, always ensure surfaces are impeccably clean. Use a strong degreaser. Sand thoroughly to create tooth. Always use a high-quality primer suitable for oak. Allow each coat to dry completely before applying the next. Proper adhesion from the start prevents future headaches. In cases where mistakes happen, knowing how to get paint off cabinets can be useful for minor touch-ups.
Long-Term Care for Painted Oak Cupboards
Once your oak cupboards are painted and cured, maintain them properly. Regular cleaning keeps them looking new. Use a soft cloth or sponge. Clean with mild soap and water. Avoid abrasive cleaners or harsh chemicals. These can damage the paint finish. Gently wipe spills immediately to prevent staining.
Periodically inspect your cupboards for chips or scratches. Touch up small areas with your leftover paint. Store a small amount of your paint for this purpose. This keeps your cupboards looking fresh and well-maintained. Proper care ensures your painted oak cupboards remain a beautiful feature in your home for many years to come. This also applies to other oak pieces in your home, like when you care for painted oak furniture.
FAQ Section
Can I paint oak cupboards without sanding?
While some “no-sanding” primers exist, light sanding is highly recommended for oak cupboards. Oak has a durable finish that paint struggles to grip. A quick scuff sand creates the necessary “tooth” for primer and paint to adhere. This prevents peeling and ensures a more durable finish, making your effort last longer.
What is the best paint for oak cupboards?
For oak cupboards, a high-quality acrylic-latex or alkyd (water-based or oil-based) enamel paint is best. These paints offer excellent durability and a smooth finish. Always use a shellac-based or oil-based primer first. This primer blocks stains and minimizes the oak grain. Choosing the right paint and primer ensures a lasting, beautiful result.
How long does it take to paint oak cupboards?
Painting oak cupboards is a multi-day project. Preparation (cleaning, dismantling, sanding) can take 1-2 days. Priming and painting, with drying times between coats, will add 2-4 days. Then, the paint needs 7-30 days to fully cure. Plan for a weekend of active work and several weeks of gentle use.
How do I prevent the oak grain from showing through paint?
To minimize oak grain showing through, start with thorough sanding. Apply a high-quality, stain-blocking primer, preferably shellac-based, with at least two coats. For a truly smooth finish, consider using a grain filler before priming. Apply multiple thin coats of paint, sanding lightly between coats.
Do I need to remove cupboard doors to paint them?
Yes, it is highly recommended to remove cupboard doors and drawer fronts for painting. Laying them flat allows for more even paint application, preventing drips and runs. It also makes painting the cupboard frames much easier. Labeling each piece ensures a smooth reassembly process.
How often should I clean painted oak cupboards?
Clean painted oak cupboards regularly with a soft cloth, mild soap, and warm water. Avoid abrasive cleaners or harsh chemicals, as these can damage the paint finish. For general dirt, a weekly wipe-down is sufficient. For spills or grease, clean immediately to prevent staining.
Conclusion
Painting your oak cupboards is a significant project that yields incredible results. You have learned that careful preparation, including thorough cleaning and proper sanding, is the foundation of success. Choosing the right primer and applying multiple thin coats of paint are crucial steps for a durable and beautiful finish. This DIY venture transforms your space, offering a fresh, modern aesthetic without the high cost of replacement.
The transformation is not just about a new color; it is about extending the life of your existing cupboards and personalizing your home. By following these steps, you can confidently take on this rewarding task. Get ready to enjoy your “new” space. Start your oak cupboard painting project today and see the dramatic difference it makes. Your efforts will result in a fresh, inviting look that enhances your entire home.
- Paint Oak Cupboards
- DIY Cupboard Painting
- Kitchen Renovation
- Home Improvement
- Oak Cabinet Makeover
- Cupboard Refinishing

Todd Martin
Senior Writer
With over 15 years of experience in home renovation and design, I started HEG to share what I’ve learned with homeowners who want to create spaces that are both beautiful and functional. I’ve always believed in a hands-on approach, and over the years, I’ve picked up practical solutions that actually work. Through HEG, I aim to make home improvement more approachable, sharing real tips that help you create a home you truly love.